Set Up Your Environment
This documentation provides step-by-step instructions for setting up your environment for developing with HOOPS Solve using C or C++.
The process includes installing a development environment, downloading and extracting the library package, obtaining and configuring the license, and testing the installation using sample codes.
Installing Your Developer Environment
Developing applications with HOOPS Solve for Windows is typically done using the Visual Studio Integrated Development Environment (IDE).
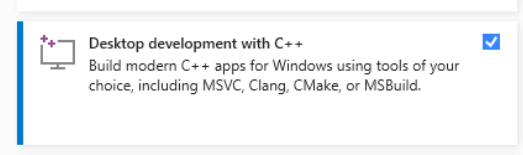
To get started, visit the Microsoft Visual Studio download page and choose the edition of Visual Studio that suits your needs. During the installation process, make sure to select at least the Desktop development with C++ component set.
Additionally, verify that your installed compiler adheres to the Platform Requirements.
After completing the installation, restart your computer to ensure that all changes take effect.
Configure Linux:
- Go to the required components page.
- Make sure that your Minimum Supported OS and Compiler are compatible with HOOPS Solve.
Installing HOOPS Solve
Getting HOOPS Solve:
This is your first visit to our website, and neither you nor your company has ever used or licensed our products before:
Go to our User Dashboard page and click the Sign Up link.

Create your self-evaluation account. You will be emailed a link to verify your account details.
Once you’ve verified your account, click on Product Downloads and then Download HOOPS Solve to be taken to the Developer Zone.
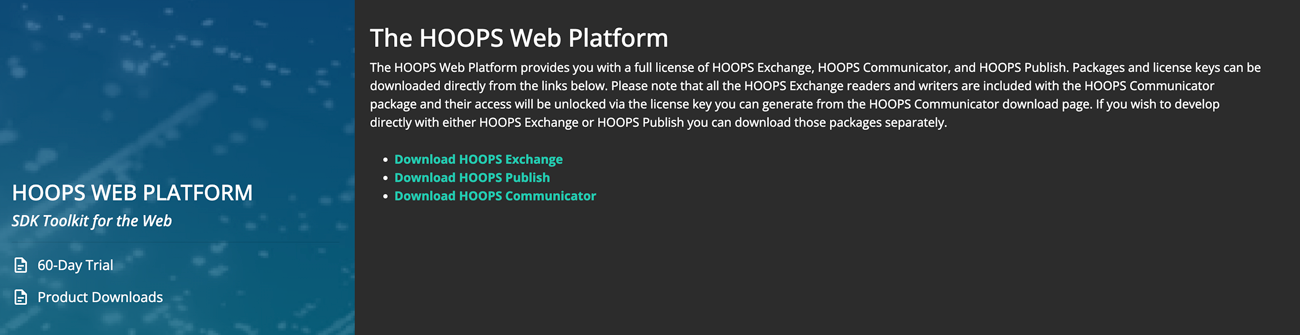
Lastly, click the Download button.
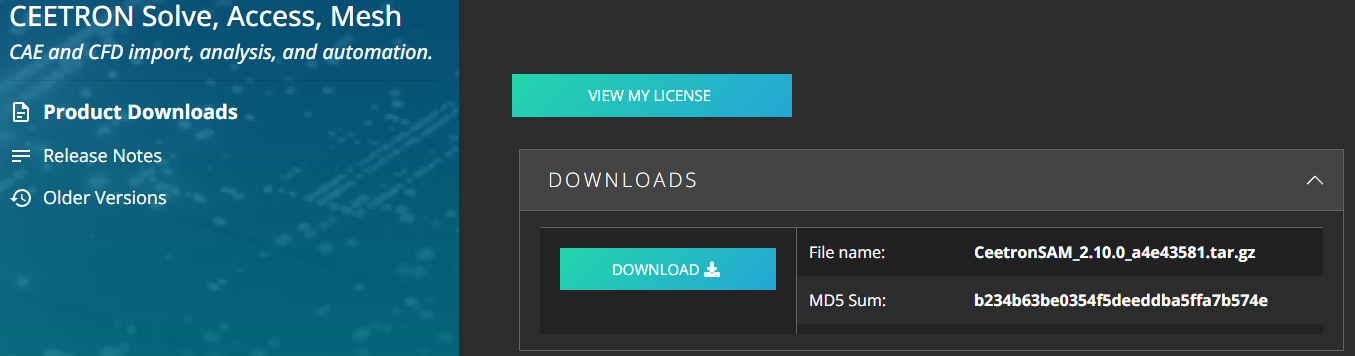
The evaluation package is available as a .tar.gz file archive.
Read the Directory Structure page for more information about the download package content.
You can use either a built-in extractor or third-party software to extract the contents to your chosen destination folder.
Obtaining, Setting Up and Checking the License:
Before you can use this product, you must have a valid HOOPS Solve license:
The generated key is permanent and accessible from the Developer Zone at any time during your evaluation.
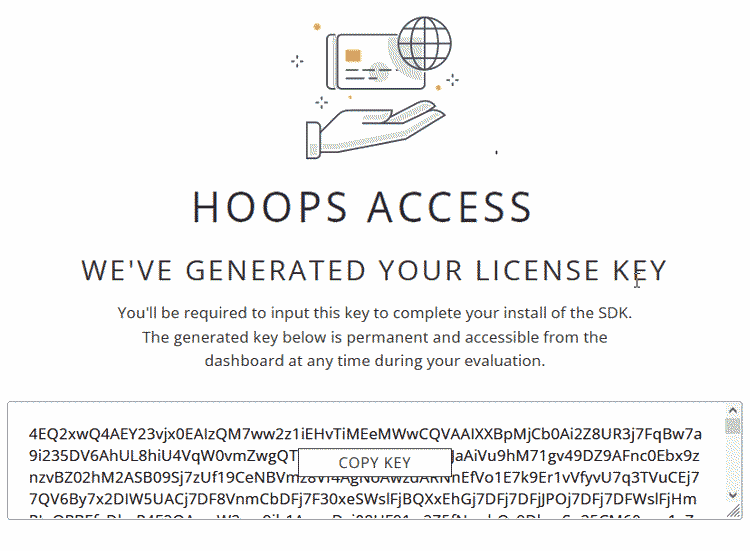
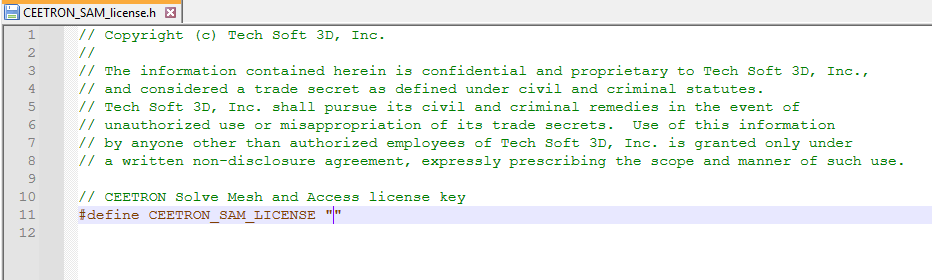
You will need to copy and paste your new license key into the license file available in your installation folder:
- Locate the folder where you have previously extracted HOOPS Solve on your system.
- Navigate to the
../src/sam/directory. - Edit the file
hoops_license.hand enter your new license key.
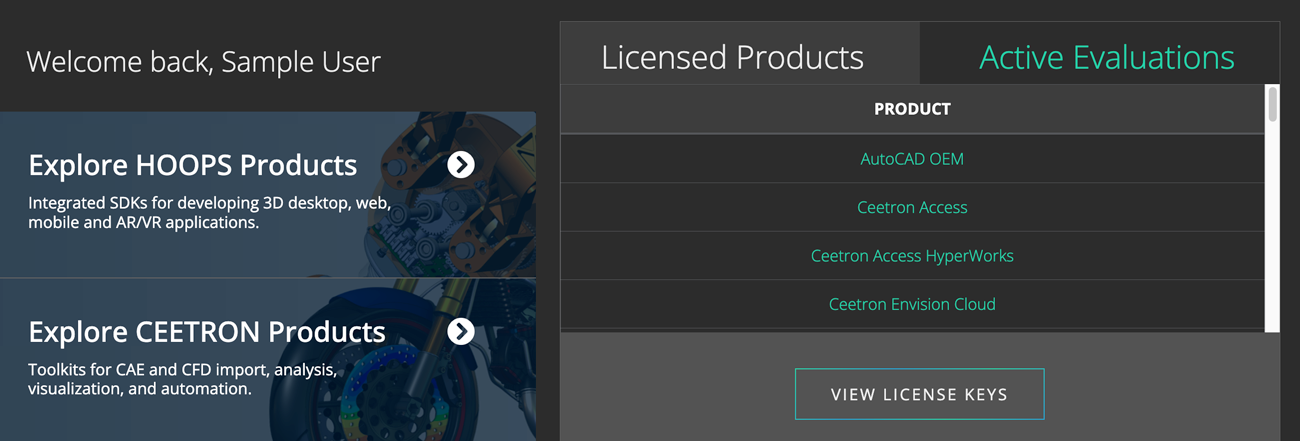
From the Developer Zone, clicking Active Evaluations at the top right of the page and then License Key will give you access to your license status.
HOOPS Solve only requires a new license key if you are currently using a key which was generated for a prior major version. For example, developers upgrading from HOOPS Solve 2.10.0 to HOOPS Solve 2.11.0 may use the same key, but those upgrading from 2.0 to 3.0 need to generate a new key.
The expiration date for the generated license key is tied to your contract with Tech Soft 3D. If you have signed a license agreement for HOOPS Solve, then the license key that is generated will be a perpetual (non-expiring) license key. If you are evaluating HOOPS Solve, then the license key will expire when your evaluation expires. Evaluation license keys will expire at the end of the evaluation period and are not suitable for production software. Any software that uses an evaluation license key will no longer work after the evaluation period.
HOOPS Solve releases are not binary compatible with older releases. You must recompile your application when updating to a new version of HOOPS Solve.
Getting HOOPS Solve:
Your company is already evaluating or licensing one of our products, go to the Developer Zone.
At the top right of the page, click on the Sign In button:
If you have an existing account, simply enter your credentials.
If your company is already licensing our technology, please contact us.
After our team has attached your contact to your company records, you will receive a personal invitation to log in.
From here, you can download:
- Your license file (perpetual and evaluation license key).
- Compressed file archives of current and previous versions for Windows and Linux.
- All of our other HOOPS, Partners, and OEM CAD technologies and viewers.
Read the Directory Structure page for more information about the download package content.
You can use either a built-in extractor or third-party software to extract the contents to your chosen destination folder.
Obtaining, Setting Up and Checking the License:
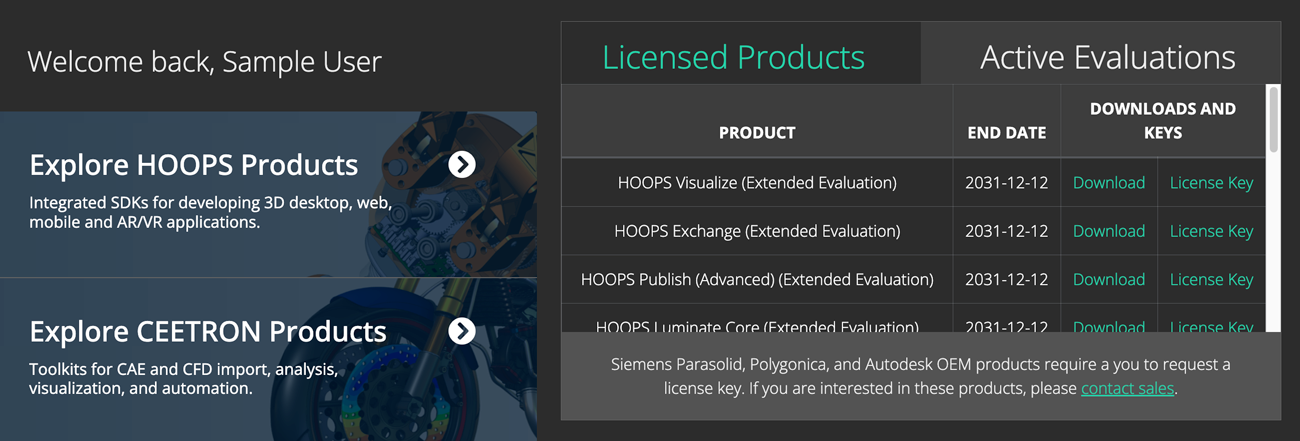
Existing partners can download the Distribution Archive and License File from the Developer Zone:
Visit the Developer Zone and click the View License Keys button.
- Copy the license key string.
- Locate the folder where you have previously extracted HOOPS Solve on your system.
- Navigate to the
../src/sam/directory. - Open the file
hoops_license.hand insert your new license key.
HOOPS Solve only requires a new license key if you are currently using a key which was generated for a prior major version. For example, developers upgrading from HOOPS Solve 2.10.0 to HOOPS Solve 2.11.0 may use the same key, but those upgrading from 2.0 to 3.0 need to generate a new key.
The expiration date for the generated license key is tied to your contract with Tech Soft 3D. If you have signed a license agreement for HOOPS Solve, then the license key that is generated will be a perpetual (non-expiring) license key. If you are evaluating HOOPS Solve, then the license key will expire when your evaluation expires. Evaluation license keys will expire at the end of the evaluation period and are not suitable for production software. Any software that uses an evaluation license key will no longer work after the evaluation period.
HOOPS Solve releases are not binary compatible with older releases. You must recompile your application when updating to a new version of HOOPS Solve.
Building HOOPS Solve
Now that you’ve completed the setup and successfully configured a valid HOOPS Solve license, it’s time to test the installation using sample codes provided with HOOPS Solve. The built-in CMake system is the easiest way to compile and link with HOOPS Solve.
Since HOOPS Solve 1.8.0, we provide CMake support for our sample code.
You need CMake version 3.21.0 or higher.
The example code projects follow a typical CMake workflow. If you are familiar with CMake, no special steps are required. If you are new to CMake, we recommend the official tutorial from Kitware.
To learn more or to download CMake, visit the official website.
Check if you have CMake
You can check if CMake is installed by running the following command in your terminal or command prompt:
cmake --version
This will show the version of CMake on your system. If you do not have it, or if the version is lower than 3.21.0, you should install a newer version.
You can download the installer from the CMake downloads page. There are versions for Windows, macOS, and Linux.
Building sample code with the CMake GUI
CMake has a graphical interface that can help you set up your project step by step. This is available on Windows, macOS, and Linux.
First, open the CMake application.
- In the field Where is the source code, choose the folder that contains the sample code.
- In the field Preset, select the preset that matches your platform and compiler.
- In the field Where to build the binaries, choose a different empty folder. This is where the build files will be created.
Click the Configure button. CMake will ask you which compiler or tool you want to use (see Supported Platforms). After configuration, you will see some options you can change if needed.
Click Generate to create the project files.
Now you can open the generated project in your IDE and build it there.
Building sample code from the command line
If you prefer to use the terminal, you can also run CMake from the command line.
First, create a new folder for the build:
mkdir build
cd build
Generate build files for your project. If you are on Windows, use the following command:
cmake --preset=Windows ..
Visual Studio 16 2019 is the default CMake Generator. This generator can be changed to a more recent Visual Studio version or another generator. Visual Studio 17 2022 generator can be enabled with the following command:
cmake --preset=Windows -G "Visual Studio 17 2022" ..
If you are on Linux, use this instead:
cmake --preset=Linux ..
Once CMake finishes, you can build the code with this command:
cmake --build .
If you are on Linux, you’ll need to add the path of the dependencies in the thirdparty directory to the
LD_LIBRARY_PATH environment variable. This allows the dynamic linker to find them at runtime. Here’s an
example of how to do this:
export LD_LIBRARY_PATH=$LD_LIBRARY_PATH:/home/techsoft3d/HoopsSAM/thirdparty/abaqus-odb_api-2023-linux64/lib
Replace /home/techsoft3d/HoopsSAM/thirdparty/abaqus-odb_api-2023-linux64/lib with the actual path to your thirdparty directory.
To facilitate the definition of the LD_LIBRARY_PATH or PATH environment variable, depending on the
operating system, CMake advanced variables are created when build files are generated.
CEE_SAM_OPTION_EXTERNAL_LIBRARIES_BIN_PATHS will contain all needed binary paths to run the compiled
HOOPS Solve binary. This variable content can be directly appended to the LD_LIBRARY_PATH or PATH
environment variable. Furthermore, on Linux operating systems, libraries may need to be preloaded using the
LD_PRELOAD environment variable. These binary paths can be found in the
CEE_SAM_OPTION_EXTERNAL_PRELOAD_LIBRARIES_BIN_PATHS CMake advanced variable.
CMake compilation options - CMakePreset
There are a variety of CMake definitions which are used to conditionally compile source code and allow to enable or disable options and reader support. The following definitions are set when using the predefined CMake Preset.
| CEE_SAM_PROJECT_NAME | “HoopsSAM” | Project Name |
| CMAKE_BUILD_TYPE | “Release” | Build type |
| CEE_SAM_VERBOSE_LOGGING | “OFF” | Verbose logging flag |
| CEE_SAM_BUILD_CONFIGURATION | “Static_and_shared” | Build configuration. Static, Shared and Static_and_shared for Windows and Linux available |
| CEE_SAM_BASE | “ON” | Add base sam src directory |
| CEE_SAM_VDM | “ON” | Add vdm sam src directory (HOOPS Access) |
| CEE_SAM_VIS | “ON” | Add vis sam src directory (HOOPS Mesh, GlobalModules) |
| CEE_SAM_VFE | “ON” | Add vfe sam src directory (HOOPS Solve) |
| CEE_SAM_VFS | “ON” | Add vfs sam src directory (HOOPS Solve) |
| CEE_SAM_VFX | “ON” | Add vfx sam src directory (HOOPS Solve) |
| CEE_SAM_VGL | “ON” | Add vgl legacy src directory (HOOPS legacy visualization) |
| CEE_SAM_VIS_LEGACY | “ON” | Add vis legacy src directory (HOOPS legacy visualization) |
| CEE_SAM_DATA_PROVIDER_FRAMEWORK | “ON” | Link against the Data Provider Framework |
| CEE_SAM_EXAMPLES | “ON” | Add Examples in the current project |
| CEE_SAM_PROVIDER_EXAMPLES | “ON” | Add Data Provider Framework Examples in the current project |
| CEE_SAM_INTERFACE_FORTRAN | “OFF” | Generate Fortran interface |
| CEE_SAM_INTERFACE_CSHARP | “OFF” | Generate C# interface |
| CEE_SAM_READER_ABAODB | “ON” | Link against Abaqus ODB API external library |
| CEE_SAM_READER_ALTAIR_H3D | “OFF” | Link against Altair H3D API external library |
| CEE_SAM_READER_ANSYS_AUTODYN | “OFF” | Link against ANSYS AUTODYN external library |
| CEE_SAM_READER_ANSYS_CFX | “OFF” | Link against ANSYS CFX external library |
| CEE_SAM_READER_ANSYS_DPF | “ON” | Link against ANSYS DPF API external library |
| CEE_SAM_READER_OPENFOAM | “ON” | Toggle support for OpenFOAM files. Requires linking with zlib |
| CEE_SAM_READER_PERMASLIB | “ON” | Toggle support for PERMAS files. Requires linking with zlib |
| CEE_SAM_READER_STARCCM | “OFF” | Link against STAR-CCM external library |
| CEE_SAM_READER_CGNS | “ON” | Link against CGNS API external library |
| CEE_SAM_CGNS_DYNAMIC_LOADING | “OFF” | Enable dynamic loading of CGNS library |
| CEE_SAM_READER_PAMLIBERF | “OFF” | Link against PAM API external library |
| CEE_SAM_READER_SAMCEF | “OFF” | Link against SAMCEF API external library |
| CEE_SAM_OPTION_OPENFOAM_PLUGIN | “ON” | Build the OpenFOAM Data Provider Plugin. |
| CEE_SAM_OPTION_VTU_PLUGIN | “ON” | Build the Vtk Data Provider for Vtu, Vtm, Pvd, Pvtu. |
| CEE_SAM_OPTION_EXCHANGE_PLUGIN | “OFF” | Build the Exchange Data Provider Plugin. Requires linking against HOOPS Exchange library. |
| CEE_SAM_OPTION_BLOSC | “ON” | Link against c-blosc library (Needed for compressed HDF5 Nastran result files) |
| CEE_SAM_OPTION_BOOST | “OFF” | Link against Boost (required for Autodyn library) |
| CEE_SAM_OPTION_LIB_PATH | “./lib/WIN64” | Library binaries path for MSVC or Linux |
| CEE_SAM_OPTION_BIN_PATH | “./bin/WIN64” | Binaries path for MSVC or Linux |
| CEE_SAM_OPTION_CAPRI | “OFF” | Link against CAPRI |
| CEE_SAM_OPTION_CHECK_ERRS | “ON” | Include additional error checking |
| CEE_SAM_OPTION_CHECK_FPE | “OFF” | Check floating-point exceptions |
| CEE_SAM_OPTION_CHECK_MEM | “OFF” | Include memory checks |
| CEE_SAM_OPTION_FFMPEG | “OFF” | Link against FFMPEG (required for vglTools) |
| CEE_SAM_OPTION_FREETYPE | “OFF” | Link against FREETYPE (required for vglTools) |
| CEE_SAM_OPTION_GLEW | “OFF” | Link against GLEW (required for VGL) |
| CEE_SAM_OPTION_HDF5 | “ON” | Link against HDF5 external library (required for CGNS reader) |
| CEE_SAM_OPTION_HDF5_BUILD_TYPE | “Static” | HDF5 external library build type used (Static or Dynamic) |
| CEE_SAM_OPTION_HOOPS | “OFF” | Link against HOOPS Exchange (option for HOOPS Mesh) |
| CEE_SAM_OPTION_INTEL_MKL | “ON” | Link against MKL (required for the eigensolver) |
| CEE_SAM_OPTION_INTEL_MKL_MULTITHREAD | “ON” | Link against MKL (required for the eigensolver) |
| CEE_SAM_OPTION_JTTK | “OFF” | Link against JT Open Toolkit |
| CEE_SAM_OPTION_JPEG | “None” | Link against the JPEG library. Options: None and Internal |
| CEE_SAM_OPTION_METIS | “ON” | Link against Metis (required for SurfMesh parallel mesher) |
| CEE_SAM_OPTION_MPI | “Off” | Link against on MPI library. Two options: Off or Microsoft |
| CEE_SAM_OPTION_MUMPS | “OFF” | Use MUMPS, the MUltifrontal Massively Parallel sparse direct Solver |
| CEE_SAM_OPTION_NOVGLTOOLS | “OFF” | Disable legacy vizualisation/vgl (VKI_NOVGLTOOLS) |
| CEE_SAM_OPTION_NOVISTOOLS | “OFF” | Disable legacy vizualisation tools/Legacy vis support (VKI_NOVISTOOLS) |
| CEE_SAM_OPTION_NOVISTOOLSMESH | “OFF” | Disable Mesh support (VKI_NOVISTOOLSMESH) |
| CEE_SAM_OPTION_NOVDMTOOLS | “OFF” | Disable Access/vdm support (VKI_NOVDMTOOLS) |
| CEE_SAM_OPTION_ODB_API_CURRENT_VERSION | “2025” | Current Abaqus ODB API version (2025 is cited as an example) |
| CEE_SAM_OPTION_ODB_API_SUPPORTED_VERSIONS | “2016;2017…” | Currently supported Abaqus ODB API versions |
| CEE_SAM_OPTION_ODB_API_LIBRARIES_LIST | “lib1.lib;…” | Semi-colon separated list of Abaqus ODB API libraries to be added to the link |
| CEE_SAM_OPTION_OPENGL | “OFF” | Link against OpenGL |
| CEE_SAM_OPTION_OPENMP | “ON” | Link against OPENMP |
| CEE_SAM_OPTION_OPENMP_VERSION | “Intel” | OpenMP version: Intel or Default |
| CEE_SAM_OPTION_OPEN_CASCADE | “OFF” | Link against Open CASCADE |
| CEE_SAM_OPTION_PARASOLID | “OFF” | Link against Parasolid |
| CEE_SAM_OPTION_PNG | “None” | Link against the PNG library. Options: None and Internal |
| CEE_SAM_OPTION_POLYGONICA | “OFF” | Link against Polygonica |
| CEE_SAM_OPTION_TIFF | “None” | Link against the TIFF library. Options: None and Internal |
| CEE_SAM_OPTION_THIRD_PARTY_DIRECTORY_NAME | “thirdparty” | Name of folder where the third-party libraries are located |
| CEE_SAM_OPTION_WIDECHAR | “OFF” | Build with Unicode support |
| CEE_SAM_OPTION_ZLIB | “Internal” | Link against zlib (required for OpenFOAM, Permas reader, and HDF5 link). Options: None, Internal and External |
| Third-party library | CMake option | Foundation/Global | Access | Solve | Mesh | Legacy Vistools/Vgltools |
|---|---|---|---|---|---|---|
| Abaqus API | CEE_SAM_READER_ABAODB | X | ||||
| Altair API | CEE_SAM_READER_ALTAIR_H3D | X | ||||
| Ansys DPF | CEE_SAM_READER_ANSYS_DPF | X | ||||
| c-blosc | CEE_SAM_OPTION_BLOSC | X | ||||
| CGNS | CEE_SAM_READER_CGNS | X | ||||
| FreeType | CEE_SAM_OPTION_FREETYPE | X | ||||
| GKlib | CEE_SAM_OPTION_METIS | X | X | |||
| GLEW | CEE_SAM_OPTION_GLEW | X | ||||
| HDF5 | CEE_SAM_OPTION_HDF5 | X | ||||
| Intel MKL | CEE_SAM_OPTION_INTEL_MKL | X | ||||
| Intel openMP | CEE_SAM_OPTION_OPENMP | X | X | X | X | X |
| JPEG | CEE_SAM_OPTION_JPEG | X | ||||
| METIS | CEE_SAM_OPTION_METIS | X | X | |||
| PNG | CEE_SAM_OPTION_PNG | X | ||||
| TIFF | CEE_SAM_OPTION_TIFF | X | ||||
| Zlib | CEE_SAM_OPTION_ZLIB | X | X | X |
The current external library APIs that can be used in HOOPS Solve are to support the ABAQUS .odb, PAM-CRASH .DSY, PAM-CRASH .erfh5, MSC/NASTRAN .h5, STAR-CCM results file, CGNS data base, AUTODYN results file, Altair H3D file, CFX results file, SAMCEF results file interfaces and any other HDF5 based interface.
ABAQUS .odb Interface
The HOOPS Solve distribution includes a version of the Abaqus libraries. These are provided to simplify the process of using Abaqus readers and writers when developing with HOOPS Solve. In order to distribute these in an application, users need to have a proper partnership agreement with Dassault Systemes. Calls to the Abaqus functions are conditionally compiled by setting CEE_SAM_READER_ABAODB CMake option. See the following URL for more information on Abaqus.
Required libraries are dependent upon the specific version of ABAQUS and computer platform.
Note: Linux users must export CATInstallPath as specified in the testOdbApi.csh file included in the Abaqus ODB API package.
Autodyn Interface
The Autodyn interface is implemented using the Autodyn toolkit provided by Ansys Autodyn. Calls to the Autodyn functions are conditionally compiled by setting CEE_SAM_READER_ANSYS_AUTODYN CMake option. See the following URL for more information on Ansys Autodyn.
FEMZIP LS-DYNA d3plot Interface
FEMZIP is used, amongst others, to compress a family of LS-DYNA d3plot files. The FEMZIP API is implemented using a toolkit provided by Fraunhofer SCAI. FEMZIP is written in Fortran so that the function names may be appended by an underscore on some platforms. Calls to the toolkit functions are conditionally compiled by defining VKI_LIBAPI_FEMZIP_ or VKI_LIBAPI_FEMZIP to access functions with or without an appended underscore respectively. See the following URL for more information on FEMZIP.
CFX Results File
The CFX results file API is implemented using a toolkit provided by Ansys CFX. Calls to the toolkit functions are conditionally compiled by setting CEE_SAM_READER_ANSYS_CFX CMake option. See the following URL for more information on Ansys CFX.
CGNS Data Base
The CFD General Notation System (CGNS) data base is a collection of conventions and software for the storage and retrieval of CFD data. In the source distribution, calls to the CGNS functions are conditionally compiled by setting CEE_SAM_READER_CGNS CMake option. In the binary distribution, calls to the CGNS functions are always available if the CGNS third-party binaries can be found in the environment or in the CEE_SAM_READER_CGNS_LIBRARY_DIR environment variable. The source code for the underlying CGNS library is publicly available. See the following URL for more information on CGNS.
Altair H3D Interface
The H3D interface is implemented using the H3d toolkit provided by Altair Engineering. Calls to the H3D functions are conditionally compiled by setting CEE_SAM_READER_ALTAIR_H3D CMake option. We support two versions 2014 and 2025 of the Altair H3D API. The version can be selected using the CEE_SAM_READER_ALTAIR_H3D_VERSION CMake option. Ex: “CEE_SAM_READER_ALTAIR_H3D_VERSION”:”2025” See the following URL for more information on Altair H3D.
PAM-CRASH .DSY Interface
The .DSY API is implemented using a toolkit provided by ESI Group. Calls to the toolkit functions are conditionally compiled by defining VKI_LIBAPI_PAMDSY. See the following URL for more information on PAM-CRASH.
PAM-CRASH .erfh5 Interface, MSC/NASTRAN .h5, Native .vh5
The above file formats are implemented on top of the HDF5 interface. Calls to the toolkit functions are conditionally compiled by setting CEE_SAM_OPTION_HDF5 CMake option. See the following URL for more information on HDF5.
STAR-CCM .ccm Results File Interface
The STAR-CCM API is implemented using a toolkit then provided by CD-Adapco, and now by Siemens. Calls to the toolkit functions are conditionally compiled by setting CEE_SAM_READER_STARCCM CMake option. See the following URL for more information on STAR-CCM.
SAMCEF .des Results File Interface
The SAMCEF API is implemented using a toolkit provided by Siemens. In the source distribution, calls to the toolkit functions are conditionally compiled by setting CEE_SAM_READER_SAMCEF CMake option. In the binary distribution, calls to the toolkit functions are always available if the SAMCEF third-party binaries can be found in the environment or in the CEE_SAM_READER_SAMCEF_LIBRARY_DIR environment variable.
See the following URL,
The SAMCEF interface allows the definition of two environment variables: SAM_ZONE refers to the memory usage in the SAMCEF library. SAM_EXE identifies the SAMCEF library installation path.
Conclusion
You have successfully set up your environment for HOOPS Solve, package download and extraction, license configuration, and built the examples.
You are now ready to start working with HOOPS Solve. If you encounter any issues or have questions, please refer to our support resources or forum.