Hello Web Viewer
Summary
In this section, we will create the basic code skeleton for a web application based on HC and introduce you to some of the fundamental development concepts of the HC Javascript API.
Concepts
Creation of Basic Application Skeleton
Starting the HOOPS Web Viewer Component
Introduction to Callbacks
How to Switch Operators
Changing View Modes
Creating a minimal HTML header
We need to create the basic “skeleton” required to get the HOOPS Web Viewer component running on your webpage. Open the file called index.html (or create it if not present) and copy the following into it:
<!DOCTYPE html>
<html xmlns="http://www.w3.org/1999/xhtml">
<head>
        <title>My Viewer</title>

        <style type="text/css">
                #viewer {
                        width: 640px;
                        height: 480px;
                        position: relative;
                        outline: 1px solid black;
                }
        </style>
        <script type="text/javascript" src="js/hoops/hoops_web_viewer.js"></script>
</head>
We have added an HTML header containing the style of the ‘viewer’ <div> element as well as the reference to the hoops_web_viewer library file.
Creating a minimal HTML body
Next, we will define the minimal HTML body which for now just contains a single <div> element using the style defined above representing the “canvas” for your application. This is the element on the page where the HOOPS Web Viewer will draw into and receive events from. Everything inside that <div> element will be controlled by the HOOPS Web Viewer component.
<body>
        <h3>Web Viewer Minimal Example</h3>
        <div id="viewer"></div>
</body>
</html>
If you are using HOOPS Communicator 2020, you must make the following additional changes.
Edit the file start_server.[bat|sh]. Update the command line argument –config-file to ../../tutorials/basic_app/server_config.js.
Edit the file server_config.js. On line 227 change basic-app to basic_app.
Start the application by executing the start_server.[bat|sh] script from the root of the project. Navigate to http://localhost:11180/index.html in your browser. For now, you should just see an empty page with the title:
Connecting to the HOOPS Web Viewer component
Now let’s connect the HOOPS Web Viewer component with the empty ‘viewer’ canvas we just created, by adding the following lines right after the reference to the HOOPS Web Viewer library:
<head>
        // ...
        <script type="text/javascript" src="js/hoops/hoops_web_viewer.js"></script>
        <script type="text/javascript">
                window.onload = () => {
                        hwv = new Communicator.WebViewer({
                                containerId: "viewer",
                        });

                        hwv.start();
                }
        </script>
</head>
The onload event is a JS event built into the browser that is fired when all the content of the page has been loaded (in particular the JS library required to run the HOOPS Web Viewer). The assigned script instantiates a new global Web Viewer top-level object called hwv and initializes it with the ID of the container element (the viewer <div> element we created earlier). The start() function that is called next will start the HOOPS Web Viewer component, and begin the loading process if a model is specified.
As you can see it is not required to specify an initial model on startup. That can be done later via the HOOPS Web Viewer API.
Running the application now will initialize and start the Web Viewer, but will still show a blank page as nothing has been loaded yet.
Loading a model
Let’s add a model to the scene. For this tutorial, we will use one of the sample models from the HC installation. You can find it in the following location:
/quick_start/converted_models/standard/scs_models/microengine.scs
Create a new folder called data and copy this model into it. Add the endpointUri line from the code snippet below to the Web Viewer component initialization after containerId: "viewer":
hwv = new Communicator.WebViewer({
        containerId: "viewer",
        endpointUri: "data/microengine.scs"
});
The HOOPS Web Viewer component can load models either via its proprietary server through a websocket connection or directly via HTTP requests to a standard web server. Both loading variants use different filetypes. As mentioned before, we will not be using the streaming functionality of the Web Viewer in this tutorial, which means we will use files with the .scs extension. For more details on the various loading modes of the Web Viewer, please see the Programming Guide.
After running the application again, you should see the following on the screen:
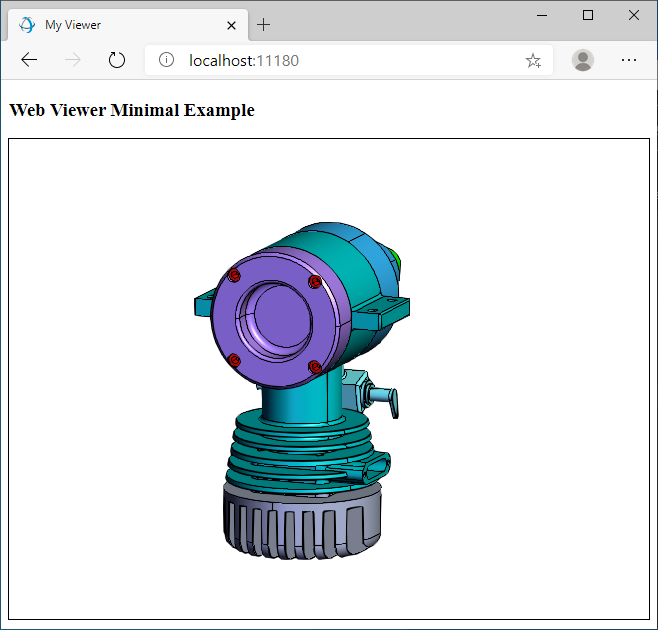
That is all that is required to have a fully functioning application that utilizes the HOOPS Web Viewer component of Communicator. Go ahead and interact with the model. You will notice that you can fully manipulate the camera and select entities within the model.
Registering callbacks
Before the Web Viewer starts, the application can register several callbacks which communicate various events and Web Viewer states. See below for how to connect to those callbacks via the setCallbacks() function. We will set the callbacks after calling the Web Viewer constructor.
hwv = new Communicator.WebViewer({
        containerId: "viewer",
        endpointUri: "data/microengine.scs"
});

hwv.setCallbacks({
        sceneReady: () => {
                hwv.view.setBackgroundColor(Communicator.Color.blue(), Communicator.Color.white());
        },
        modelStructureReady: () => {
                document.getElementById('ModelStructureReady').innerHTML = 'Model Structure Ready';
        },
        camera: () => {
                document.getElementById('CameraData').innerHTML = JSON.stringify(hwv.view.getCamera().toJson(), null, 4);
        },
});

hwv.start();
In this example, we are initially setting up three useful callbacks before the Web Viewer starts:
sceneReady: This callback gets triggered as soon as the Web Viewer is active and can be interacted with. Any functions on the Web Viewer object should only be called after this callback has been triggered. For example we are changing the background color to a gradient.modelStructureReady: This callback gets triggered as soon as the model structure information has been loaded. Before this callback is executed, no model structure related functionality (e.g., selection) is available in the HOOPS Web Viewer component. We will discuss the model structure and how to parse it in more detail in an upcoming section of this tutorial. For now, we will just display a message indicating that the model structure has been loaded.camera: This callback gets triggered whenever the camera in the view has changed.
To display the modelStructureReady message, we also need to add an element to the DOM. Create a new <div> in the body of the HTML as shown below:
<body>
...
<div>
        <h4>Model Structure...</h4>
        <div id="ModelStructureReady">Not Ready</div>
</div>
For small models, like the ‘microengine’ model we use for this tutorial, the model tree will be available almost instantly. It can take more time for larger models, so it is important for your application to gracefully handle this time period when the model can be viewed, but interaction is limited.
In this example, we add another section to the DOM to display the current camera information:
<div>
        <h4>CameraCallback</h4>
        <pre id="CameraData"></pre>
</div>
There are many other useful callbacks available in the Web Viewer component. Please see the Programming Guide for more information.
Switching operators
When we first loaded the model onto the page, we were able to interact with it because the Orbit operator is active by default. The HOOPS Web Viewer includes several built-in operators that provide a wide range of useful functionality. You can also write your own operators to extend the functionality of the HOOPS Web Viewer. This will be covered in an upcoming tutorial. More info on operators can also be found here.
Switching between operators (either built-in or user-defined) is accomplished via the OperatorManager class. To demonstrate usage of that class and other functionality, we will be creating a very basic UI and place all the UI related functionality into a separate file.
Let’s call this new file Menu.js. Add it to the recently created js project directory with the following code:
class Menu {
        constructor(hwv) {
                this._hwv = hwv;
                this._initEvents();
        }

        _initEvents() {
                var customOperatorSelect = document.getElementById("operatorType");
                customOperatorSelect.onclick = () => {
                        this._hwv.operatorManager.clear();
                        this._hwv.operatorManager.push(Communicator.OperatorId.Orbit);
                        if (customOperatorSelect.value === "Area Select") {
                                this._hwv.operatorManager.push(Communicator.OperatorId.AreaSelect);
                        }
                }
        }
}
The code above creates a new JS class with a constructor that is called when the class is first instantiated. In the initEvents function, it then associates events with a select HTML element in the DOM. Add Menu.js to your HTML as seen below:
<script type="text/javascript" src="js/hoops/hoops_web_viewer.js"></script>
<script type="text/javascript" src="js/Menu.js"></script>
An instance of the Menu class from Menu.js must be created. This can be done by adding the line below:
window.onload = () => {
        ...
        let menu = new Menu(hwv);
        hwv.start();
}
The OperatorManager class supports a “stack” of operators that all can be active and receiving events simultaneously. Operators receive events according to the stack order - the most recently added (highest) operator in the stack “seeing” the event first. Each operator that receives an event can decide to consume it, or pass it on to an operator lower in the stack. In our case, we are adding the orbit operator to the stack first, and the area select operator second. With the area select operator on the stack, the orbit operator is still active, but will only receive events if the area select operator does not consume them.
Below are the required DOM elements for the operator. Simply add those tags to the main page right under the model structure <div>.
<div id="SwitchOperator">
        <h4>Switch Operator</h4>
        <div>
                <label for="operatorType">Operator: </label>
                <select id="operatorType">
                        <option value="Orbit">Orbit</option>
                        <option value="Area Select">Area Select</option>
                </select>
        </div>
</div>
Switching the draw mode
As another example for interacting with the HOOPS Web Viewer API, here is code to change the draw mode. Place this code right after the customOperatorSelect.onclick event within the _initEvents() function in Menu.js:
var drawModeSelect = document.getElementById("drawmodeType");
drawModeSelect.onclick = () => {
        if (drawModeSelect.value === "Solid With Edges")
                this._hwv.view.setDrawMode(Communicator.DrawMode.WireframeOnShaded);
        else if (drawModeSelect.value === "Wireframe")
                this._hwv.view.setDrawMode(Communicator.DrawMode.Wireframe);
        else if (drawModeSelect.value === "Hidden Line")
                this._hwv.view.setDrawMode(Communicator.DrawMode.HiddenLine);
}
Here is the required HTML code for the menu. Place this <div> into the body of your HTML file:
<div id="DrawMode">
        <h4>Draw Mode</h4>
        <div>
                <label for="drawmodeType">Draw Mode: </label>
                <select id="drawmodeType">
                        <option value="Solid With Edges">Solid</option>
                        <option value="Wireframe">Wireframe</option>
                        <option value="Hidden Line">Hidden Line</option>
                </select>
        </div>
</div>
In general, all view related functionality such as setting the drawmode or the background color will be on the ‘view’ object of the HOOPS Web Viewer component.
Finally, let’s run the application again:

You should be able to see all the callbacks we set up in action, manipulate the camera, switch between two different operators and change the drawmode of the scene.
