
Building Code Examples
This guide explains how to build the sample code included in your HOOPS Exchange installation package.
Quick Start
For desktop platforms (Windows, Linux, macOS with CMake):
cd /path/to/HOOPS_Exchange/samples
cmake -B build
cmake --build build/
Executables are placed in build/bin/.
For platform-specific options, IDE integration, or mobile platforms, see the sections below.
Desktop Platforms
Prerequisites
Starting from HOOPS Exchange 2026.3.0, CMake is the recommended build system for all desktop platforms. CMake generates native project files for your preferred IDE or build tool.
You need:
- CMake 3.21 or higher - Download from cmake.org
- A C++ compiler - See Supported Platforms for supported compilers
Tip
New to CMake? Start with the official CMake tutorial.
Configuring with CMake
CMake generates project files for your chosen build system (Visual Studio, Xcode, Make, Ninja, etc.).
Using CMake GUI
Open the CMake application.
Set the paths:
- Where is the source code: Select the samples/ folder from your HOOPS Exchange installation.
- Where to build the binaries: Select an empty folder (e.g., samples/build/).
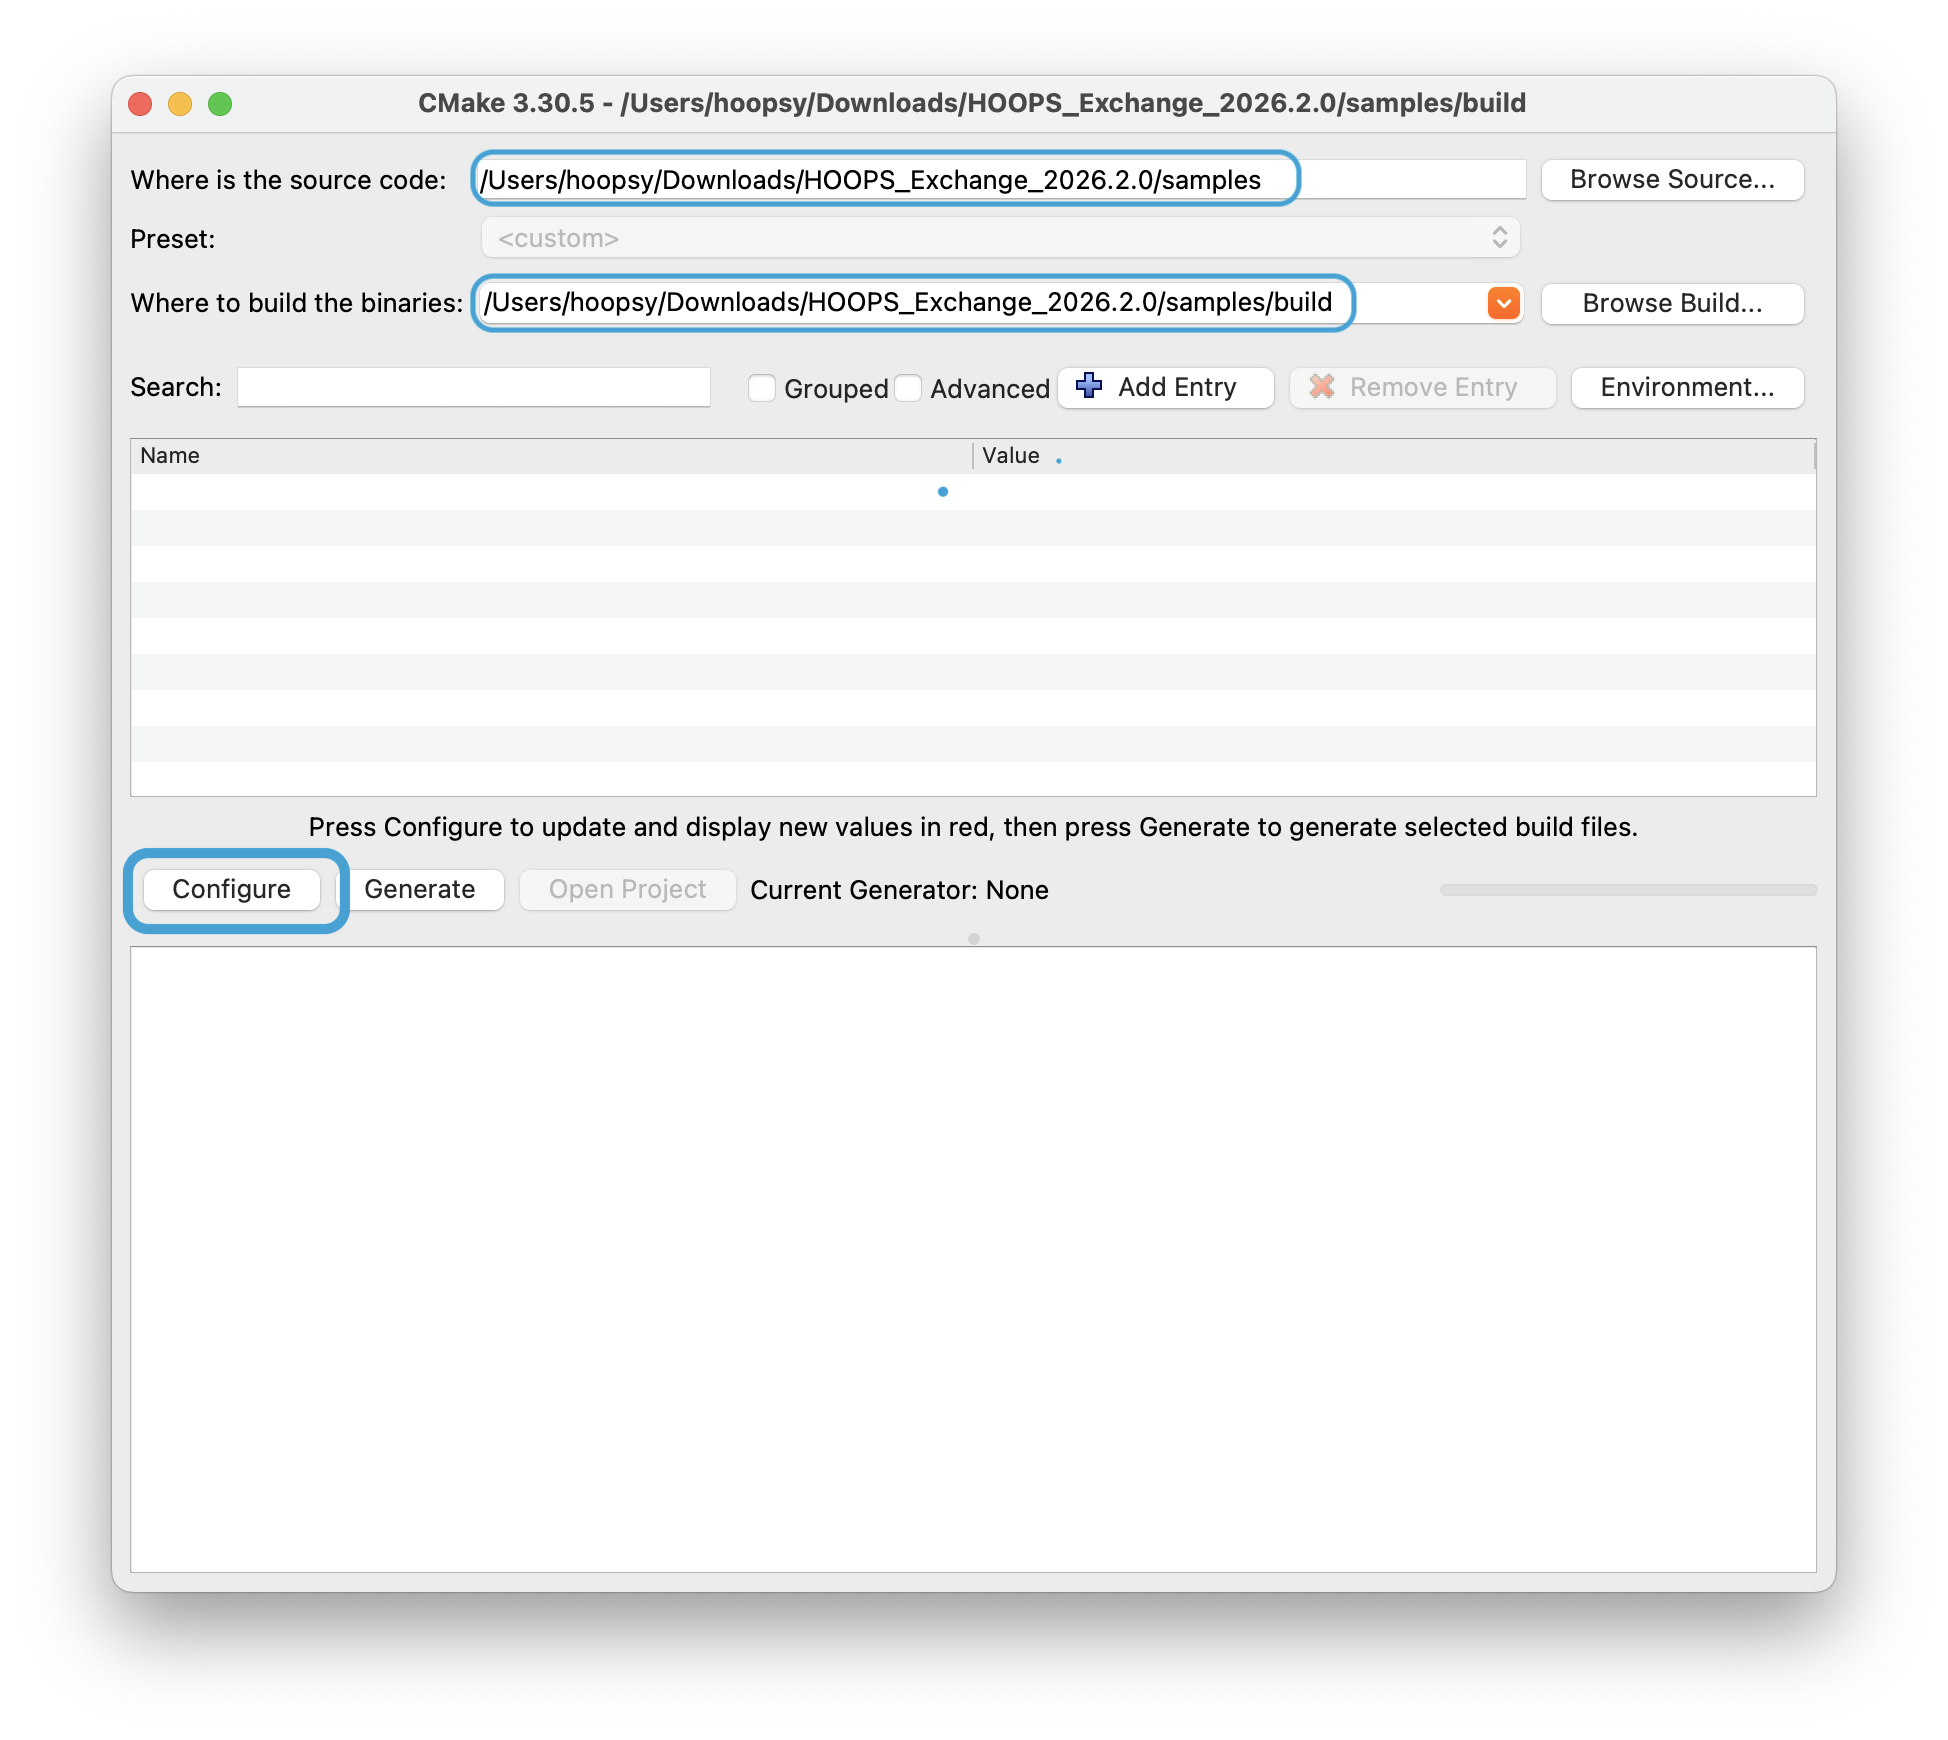
Example: HOOPS Exchange extracted to /Users/hoopsy/Downloads/HOOPS_Exchange_2026.2.0/
Click Configure and select a generator:
- Visual Studio 17 2022 for Windows
- Xcode for macOS
- Unix Makefiles for Linux/macOS command line
Click Generate to create the project files.
Click Open Project to launch your IDE, or navigate to the build folder manually.
Using the Command Line
cd /path/to/HOOPS_Exchange/samples
cmake -B build
To specify a generator explicitly:
cmake -B build -G "Visual Studio 17 2022"   # Windows
cmake -B build -G "Xcode"                   # macOS
cmake -B build -G "Unix Makefiles"          # Linux/macOS
Next Steps
Your project is now configured. If you selected an IDE generator (Visual Studio, Xcode), you can click the Open Project button in CMake GUI to launch your IDE directly.
Now proceed to build using your preferred method:
Build the Samples
Build with CMake (All Platforms)
The simplest approach - CMake invokes the appropriate build tool automatically:
cmake --build build/
For a Release build:
cmake --build build/ --config Release
Compiled executables are placed in build/bin/.
Build with Visual Studio (Windows)
Using CMake-generated solution:
- Open
build/HOOPSExchangeSample.slnin Visual Studio.
Using pre-built solution (Windows package only):
- Open
samples/HOOPSExchangeSamples.slndirectly - no CMake required.
Build and run:
- Select Debug or Release configuration from the toolbar.
- Build the solution: Build -> Build Solution (Ctrl+Shift+B).
- To run a sample, right-click it in Solution Explorer, select Set as Startup Project, then press F5.
Compiled executables are placed in the bin/ folder.
Note
Two samples require additional setup:
- .NET Wrapper: Install Microsoft .NET for Visual Studio.
- TranslateToPkParts: See the Parasolid bridge documentation.
Build with Make (Linux/macOS)
Using CMake-generated Makefiles:
cd build/
make -j$(nproc)      # Linux (parallel build)
make -j$(sysctl -n hw.ncpu)   # macOS (parallel build)
Compiled executables are placed in build/bin/.
Using legacy Makefiles (without CMake):
The Linux and macOS packages include standalone Makefiles:
cd /path/to/HOOPS_Exchange/samples
make              # Build all samples
make DEBUG=1      # Debug build
make clean        # Clean build artifacts
With legacy Makefiles, executables are placed alongside each sample’s source files.
Build with Xcode (macOS)
Generate an Xcode project:
cmake -B build -G XcodeOpen the project:
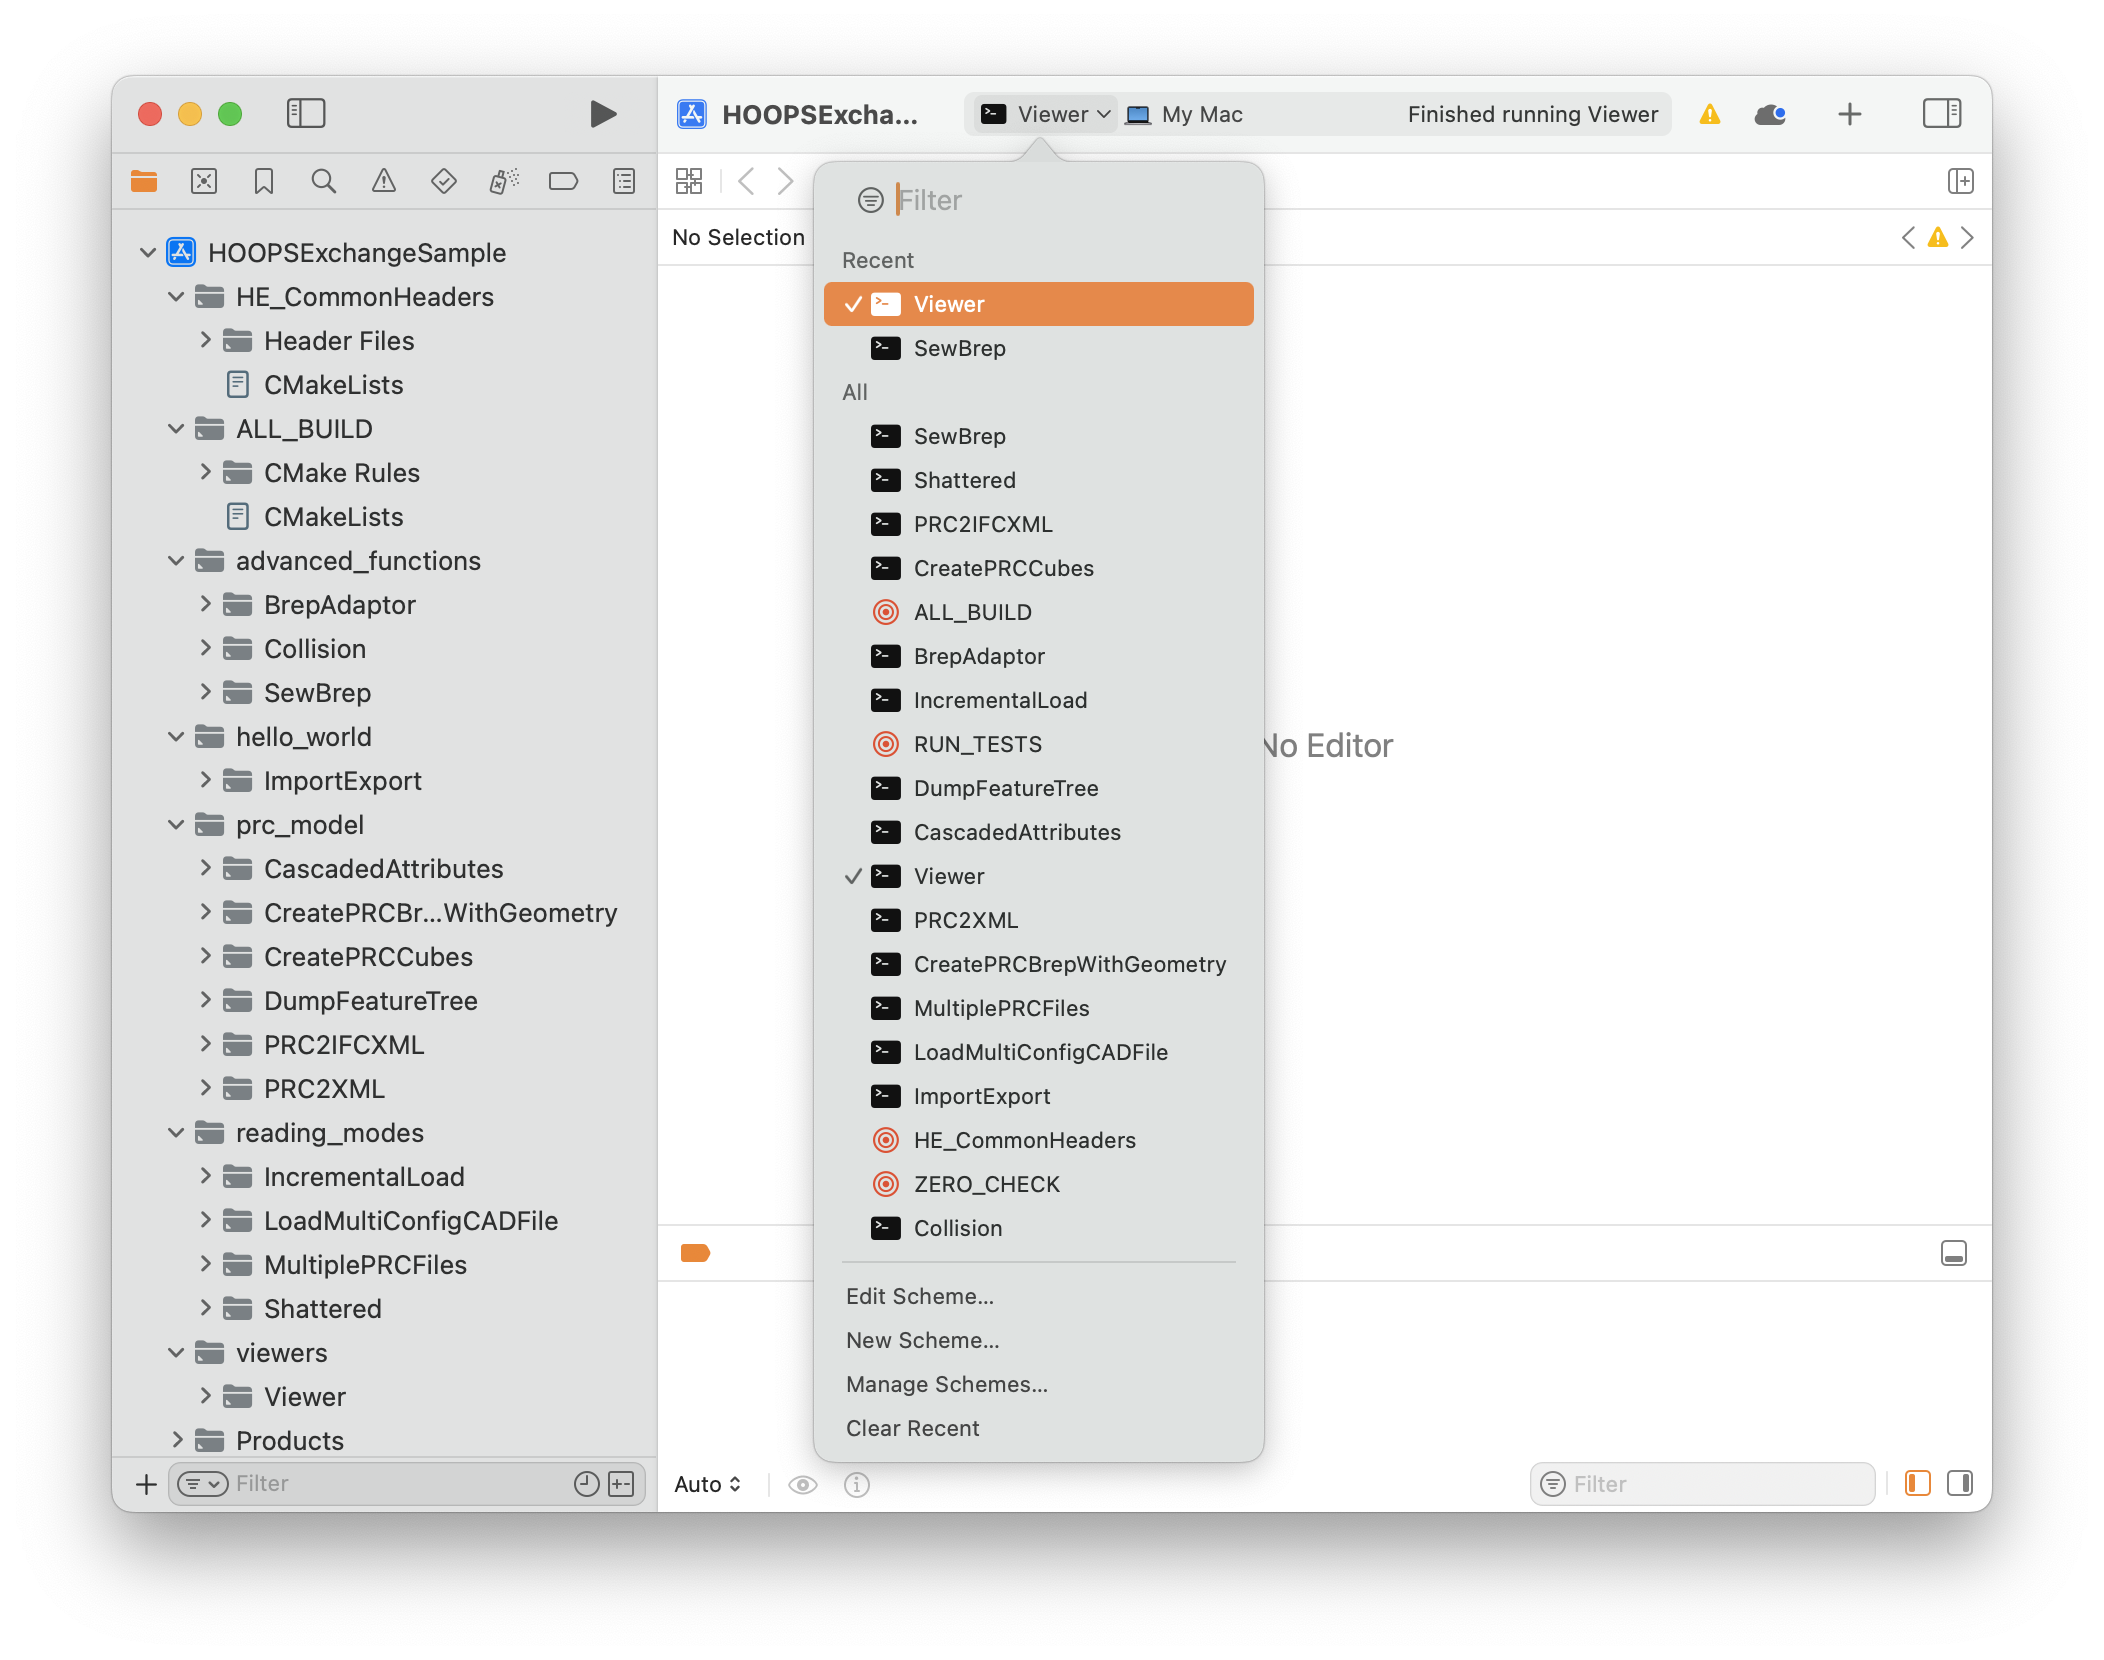
open build/HOOPSExchangeSample.xcodeprojSelect a sample from the scheme dropdown (next to the Stop button).
Build: Product -> Build (Cmd+B).
Run: Product -> Run (Cmd+R).
Note
On first run, macOS may block the HOOPS Exchange library. Go to System Settings -> Privacy & Security and click Allow Anyway.
Mobile Platforms
Mobile platforms have limited CAD format support and fewer samples compared to desktop.
iOS
Supported formats:
- Import: SolidWorks, IFC, IGES, JT, Parasolid, PDF, PRC, STEP, STEPXML, U3D
- Export: IGES, Parasolid, STEP
Available samples:
- PRC2XML: Loads a CAD file and dumps the model tree, metadata, and attributes to XML.
- IOSWriter: Loads a CAD file and converts it to another format.
Package contents: bin/, includes/, samples/, documentation/
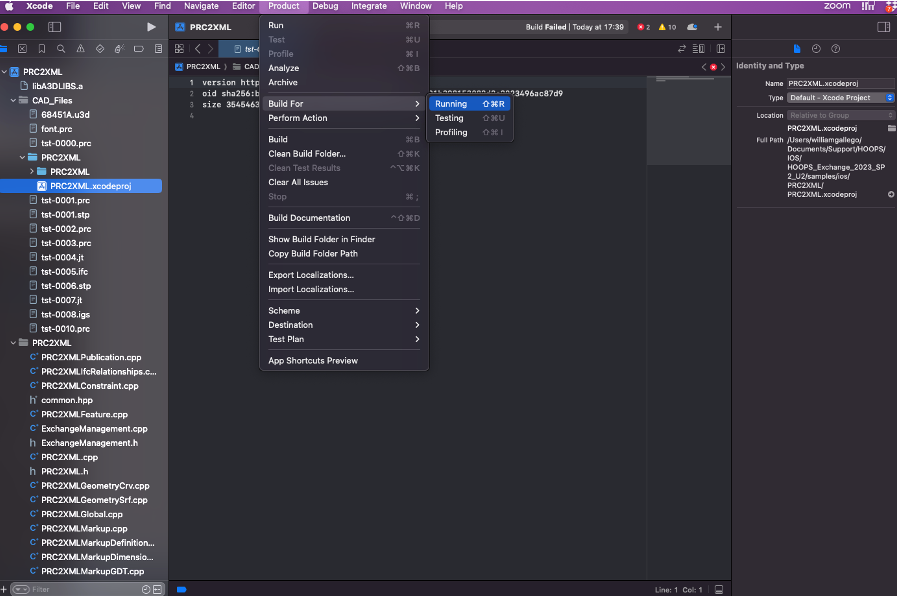
Build the iOS Samples
Open the Xcode project at
samples/ios/PRC2XML/PRC2XML.xcodeproj.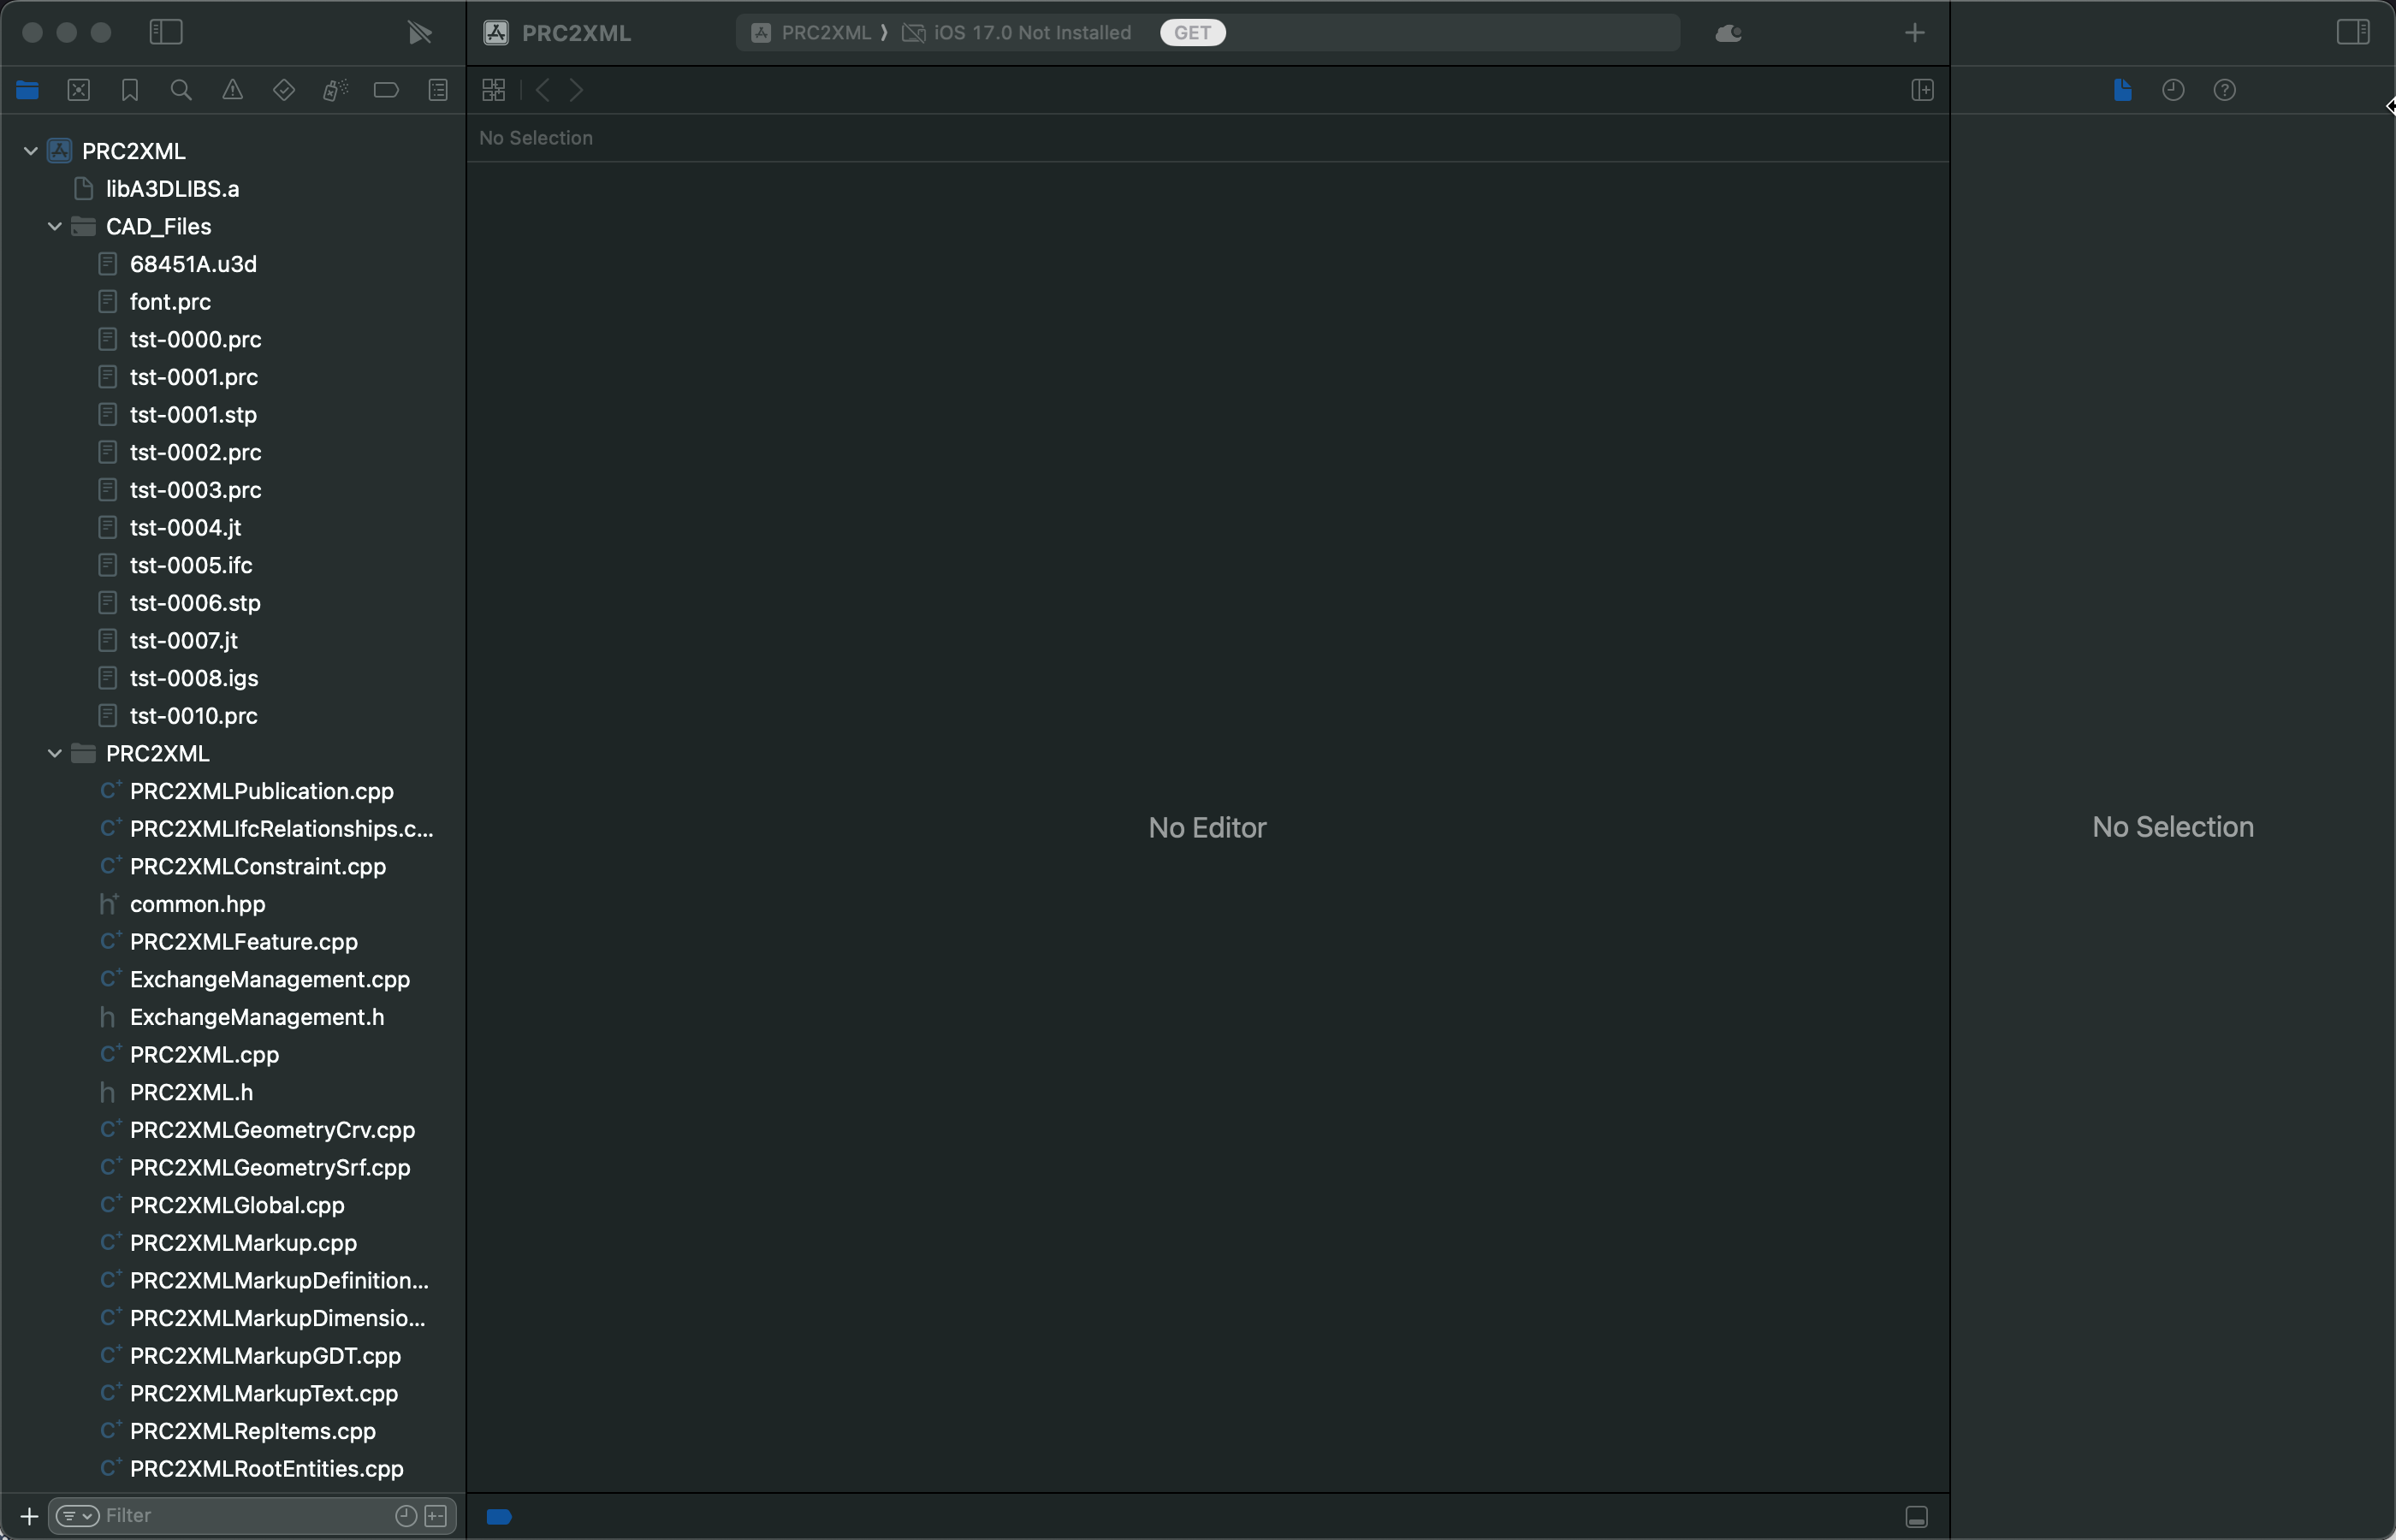
In the Project navigator, select
ts-0000.prc, then right-click and choose Add files to “PRC2XML”….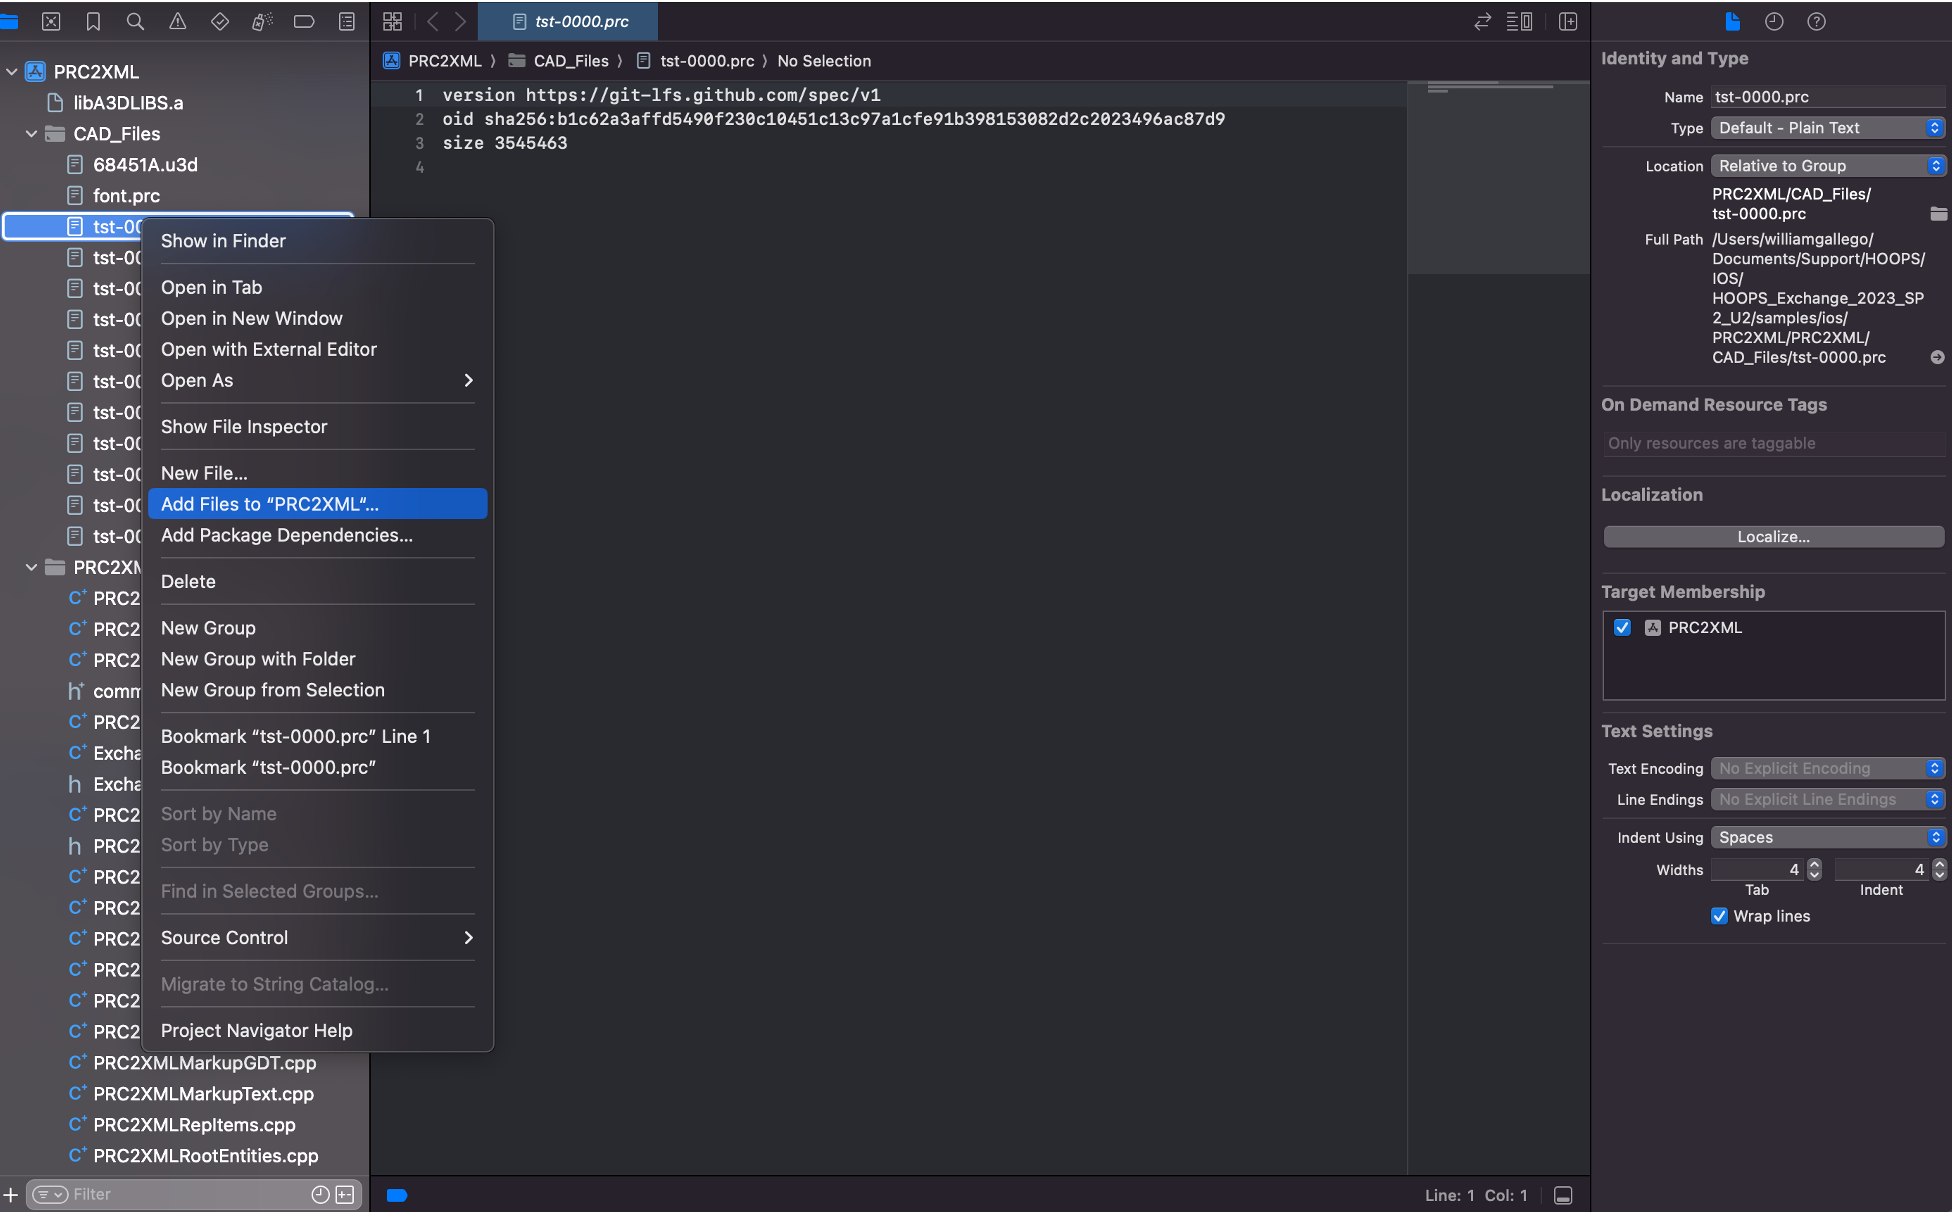
Build the sample: Product -> Build For -> Running.
Running on the iOS Simulator
Run the sample: Product -> Run.
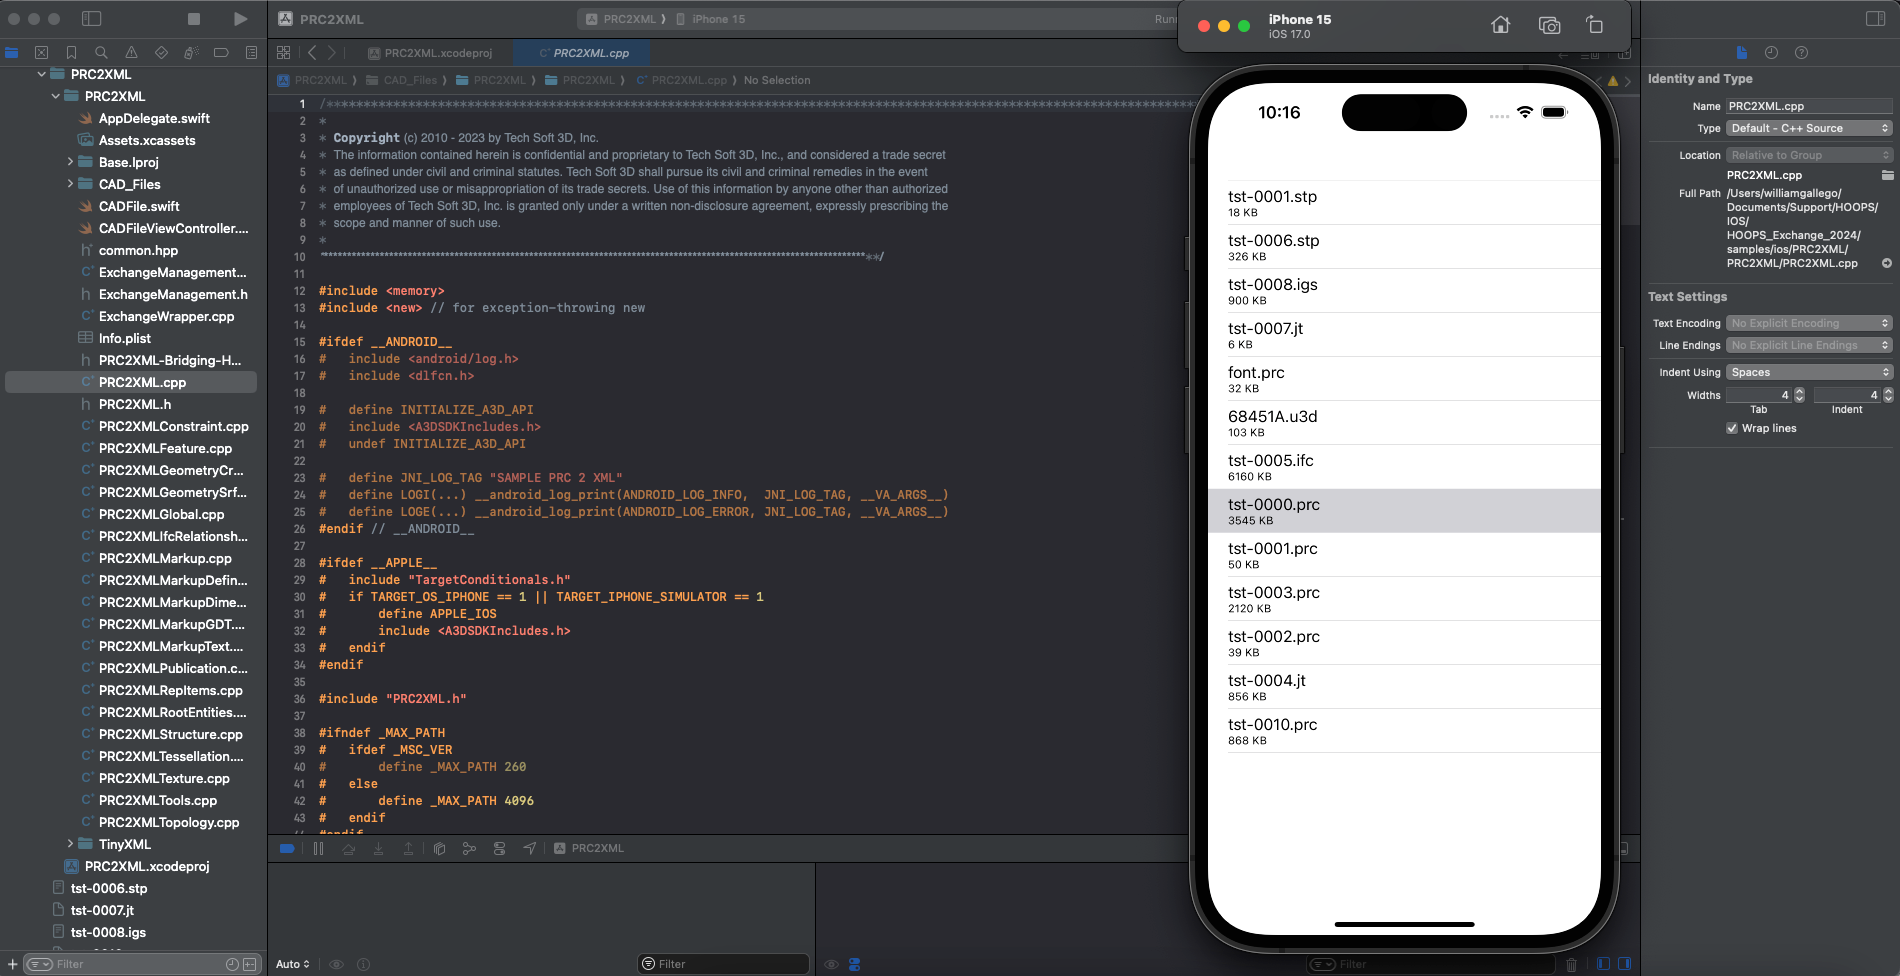
The iOS Simulator launches. Tap
ts-0000.prcto process the file.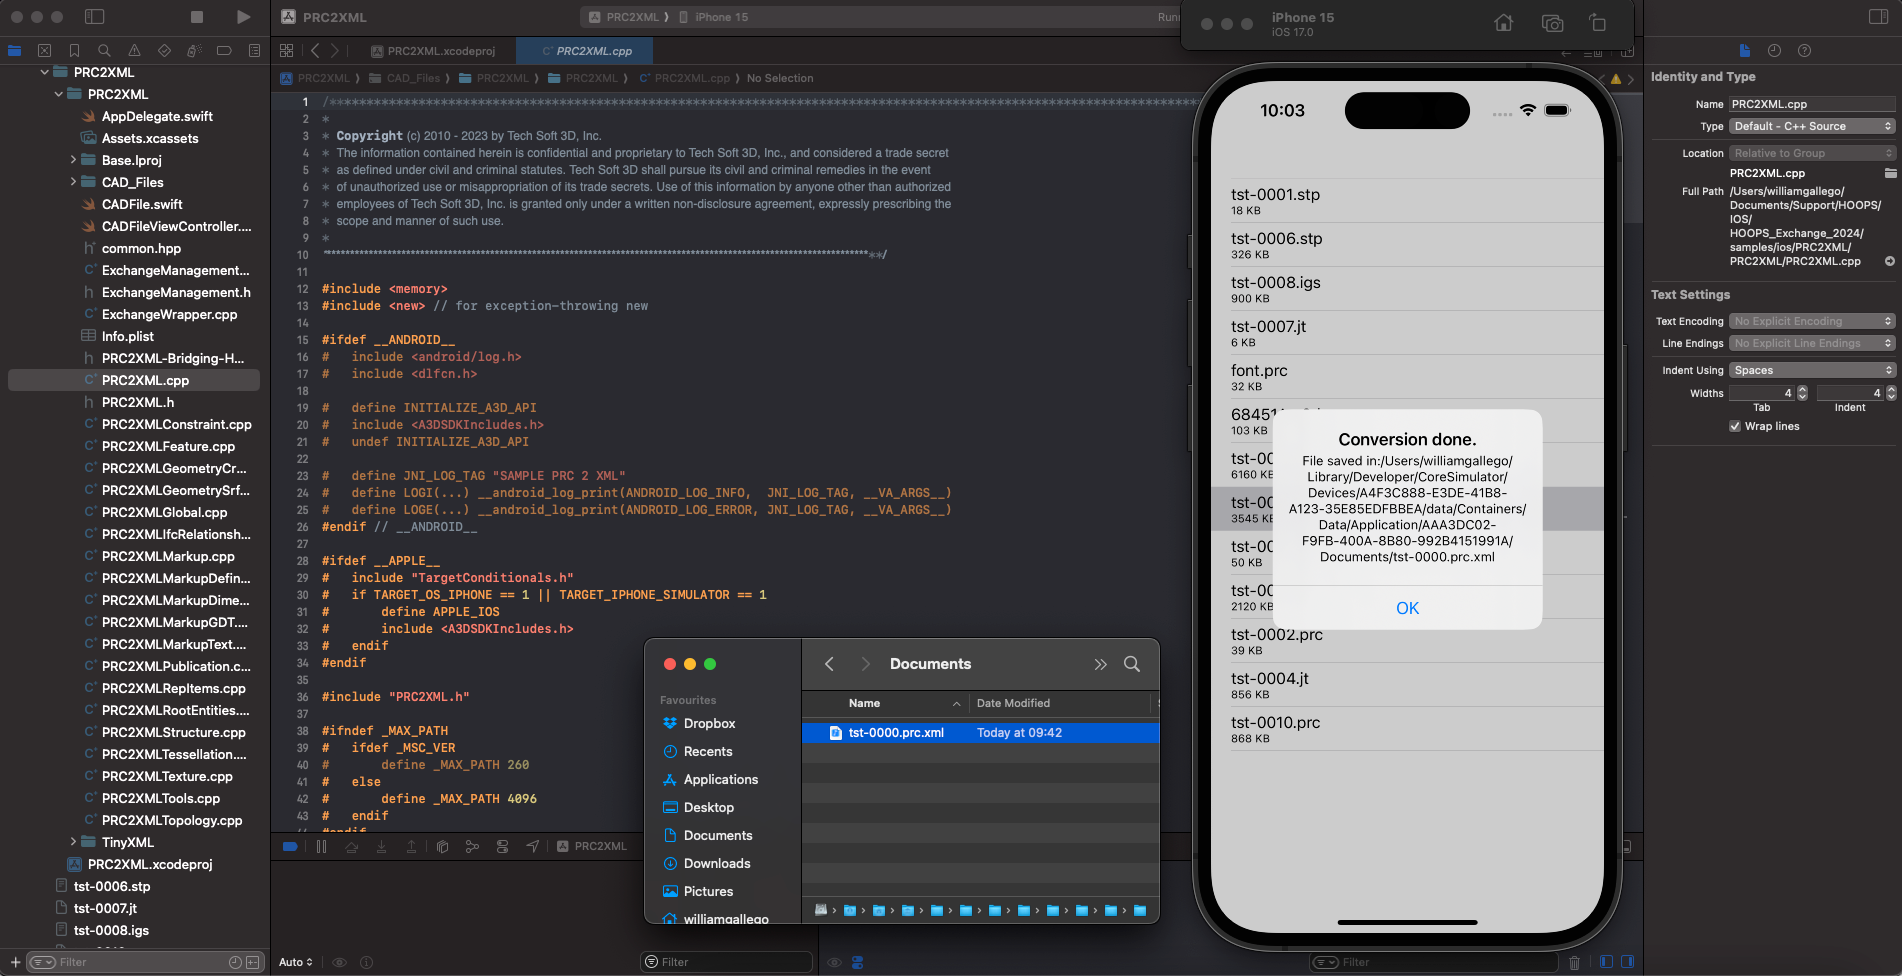
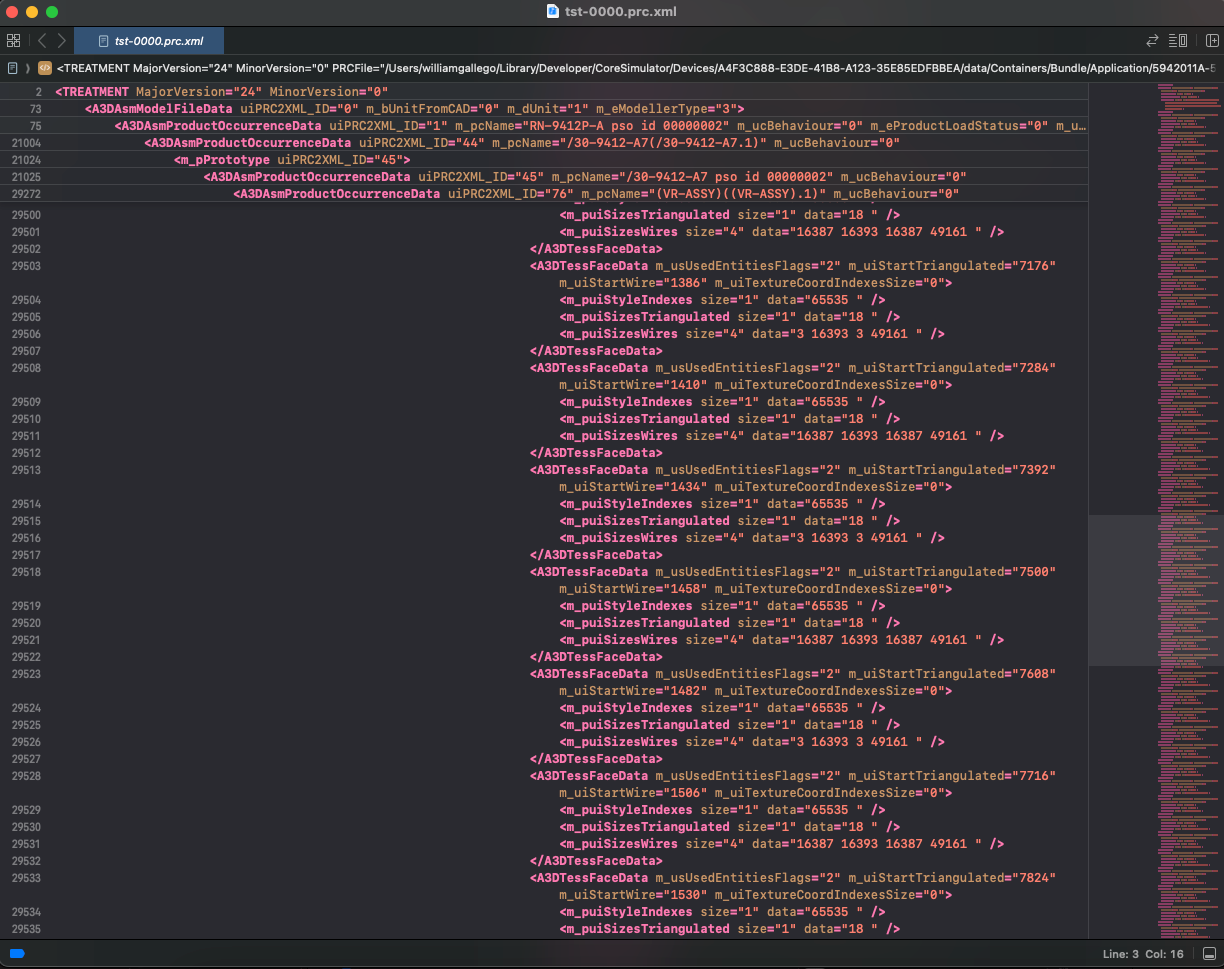
The generated
ts-0000.prc.xmlfile is saved to the app’s Documents folder:~/Library/Developer/CoreSimulator/Devices/<DEVICE_ID>/data/Containers/Data/Application/<APP_ID>/DocumentsOpen the XML file to explore the PRC structure, metadata, and attributes.
Note
The iOS samples are Swift applications that use C++ bridging headers to call HOOPS Exchange APIs.
Android
Available samples:
- PRC2XML: Loads a CAD file and dumps the model tree structure to XML.
Build the Android Sample
- Open Android Studio.
- Go to File -> Open and select
samples/android/PRC2XML/. - If prompted about missing SDK components, click the messages to install them (NDK, SDK, etc.).
- Wait for Gradle sync to complete (watch the progress bar at the bottom).
- Build: Build -> Rebuild Project.
- Run: Run -> Run ‘app’ (Shift+F10) and select your device or emulator.
Warning
Path length limitation (Windows): If you see errors about paths exceeding 240 characters, move the project closer to the drive root (e.g., C:\dev\PRC2XML).
Note
The Android sample uses Java with JNI to call HOOPS Exchange C++ APIs. Native code is built via CMake through the Android NDK.