
1. Set Up Your Environment
This documentation provides step-by-step instructions for setting up your environment for developing with HOOPS Exchange using C.
The process includes installing a development environment, downloading and extracting the library package, obtaining and configuring the license, and testing the installation using sample codes.
1.1. Installing Your Development Environment
Developing applications with HOOPS Exchange for Windows is typically done using the Visual Studio Integrated Development Environment (IDE).
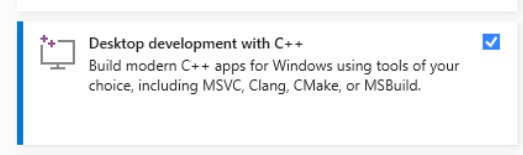
To get started, visit the Microsoft Visual Studio download page and choose the edition of Visual Studio that suits your needs. During the installation process, make sure to select at least the Desktop development with C++ component set.
Additionally, verify that your installed compiler adheres to the HOOPS Exchange platform requirements.
After completing the installation, restart your computer to ensure that all changes take effect.
Configure Linux:
- Go to the required components page.
- Make sure that your Minimum Supported OS and Compiler are compatible with HOOPS Exchange.
Configure macOS:
- Go to the required components page.
- Make sure that your Minimum Supported OS and Compiler are compatible with HOOPS Exchange.
Configure iOS:
- Go to the required components page.
- Make sure that your Minimum Supported OS and Compiler are compatible with HOOPS Exchange.
Configure Android:
- Go to the required components page.
- Make sure that your Minimum Supported OS and Compiler are compatible with HOOPS Exchange.
1.2. Installing HOOPS Exchange
Getting HOOPS Exchange:
This is your first visit to our website, and neither you nor your company has ever used or licensed our products before:
Go to our User Dashboard page and click the Sign Up link.
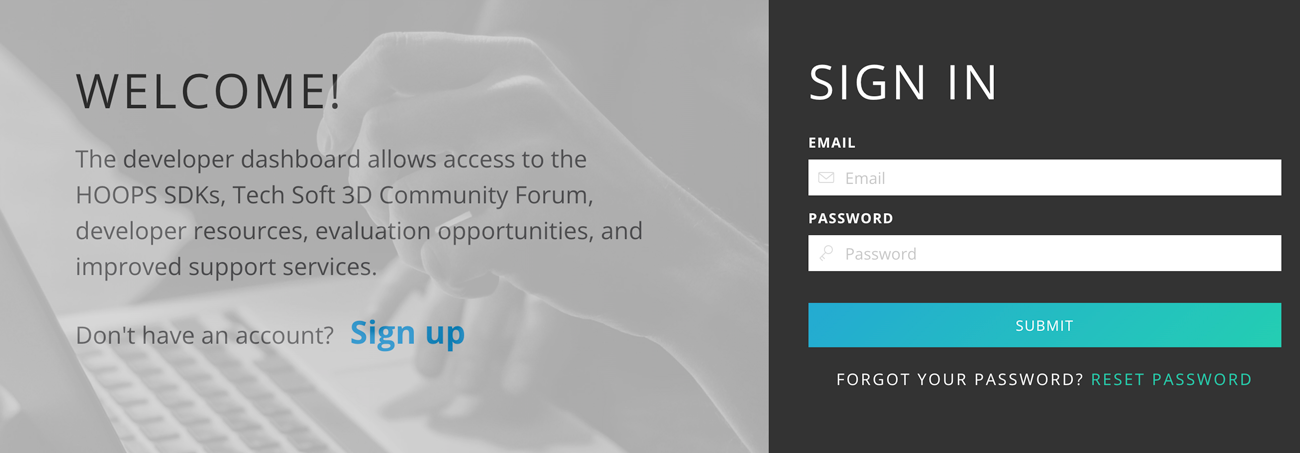
Create your self-evaluation account. You will be emailed a link to verify your account details.
Once you’ve verified your account, click on Product Downloads and then Download HOOPS Exchange to be taken to the Developer Zone.

Lastly, click the Download button for your chosen operating system.
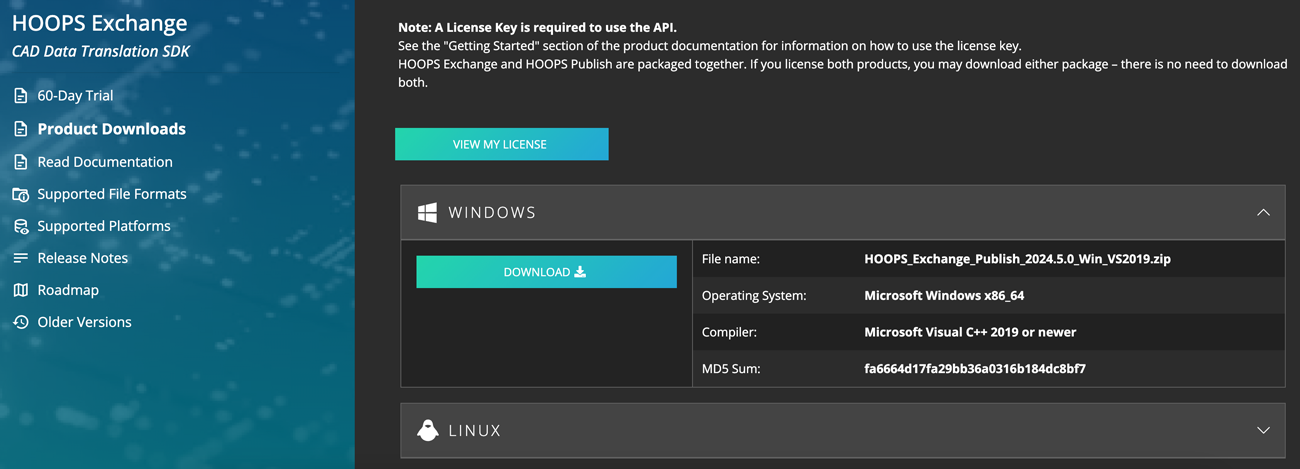
If you are on a Windows or Linux platform, you may download the Installer or the ZIP file. macOS users must use the ZIP file. To download the iOS or Android package, please Contact Us.

Read the Package Description page for more information about the download package content.
- Installer: Run the installer and follow the instructions to install the package on your local machine.
- ZIP file: Locate the downloaded package file, which is a zip archive.
You can use either a built-in extractor or third-party software to extract the contents to your chosen destination folder.
Obtaining, Setting Up and Checking the License:
Before you can use this product, you must have a valid HOOPS Exchange license:
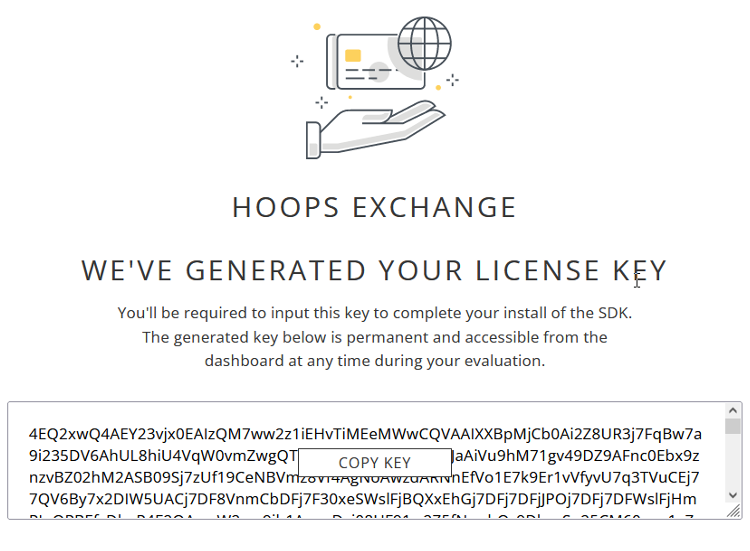
If you are using the Installer, you’ll be required to input the license key to complete installation of the SDK.
The generated key is permanent and accessible from the Developer Zone at any time during your evaluation.
If you are using the ZIP file, you will need to copy and paste your new license key into the license file available in your installation folder:
Locate the folder where you have previously extracted HOOPS Exchange on your system.
Navigate to the
../include/directory.Edit the file
hoops_license.hand enter your new license key.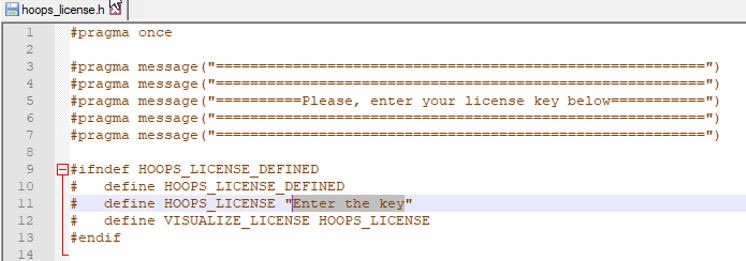
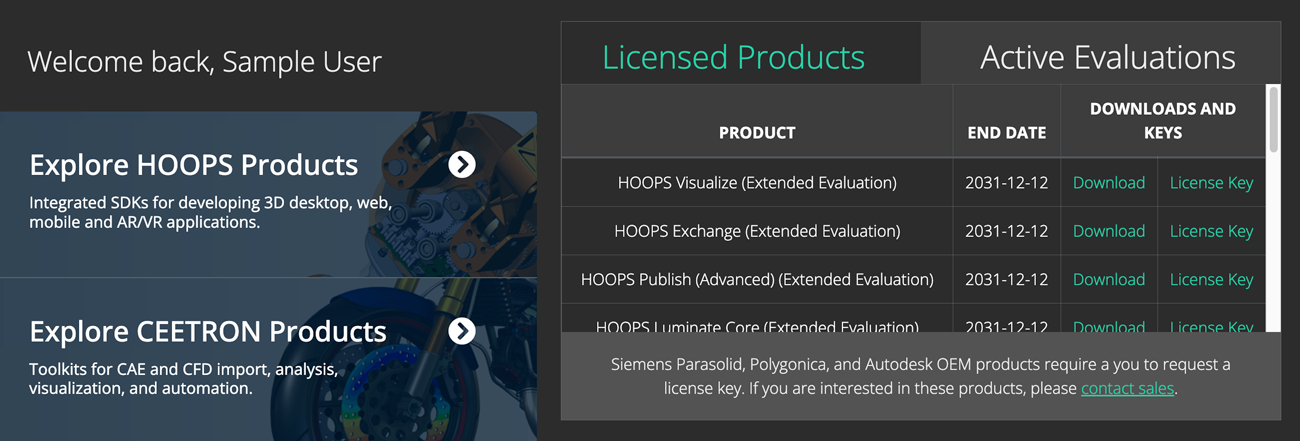
From the Developer Zone, clicking Active Evaluations at the top right of the page and then License Key will give you access to your license status.
HOOPS Exchange only requires a new license key if you are currently using a key which was generated for a prior major version. For example, developers upgrading from HE 2024.0.0 to HE 2024.1.0 may use the same key, but those upgrading from 2023.0.0 to 2024.0.0 need to generate a new key.
The expiration date for the generated license key is tied to your contract with Tech Soft 3D. If you have signed a license agreement for HOOPS Exchange, then the license key that is generated will be a perpetual (non-expiring) license key. If you are evaluating HOOPS Exchange, then the license key will expire when your evaluation expires. Evaluation license keys will expire at the end of the evaluation period and are not suitable for production software. Any software that uses an evaluation license key will no longer work after the evaluation period.
HOOPS Exchange releases are not binary compatible with older releases. You must recompile your application when updating to a new version of HOOPS Exchange. Please see Distributing Your Application section for an up-to-date list of binaries required for distribution.
Getting HOOPS Exchange:
Your company is already evaluating or licensing one of our products, go to the Developer Zone.
At the top right of the page, click on the Sign In button:
If you have an existing account, simply enter your credentials.
If your company is already licensing our technology, please contact us.
After our team has attached your contact to your company records, you will receive a personal invitation to log in.
From here, you can download:
- Your license file (perpetual and evaluation license key).
- ZIP files of current and previous versions for Windows, Linux, macOS, iOS, Android platforms.
- All of our other HOOPS, Ceetron, Partners, and OEM CAD technologies and viewers.
Read the Package Description page for more information about the download package content.
- ZIP file: Locate the downloaded package file, which is a zip archive.
You can use either a built-in extractor or third-party software to extract the contents to your chosen destination folder.
Obtaining, Setting Up and Checking the License:
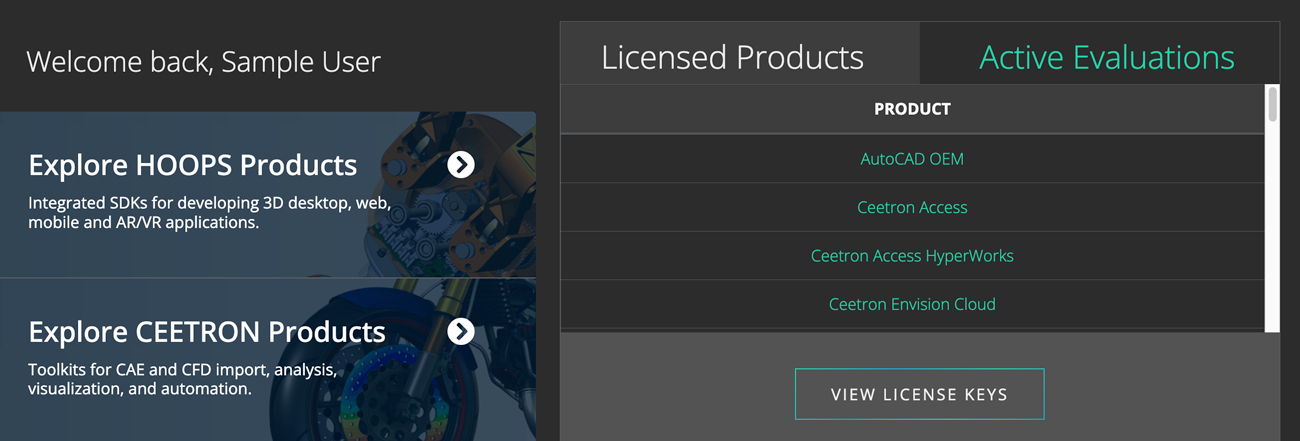
Existing partners can download ZIP Files and License File from the Developer Zone:
Visit the Developer Zone and click the View License Keys button.
Click the C Header button in the Header Files section.
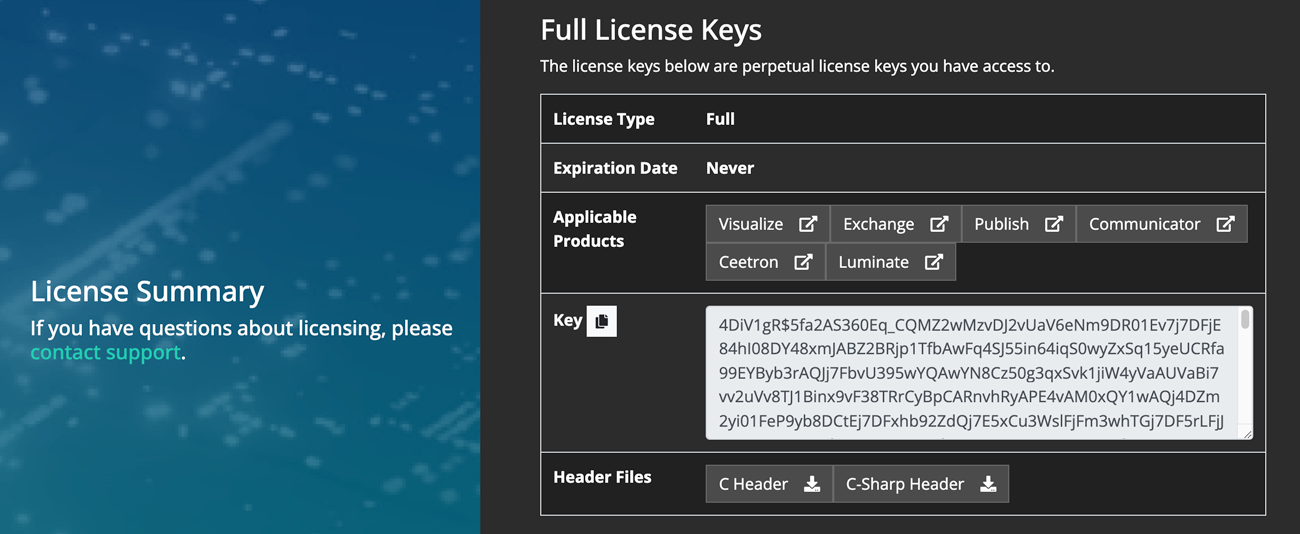
This will generate a file named
hoops_license.hfor you. Once done, simply:Locate the folder where you have previously extracted HOOPS Exchange on your system.
Navigate to the
../include/directory.Copy the downloaded
hoops_license.hand replace the default one in the../include/directory.
HOOPS Exchange only requires a new license key if you are currently using a key which was generated for a prior major version. For example, developers upgrading from HE 2024.0.0 to HE 2024.1.0 may use the same key, but those upgrading from 2023.0.0 to 2024.0.0 need to generate a new key.
The expiration date for the generated license key is tied to your contract with Tech Soft 3D. If you have signed a license agreement for HOOPS Exchange, then the license key that is generated will be a perpetual (non-expiring) license key. If you are evaluating HOOPS Exchange, then the license key will expire when your evaluation expires. Evaluation license keys will expire at the end of the evaluation period and are not suitable for production software. Any software that uses an evaluation license key will no longer work after the evaluation period.
HOOPS Exchange releases are not binary compatible with older releases. You must recompile your application when updating to a new version of HOOPS Exchange. Please see Distributing Your Application section for an up-to-date list of binaries required for distribution.
1.3. Testing the Installation
Let’s verify your setup by building and running a sample. We’ll use CMake, a tool that generates project files for your IDE. If you don’t have CMake installed, download it from cmake.org.
Open CMake (search for “CMake” in your Start menu or Applications folder).
In the field Where is the source code, select the samples folder from your HOOPS Exchange installation.
In the field Where to build the binaries, select an empty folder (for example, create a build folder inside samples).
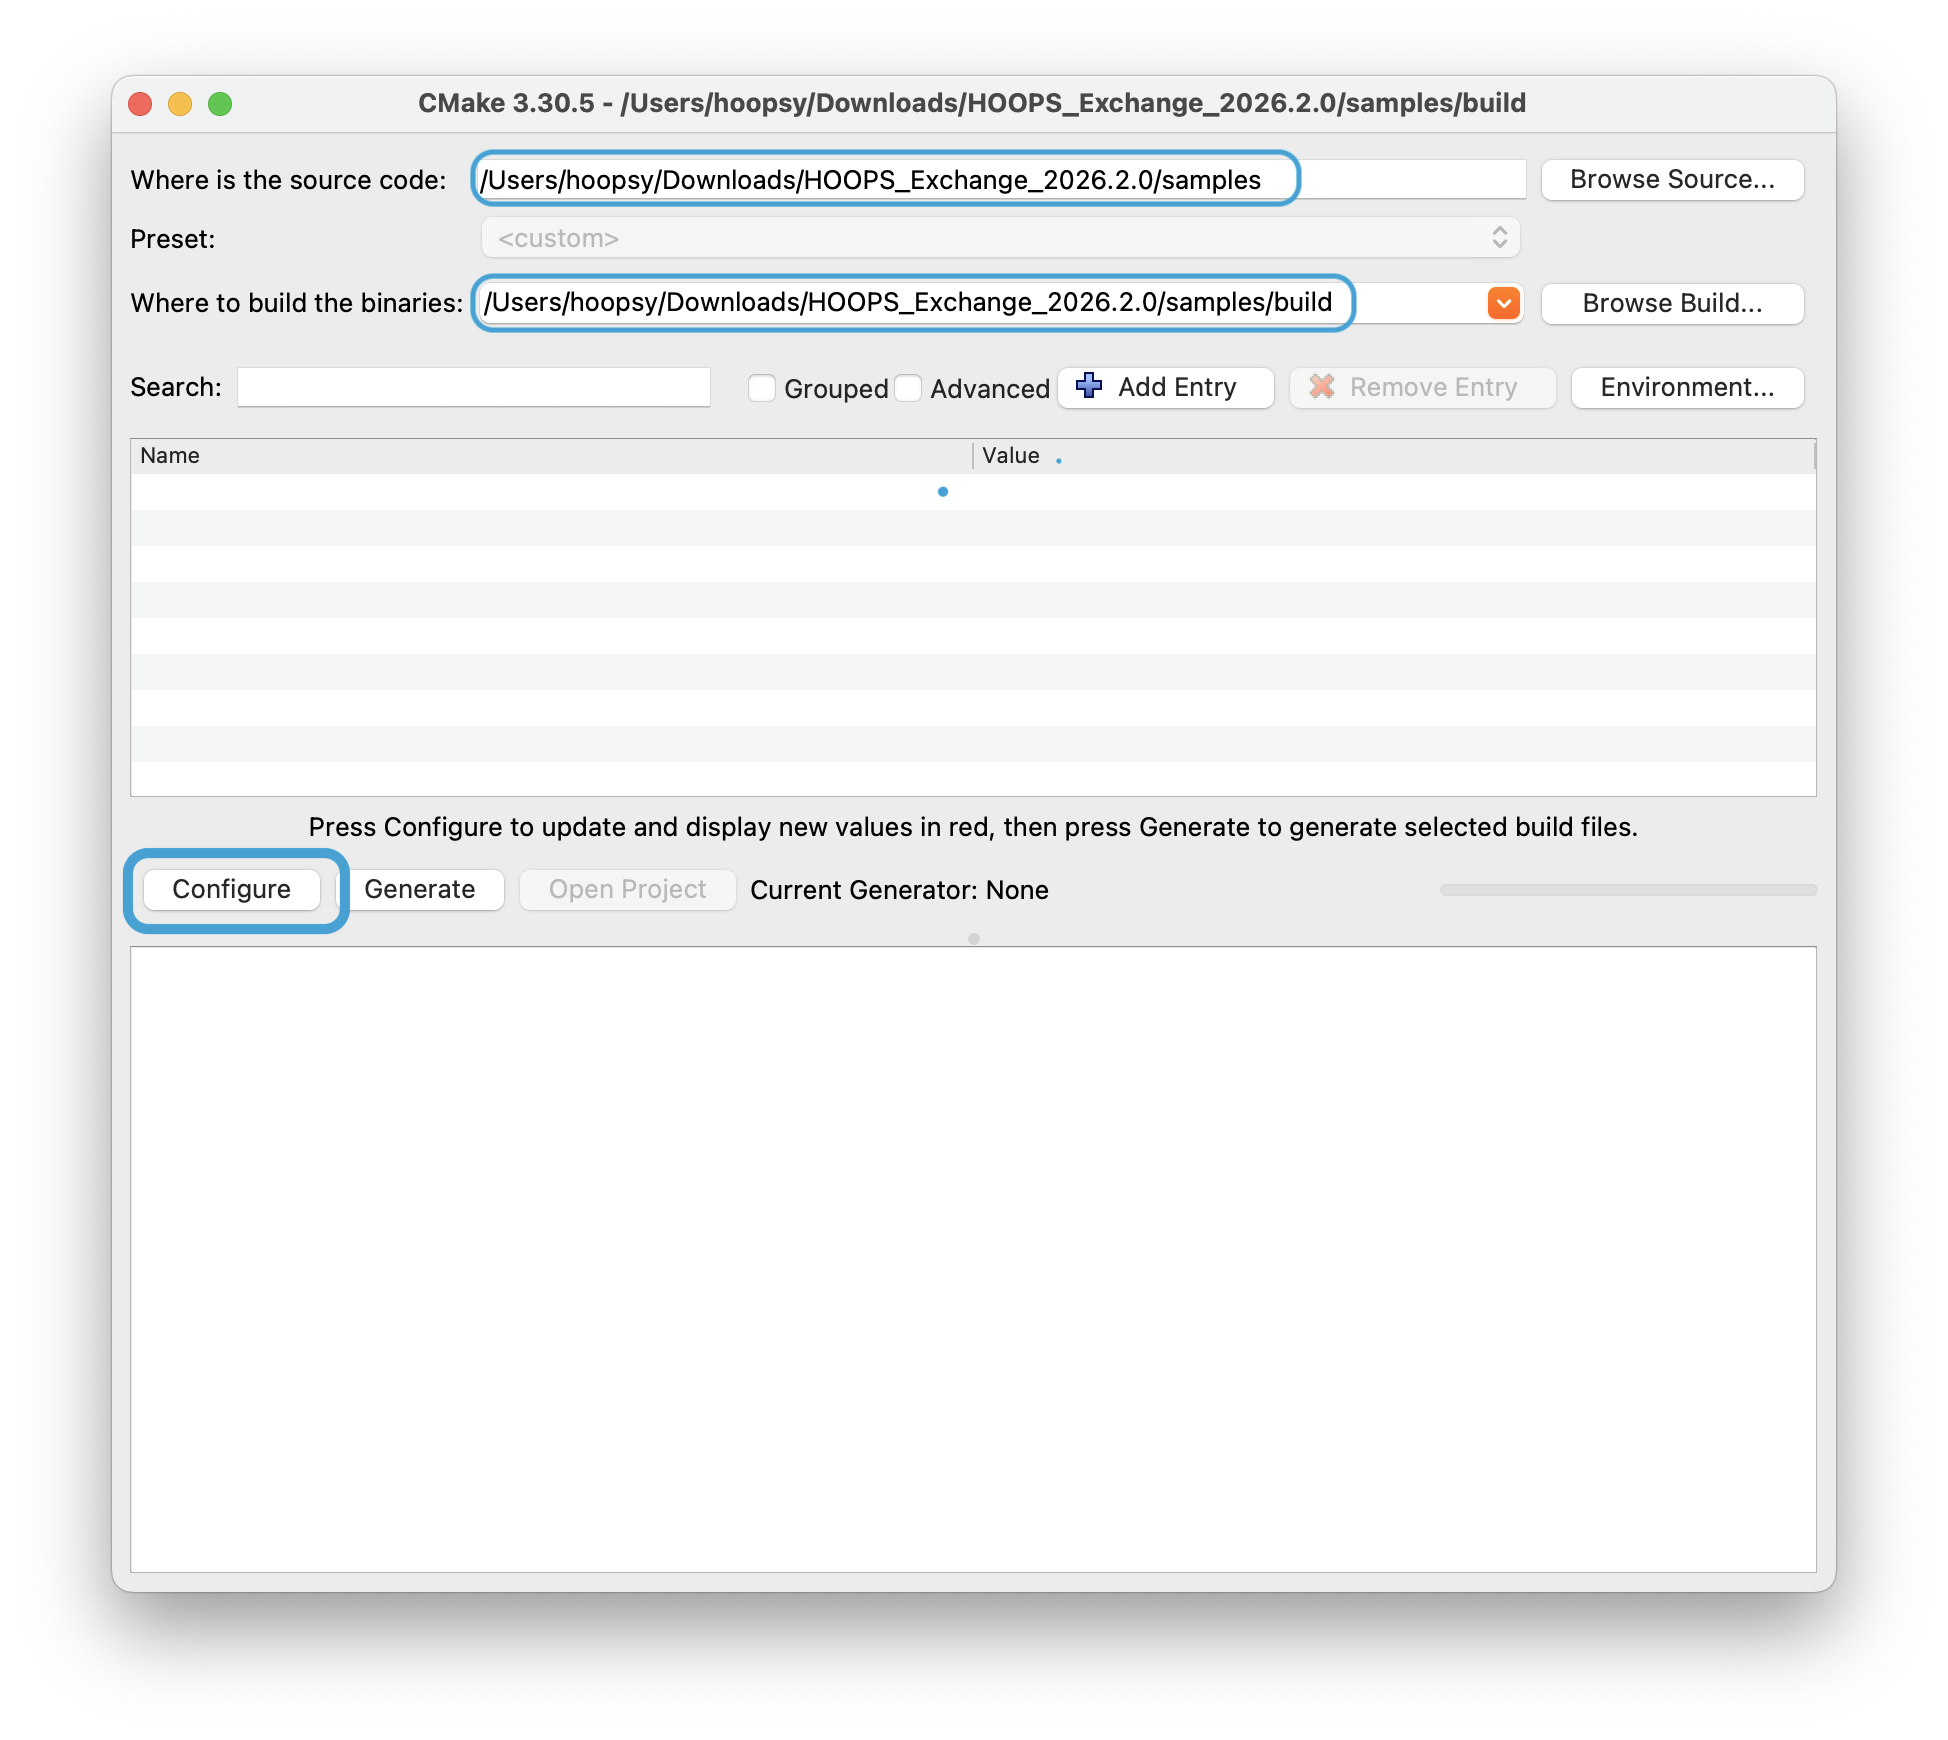
CMake GUI with HOOPS Exchange samples folder selected.
Click Configure. CMake asks you to select a generator — choose your IDE (Visual Studio 17 2022 on Windows, Xcode on macOS, or Unix Makefiles on Linux). Once configured, click Generate to create the project files.
Now click Open Project. Your IDE opens with all samples ready to build.
In Visual Studio, select Release from the configuration dropdown, then go to Build -> Build Solution. In Xcode, go to Product -> Build.
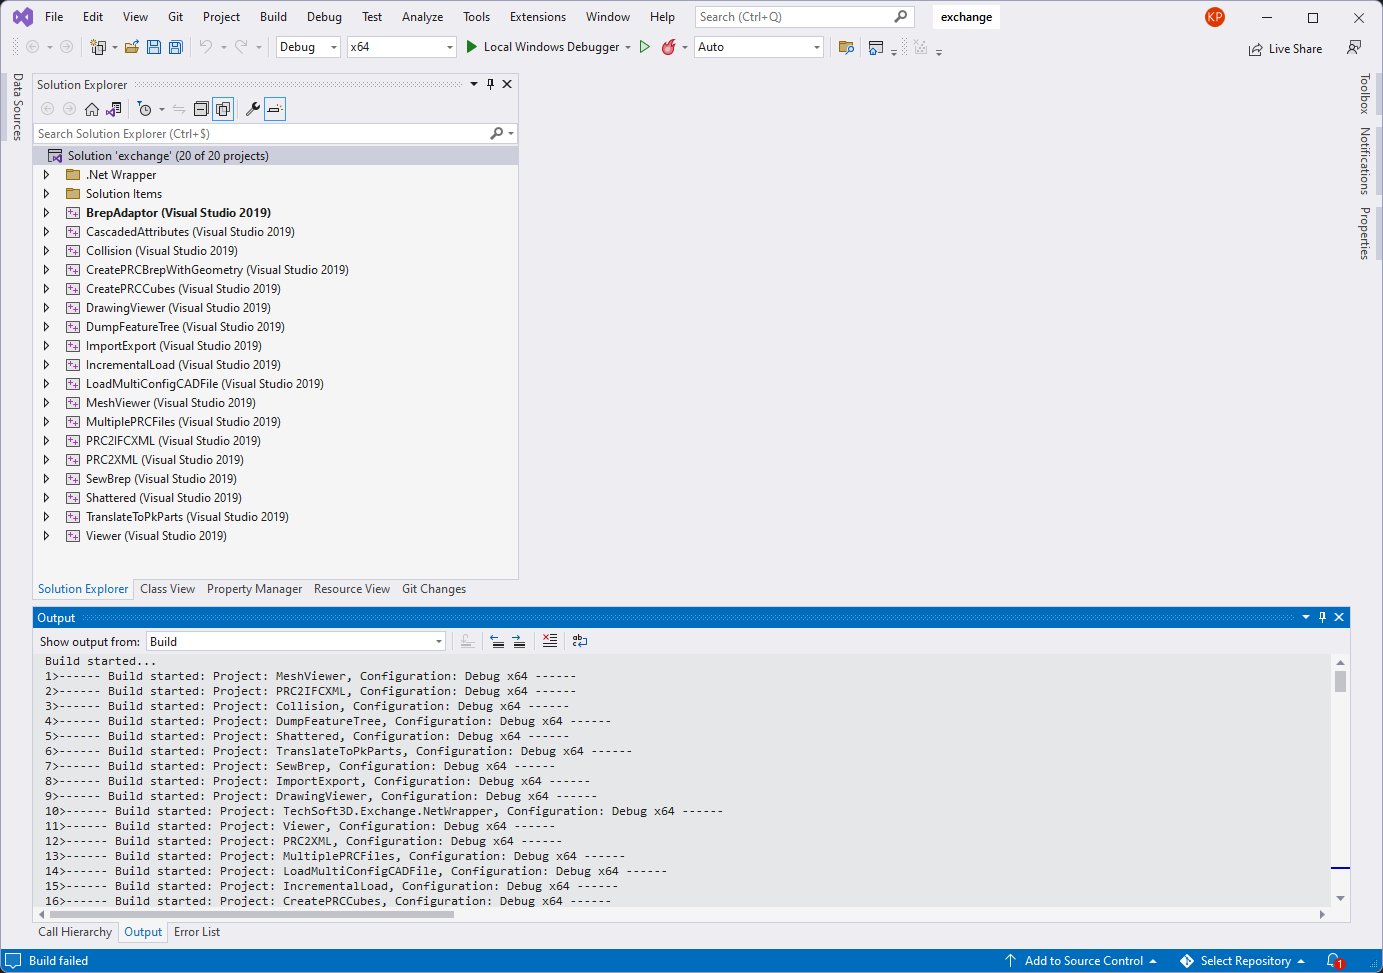
Building the samples in Visual Studio.
Once the build completes, locate the ImportExport project in your IDE, set it as the startup project, and run it. The sample converts a sample CAD file to PRC format.
Navigate to samples/data/catiaV5/CV5_Aquo_Bottle/ and look for the newly created file _Aquo Bottle.CATProduct.prc.
If this file exists, congratulations — your installation is working!
For more build options, see Building Code Examples.
1.4. Conclusion
You have successfully set up your environment for HOOPS Exchange, including Visual Studio installation, package download and extraction, license configuration, and testing using sample codes.
You are now ready to start working with HOOPS Exchange. If you encounter any issues or have questions, please refer to our support resources or forum.
You are now ready for our next tutorial: File-to-File Translation.