
Using the UI Kit with React
This sample application uses the Next.js framework to demonstrate how to load a model and use React with the UI kit. Follow along step-by-step, or scroll to the bottom for the completed project.
Project Setup
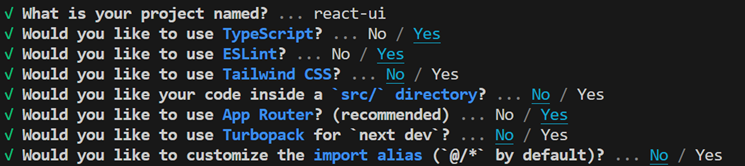
npx create-next-app@latest
Install the React web viewer components using one of the following methods:
Option A: Direct npm installation
- Run
npm install @ts3d-hoops/web-viewer-components-react
Option B: Local installation from customer package
- Create a folder called @ts3d-hoops in your main project directory and copy all folders (except beta-demo-app-src) from the <INSTALL_DIR>/web_viewer/@ts3d-hoops directory to this folder
- Run
npm install "./@ts3d-hoops/web-viewer-components-react"in a command prompt from your project directory
- Run
Copy microengine.scs from the HOOPS Visualize Web package to the public folder.
Setup the WebAssembly engine files based on your installation method:
Option A: npm installation:
- Copy engine.esm.wasm from node_modules/@ts3d-hoops/sc-engine/engine.esm.wasm to your public folder
- Alternatively, configure your bundler (Vite, Webpack, etc.) to automatically copy the engine files during build
Option B: local installation:
- Copy engine.esm.wasm from ./@ts3d-hoops/sc-engine/engine.esm.wasm to your public folder
Create a directory in your project’s app directory called components.
Create a Viewer.tsx file here and create an empty basic component:
export default function Viewer() {
    return (
        <>
        </>
    )
}
- At the top of the file, add the ‘use client’ directive to support the web viewer and React functionalities.
'use client'
- Below that, add an import statement for the web viewer components:
import { WebViewerComponent } from '@ts3d-hoops/web-viewer-components-react';
Note: you may be able to skip this step if your IDE can automatically add these as you use them in your code.
- In the
Viewerfunction, update thereturnwith aWebViewerComponent:
export default function Viewer() {
    return (
        <WebViewerComponent
        id='hwv'
        endpointUri='./microengine.scs'
        enginePath='./'
        />
    )
}
- Delete all the contents of app/page.tsx and replace with the following:
'use client'
import dynamic from "next/dynamic";

const Viewer = dynamic(()=> import('./components/Viewer'), {
  ssr: false
});

export default function Home() {
  return (
     <Viewer />
  )
}
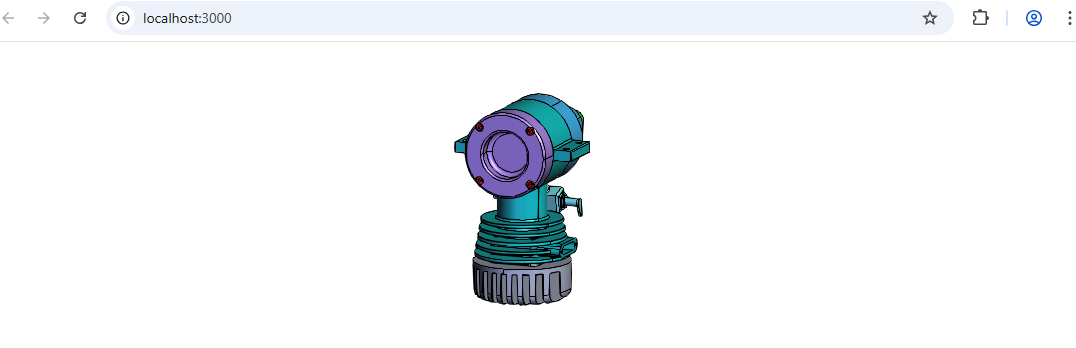
- From your app’s directory, run
npm run dev:
Adding a Button
- Edit the Viewer.tsx file to return the following:
<>
    <WebViewerComponent
        id='hwv'
        endpointUri='./microengine.scs'
        enginePath='./'
    />
    <div id="hwvHomeButton" style={{position: "absolute", top: "10px", right: "10px"}}>
        <HoopsIconButton>
            <HoopsIcon icon="home"></HoopsIcon>
        </HoopsIconButton>
    </div>
</>
- Ensure the following import statements have been added if not already done in the last step:
import { HoopsButton, HoopsIcon, HoopsIconButton } from '@ts3d-hoops/ui-kit-react/lib';
- Next, we will use a
useRefhook to manage the instantiated Web Viewer since we will not need it to trigger a re-render when updated. First, importuseRefand initialize the variable for the Web Viewer inside of theViewerfunction:
import { useRef } from 'react';

export default function Viewer() {
    const hwvRef = useRef<WebViewer | null>(null);
    ...
}
- Now we can add functionality to the button. Create a new function as follows:
function modelReady(event: CustomEvent<{hwv: WebViewer}>) {
    const { hwv } = event.detail;
    hwvRef.current = hwv;
}
- Finally, add an
onClickproperty to the element containing theHoopsIconButton:
<div id="hwvHomeButton" style={{position: "absolute", top: "10px", right: "10px"}} onClick={()=>hwvRef.current?.reset()} >
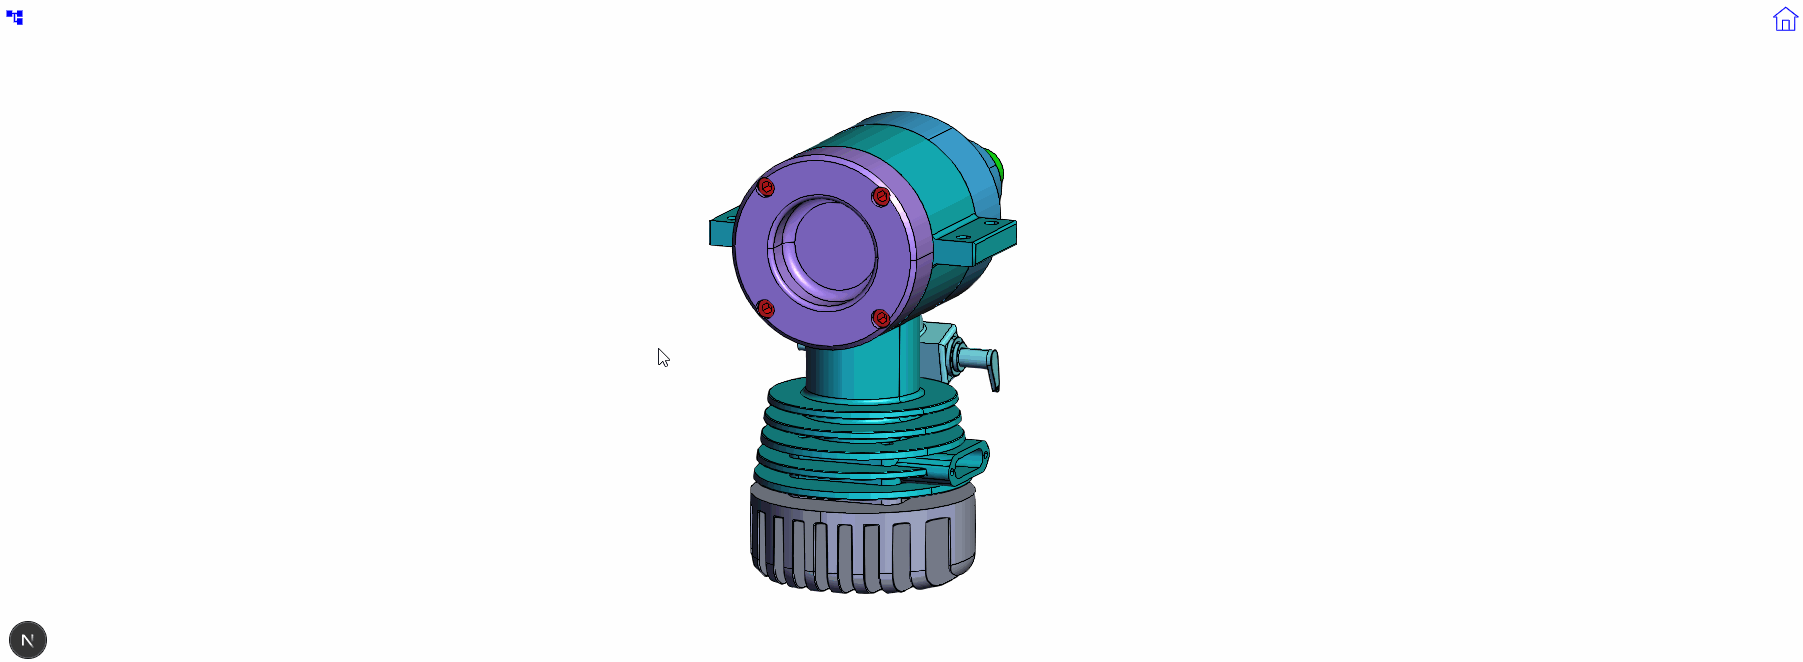
You should now have a working “Home” button.
Customizing Appearance
- In app/globals.css, add the following at the end of the file to make the viewer appear full screen:
hoops-web-viewer {
  width: 100vw;
  height: 100vh;
}
- To change the appearance of the
hoops-icon, you can customize the CSS variables that define its behavior, such as the stroke color. In the:rootselector, add the following:
:root {
    --hoops-svg-stroke-color: blue;
}
Adding the Model Tree
- In this section, we will add a model tree and a button to toggle its visibility. First, we will need to create a reference for the model tree. Add this directly below the declaration of hwvRef:
const modelTreeRef = useRef<HoopsModelTreeElement | null>(null);
- We will also create a hook to track the visibility state of the model tree in our
Viewercomponent. AdduseStateto your import statement as follows:
import { useRef, useState } from 'react';
Also, create the hook directly below the declaration of modelTreeRef:
const [modelTreeVisible, setModelTreeVisible] = useState<boolean>(false);

let modelTreeDisplay = "none";
if (modelTreeVisible) modelTreeDisplay = "block";
- In the
modelReadyfunction, we can set the model tree reference to the instantiated viewer’s model property:
function modelReady(event: CustomEvent<{hwv: WebViewer}>) {
    // ...

    if (modelTreeRef.current) {
        modelTreeRef.current.model = hwv.model;
    }
}
- Define a function to toggle the visibility of the tree (still within the Viewer function):
function toggleTree() {
    if (modelTreeVisible) {
        setModelTreeVisible(false);
    }
    else {
        setModelTreeVisible(true);
    }
}
- In globals.css, add the style for the
<hoops-model-tree>element:
hoops-model-tree {
  width: 600px;
  overflow: auto;
  z-index: 3;
  position: absolute;
  left: 20px;
  top: 50px;
  display: none;
}
- Back in Viewer.tsx, add a model tree toggle button to the
returnstatement of theViewerfunction:
<div id="modelTreeDiv" style={{position: "absolute", top: "10px", left: "10px", zIndex: 2}} onClick={toggleTree}>
    <HoopsModelTreeButton id="hwvModelTreeButton"></HoopsModelTreeButton>
</div>
- Finally, also add the
HoopsModelTreecomponent to the return statement, passing in the model tree reference to therefproperty:
<HoopsModelTree id="hwvModelTree" style={{display: modelTreeDisplay}} ref={modelTreeRef}></HoopsModelTree>
Now your app should have a model tree button that toggles the tree when clicked.
Making the Model Tree Interactive
- Update your import statement to import
SelectionModeas follows:
import { WebViewer, SelectionMode } from '@ts3d-hoops/web-viewer';
- Create a new function to handle a model tree node click (add this within the Viewer` function just above the
returnstatement):
function handleNodeClick(event: CustomEvent<{nodeId: number}>) {
    event.stopPropagation();
    hwvRef.current?.selectionManager.clear(false);
    hwvRef.current?.selectionManager.selectNode(event.detail.nodeId, SelectionMode.Add);
}
- Update the
HoopsModelTreecomponent in thereturnstatement withmodelTreeNodeClick:
<HoopsModelTree id= "hwvModelTree" style={{display: modelTreeDisplay}} ref={modelTreeRef} modelTreeNodeClick={handleNodeClick}></HoopsModelTree>
When the app runs, you should now be able to click an element in the model tree to select the respective node on the model.
- Now, to add functionality to the visibility icons, create a function to handle a visibility change (you can add this after your
handleNodeClickfunction):
function handleNodeVisibilityChange(event: CustomEvent<{nodeId: number, visibility: boolean}>) {
    event.stopPropagation();
    hwvRef.current?.model.setNodesVisibility([event.detail.nodeId], event.detail.visibility);
    modelTreeRef.current?.updateNodeData(event.detail.nodeId, {
        visible: event.detail.visibility
    });
}
- Update the
HoopsModelTreecomponent’smodelTreeNodeVisibilityChange:
<HoopsModelTree id="hwvModelTree" style={{display: modelTreeDisplay}} ref={modelTreeRef} modelTreeNodeClick={handleNodeClick} modelTreeNodeVisibilityChange={handleNodeVisibilityChange}></HoopsModelTree>
- The model tree can only affect the Web Viewer at the moment (and not vice versa), so in order to fully sync the Web Viewer and model tree, we can use the Web Viewer callbacks so changes can propogate to the model tree (add this within the
modelReadyfunction):
hwvRef.current.setCallbacks({
    selectionArray: ()=> {
        modelTreeRef.current!.selected = hwvRef.current!.selectionManager.getResults().map((current)=> {
            return current.getNodeId();
        });
    },
    visibilityChanged: (shownBodyIds: number[], hiddenBodyIds: number[])=> {
        shownBodyIds.forEach((nodeId)=>{
            modelTreeRef.current?.updateNodeData(nodeId, {visible: true});
        });
        hiddenBodyIds.forEach((nodeId)=>{
            modelTreeRef.current?.updateNodeData(nodeId, {visibility: false});
        })
    }
});
Note: this is a simple example and the node IDs returned by the visibilityChanged callback will be leaf nodes - to see the effect of the Web Viewer on the model tree, you may need to expand the tree or alter the logic. For example, if you add hwv.model.setNodesVisibility([hwv.model.getAbsoluteRootNode()], false); in the modelReady function, you will still see the visible icon on the parent nodes and invisible icon for the leaf nodes.
- Finally, let’s update the style of the model tree. In globals.css within the
:rootselector, add--hoops-accent-foreground-hover: #005588;and--body-font: sans-serif;.
For more information about the components, refer to the Programming Guide and API documentation.
The complete sample application from this page can be found here: react-app.zip.