Setting Up Views
Summary
In this chapter, we will walk through setting up the main focus of our application: the viewers.
Concepts
- Instantiating and starting the WebViewers
- Setting callbacks
- Configuring additional WebViewer options
Project Setup
You must install the necessary packages directly from npm or from a local installation method with the customer package.
Option A: Direct npm installation
Install the necessary packages directly from npm:
npm install @ts3d-hoops/common @ts3d-hoops/web-viewer
Option B: Local installation from customer package
Copy the <INSTALL_DIR>/web_viewer/@ts3d-hoops directory from our HOOPS Visualize Web package to somewhere accessible to the tutorial project. We will be using <INSTALL_DIR>/tutorials/inventory_management/ as the destination, but you can choose any location that is convenient.
Then, install the necessary packages from these paths using a command prompt:
npm install <PROJECT_PATH>/@ts3d-hoops/common <PROJECT_PATH>/@ts3d-hoops/web-viewer
Engine Setup
Next, make your server (or bundler) serve the engine as static assets. In our case (with Vite), this is done as follows:
npm install -D vite-plugin-static-copy
Then use it in your vite.config.ts:
// vite.config.ts

import { defineConfig } from "vite";
import { viteStaticCopy } from "vite-plugin-static-copy";

// https://vitejs.dev/config/
export default defineConfig({
  plugins: [
    viteStaticCopy({
      targets: [
        // For Option A (npm installation): copy from node_modules
        {
          src: "node_modules/@ts3d-hoops/sc-engine/engine.esm.wasm",
          dest: "@ts3d-hoops/sc-engine/",
        },
        // For Option B (local installation): use these paths
        // {
        //   src: "path/to/@ts3d-hoops/sc-engine/engine.esm.wasm",
        //   dest: "@ts3d-hoops/sc-engine/",
        // },
      ],
    }),
  ],
});
Note
vite-plugin-static-copy requires Vite 6, 7, or 8. If your project is pinned to an older Vite (5.x or earlier), this plugin will fail to install. In that case, Vite’s own zero-config publicDir (a public/ folder copied verbatim to your build output) is a dependency-free alternative for hosting engine.esm.wasm - point enginePath at wherever you place it.
Instantiating the WebViewer
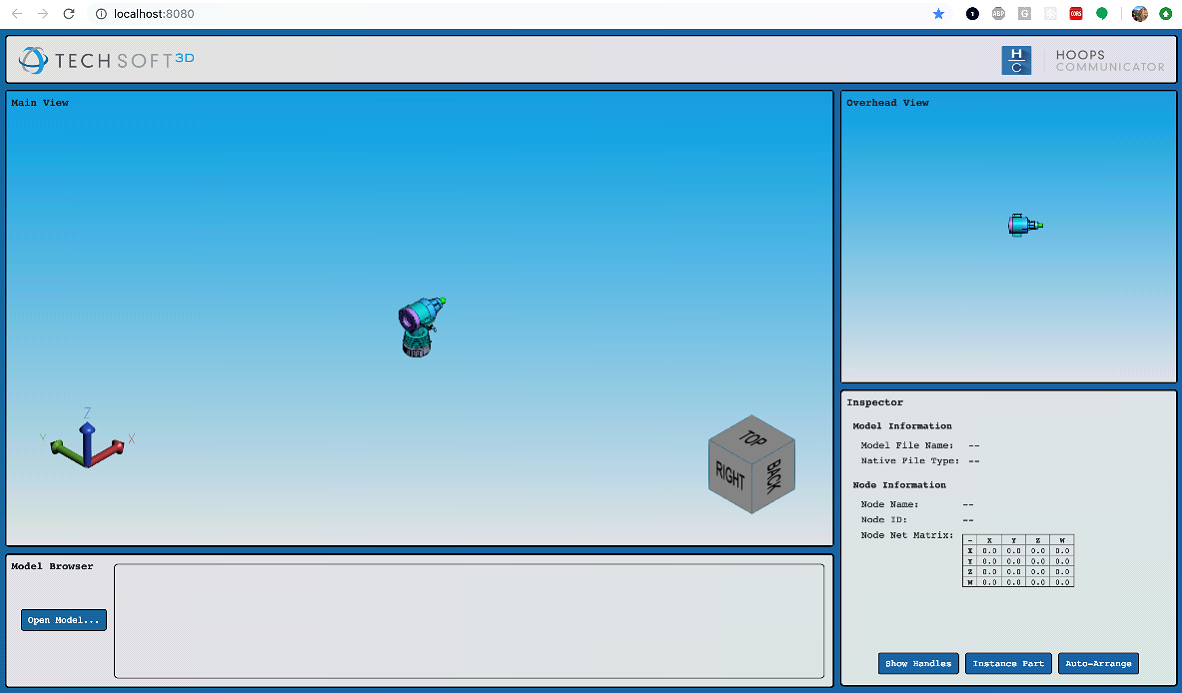
We’ll use two different views for this project: a main view where we can manipulate the camera, and an overhead reference view. We’ll also add the axis triad and navigation cube. First, we use our main class called Application as a starting point in Application.ts:
Below: you’ll notice the import statement. Make sure this points to the location where you copied the @ts3d-hoops directory:
import { Point3, Color, Matrix, Box } from "@ts3d-hoops/common";
Inside the Application class, you’ll see the member elements and the contructor where we get references to both the main and the overhead views. This associates the HTML elements on our page with the Typescript variables representing the views:
mainViewElm: HTMLElement;
overheadViewElm: HTMLElement;

// ...

constructor() {
    const mainViewElm = document.getElementById("main-view");
    if (!mainViewElm) {
      throw new Error("Main view not found");
    }
    this.mainViewElm = mainViewElm;

    const overheadViewElm = document.getElementById("overhead-view");
    if (!overheadViewElm) {
      throw new Error("Overhead view not found");
    }
    this.overheadViewElm = overheadViewElm;
  }
Now that we have the references, we can instantiate them as WebViewer objects. We’ll start with the main view using a call to new WebViewer. Notice we provide the HTML element that will be associated with the view as well as the path the HOOPS engine:
this.hwv = new WebViewer({
    container: this.mainViewElm,
    empty: true,
    enginePath: "/@ts3d-hoops/sc-engine",
});
At this point, the view is created, but it can’t display anything because it has no associated model. Loading a model can be done in a number of ways, however, for this tutorial, we’ll load the microengine.scs model included in the package with the tutorial.
Note
HOOPS Web Viewer uses a set of callback functions to indicate when certain events have occurred. Intercepting these events will give you important information on the status of your application. A list of all callbacks can be seen in the CallbackMap class.
In order to know when the model is ready, we’ll use one of these callbacks. In this case, we are waiting for the modelStructureReady callback to load the model:
this.hwv.setCallbacks({
  modelStructureReady: async () => {
    await Promise.all([
      this.printingPlane.init(this.hwv),
      this.loadModel("microengine"),
    ]);
  },
Now let’s initialize our overhead view. Rather than instantiating a second, independent WebViewer, we call addView on our existing hwv to create an additional render view of the same model and scene. This keeps both views in sync automatically, since there is only ever one model loaded. We do this once the scene is ready, so we wait for the sceneReady callback before assigning it to the overheadViewElm element:
sceneReady: async () => {
    this.overheadView = await this.hwv.addView({
      container: this.overheadViewElm,
    });
Setting the Cameras
This application will use two views, and a good time to initialize their cameras is during the sceneReady event. Continuing from our last code snippet, we associate both mainCamera and overheadCamera to their respective views:
sceneReady: async () => {

    // ...

    const mainCamera = Camera.create(
        new Point3(-1000, -1000, 1000),
        new Point3(0, 0, 0),
        new Point3(0, 0, 1),
        1, 720, 720, 0.01);

    this.hwv.view.setCamera(mainCamera);

    const overheadCamera = Camera.create(
        new Point3(0, 0, 1000),
        new Point3(0, 0, 0),
        new Point3(0, 1, 0),
        1, 720, 720, 0.01);

    this.overheadView.setCamera(overheadCamera);
},
More information about the Camera object can be found in our Programming Guide.
Adding the Navigation Cube and Axis Triad
We’ll add a navigation cube and axis triad to our main view. These components are built-in to HOOPS Visualize Web - we just need to enable them. In this case, we’re setting a background color and the anchor point, or position, of the navigation cube.
The following code is also part of sceneReady:
this.hwv.view.setBackgroundColor(Color.blue(), Color.white());
this.hwv.view.axisTriad.enable();
this.hwv.view.navCube.enable();
this.hwv.view.navCube.setAnchor(OverlayAnchor.LowerRightCorner);
With our two views instantiated, their cameras set, and the navigation cube and axis triad enabled on the main view, we have the visual foundation for the rest of the tutorial. The printingPlane.init() and loadModel() calls referenced in the modelStructureReady callback above are covered next, in Loading Models and Geometry.