
Acrobat tools
The Acrobat tools menu provides a direct access to some Acrobat features that are often used when creating documents with Tetra4D Enrich:
Add button.
Add text field.
Select Object.
These features are for example are required to define actions with Tetra4D Enrich (ie: when a button is pressed, an action outputs a text in a text field…) and they may be accessed at any time.
Note
These functions can be accessed in Acrobat using:
Prepare Form: Access to the add a text field and add a button
Rich media: Access to the Select Object feature

Prepare Form toolbar

Rich Media toolbar
Add button
Allows a button to be created.
Within the Tetra4D Enrich toolbar, choose Acrobat Tools > Add Button.
Drag a rectangle to define the location and the size of the button.
Define the name of the button in the Field Name dialog that appears.
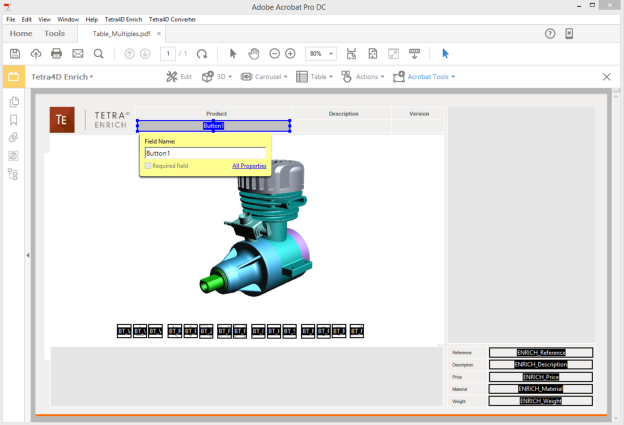
Creation of a button using the Acrobat Tools > Add button feature
- Optionally click on the “All properties” option in the Field Name dialog to open the “Button Properties” dialog.Note: The “Button Properties” dialog gives access to all the available options to define the layout of the button (name, color, icons if any…).Note: Refer to the Acrobat user manual to have detailed explanations about buttons.
- Once defined, click on the “Click to pan around the document” icon to activate the standard control of the document.Note: The “Click to pan around the document” icon is accessible with the other page controls, that can be located at the bottom of the Acrobat window or that can be displayed in the toolbars.
Note
The “Add button” feature temporarily hides any existing table, carousel or search widget to limit the number of visible objects (text fields and buttons). Note that using the Add button feature of the Prepare Form tool of Acrobat keeps all the text fields and buttons that define the Tetra4D Enrich widgets visible.
Add text field
Allows a text field to be created.
Within the Tetra4D Enrich toolbar, choose Acrobat Tools > Add text field.
Drag a rectangle to define the location and the size of the text field.
Define the name the text field in the Field Name dialog that appears.
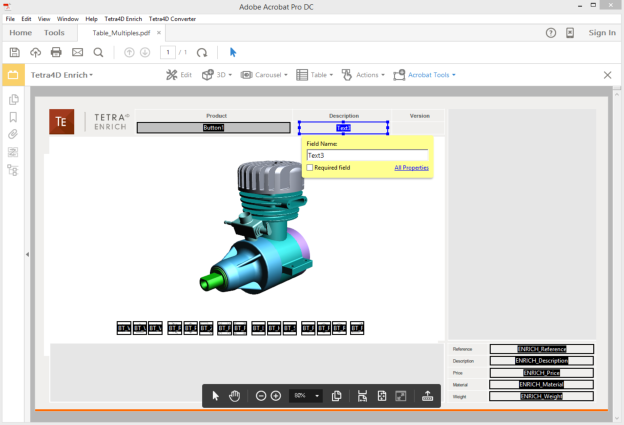
Creation of a text field using the Acrobat Tools > Add text field feature
- Optionally click on the “All properties” option in the Field Name dialog to open the “Text Field Properties” dialog.Note: The “Text Field Properties” dialog gives access to all the available options to define the layout of the text field (name, color, icons if any…).Note: Refer to the Acrobat user manual to have detailed explanations about text fields.
5. Once defined, click on the  “Click to pan around the document” icon to activate the standard control of the document.
Note: The “Click to pan around the document” icon is accessible with the other page controls which can be located at the bottom of the Acrobat window, or which can be displayed in the toolbars.
“Click to pan around the document” icon to activate the standard control of the document.
Note: The “Click to pan around the document” icon is accessible with the other page controls which can be located at the bottom of the Acrobat window, or which can be displayed in the toolbars.
Note
The “Add text field” feature temporarily hides any existing table, carousel or search widget to limit the number of visible objects (text fields and buttons). Note that using the Add text field feature of the Prepare Form tool of Acrobat keeps all the text fields and buttons that define the Tetra4D Enrich widgets visible.
Edit object
The Edit object feature allows the user to modify Acrobat objects that are present in the PDF document, like buttons and text fields.
Note
It is important to note that Buttons and Text Fields are Adobe objects, and that they cannot be edited using the Tetra4 Enrich “Edit” feature, which is meant to edit Tetra4D Enrich items, such as tables, carousel of views, and actions.
Within the Tetra4D Enrich toolbar, choose Acrobat Tools > Edit object.
- Select one of the highlighted Acrobat object (button or text field).Note: make a double-click on the object or make a right click > Properties to open the Properties dialog for the selected object.
Make the changes and click Close in the Properties dialog to save the changes.
Edit feature: highlight the text fields and buttons that can be modified (Note that the Carousel of views and the table are temporarily hidden)
Note
The “Edit object” feature temporarily hides any existing table, carousel or search widget to limit the number of visible objects (text fields and buttons). Note that using the Select Object feature of the Prepare Form or the Reach Media tools of Acrobat keeps all the text fields and buttons that define the Tetra4D Enrich widgets visible.
Set populate method for text fields
The “Set populate method for text fields” function allows you to define how to populate text fields present in the PDF document, with information coming from:
3D File attributes,
CAD model attributes,
XML.
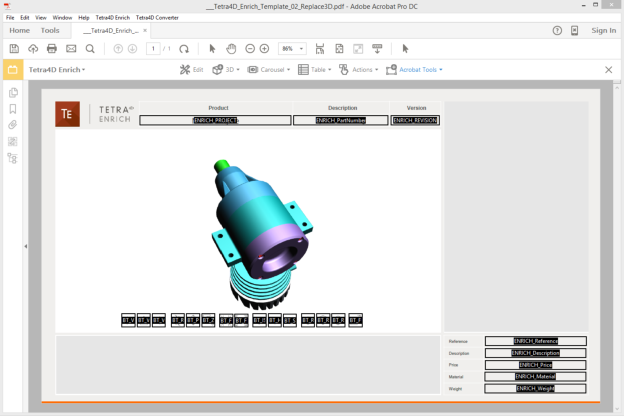
For example, it is possible to have a title block in the PDF document where different text fields are populated with information coming from the 3D CAD data that are in the document (name of the CAD file, attribute information like Material, Revision…)
Note
This feature enables to directly populate the text fields with information present in the PDF document, and is also suitable for a template usage of the PDF document since the defined method to populate the text fields is stored in the PDF itself. In case of re-use of an existing PDF document where this feature was used to define how to populate the text fields, the values present in these text fields will be automatically updated when a Replace 3D is performed.
Definition of methods to populate text fields
Note
The text fields must be defined prior the definition of method to populate them. Refer to “Add text field” for instructions on how to create text fields.
- Within the Tetra4D Enrich toolbar, choose Acrobat Tools > Set populate method for text fields.Note: The existing text fields in the active page of the PDF document are highlighted in orange.
- Select a text field.Note: Once selected, the text field is highlighted in blue.
- In the Populate method panel which appears on the right, select the source that will be used to populate the selected field.Note: Refer to Description of the different methods to populate text fields to have detailed explanations about the proposed methods.
Depending on the selected source, select the attribute in the “Attributes list” sub-panel, or manually define the attribute name if not present in the list or the XML key in the “Attribute or XML key” sub-panel.
Click on the green check button “Save and populate fields” icon to populate the text field with the value and save the methods, or
Click on the red “X” “Cancel the modifications” icon to discard the changes.
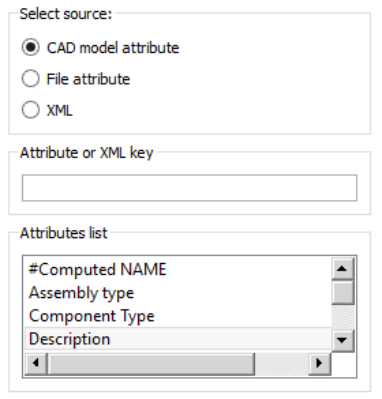
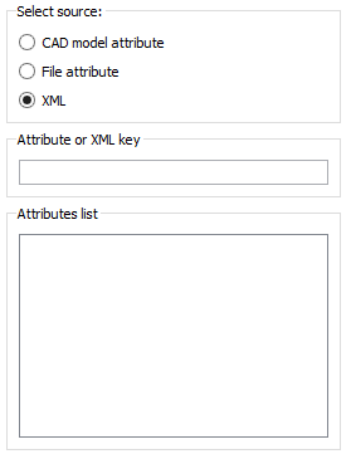
Description of the “Set populate method for text fields” panel
The Editor panel offers several settings to define the populate method.
Hover your mouse over any of the buttons to see the specific command.
Select source: Defines the method used to populate the text field.
Attribute or XML key: Field to input an attribute or an XML key.
Attribute list: List of the attributes that are currently present if the 3D annotation, or list of the available File attributes.
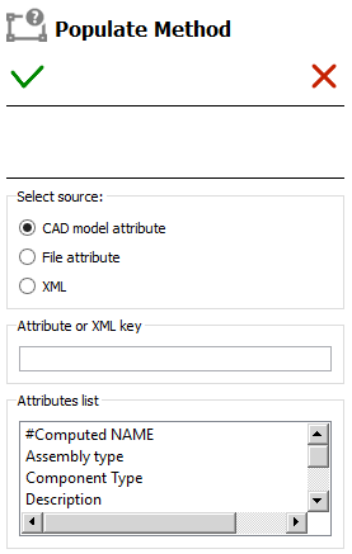
Edit panel for the Set populate method for text fields
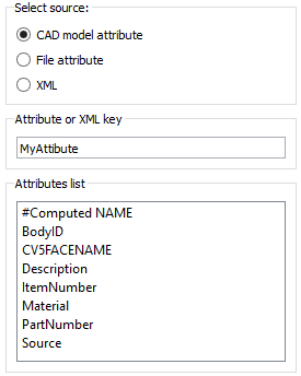
CAD model attributes
The text field is populated with the value of an attribute linked to the 3D annotation.
The list shows the attributes that are present in the 3D annotation.
Note
The text field is populated when the CAD model attribute is chosen and the “Save and populate fields” icon is pressed

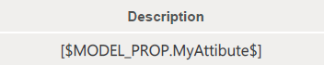
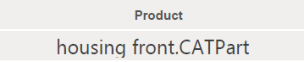
Text field populated with a CAD attribute
If the CAD attribute is not present in the list and defined manually using the Attribute or XML key, the text field will show the mapping key
This text field will be populated as soon as a Replace 3D operation will be performed on the document, if the chosen attribute exists in the read CAD data.
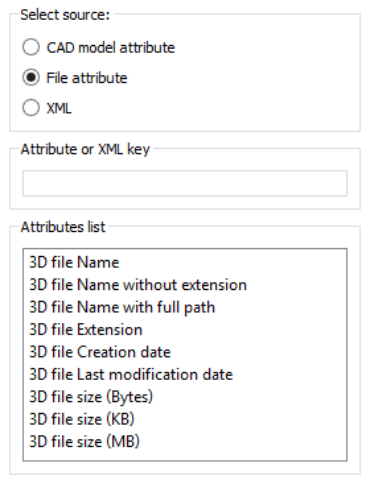
File attribute
The text field is populated with the selected 3D file’s attribute.
3D file Name: Name of the file
3D file Name without extension: Name of the file without the extension
3D file Name with full path: Name of the file and full path
3D file Extension: Extension of file
3D file Creation date: Date of creation of the file
3D file Last modification date: Date of last modification
3D file size (Bytes): Size of the file in Bytes
3D file size (KB): Size of the file in Kilo Bytes
3D file size (MB): Size of the file in Mega Bytes
Note
The text field is populated when the file attribute is chosen and the “Save and populate fields” icon is pressed
Text field populated with the name of the 3D file
If a Replace 3D operation is performed on the document, the text field will be updated with the chosen attribute corresponding to the read CAD data.
XML
The text field is populated with values defined in an XML file encoded in UTF8.
Note: Refer to “Format of the XML file to import text field data” for detailed explanations about the XML format and the mapping with the text fields.
Note
The XML keys are always defined manually. Consequently, the text field will show the mapping key when the “Save and populate fields” icon is pressed.
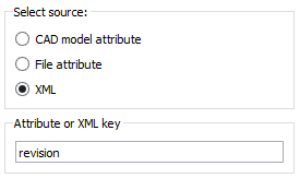

Text field populated with a XML value
This text field will be populated as soon as a Populate text fields from XML operation will be performed.
Populate text fields from XML
The Populate text fields from XML function allows you to populate text fields in the PDF document from an XML file.
- Prepare the PDF document by creating all the required text fields.Note: Refer to Add text field for explanation about text fields.

Text fields in the PDF document
- Define the method to populate these text fields to enable the mapping with the values defined in the XML file.Note: Refer to “Set populate method for text fields” for detailed explanations about the definition of mapping keys with the text fields.

Example of mapping keys defined in the text fields
- Within the Tetra4D Enrich toolbar, choose Acrobat Tools > Populate text fields with XML.Note: Refer to “Format of the XML file to import text field data” for detailed explanations about the XML format and the mapping with the text fields.
Select the XML in the “XML File” dialog.
Check the result of the import in the text fields.

Example of populated text fields with imported values
Note
The imported values are set as values for these populated text fields. However, the populate method remains assigned to the text fields so that it is possible to populate again these text fields with another XML file.
Format of the XML file for the Import text field data
The XML file contains all the required information to populate the text fields that are in the PDF document (key information and value). The file must be encoded in UTF8
The method to map the contents of the XML file to the text fields is based on key values that must be defined in the text fields using the “Set populate method for text fields” feature.
Example of a XML file:
<Fields>
    <Field key="KeyValue1" value="Value1" />
    <Field key="KeyValue2" value="Value2" />
</Fields>
Key for the mapping (in the XML file):
The values of the keys for the mapping are defined in the “key” attribute.
<Field key="KeyValue1" value="Value1" />
- Key for the mapping (in the text fields in the PDF document):The mapping method must be defined using the “Set populate method for text fields” feature

- New attribute definition:The values of the keys for the mapping are defined in the “value” attribute.
<Field key="KeyValue1" value="Value1" />
Results after XML file import:

Export parts list
The Export parts list feature allows you to export the list of the parts from the 3D annotation to an XML file encoded in UTF8. The exported XML file can be used as follows:
A reference file to define new attributes to be imported in the PDF document,
A reference file to translate in other languages the labels and values of the selected attributes, to create a multiple languages PDF document.
Exporting a parts list
Within the Tetra4D Enrich toolbar, choose Acrobat Tools > Export parts list.
In the Export parts list panel which appears on the right, select a type of file to be created.
Define the mapping method.
Select the attributes to be exported.
Click on the green check button “Export file” to save the XML file, or
Click on the red “X” button “Cancel the operation” to exit the feature without saving.
Definition of the type and contents of the list
The panel offers several settings to define the parts list:
Type of file: Defines the type of parts list.
Mapping key: Defines what information is used to identify the parts.
Attributes to export: Defines the attributes that are exported in the list.
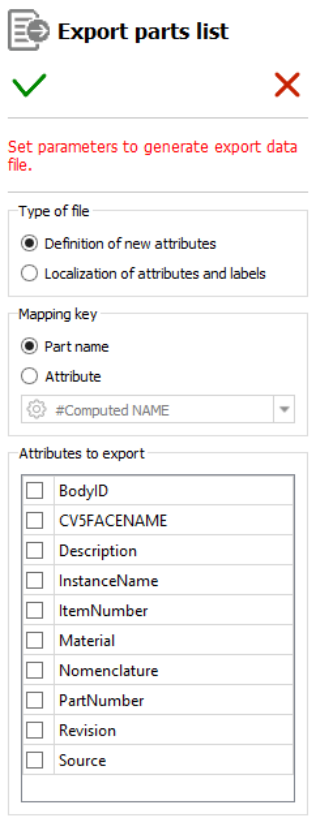
Panel for Export parts list (example)
Type of file subpanel
Definition of new attributes: Creates an XML file that lists the parts and optionally the attributes linked to the parts.
Localization of attributes and labels: Creates an XML file that lists the parts, the selected attributes linked to the parts, the text labels that are defined in all the text fields and buttons from the PDF document, and adds empty keys for localization purposes.
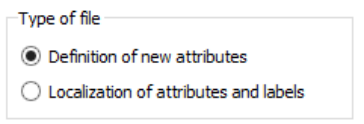
Type of file settings area of the Export parts list panel
Note
Refer to “New attribute” XML file sample for an example of usage. Refer to “Localization of attributes and labels” XML file sample for an example.
Mapping key subpanel
The Mapping key sub-panel defines how the components are identified in the list. There are two different mapping methods:
Based on the value of an attribute of the part.
Note
Refer to XML format, with a mapping based on the value of an attribute for a mapping sample.
Based on the name of the part in the 3D annotation.
Note
Refer to XML format, with a mapping based on name of the part in the 3D annotation for a mapping sample.
Definition of a mapping key:
Select Part name, or
Select Attribute and select the mapping attribute in the list of attributes.
Select the attribute in the list of attributes from the dropdown.
Check the result in the table.
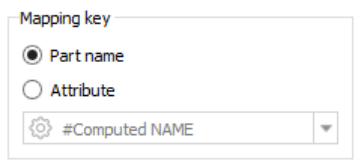
Mapping key settings area of the Export parts list panel
Attributes to export subpanel
The Export parts list feature makes it possible to optionally export some of the attributes that are linked to the parts.
The attributes are exported
Definition of the attributes to be exported:
Check the mark aside the attribute to be exported
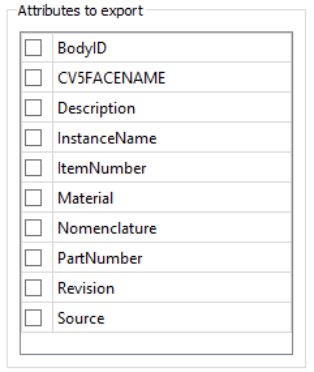
Attributes to export settings area of the Export parts list panel (example)
Note
In case of a 3D annotation containing an assembly, the list of attributes will show all the attributes that have been read from the different components of the assembly.
Example of an exported attribute:
<ATTRIBUTE key="ItemNumber" attribute_value="A4123589">
    <NEW_ATTRIB name="Description" value="AXE" />
</ATTRIBUTE>
Note
The part is defined by its attribute “ItemNumber”, having the value “A4123589”,
The exported attribute is “Description”, having the value “AXE”.
“New attribute” XML file sample
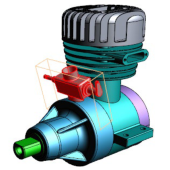
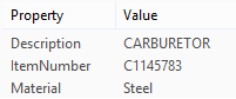
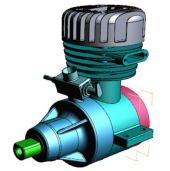
The sample below shows the XML sections corresponding to the highlighted parts. The right table shows the CAD attributes that are linked to these parts.
Part 1
|
|
<ATTRIBUTE key="ItemNumber" attribute_value="C1145783">
    <NEW_ATTRIB name="Description" value="CARBURETOR" />
    <NEW_ATTRIB name="Material" value="Steel" />
</ATTRIBUTE>
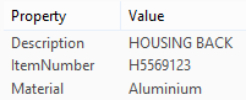
Part 2
|
|
<ATTRIBUTE key="ItemNumber" attribute_value="H5569123">
    <NEW_ATTRIB name="Description" value="HOUSING BACK" />
    <NEW_ATTRIB name="Material" value="Aluminium" />
</ATTRIBUTE>
“Localization of attributes and labels” XML file sample
The sample below shows the XML sections corresponding to the highlighted parts and some of the “labels” from the document (green area).
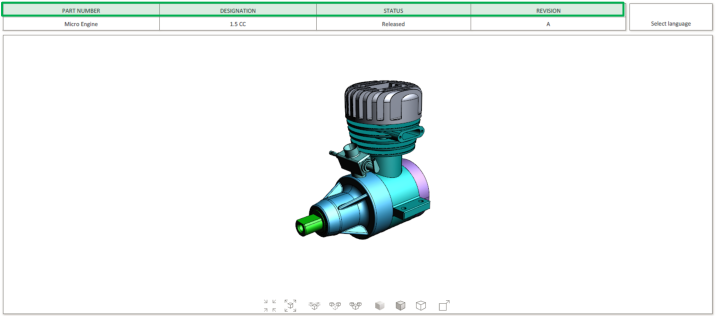
PDF document
“Parts list” sub-section
<attributes>
    <ATTRIBUTE key="ItemNumber" attribute_value="C1145783">
        <NEW_ATTRIB name="Description" value="CARBURETOR" translation="" />
        <NEW_ATTRIB name="Material" value="Steel" translation="" />
    </ATTRIBUTE>
    <ATTRIBUTE key="ItemNumber" attribute_value="H5569123">
        <NEW_ATTRIB name="Description" value="HOUSING BACK" translation="" />
        <NEW_ATTRIB name="Material" value="Aluminium" translation="" />
    </ATTRIBUTE>
</attributes>
“Labels” subsection
<labels>
    <NEW_LABEL name="TB_01_Label" value="PART NUMBER" translation="" />
    <NEW_LABEL name="TB_02_Label" value="DESIGNATION" translation="" />
    <NEW_LABEL name="TB_03_Label" value="STATUS" translation="" />
    <NEW_LABEL name="TB_04_Label" value="REVISION" translation="" />
</labels>