
Configure Acrobat
Acrobat environment setting
Introduction to the Acrobat environment
When starting Acrobat Professional, the standard environment appears as below:
Toolbars appear once a PDF document is open (Press CTRL + SHIFT + T to create a blank document if needed, or open an existing PDF document)
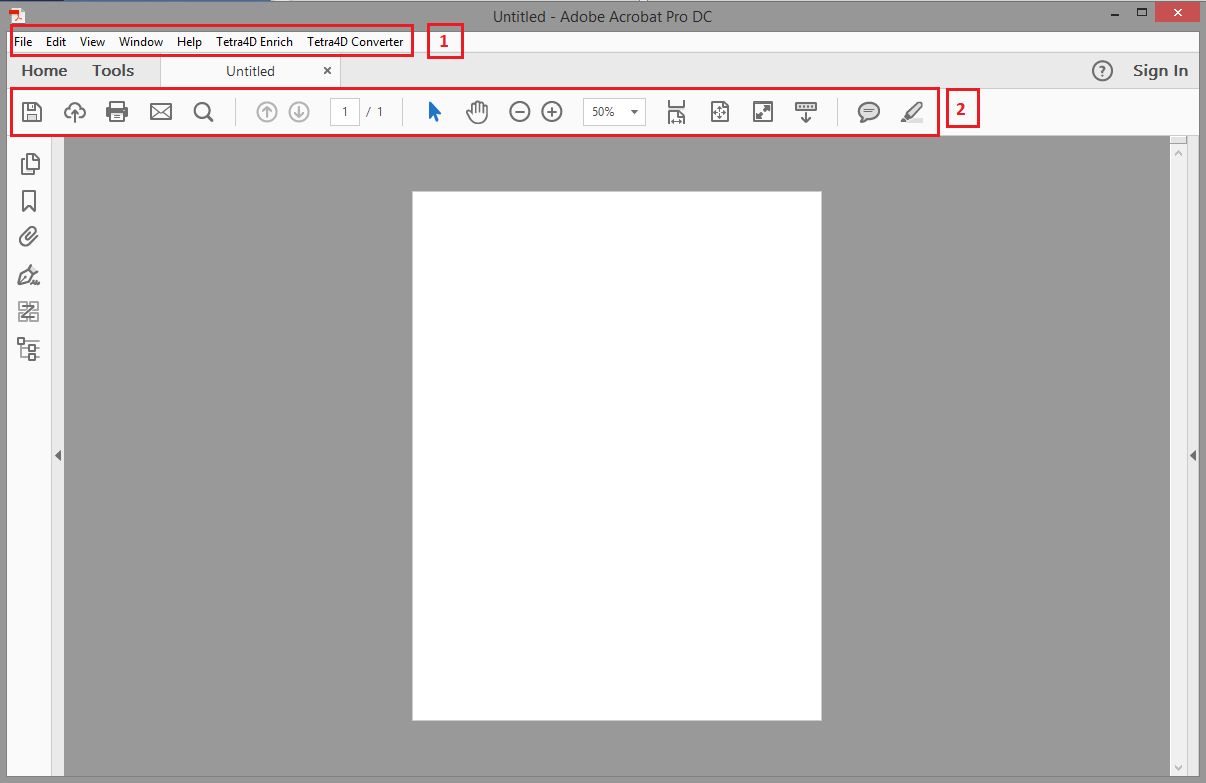
1: Menu bar
2: Toolbar area
Note
The menu bar can be hidden / displayed back by pressing F8 key
The Toolbars can be hidden / displayed back by pressing F9 key
Toolbars presentation
The following toolbars are present by default in the toolbar area:

1: File tools
2: Navigation tools
3: Page controls
4: Quick tools
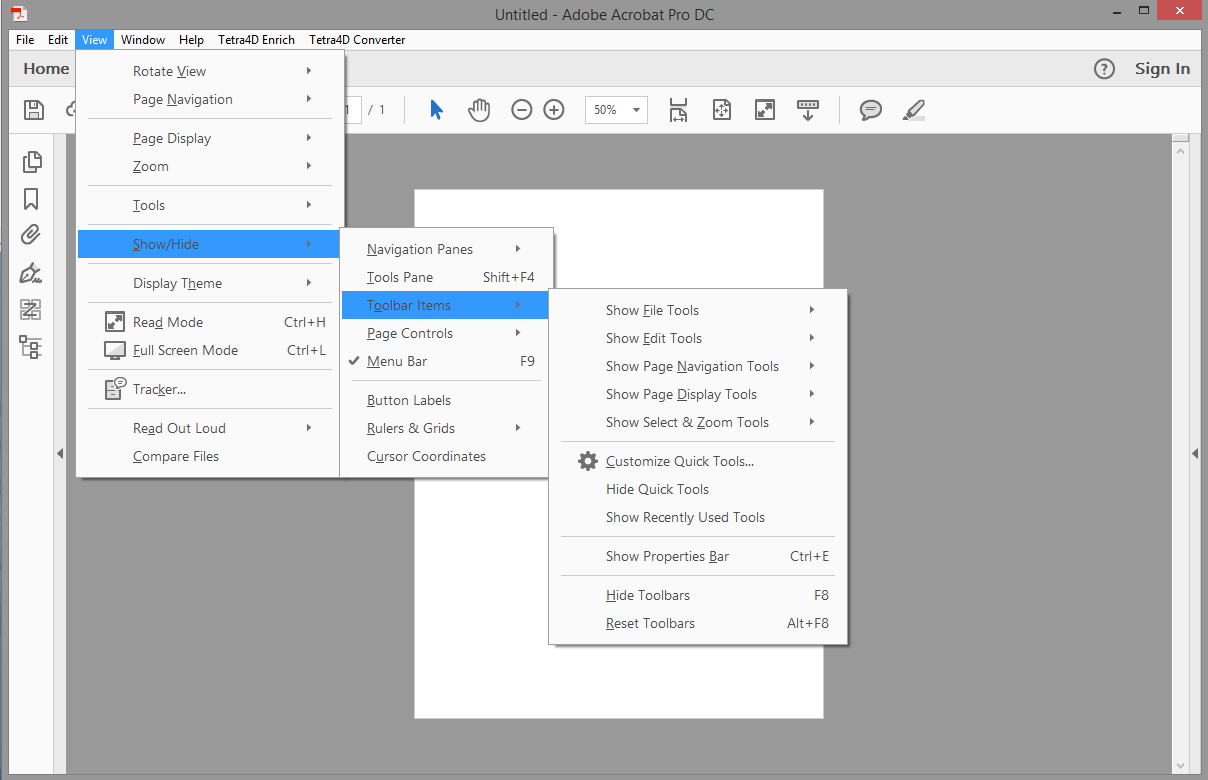
To select the toolbars to be displayed or to customize the tools that are shown in the different toolbars, you can:
Right-click in the toolbar or,
Select the top menu View > Show/Hide > Toolbar Items
“Page Controls” toolbars presentation
The “Page Controls” toolbars provides user with tools dedicated to the visualization of the document and to the selection of items. This toolbar can be displayed in the top toolbar area, or at the bottom of the document.
To change the position of this toolbar, press the icons ![]() or
or ![]()

|

|
Introduction to the different selection modes proposed by Acrobat
The Page controls toolbar proposes a tool to select text and images:

This selection tool is not suitable to select some other standard PDF objects that are present in 3D PDF documents like:
« rich media » objects: 3D annotation, videos…
forms objects: Text fields, buttons…
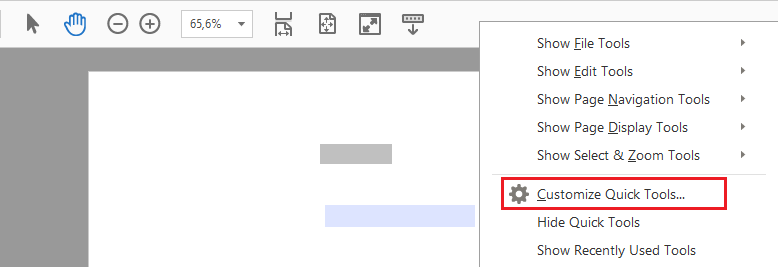
This other selection tool is as default only accessible in the Forms and in Rich media plugin. We recommend to add this selection tools to the “Quick Tools” toolbar. To customize the Quick Tools toolbar, do the following:
Make a right-click in the top tool bars area
Select the Customize Quick Tools menu
In the plugins list, scroll down to the “Rich Media” plugin and open it

Click on the “Select Object” icon at the bottom of the list
Then click on the right arrow to add this tool to the “Quick tools” toolbar
Click on Save
Note
It is possible to remove the other default tools from the quick tools toolbar.
After this operation, the top toolbar should look like this:

Note
Note that the “Select Object” tool has the same icon that the standard selection tool. However, these tools are not behaving the same. The new one which has been added enables to select 3D annotation, text fields, buttons… in order to edit them (position, size, parameters…)
ACROBAT general settings
- Edit > Preferences (CTRL + K)
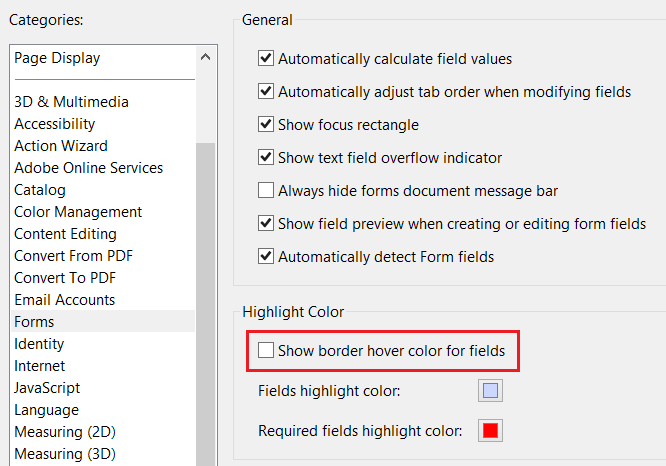
- FormsUncheck Show border hover…
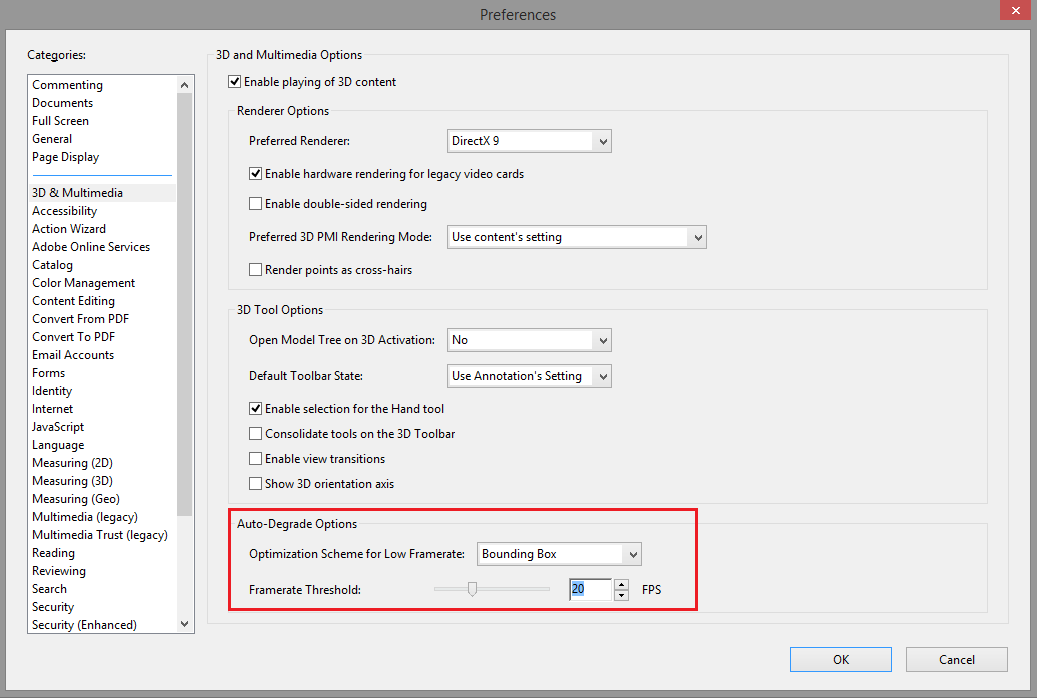
- 3D & MultimediaSet the Auto-Degrade Options to Bounding Box, and set the threshold to 20This option enables to manipulate large model while keeping acceptable performances when rotating the 3D model.
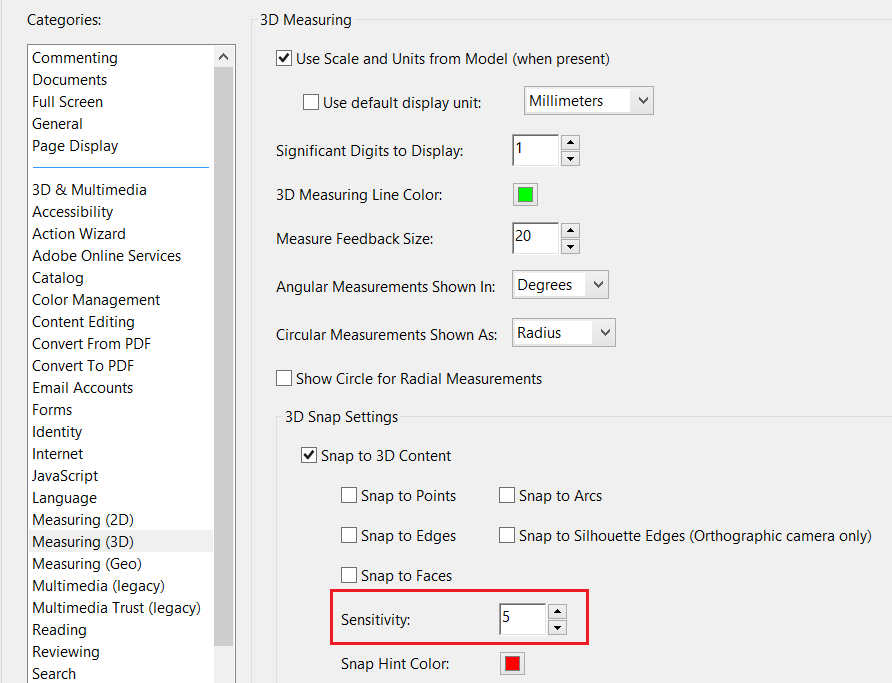
- Measuring (3D) - OPTIONALSet sensitivity to 5Modify other parameters if required (number of digits, units, colors for dimensions…)
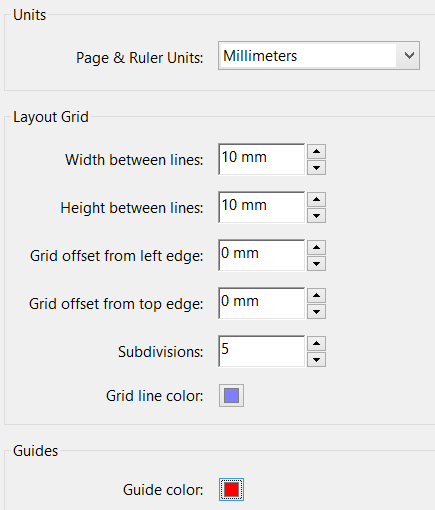
- Units & Guides - OPTIONALSet units and grid layoutSet grid and guides colors
Usage of Grid and rulers - OPTIONAL
The display of the grid, rulers and guides may help when designing the PDF document Grid:
Activation : CTRL + U
View > Rulers & Grid > Show/Hide > Grid Snap to Grid:
View > Rulers & Grid > Show/Hide > Grid (no shortcut) Rulers :
Activation : CTRL + R
View > Rulers & Grid > Show/Hide > Rulers Guides:
View > Rulers & Grid > Show/Hide > Guides
Explanation
The grid and rulers help positioning items such as buttons. Grid and rulers can be displayed using short-cuts.
However, the Snap to grid option is accessible only through a menu.
Displaying guides is an alternative to the Snap to grid mode. The guides can be defined by clicking inside a ruler, and by dragging the guide in the 3D annotation. Guide are only a visual support, and they can easily be moved, deleted…