
Adding 3D to PDFs
Adding 3D Data
Create new pages from 3D models
You can use 3D models in supported file formats as the basis of new PDFs, or you can bring them directly into existing PDFs. For many supported formats, you can do any of these in Acrobat Pro.
Add a 3D model as a new page
Open a PDF and choose Tools > Organize Pages > Insert > Blank Page.
Indicate where you want to place the inserted page in the document, and click OK.
Select Tools > Tetra4D Converter > Add 3D.
Indicate where you want to place the 3D annotation by dragging to create a rectangle on the page.
In the Select File dialog box, choose the file type from the Files of Type menu. Select the supported 3D file you want to open, and then click Select.
In the Tetra4D Converter Conversion dialog box, select the preset or individual settings that you want to use, and then click OK.
Replacing 3D Data
Replacing 3D in a PDF
In the Select File dialog box, choose the file type from the Files of Type menu. Select the supported 3D file you want to open, and then click Open.
In the Tetra4D Converter Conversion dialog box, select the preset or individual settings that you want to use and then click OK.
Replace 3D models to a PDF page
You can use the 3D tool to place a 3D file on a page of a PDF. During this process, you can select how the model is displayed and the lighting, navigation, and display settings (like those found on the 3D toolbar), and change conversion settings.
After you place a 3D file, you can adjust the area or canvas in which the 3D model appears, edit the presentation properties for the 3D toolbar and content, and create additional views.
Managing 3D Data
Move, delete, or resize the 3D canvas
Choose Tools > Rich Media > Select Object.
Note
Be careful not to confuse the Select Object tool with the basic Select tool. Use the Select Object tool to adjust a 3D canvas.
Select the 3D canvas and change it as needed:
To move the canvas: Drag it to a new location on the page.
To delete the canvas: (and the 3D model), select it and press Delete.
To resize the canvas: Drag the frame corners. The 3D content stays proportional within the adjusted frame.
3D properties
View 3D properties by right-clicking on the model and select Properties.
Edit 3D Window
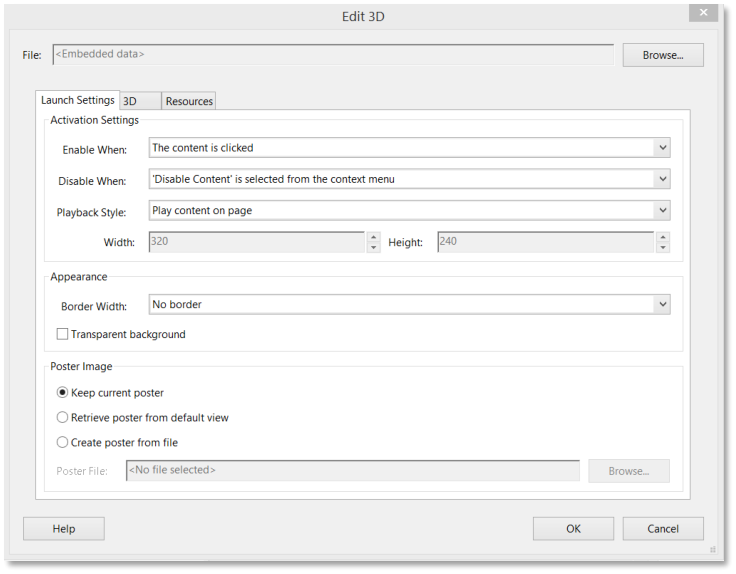
Launch Settings Tab
Activation Settings
Enable When: Specifies when the 3D model is activated. When the 3D model is enabled, you can interact with it by using the 3D navigation tools, for example.
Disable When: Determines how the 3D model can be deactivated. When a 3D model is disabled, the 2D preview image or poster appears in the canvas.
Playback Style: Enables you to display the 3D model in a floating window outside the page. If you select Play Content in Floating Window, you can select the size of the window (in pixels) from the Height and Width menus.
Appearance
Border Width: Select to create a border around the 3D object.
Transparent Background: Removes any background color.
Poster Image
Poster Image: To replace the default view of the 3D model when it isn’t activated, select a poster image option. Click Browse to find the image you want.
3D Tab
The options on the 3D tab determine how the 3D model is presented. Unlike the settings on the other tabs, 3D settings do not affect the imported file itself.
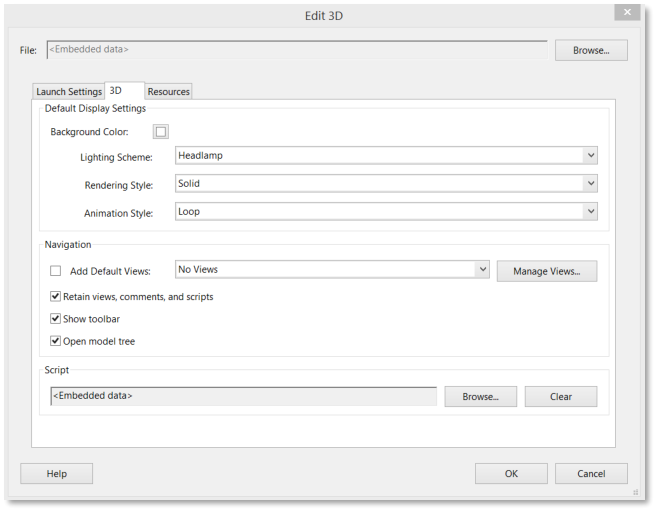
3D tab of Edit 3D Window
The options on the 3D tab are the same as the options on the 3D toolbar except for the following:
Default Display Settings
Animation Style: For models created with animation, this setting determines how the animation runs in Acrobat.
Script
Specifies the JavaScript file that runs if a 3D model is enabled. Click Browse to add a JavaScript file to the PDF.
Resources Tab
Use the Resources tab to add files developed in Flash® to a 3D model for animation, effects, and textures. To bind a Flash resource, select it from the list of resources, and then select a binding type (Foreground, Background, or Material). To bind a material, also enter the material name for the part or parts where you want to display the material.
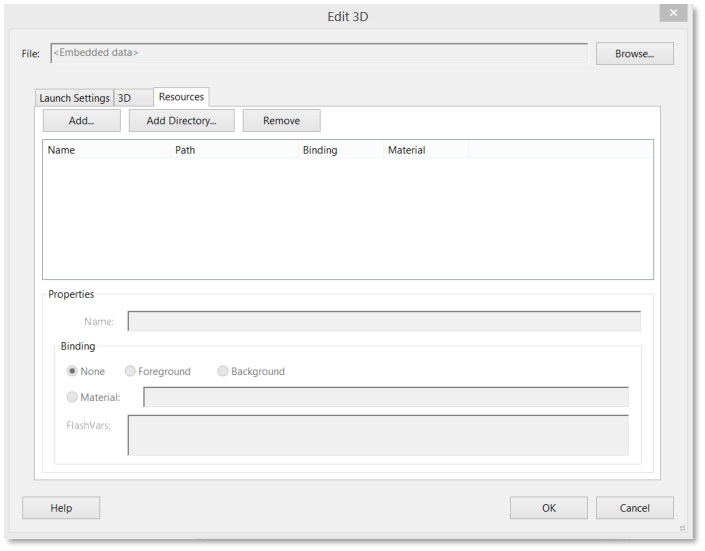
Resources tab of Edit 3D Window
Add
Use to add SWF files for animations and backgrounds for the 3D model.
Add Directory
Select to add a directory of resource files to the 3D object.
Remove
Select a file in the list, and then click Remove to delete it from the file.
Properties
Name: Displays the name of the file that is selected from the list. You can also rename a resource, which is useful with scripting. For example, you can replace the name with the one used in a script.
Binding
When adding files that are developed in Flash as a resource for a 3D model, binding determines how those files interact. For example, you can identify a resource to run in the background and one to run in the foreground. After you add the files to the file list, select one, and in the Binding section, select either Background, Foreground, or Material.
Material: 3D designers can use the Material field to define a material to use in a model. The material name can be associated with a resource by selecting Material in the Binding section.
FlashVars: Flash developers can use the FlashVars field to add ActionScript variables for the selected file.

