Evaluate & Install
HOOPS AI Package & License Key
To get access to the HOOPS AI package and license:
Visit the HOOPS AI product page
Click either “Request Preview” or “Talk to An Expert”
Fill out and submit the contact form.
After submitting the form, a Sales Representative will contact you to discuss your needs and objectives. If they align with our policy, you will receive an email containing:
🔗 Download link for the HOOPS AI package
📋 Installation instructions
HOOPS AI comes with a 30-day evaluation license. During your evaluation, a dedicated Consulting Engineer will be assigned to assist you. For technical support or to extend your evaluation license, please contact your assigned Consulting Engineer.
Important
The MVP test license will expire on December 8 2025.
If you are currently using the MVP test license, you must switch to the license key provided by your assigned Consulting Engineer. Contact your Consulting Engineer to obtain the updated license and apply it before the MVP test license expires.
For more details on how to setup your license, refer to :
Setup License through CLI
Installing HOOPS AI
Already have Conda installed? Get started in just two commands:
# Example command - use the complete command from your email
pip install hoops-ai-installer --index-url https://__token__:{YourToken}@pkgs.dev.azure.com/...
hoops-ai-installer install --mode cpu
Prerequisites and Environment Setup
Install Miniconda
Miniconda is a lightweight installer for Conda, a package and environment manager. Follow these steps to install:
Download the latest Miniconda for Windows by clicking here.

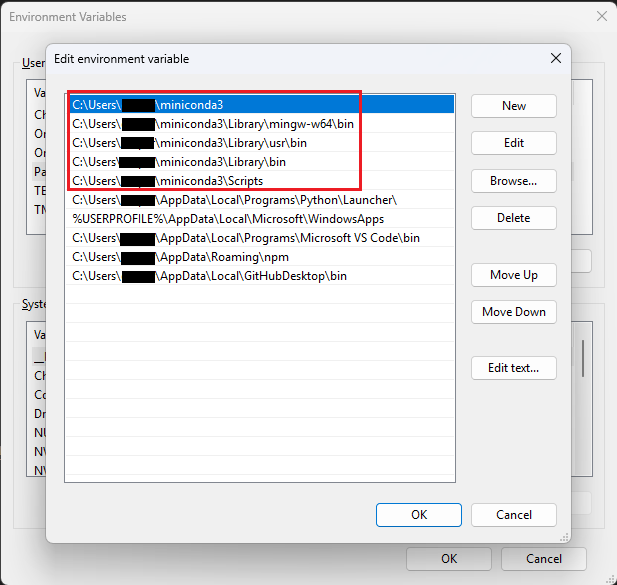
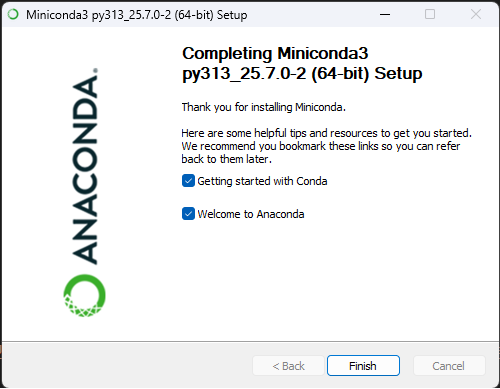
- Run the installer and follow the prompts.Note: Make sure to add Miniconda to your PATH environment variable.
 Double-check that miniconda and condabin are in the path: i.e:
C:\Users\**{UserName}**\miniconda3
C:\Users\**{UserName}**\miniconda3\condabin

Verify the installation by opening PowerShell and running:
conda --version
python --version
These commands display the installed versions of conda and Python, confirming that Miniconda is properly installed.

Coming soon. A Linux-specific walkthrough will be added here.
Coming soon. A macOS-specific walkthrough will be added here.
Note
Please make sure C:\Users\{USERNAME}\miniconda3\Scripts is in your path. or where you installed conda.
Install CUDA (Required for GPU Support)
CUDA 11.7 must be installed prior to installing HOOPS AI for GPU support. Follow these steps:
Download CUDA 11.7 from the NVIDIA CUDA Toolkit Archive.
- Select your OS-specific installer and download.Run the installer and follow the prompts.
- Ensure the CUDA installation path is included in your system’s PATH environment variable.The default installation path is typically:
C:\Program Files\NVIDIA GPU Computing Toolkit\CUDA\v11.7\bin
C:\Program Files\NVIDIA GPU Computing Toolkit\CUDA\v11.7\libnvvp
Verify the installation by opening PowerShell and running:
nvcc --version
This command displays the installed version of CUDA, confirming that CUDA is properly installed.
Coming soon. A Linux-specific walkthrough will be added here.
Coming soon. A macOS-specific walkthrough will be added here.
Installation
Once you fill out the form to evaluate HOOPS AI, one of our Sales Representatives will get in touch with you to discuss your needs and objectives. If they align with our policy, you will receive an email with a download link and installation instructions for HOOPS AI.
Step 1: Download the installer
Download the installer from our private artifactory using the complete pip install command provided in the Sales team email.
# Example command - use the complete command from your email
pip install --pre "hoops-ai-installer==1.0.0b2" --index-url https://__token__:{UserToken}@pkgs.dev.azure.com/techsoft3d-engineering/ML-Initiative/_packaging/hoops_ai_dist%40Release/pypi/simple/
Step 2: Run the installer
# CPU Version (run from any directory)
hoops-ai-installer install --mode cpu

# GPU Version (CUDA 11.7 required, run from any directory)
hoops-ai-installer install --mode gpu
The installer will:
✅ Check prerequisites (Python 3.9, Conda, CUDA for GPU)
✅ Create conda environment from environment_cpu.yml or environment_gpu.yml
✅ Install all dependencies (PyTorch, DGL, ML libraries, Jupyter, etc.)
✅ Install HOOPS AI, Exchange, and Viewer packages
✅ Register Jupyter kernel
✅ Setup license (if license.env exists)
✅ Setup converter path (if packages/ exists)
✅ Verify installation
Activate The Environment
To start using HOOPS AI, activate the Conda environment created by the installer:
# Activate the environment
conda activate hoops_ai_cpu      # For CPU version
conda activate hoops_ai_gpu      # For GPU version

# Launch JupyterLab
jupyter lab
⚠️ First-time conda users: If you get
CondaError: Run 'conda init' before 'conda activate'
- Run the initialization command:
Before you can activate environments in PowerShell, you must initialize conda:
conda init powershell
This command configures PowerShell to recognize conda activation commands. You must close and reopen PowerShell for the changes to take effect.
After initialization and reopening PowerShell, activate the environment:
conda activate hoops_ai_cpu      # For CPU version
conda activate hoops_ai_gpu      # For GPU version
This switches to the newly created environment, making its packages and Python interpreter active. When successful, you will see
(hoops_ai_cpu)prepended to your command prompt, indicating that all commands are now executed within this conda environment.
- Run the initialization command for CMD:
Before you can activate environments in Command Prompt, you must initialize conda:
conda init
This command configures Command Prompt to recognize conda activation commands. You must close and reopen Command Prompt for the changes to take effect.
After initialization and reopening Command Prompt, activate the environment:
conda activate hoops_ai_cpu      # For CPU version
conda activate hoops_ai_gpu      # For GPU version
This switches to the newly created environment, making its packages and Python interpreter active. When successful, you will see (hoops_ai_cpu) prepended to your command prompt, indicating that all commands are now executed within this conda environment.
To verify the environment was created and list all available environments:
conda info --envs
This displays all conda environments on your system. At this stage, the new environment exists but is not yet active. (the active environment marked by an asterisk (*)).
Note
In JupyterLab, ensure you select the kernel named HOOPS AI (CPU) or HOOPS AI (GPU) to run notebooks within the correct environment.
Troubleshooting
“CondaError: Run ‘conda init’ before ‘conda activate’”
Most common issue for new conda users!
This means conda hasn’t been initialized for your shell yet.
Solution:
Run
conda init(for Command Prompt) orconda init powershell(for PowerShell)Close and completely reopen your terminal (this step is required!)
Now
conda activate hoops_ai_cpuwill workAlternative: Use the full activation path:
C:\Users\YourUsername\miniconda3\Scripts\activate hoops_ai_cpu
“Python 3.9–3.12 supported”
You can have any local Python version from 3.9 to 3.12 installed python.org.
The project runs inside a Conda environment that will use Python 3.9.
“Conda not found”
Install Miniconda and ensure it’s in PATH. Restart terminal after installation.
“CUDA 11.7 not found” (GPU)
Install CUDA 11.7 from NVIDIA CUDA Toolkit Archive.
Unicode/Emoji Display Errors
If you see
UnicodeEncodeError: 'charmap' codec can't encode character '\u2705'during verification, this is just a cosmetic issue with emoji display in Command Prompt. The installation succeeded. Use PowerShell or Windows Terminal for better Unicode support.
Import Errors
conda deactivate
conda activate hoops_ai_cpu
Environment Already Exists
The installer will ask if you want to recreate it. Choose “yes” to update.
Getting Started with Tutorials
HOOPS AI includes hands-on tutorials to help you learn by doing. These tutorials use the same conda environment you just installed.
Tutorial Notebooks
Access our interactive Jupyter notebooks from the public GitHub repository:
Repository: techsoft3d/HOOPS-AI-tutorials
Clone the repository or download the notebooks directly to get started with step-by-step examples.
You can also find the tutorials in this documentation: Tutorials
Tutorial Data Assets
The tutorials require sample CAD files and datasets. Download the tutorial data package using the link provided in your Sales team email, or access it directly:
Download: Tutorial Data Assets
After downloading, extract the data to a convenient location and update the file paths in the tutorial notebooks accordingly.
Note
The tutorial notebooks are designed to run in the hoops_ai_cpu or hoops_ai_gpu environment you created during installation. Make sure to activate the environment and select the correct Jupyter kernel before running the tutorials.
Next Steps
Now that you have Downloaded the Package and know where to get an extended evaluation or perpetual license key you are ready to read the following pages :
CAD Fundamentals- Become an expert in Computer Aided Design.
Machine Learning Fundamentals - Master core Machine Learning concepts with CAD data.
1. Accessing a CAD File - Start playing with HOOPS AI.
Ready? Simply press the button Next below to get started!

