Use the Polling Directory Watcher trigger rather than the Directory Watcher trigger.
The polling directory watcher uses a timed interval to ensure it captures file system events from networks properly.
Note: The Quick Publisher defaults to using the Directory Watcher trigger. Switch this out if appropriate.
Use the Universal Naming Convention (UNC) path rather than a mapped drive.
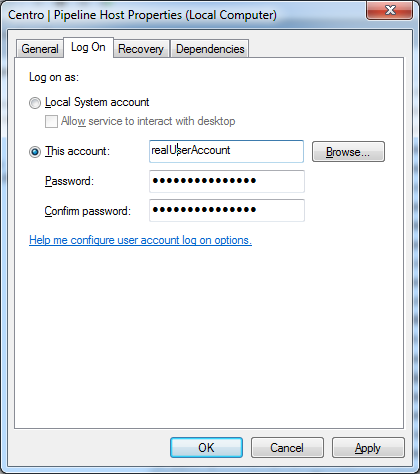
Appropriate Pipeline Service Credentials
The login credentials for the Pipeline Service must have appropriate rights to the network share folder and files as well as appropriate rights on server the service is running on. The default is the “Local System Account”.
If you accidentally deleted Locations from the Admin > Locations page, you can recreate them by following these steps.
For location in question, go to the respective web server.
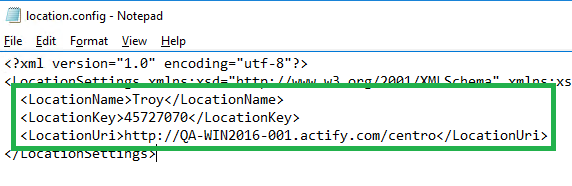
Copy the information from the C:\inetpub\wwwroot\Centro\Configuration\location.config file. Each value is specific to your configuration. The important information to note are: LocationName, LocationKey, and LocationUri.
Example
Login to the ArangoDB web interface. Typically, this will be http://<servernameorIPaddress>:8529
Click COLLECTIONS.
Open the Locations collections.
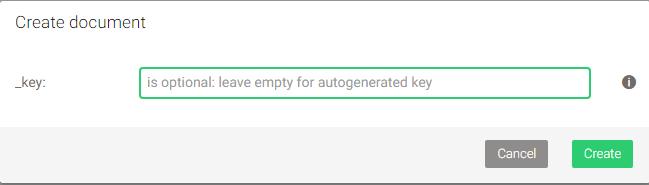
Click the ‘+’ to create a new Location.
Enter the value taken from the LocationKey entry from the location.config file.
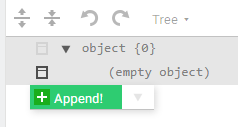
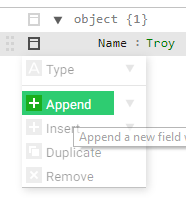
Left-mouse click on the empty object icon and select Append!
Enter “Name” as the object name (be careful as this is case-sensitive).
Enter the name value taken from the LocationName value from the location.config file.
Select Append! again.
Enter “Uri” as the object name (be careful as this is case-sensitive).
Enter the uri value taken from the LocationUri value from the location.config file.
Click Save.
Repeat for any additional Locations that were deleted.
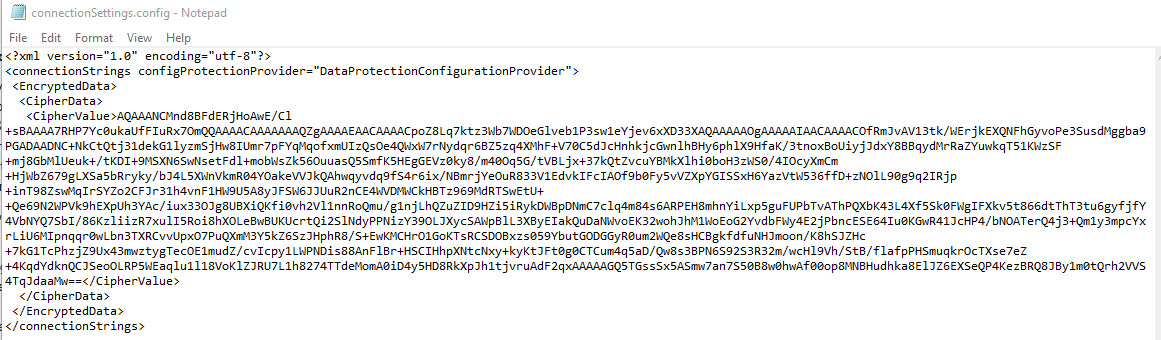
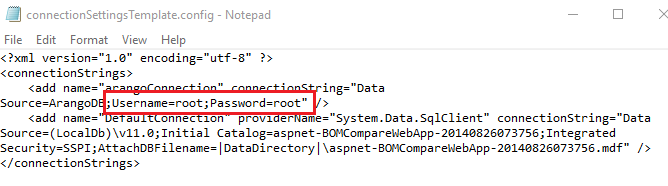
If the ArangoDB User and/or password changes, or was entered incorrectly during installation, the WebApp will not connect to Catalog and the services will not start.
Here are the steps to Reset the DB User/Password in the “connectionSettings.config” files to resolve the issue.
Actify has seen this issue in production environments when SpinFire Manage is asked to process file formats that are not yet supported (for example the latest version of NX).
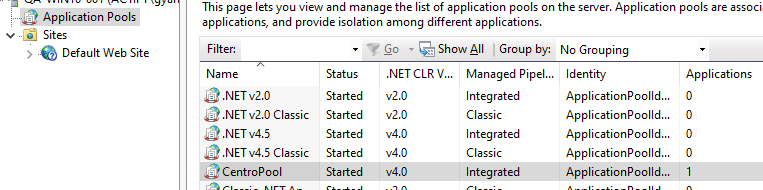
What’s occurring is the Application pool , CentroPool, is being automatically disabled due to a series of failures in the process(es) serving that application pool. Uploading such files in quick succession triggers the Rapid-Fail protection.
To alleviat this the Rapid-Fail protection can be disabled for the CentroPool.
Your multilingual generative AI assistant for documentation. Ask me anything about SpinFire Manage in your own language, or choose a sample question below to start a conversation:
What is SpinFire Manage?
What are the latest release notes for SpinFire Manage?
How do I start evaluating SpinFire Manage?
How can I get assistance?
SPINNY may store conversations according to OpenAI's policy. Responses may not always be accurate.