
2. File-to-File Translation
This tutorial walks you through the ImportExport sample, one of the samples included with HOOPS Exchange.
The sample demonstrates the basic workflow of reading an input file and exporting it to a new format.
As a prerequisite, ensure you have followed the previous tutorial about Set Up Your Environment.
Ensure you can build and run the ImportExport sample. The sample code can be found in the samples/hello_world/ImportExport folder of your package.
2.1. The Code
Open ImportExport.cpp in your editor.
The sample is organized into four functions that represent the typical HOOPS Exchange workflow:
static void initialize_exchange(void);
static A3DAsmModelFile* import_cad_file(const std::string& file_path);
static void export_cad_file(A3DAsmModelFile* model_file, const std::string& file_path);
static void terminate_exchange(void);
The main() function calls these in sequence: initialize, import, export, and terminate.
For a detailed walkthrough of the full implementation, see the ImportExport Example example documentation.
2.1.1. Initialization and Termination
Before using HOOPS Exchange, you must load the library and apply your license.
The initialize_exchange() function handles this:
50    REQUIRE(loaded);
51
52    A3DStatus status = A3DLicPutUnifiedLicense(HOOPS_LICENSE);
53    REQUIRE(status == A3D_SUCCESS);
54
55    status = A3DDllInitialize(A3D_DLL_MAJORVERSION, A3D_DLL_MINORVERSION);
56    REQUIRE(status == A3D_SUCCESS);
57
58    status = A3DDllSetCallbacksReport(Sample::PrintMessage, Sample::PrintWarning, Sample::PrintError);
59    REQUIRE(status == A3D_SUCCESS);
60}
61/// End of initialize_exchange()
62
The three key calls are A3DSDKLoadLibraryA(), A3DLicPutUnifiedLicense(), and A3DDllInitialize().
When finished, terminate_exchange() cleans up:
269/// Function entry point
270/// - Parses and set arguments
271/// - calls import and export
272int main(int argc, char* argv[])
273{
274    Sample::Arguments args;
2.1.2. Importing
The import_cad_file() function configures import parameters and calls A3DAsmModelFileLoadFromFile():
The A3DRWParamsLoadData structure controls what gets loaded: geometry types, PMI, attributes, tessellation quality, and more.
2.1.3. Exporting
The export_cad_file() function writes the model to a new format.
Each format has its own export function and parameters structure. Here’s the STEP export case:
141        }
142
143        case kA3DModellerJt: {
144            A3DRWParamsExportJTData export_data = A3D_MAKE_DATA(A3DRWParamsExportJTData);
145            export_data.m_eWriteGeomTessMode    = kA3DWriteGeomAndTess;
The sample determines the output format from the file extension and calls the appropriate export function.
2.1.4. The Main Flow
The main() function ties everything together:
293}
294// End of main()
295
296static A3DEModellerType get_file_format(const std::string& filepath) {
297    auto pos = filepath.find_last_of('.');
298    if (pos == std::string::npos || pos + 1 >= filepath.size()) {
299        return kA3DModellerUnknown;
300    }
301
2.1.5. Running the Sample
If you run the program without arguments, defaults are used:
- Input:
samples/data/catiaV5/CV5_Aquo_Bottle/_Aquo Bottle.CATProduct - Output: the input filename with
.prcappended
Use --help to see all available options
2.2. Playing With The Sample
In this section we will tweak the code and see the changes.
Change the command line
In Visual Studio from the Solution Tree explorer:
- Locate the sample
ImportExport- Right click on it and select Properties.
- Edit the Command Argument setting under the Debugging tab to change the input CAD file and output.
Assuming that the HOOPS Exchange API package is installed on the root of your disk
C:the command argument looks like this:
"C:\<HOOPS_EXCHANGE_INSTALL_DIR>\samples\data\catiaV5\CV5_Aquo_Bottle\Bullet_Lid_Cap.CATPart" "C:\<HOOPS_EXCHANGE_INSTALL_DIR>\samples\data\catiaV5\CV5_Aquo_Bottle\Bullet_Lid_Cap.CATPart.stl"
- Run the sample
ImportExportto convert a CATIA V5 part called Bullet_Lid_Cap.CATPart to STL format.- Locate the file Bullet_Lid_Cap.CATPart.stl in your output folder.
- Open the HOOPS Demo Viewer desktop application and and drag & drop your resulting Bullet_Lid_Cap.CATPart.stl file to quickly visualize the part:
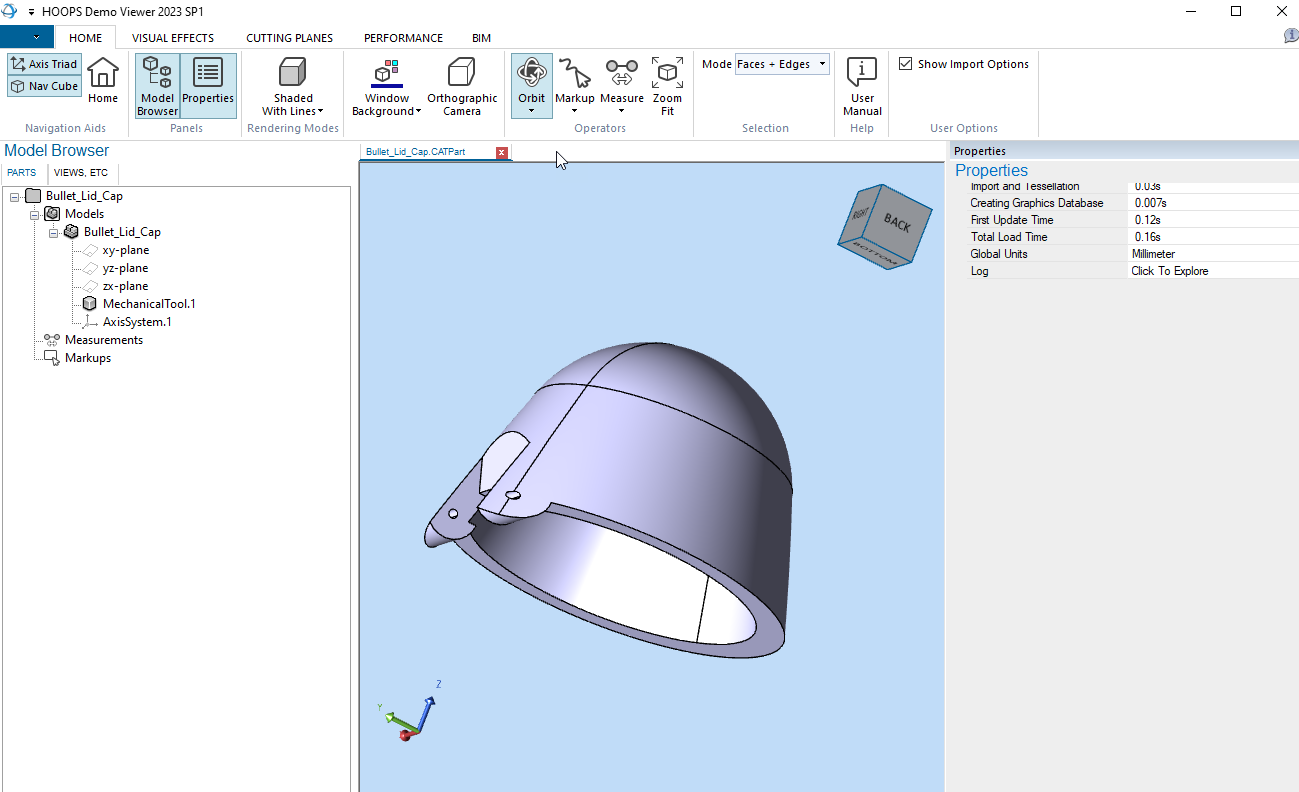
You just have learned how to specify your own input CAD file and Output format.
Change the conversions settings
In Visual Studio from the Solution Tree explorer:
- Locate the sample
ImportExport- Under the Debugging tab edit the Command Argument setting to specify the input CAD file and output.
Assuming that the HOOPS Exchange API package is installed on the root of your disk C: the command argument looks like this:
"C:\<HOOPS_EXCHANGE_INSTALL_DIR>\samples\data\pmi\PMI_Sample\CV5_Sample.CATPart" "C:\<HOOPS_EXCHANGE_INSTALL_DIR>\samples\samples\data\pmi\PMI_Sample\CV5_Sample.CATPart.prc"
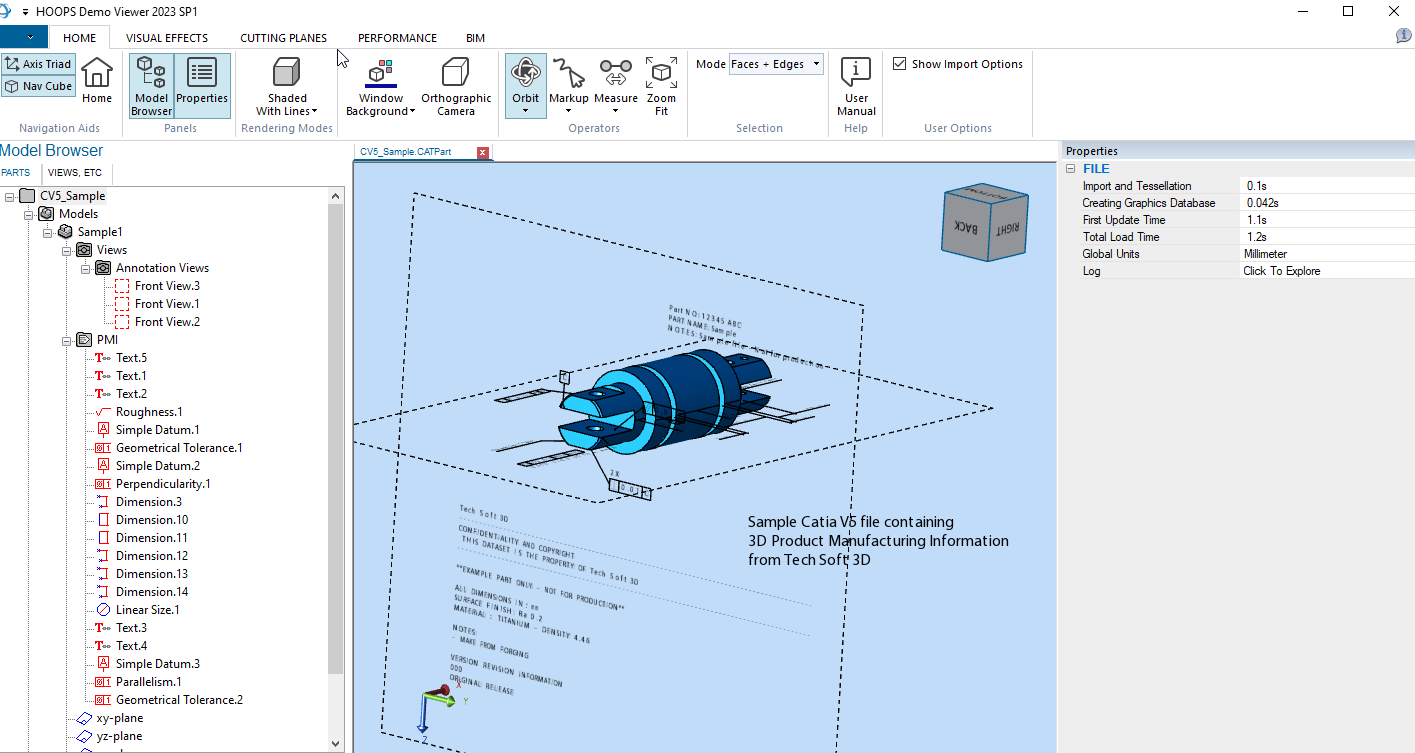
- Run the sample to convert the file CV5_Sample.CATPart to PRC format.
- Locate and drag & drop the resulting CV5_Sample.CATPart.prc in HOOPS Demo Viewer to visualize the part in your output folder:
- Open
ImportExport.cppin Visual Studio.In the
import_cad_file()function, you’ll find all the import parameters. Let’s modify one:
- Locate the line
read_params.m_sGeneral.m_bReadPmis = A3D_TRUE;- Change it to
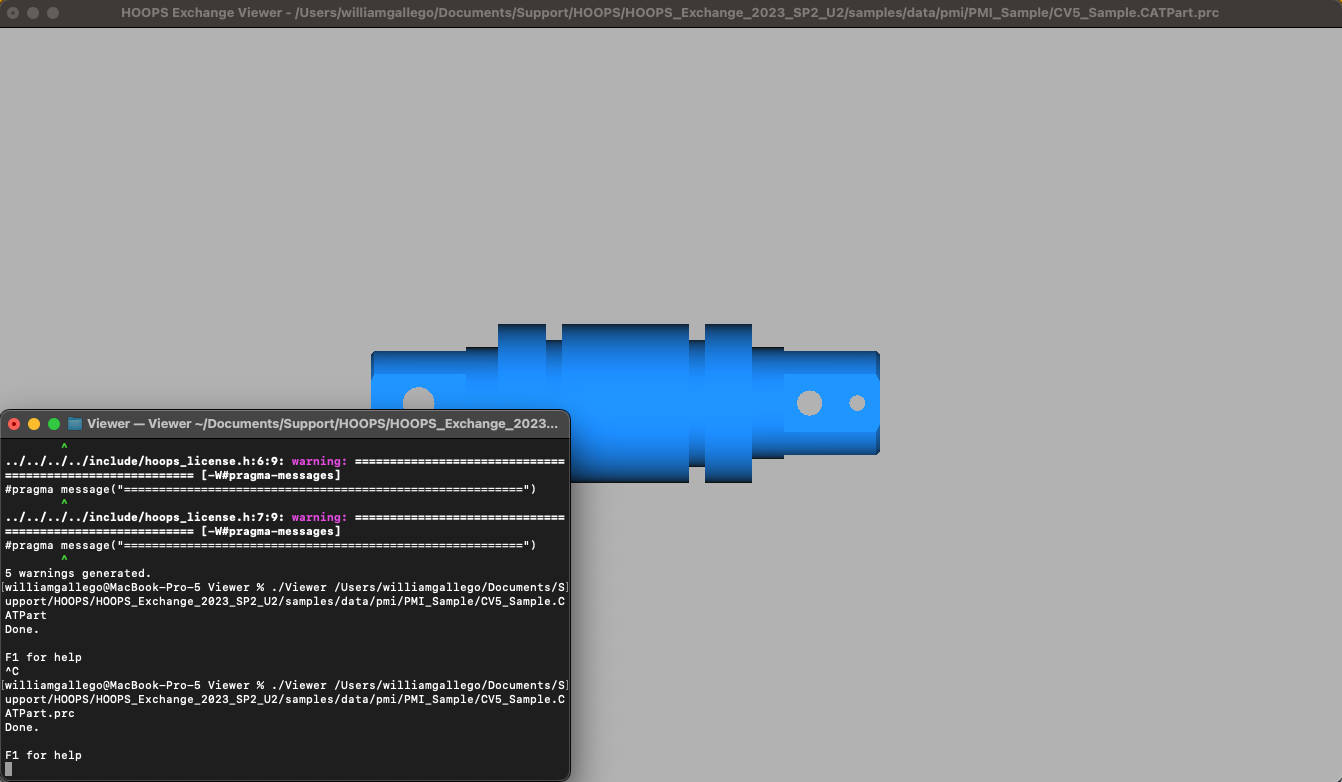
read_params.m_sGeneral.m_bReadPmis = A3D_FALSE;- Rebuild and Run the sample to convert the file CV5_Sample.CATPart to PRC format again.
- Locate and drag & drop the resulting CV5_Sample.CATPart.prc in HOOPS Demo Viewer to visualize the part.
- Compare the two resulting CV5_Sample.CATPart.prc files.
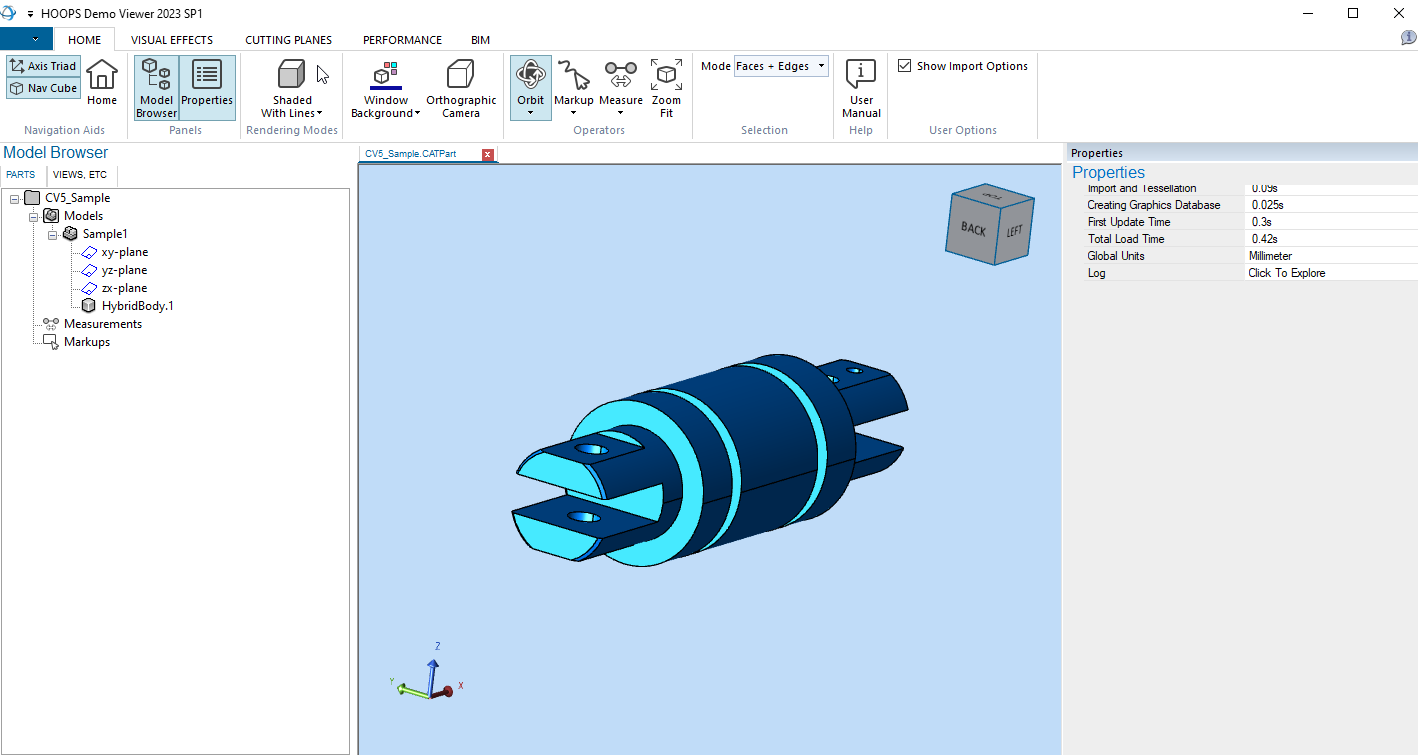
As you can see, by turning off the import parameter m_bReadPmis, the Product and Manufacturing Information is not loaded or converted.
Change the command line
On Linux, open the Terminal:
- Locate the sample
ImportExportfrom the installation folder..\samples\hello_world\ImportExport- Right click on the folder and select Open in Terminal
- Locate the file Bullet_Lid_Cap.CATPart from the installation folder
..\samples\data\catiaV5\- Make sure the Sample is already built otherwise build it again. Command Line:
make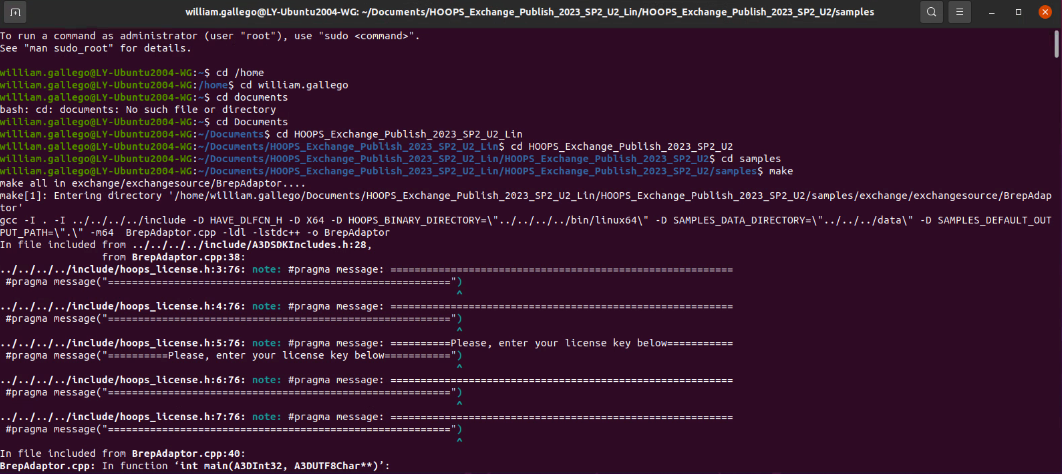
- Run the sample
ImportExportto convert a CATIA V5 part called Bullet_Lid_Cap.CATPart to STL format. Command Line./ImportExport ../samples/data/catiaV5/Bullet_Lid_Cap.CATPart ../samples/data\/atiaV5/Bullet_Lid_Cap.CATPart.stl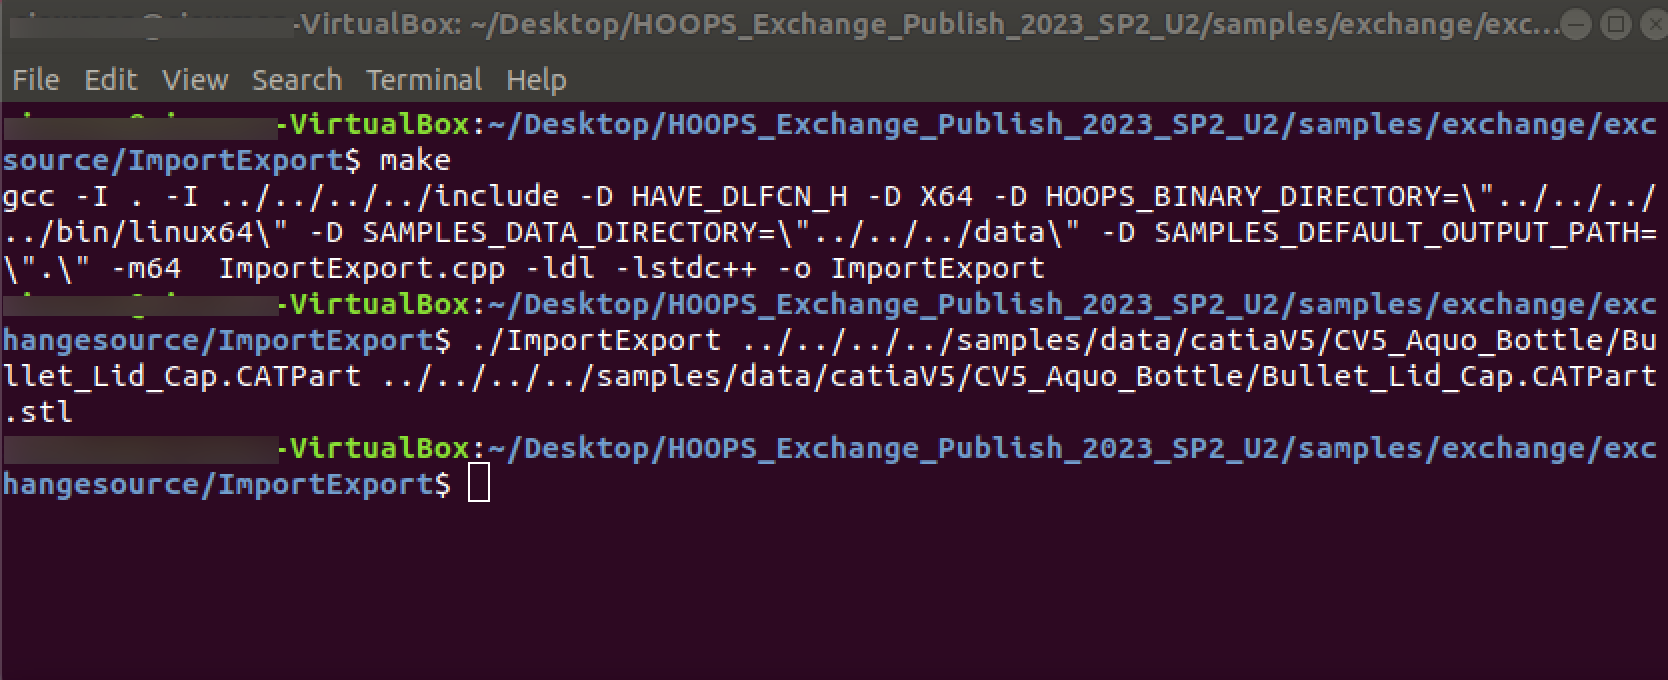
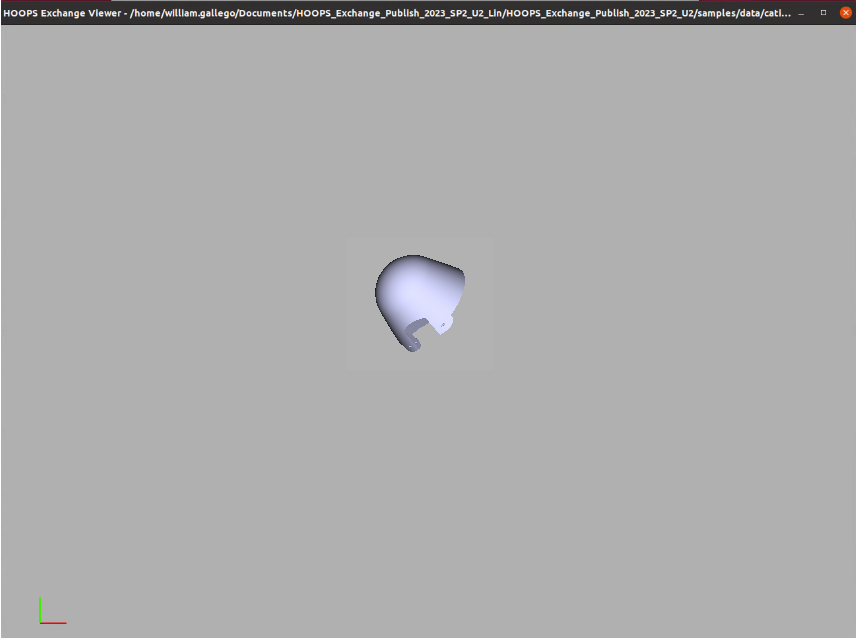
- Run the sample
Viewerto load the resulting part called Bullet_Lid_Cap.CATPart.stl. Command Line./Viewer ../samples/data/catiaV5/Bullet_Lid_Cap.CATPart.stl- Bullet_Lid_Cap.CATPart.stl file will be displayed in an OpenGL Windows:
You just have learned how to specify your own input CAD file and Output format.
Change the conversions settings
- Stop the execution of the sample
Viewer(Ctrl+C).- Locate the file CV5_Sample.CATPart from the installation folder
..\samples\data\pmi\- Run the sample
importExportto convert the file CV5_Sample.CATPart to PRC format.- Locate the resulting CV5_Sample.CATPart.prc file from the folder
./samples/data/pmi/- Run the sample
Viewerto load the PRC file. Command Line./Viewer ../samples/data/pmi/CV5_Sample.CATPart.prc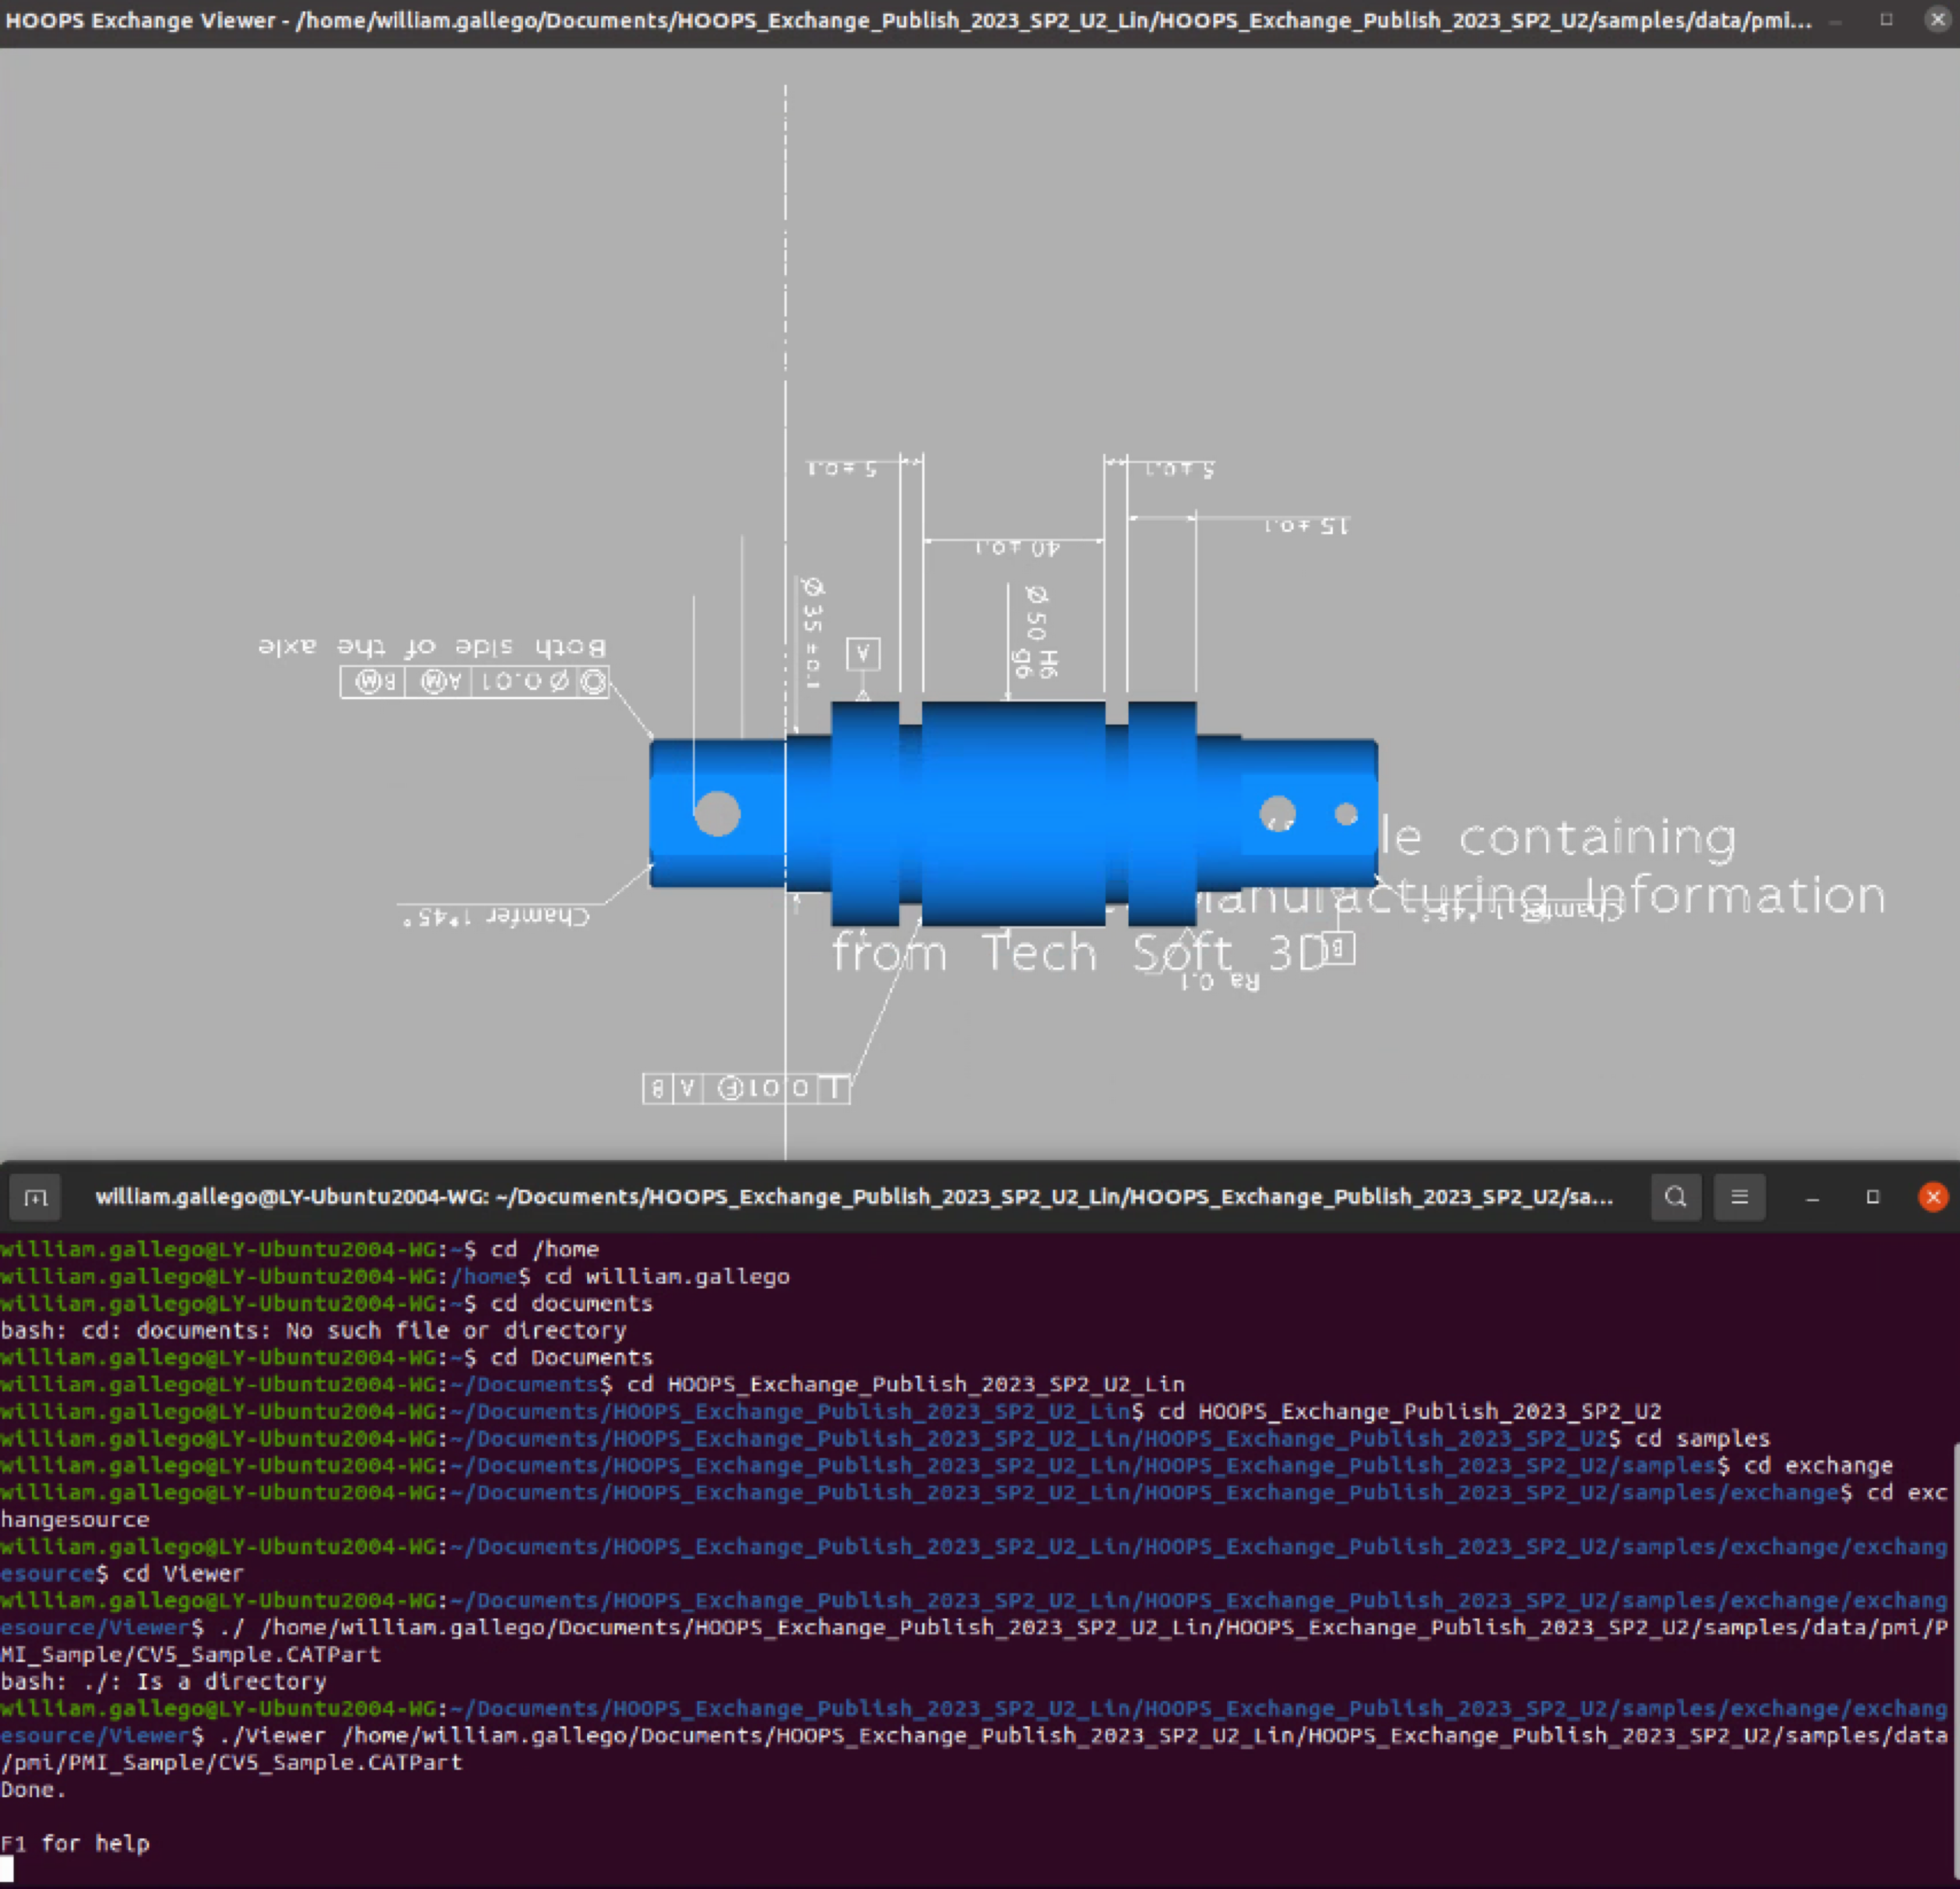
- Stop the execution of the sample
Viewer(Ctrl+C).- Open
ImportExport.cppin your text editor.
In the import_cad_file() function, you’ll find all the import parameters. Let’s modify one:
- Locate the line
read_params.m_sGeneral.m_bReadPmis = A3D_TRUE;- Change it to
read_params.m_sGeneral.m_bReadPmis = A3D_FALSE;- Rebuild with
make cleanthenmake- Run the sample to convert CV5_Sample.CATPart to PRC format again.
- Run the sample
Viewerto load the PRC file:./Viewer ../samples/data/pmi/CV5_Sample.CATPart.prc- Compare the two resulting CV5_Sample.CATPart.prc files.
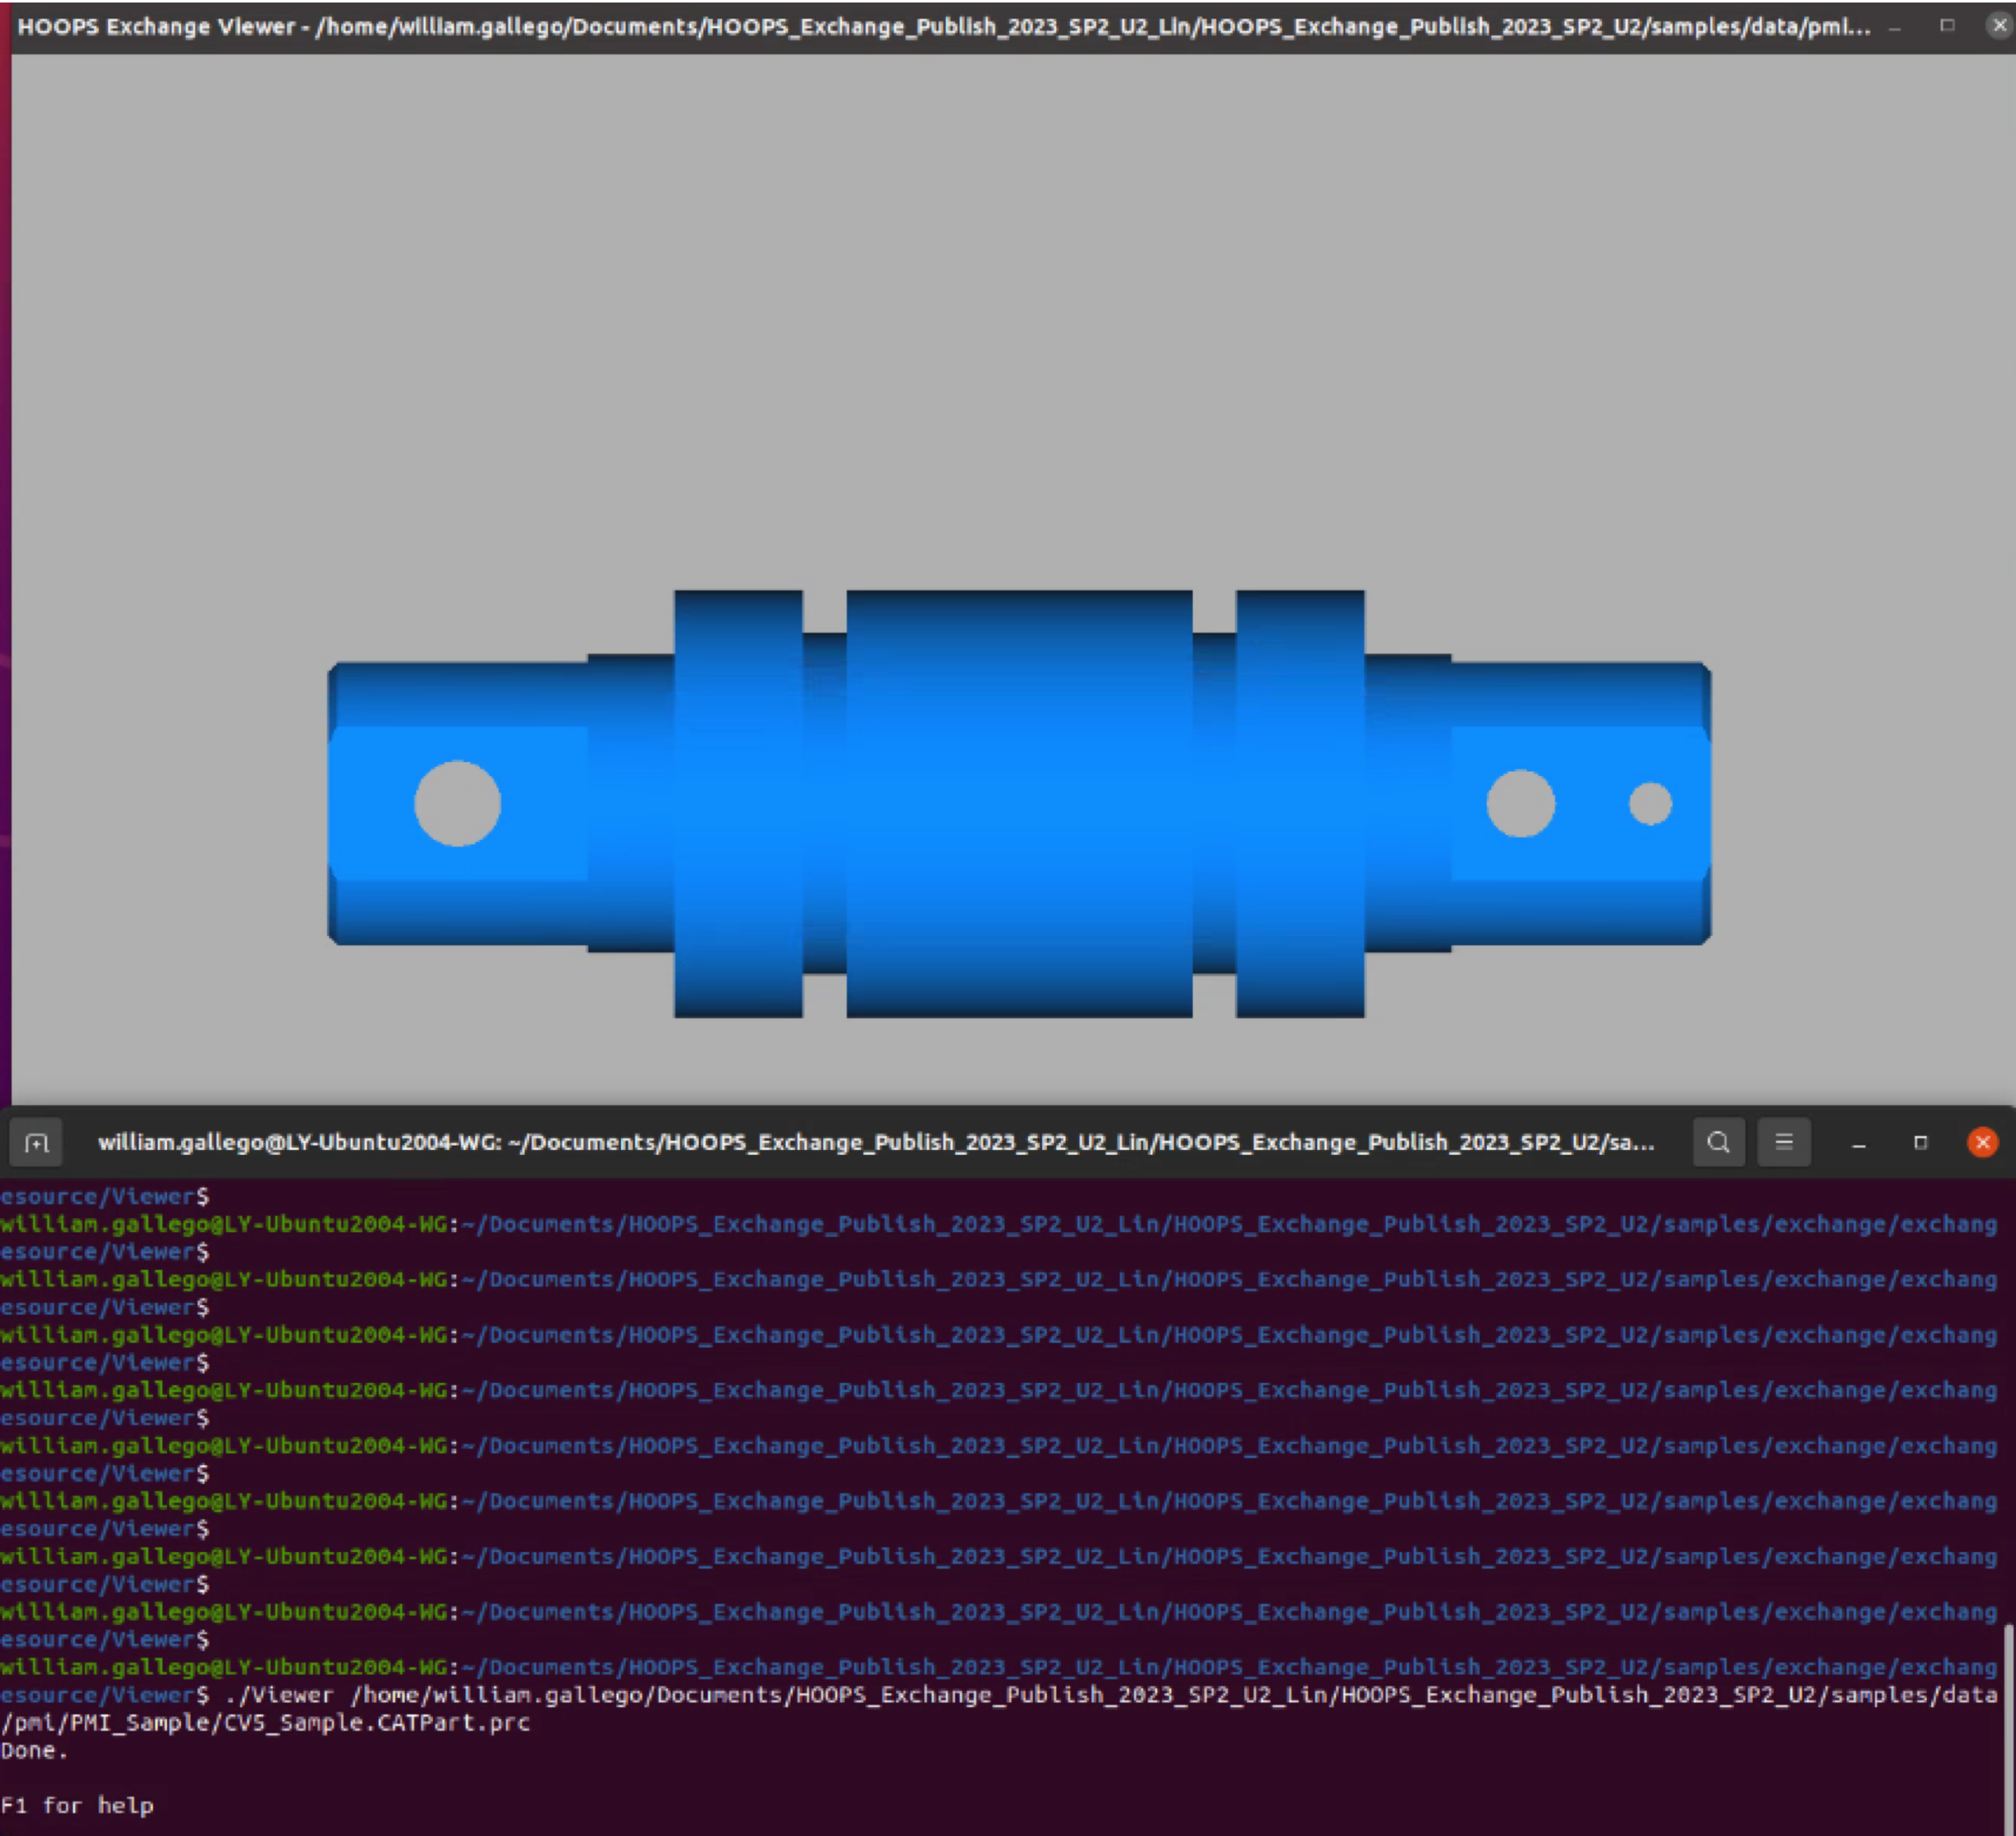
As you can see, by turning off the import parameter m_bReadPmis, the Product and Manufacturing Information is not loaded or converted.
Change the command line
On macOS, open the Terminal:
- Locate the sample
ImportExportfrom the installation folder..\samples\hello_world\ImportExport- Right click on the folder and select Open in Terminal.
- Locate the file Bullet_Lid_Cap.CATPart from the installation folder
..\samples\data\catiaV5\- Make sure the Sample is already built otherwise build it again. Command Line:
make
- Run the sample
ImportExportto convert a CATIA V5 part called Bullet_Lid_Cap.CATPart to STL format. Command Line./ImportExport ../samples/data/catiaV5/Bullet_Lid_Cap.CATPart ../samples/data\/atiaV5/Bullet_Lid_Cap.CATPart.stl
- Run the sample
Viewerto load the resulting part called Bullet_Lid_Cap.CATPart.stl. Command Line./Viewer ../samples/data/catiaV5/Bullet_Lid_Cap.CATPart.stl- Bullet_Lid_Cap.CATPart.stl file will be displayed in an OpenGL Windows:

You just have learned how to specify your own input CAD file and Output format.
Change the conversions settings
- Stop the execution of the sample
Viewer(Ctrl+C).- Locate the file CV5_Sample.CATPart from the installation folder
..\samples\data\pmi\- Run the sample
importExportto convert the file CV5_Sample.CATPart to PRC format.- Locate the resulting CV5_Sample.CATPart.prc file from the folder
./samples/data/pmi/- Run the sample
Viewerto load the PRC file. Command Line./Viewer ../samples/data/pmi/CV5_Sample.CATPart.prc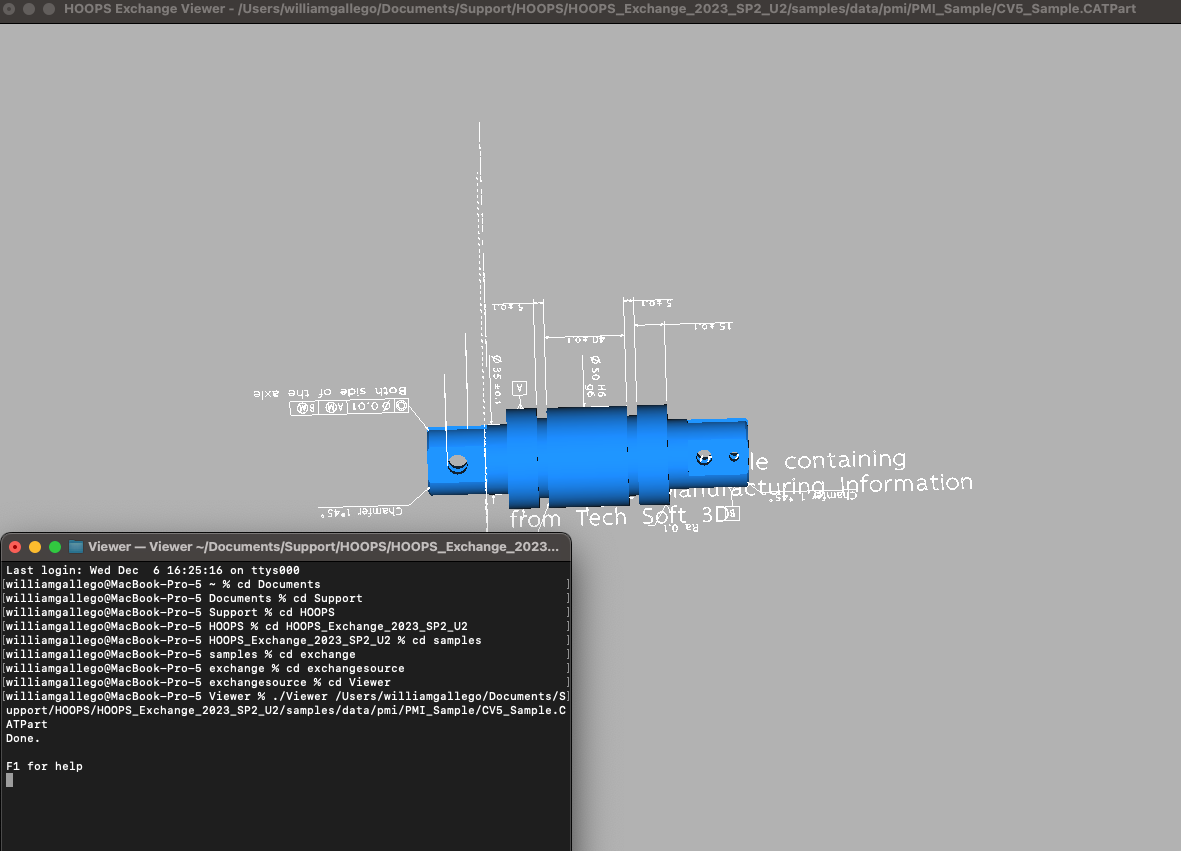
- Stop the execution of the sample
Viewer(Ctrl+C).- Open
ImportExport.cppin your text editor.
In the import_cad_file() function, you’ll find all the import parameters. Let’s modify one:
- Locate the line
read_params.m_sGeneral.m_bReadPmis = A3D_TRUE;- Change it to
read_params.m_sGeneral.m_bReadPmis = A3D_FALSE;- Rebuild with
make cleanthenmake- Run the sample to convert CV5_Sample.CATPart to PRC format again.
- Run the sample
Viewerto load the PRC file:./Viewer ../samples/data/pmi/CV5_Sample.CATPart.prc- Compare the two resulting CV5_Sample.CATPart.prc files.
As you can see, by turning off the import parameter m_bReadPmis, the Product and Manufacturing Information is not loaded or converted.
Build and Run the sample IOSWriter
- Launch Xcode and select Open Existing Project.
- In the
../samples/ios/IOSWriterfolder of your installed package, openIOSWriter.xcodeproj - From the Project navigator bar select the file
ts-0001.stp - Right Click
Add files to "IOSWriter"... - Build the sample
- Go to the tab
Product>Build For>Running - Run the sample
IOSWriter - Go to the tab
Product>Run

- The iOS simulator will be launched
- The file
ts-0001.stpis being converted to XT (Parasolid format) - The
ts-0001.prc.x_tfile is generated and is available at:
/Users/me/Library/Developer/CoreSimulator/Devices/XXXX/data/Containers/Data/Application/XXXX/Documents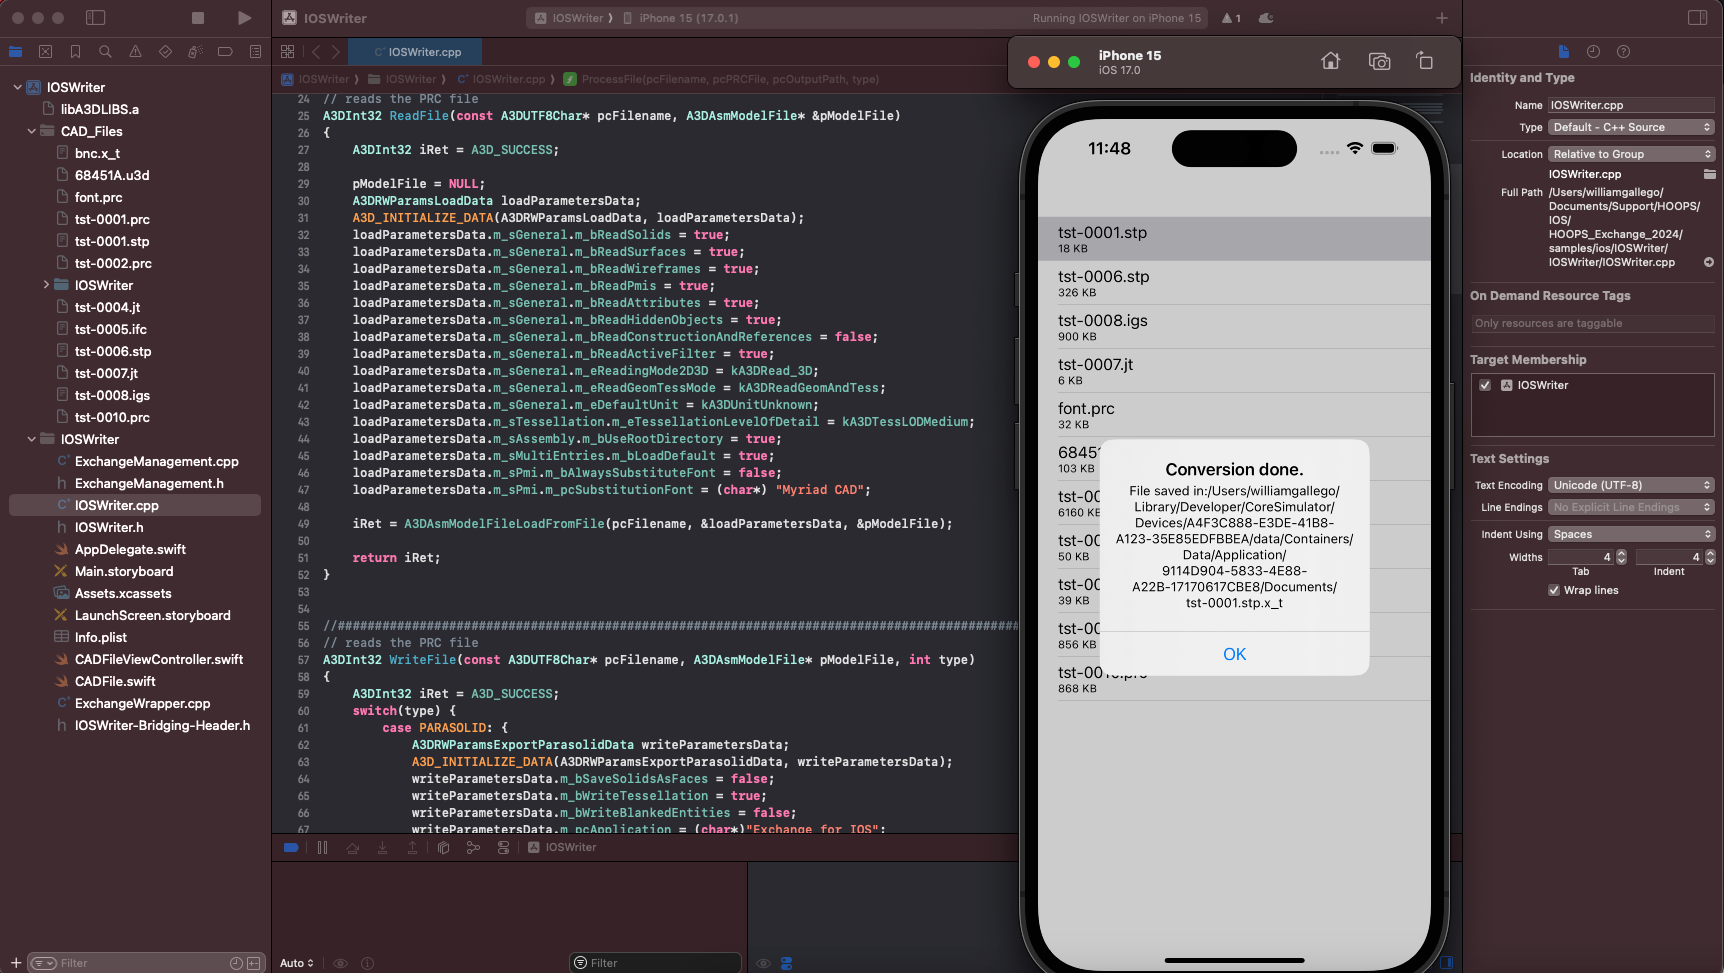
- Locate the file
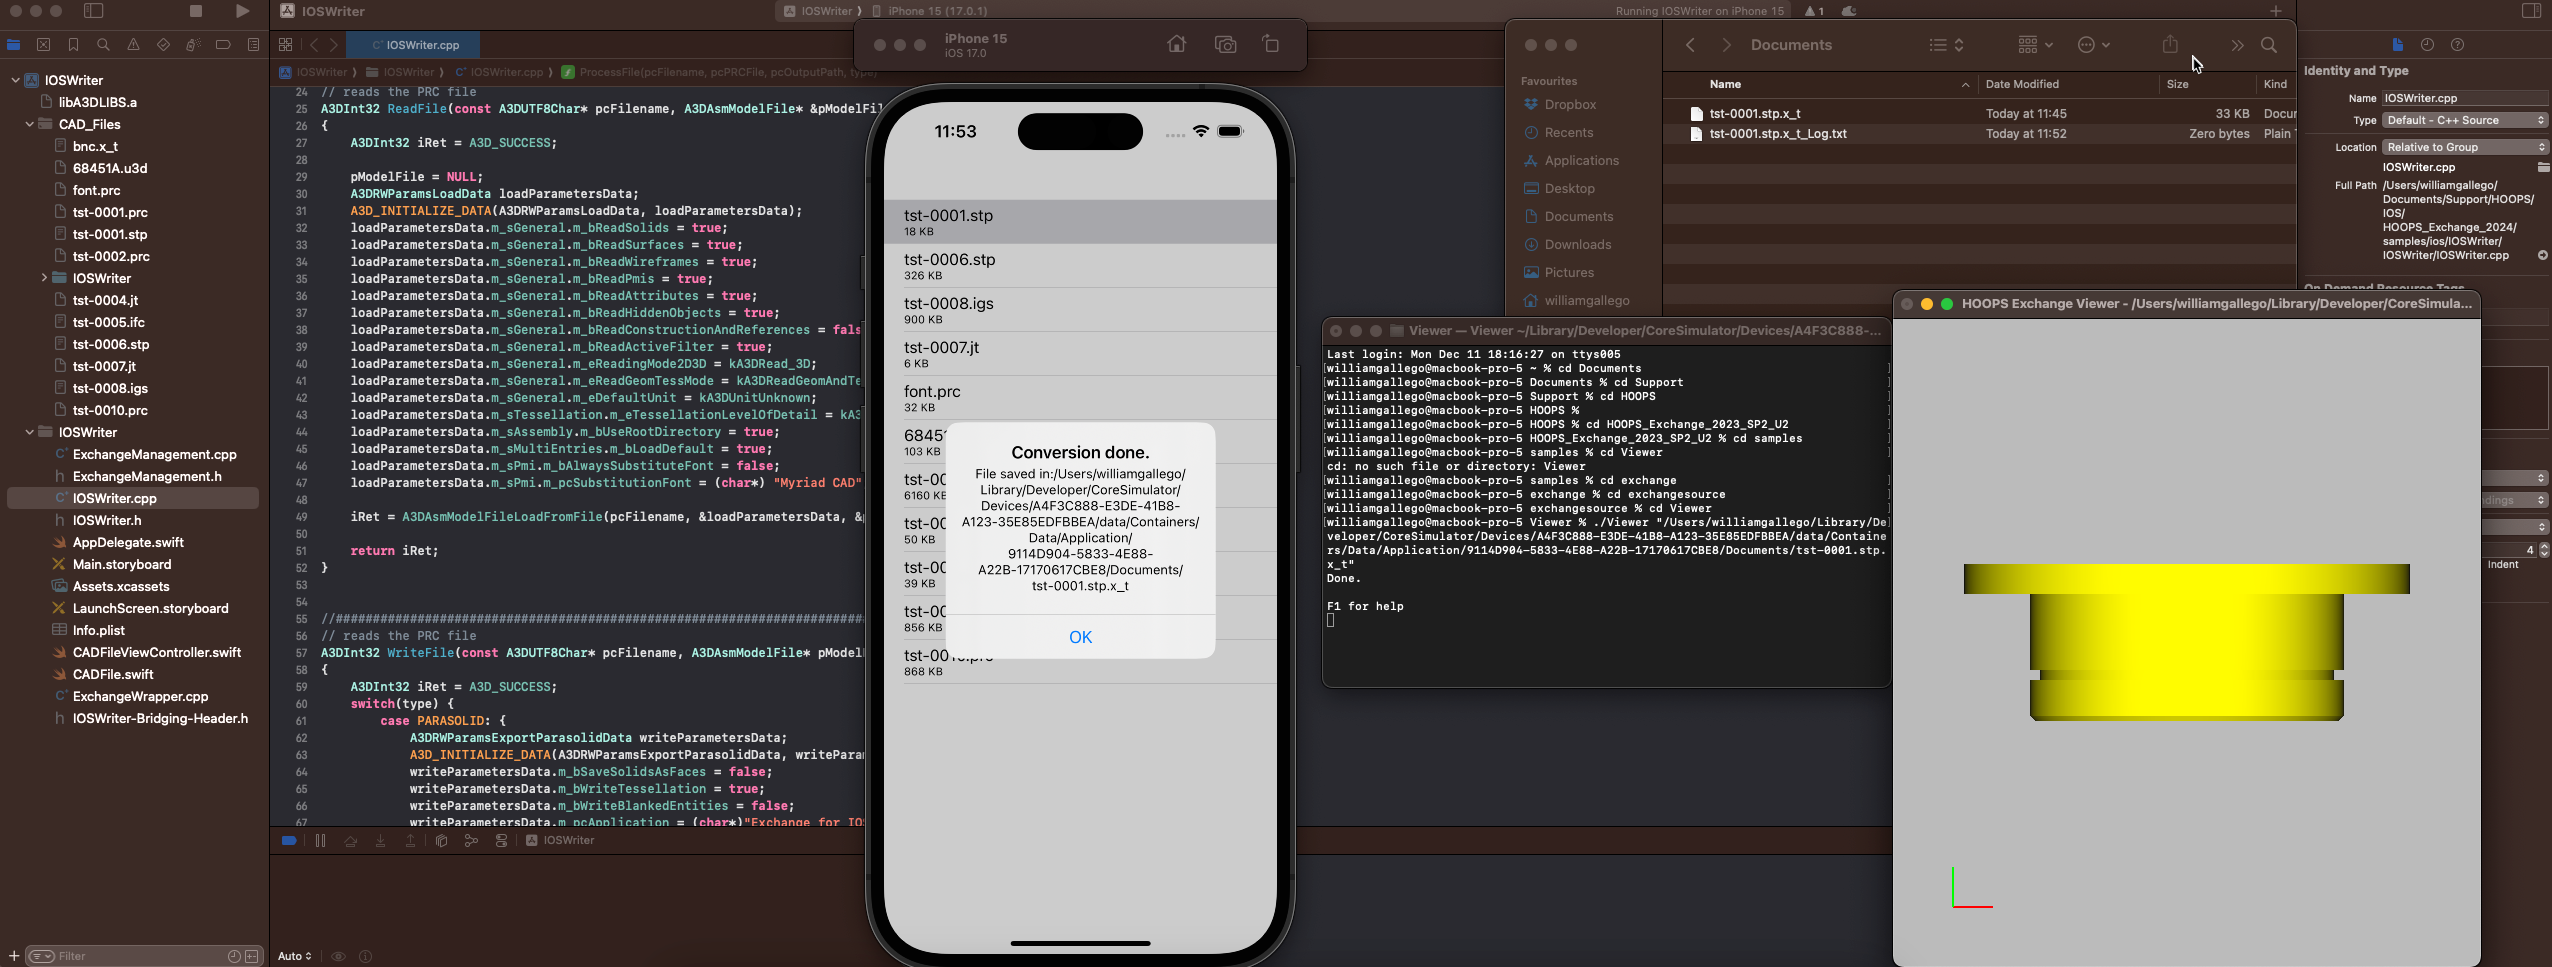
ts-0001.stp.x_t - If you have previously executed HOOPS Exchange on macOS you can re-use the sample Viewer to open your resulting
ts-0001.prc.x_tfile export from your iOS emulator:
Change the conversions settings
- Open the file
IOSWriter.cppin Xcode.
In this file, you’ll find the import parameters in the A3DRWParamsLoadData structure.
Import and export parameters can be modified as needed.
- Open the file
CADFileViewController.swiftin Xcode.
You are now looking at the “commands” of the sample IOSWriter
- Change the parameter
let TYPE_EXPORT = PARASOLIDtolet TYPE_EXPORT = IGES- Rebuild* and Run the sample.
- The iOS simulator will be launched
- The file
ts-0001.stpis being converted to IGES format.- The
ts-0001.stp.igsfile is generated and is available at:
/Users/me/Library/Developer/CoreSimulator/Devices/XXXX/data/Containers/Data/Application/XXXX/Documents
- Open the
ts-0001.stp.igsfile in the macOS Viewer to visualize the part: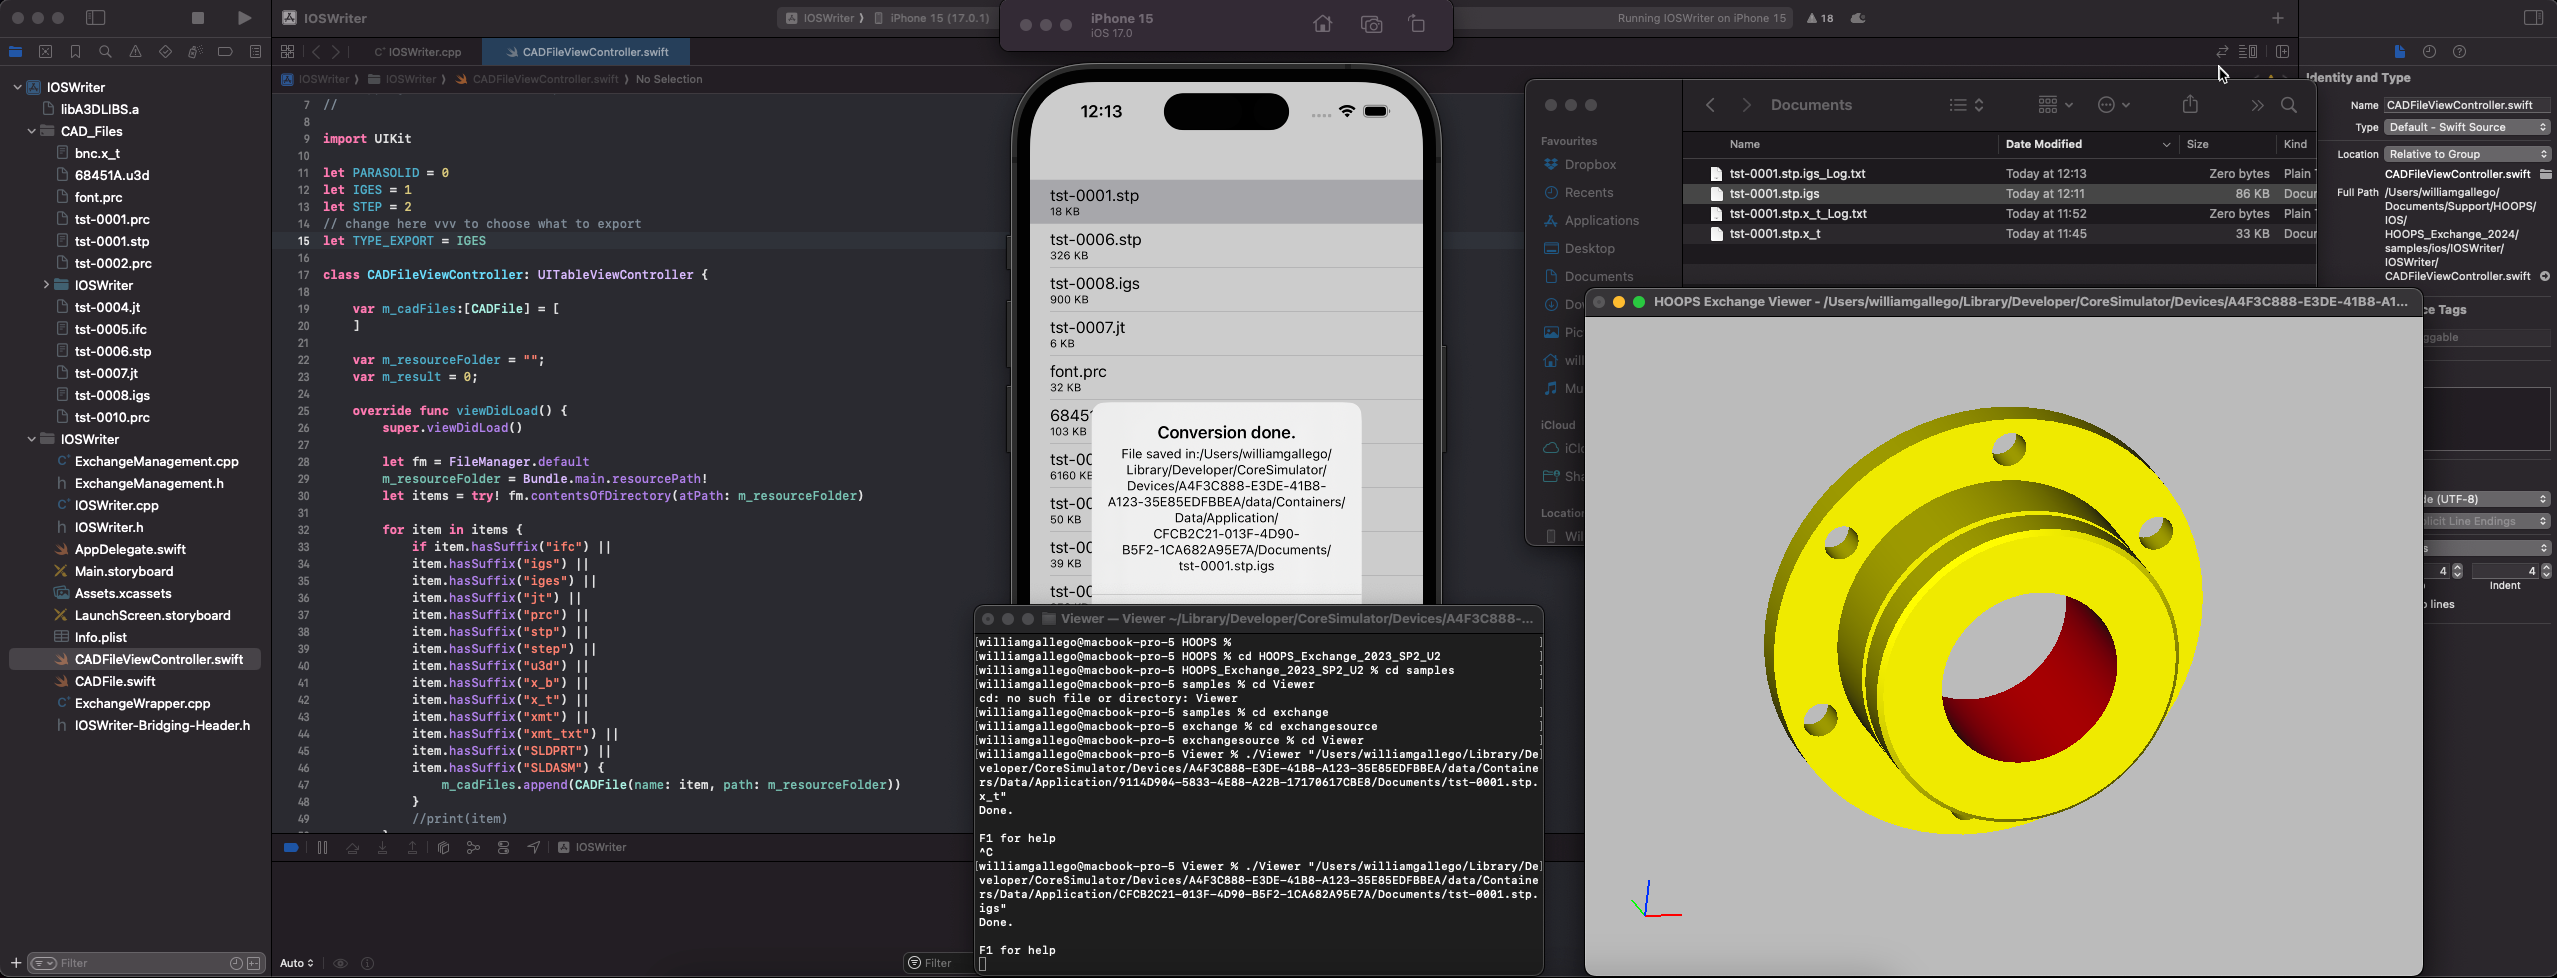
2.3. Conclusion
The file-to-file workflow is a common starting point for evaluating the capabilities of HOOPS Exchange.
Using the ImportExport sample that ships with the product, you can easily convert files from one format to another.
By completing this tutorial, you have learned:
- How to initialize and terminate HOOPS Exchange
- How to load a CAD file using
A3DAsmModelFileLoadFromFile() - How to configure import parameters with
A3DRWParamsLoadData - How to export to various formats using the format-specific export functions
- How to properly clean up with
A3DAsmModelFileDelete()
For more details on import and export options, see the Simple Load and Export programming guide.
Now that you have completed the ImportExport sample, you are ready to move forward with the Traverse CAD Structure tutorial.