
Quickstart
We recommend that you review the Technical Overview for a brief tour of the architecture and subcomponents of HOOPS Visualize Web. The Package Description provides an overview of the SDK contents.
The sections below show how to quickly get started by viewing the sample models, and converting and viewing your CAD models using HOOPS Visualize Web.
Note
In order to run the samples in this document, you will need to have installed Visual Studio C++ Redistributables. See the Supported Platforms page for versioning.
If you are getting the error exit-code=3221225781, you are likely missing one of the required redistributables.
Viewing the sample page
Navigate to the quick_start directory, ensure you have admin privileges, and run start_server.[bat|sh]. This script will deploy the provided HOOPS Server on your local machine, which is built with Node.js (included with the HOOPS Visualize Web installer).
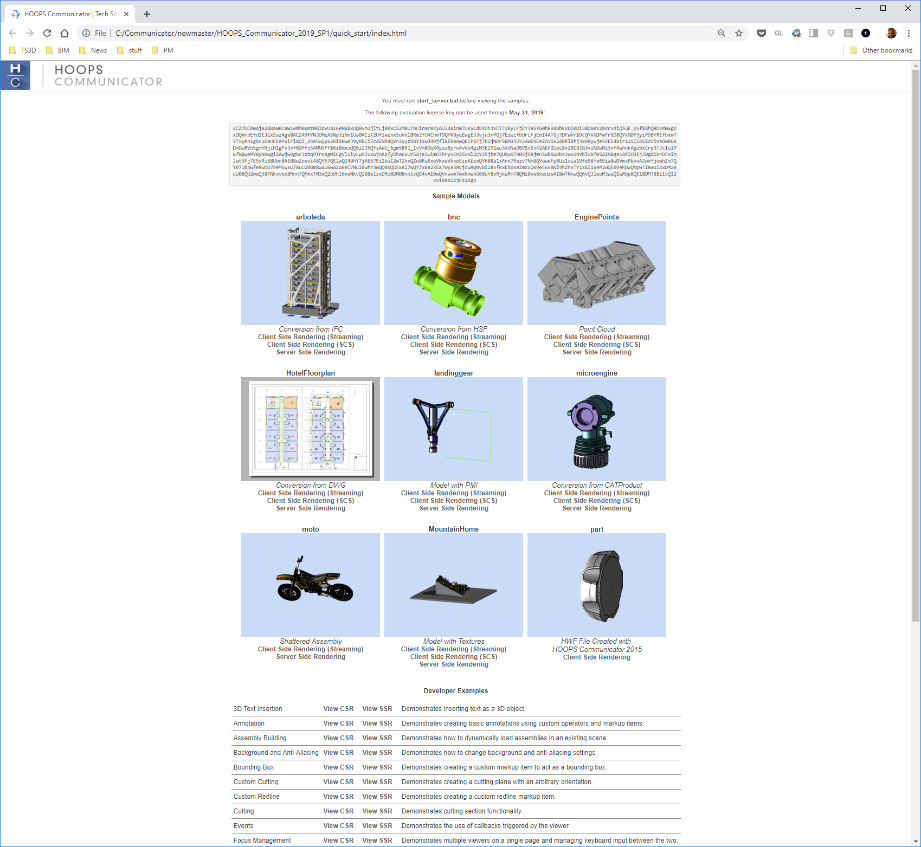
Open http://localhost:11180/index.html to view a variety of provided sample models that highlight the functionality of the HOOPS Web Viewer. The source code for these examples can be found in web_viewer/examples of your HOOPS Visualize Web installed package. When viewing one of the example models you will notice you are viewing from hoops_web_viewer_example.html. This page was served from the HOOPS Server, which was launched with start_server.[bat|sh].
Each viewed model starts an instance of the Stream Cache Server, which is responsible for streaming converted CAD models via WebSocket connections. The HOOPS Server is responsible for starting and monitoring Stream Cache Servers connected to Web Viewers in the client. The HOOPS Server has two main functions:
- Serve static assets such as HTML files
- Provide an API for a HOOPS Web Viewer to request a CAD model for rendering via a Stream Cache Server
Viewing your model
You can convert your CAD models by simply dragging them on convert_file.[bat|sh] in the quick_start directory. If the HOOPS Server is currently running, the model will automatically be displayed in your browser when the conversion is complete. You can view a list of all converted models by opening the converted_files.html document within the quick_start directory. This document is created after converting your first model using convert_file.[bat|sh], view here: http://localhost:11180/converted_files.html
Note
This file is being served from the HOOPS Server, which is also managing and monitoring all of the Stream Cache Servers that are streaming CAD models to the Web Viewer.
After the conversion process has finished, you can find the resulting .scz file in the /quick_start/converted_models/user/sc_models directory. Additionally, a .scs file is generated and placed into the /quick_start/converted_models/user/scs_models directory, and an image of the model is created in the /quick_start/converted_models/user/images directory.
Executing convert_file.[bat|sh] starts a python script that runs an application called Converter (converter.exe on Windows) with some predefined settings designed to handle the conversion of the CAD files to the Stream Cache format (SC). The SC format is the streaming-optimized internal format that the Web Viewer component can parse.
Converter application
The Converter application is included with HOOPS Visualize Web and is used to convert CAD models into the Stream Cache format for viewing in a browser.
The easiest way to see Converter working is to follow these steps:
- In your File Explorer, navigate to <INSTALL_DIR>/quick_start
- Double-click the file start_server.bat to start the stream server. You’ll get a window similar to this:

Keep this console window open and proceed to the next step.
- Select the CAD file you want to convert and drag-and-drop it to another batch file in the same directory called convert_file.bat:
In the GIF above, the CAD file is being dragged right on top of convert_file.bat which will prompt a message Open with convert_file.bat. At this point, just release the LMB to start the conversion.
- This will open another console window showing the progress of the conversion. Once the conversion is complete, you can close this console window (but do not close the server window from step #2).
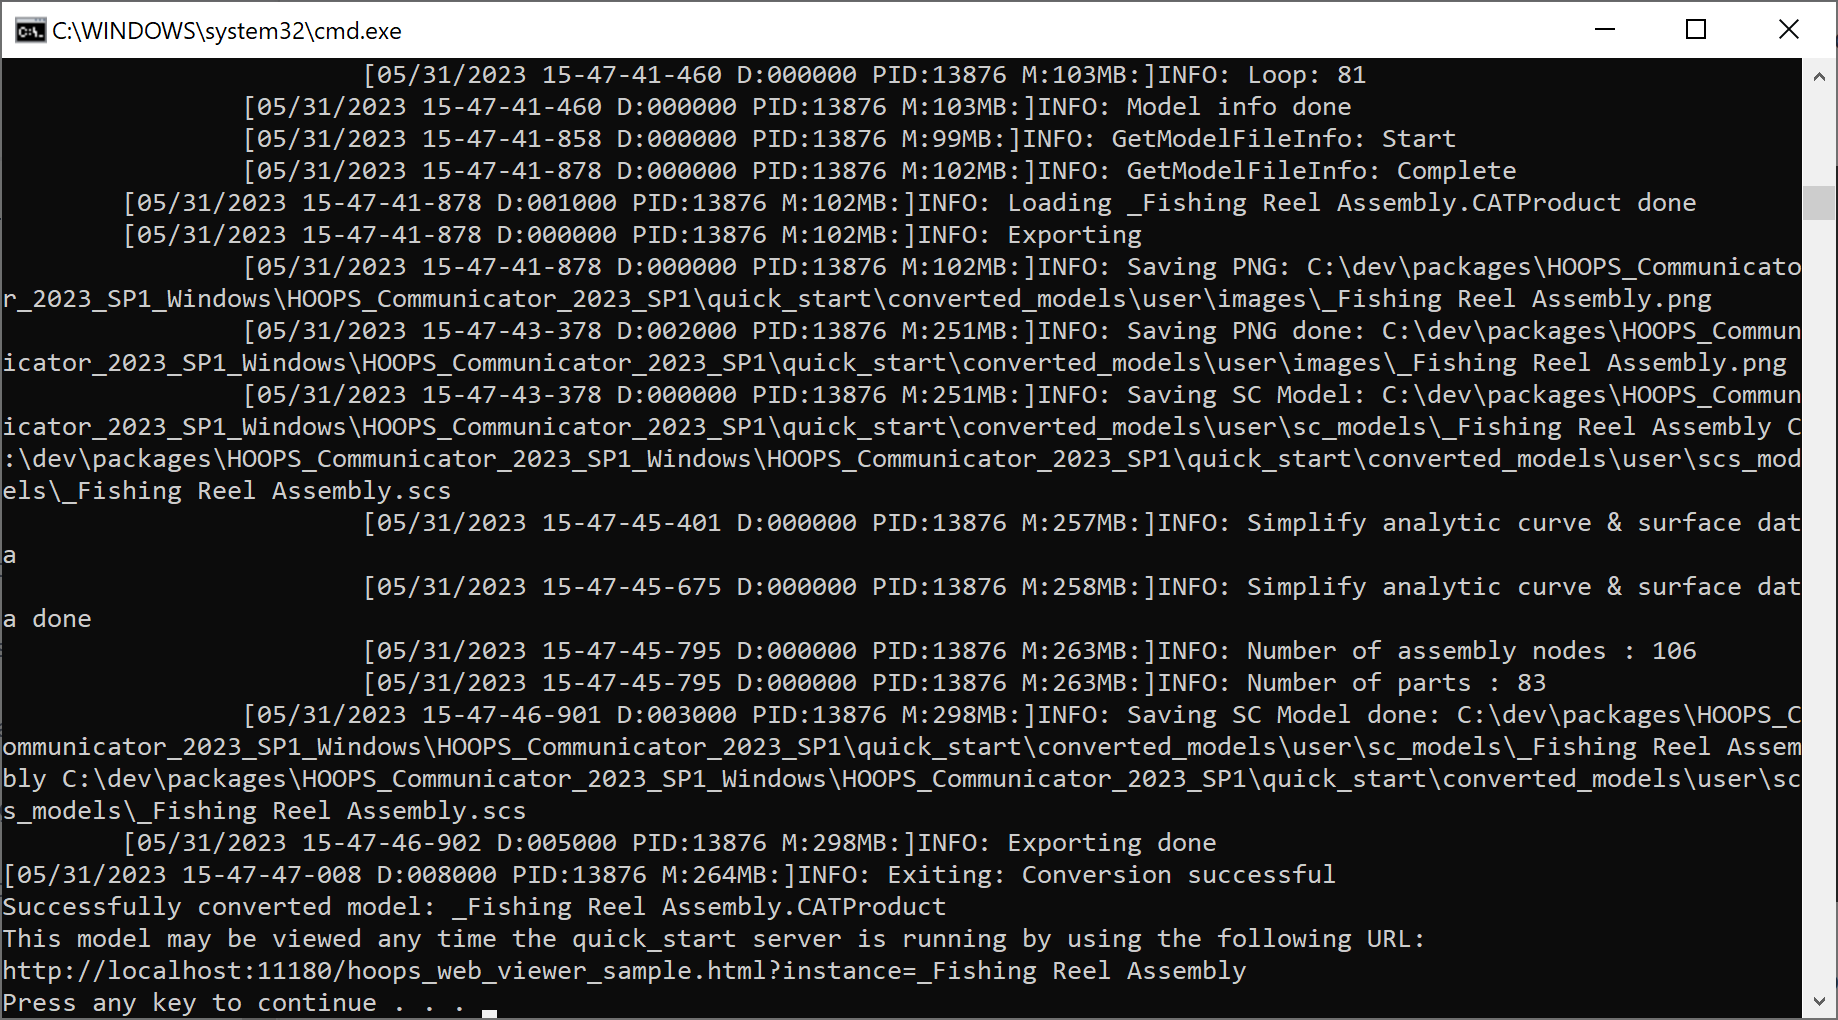
- You’ll also notice the web browser will launch a webpage showing the now-converted model in the Web Viewer. At this point, you can interact with the model as you wish.
- To keep track of all the conversion you’ve done, an HTML file called converted_files.html is automatically created in <INSTALL_DIR>/quick_start.
easy_convert.js
The companion script to convert_file.bat is easy_convert.js (located in <INSTALL_DIR>/quick_start/scripts). This JavaScript file contains the different pre-defined command-line options for the converter.exe executable.
- Open easy_convert.js in your favorite text editor and find the variable
process_args:
Listed are the pre-defined variables for the converter. You can add or delete options as you see fit.
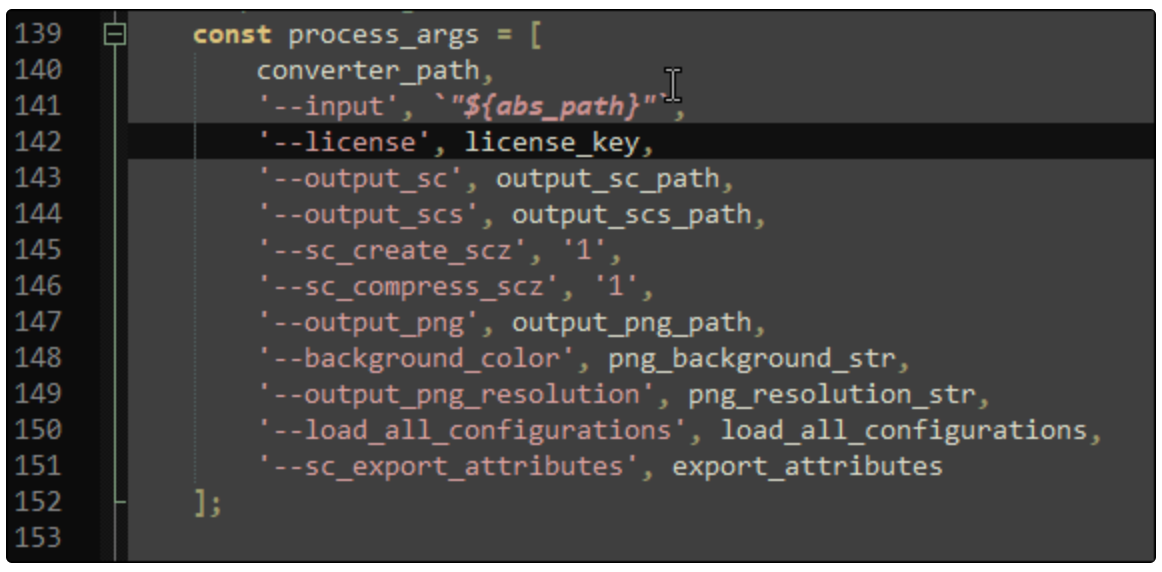
- As a demonstration, let’s modify easy_convert.js so that the conversion also produces a model information file using
--output_model_info. This option will require a location of the output file as well as a name. Set the output location to be the same directory as easy_convert.js and name the file model_info.txt:
    const process_args = [
converter_path,
'--input', `"${abs_path}"`,
'--license', license_key,
'--output_sc', output_sc_path,
'--output_scs', output_scs_path,
'--sc_create_scz', '1',
'--sc_compress_scz', '1',
'--output_png', output_png_path,
'--background_color', png_background_str,
'--output_png_resolution', png_resolution_str,
'--load_all_configurations', load_all_configurations,
'--output_model_info', "./model_info.txt", //<-----------//
'--sc_export_attributes', export_attributes
    ];
- Run easy_convert.js and check that the model info file is generated.
Performance tips
- For large CAD files (> 50MB or so), it is recommended that you don’t generate .png files as this can significantly add to the conversion time.
- For CAD files with a lot of configurations, don’t include the
--load_all_configurationsoption.
Running Converter programmatically
Converter can also be used programmatically. To do so, navigate to the authoring/converter/example directory. You will find the sample.[bat|sh] script that demonstrates various CAD conversion scenarios.
Note
Consult our page on licensing for information on how to locate or obtain your license key.
Let us modify sample.[bat|sh] to perform your CAD conversion. Open the script in a text editor and remove (or comment out) everything after the first line that calls Converter.
Result:
set CONVERTER_LICENSE_KEY="your_license_key"
IF NOT EXIST output mkdir output

../bin/<platform>/converter --input "_data/micro_engine/_micro engine.CATProduct" --output_scs "../../../quick_start/TestModel.scs" --output_png "../../../quick_start/TestModel.png" --output_png_resolution 320x240 --license %CONVERTER_LICENSE_KEY%
In the example above, we are specifying a relative path to a sample CAD file. You can adjust this path to point to a valid model on your hard drive. If you don’t have a CAD file available, you can find additional sample models in the HOOPS Visualize Web package at authoring/converter/example/_data. Also, the command has been modified to generate an image file of the default view for this model with options to specify a custom image size.
After running the script, ensure the HOOPS Server is still running and navigate to http://localhost:11180/hoops_web_viewer_sample.html?scs=TestModel.scs
There is a lot more to HOOPS Converter. Visit our API Reference for more information on its various command-line options. HOOPS Converter is provided as a C++ library with the same functionality as the standalone executable included with your installed HOOPS Visualize Web package.
Viewing Stream Cache files
If you are not interested in converting CAD files and would rather just view ready-made Stream Cache models in the Web Viewer, this is easy to do as well. Open the quick_start directory (<INSTALL_DIR>/quick_start) and start the server by double-clicking server.bat. Then, open index.html in a web browser.
The top half of page is dedicated to pre-converted sample models, while the bottom half presents developer examples. Feel free to explore the different models in the Web Viewer – both in client-side rendering (CSR) and server-side rendering (SSR). For more complex models, you may notice the CSR models are slower to load - but ultimately render faster once loaded. The SSR models may load faster but the nature of streaming makes performance slightly less responsive.
Interacting with the sample models
It’s very common to load a Stream Cache model and then make Web Viewer function calls directly in the web browser console. For all the models in the “Sample Models” section of index.html, the variable to get the Web Viewer object is hwv – you will see this again in step #4. We’ll use Chrome for this example, but other browsers will work with slightly different commands:
- In index.html, launch the “bnc” model in Client Side Rendering (SCS) in Chrome. Press F12 to view the console.
It’s typical to call functions from the Communicator.Model object directly in the console. There are quite a bit of functions which require the node ID as the parameter. Let’s get the node ID of a specific part of the bnc model. First select the large orange top part of the bnc.
- Get the selectionManager` class of the
hwvhandle. And assign it to a variable calledsm:
var sm = hwv.selectionManager; // or hwv.getSelectionManager();
- Use
selectionManagerto get the node ID by combininggetFirstandgetNodeIdand save the returned value to a variable callednodeId:
var nodeId = sm.getFirst().getNodeId();
You can also combine the previous two calls to just one:
var nodeId = hwv.selectionManager.getFirst().getNodeId();
- Set an
InstanceModiferon the node so that it doesn’t get affected when setting the draw mode to x-ray:
hwv.model.setInstanceModifier(Communicator.InstanceModifier.DoNotXRay, [nodeId], true);
Notice that nodeId is in brackets. This is because this specific function expects an array – but not all functions do.
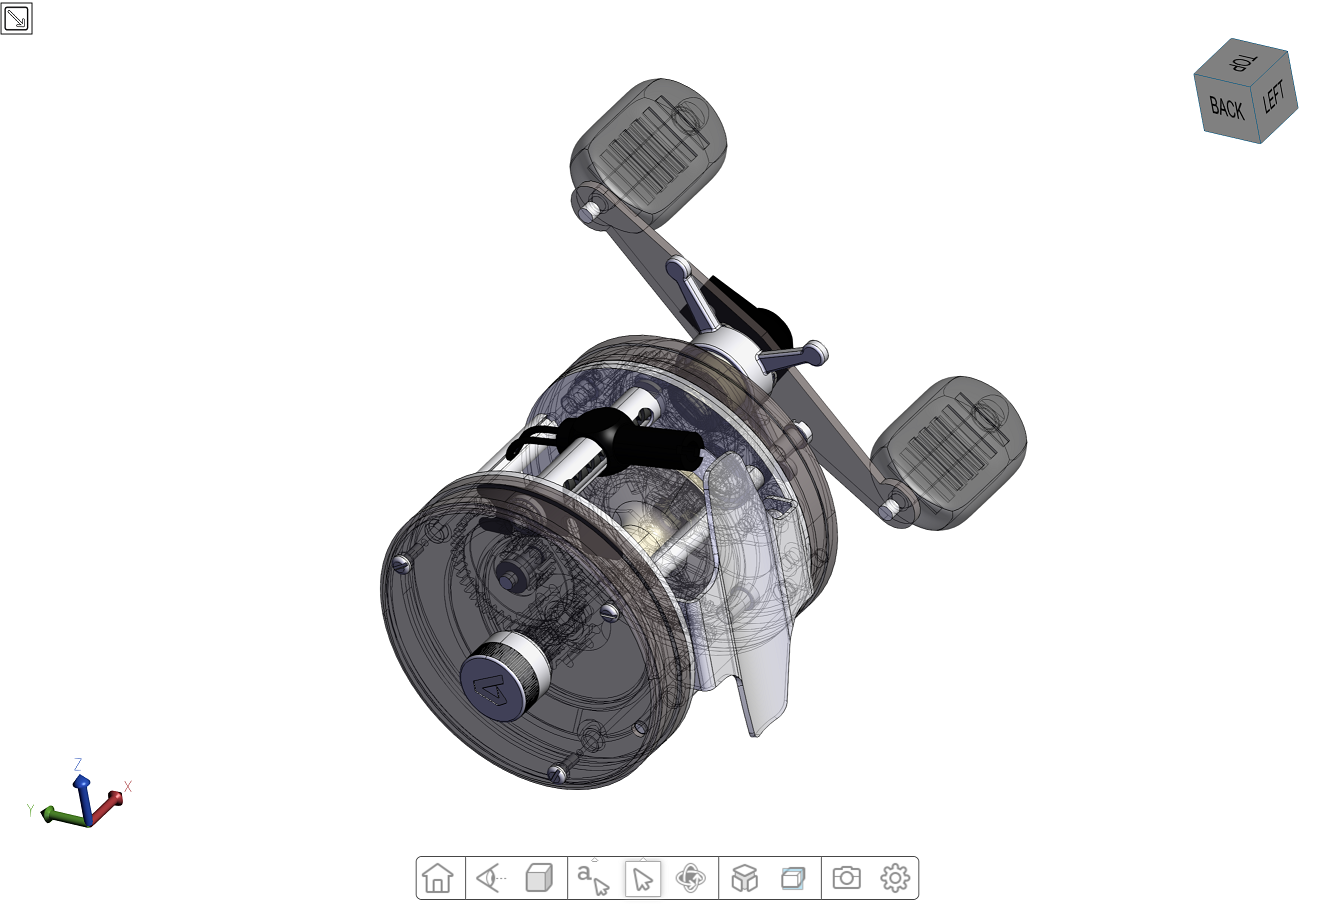
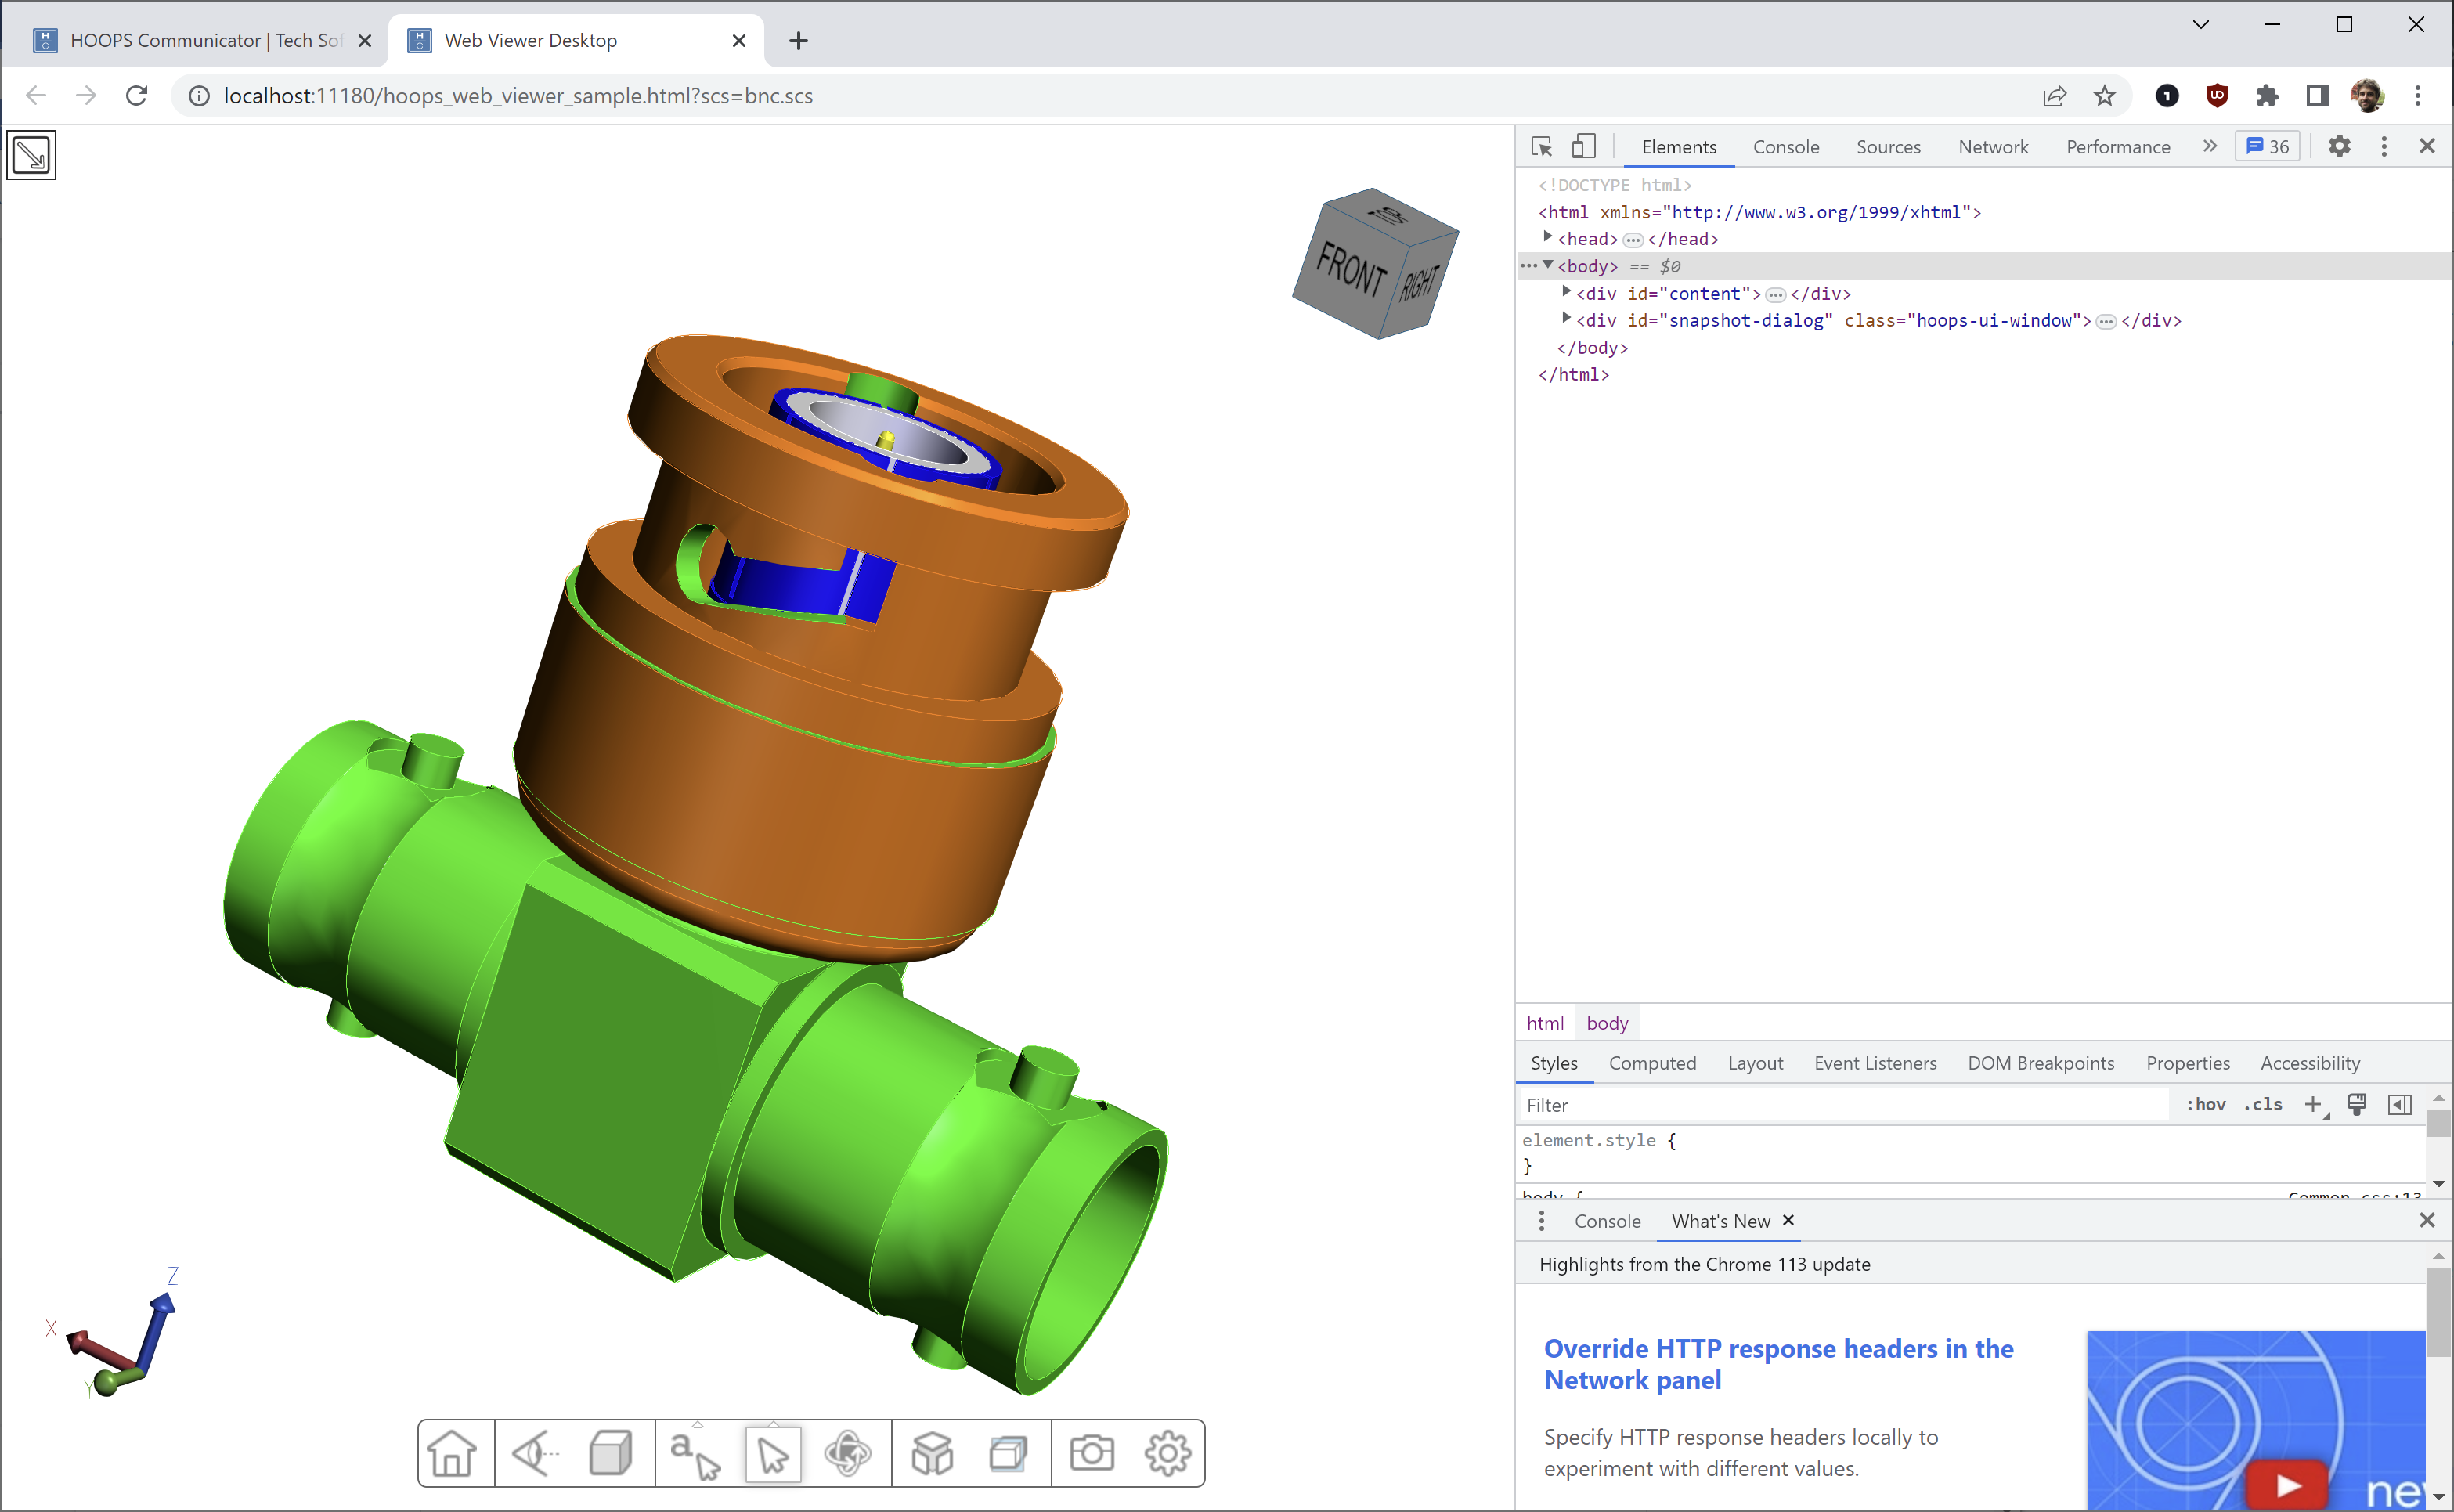
- Now, set the draw mode to x-ray:
hwv.view.setDrawMode(Communicator.DrawMode.XRay);
At this point, the model should look like this:
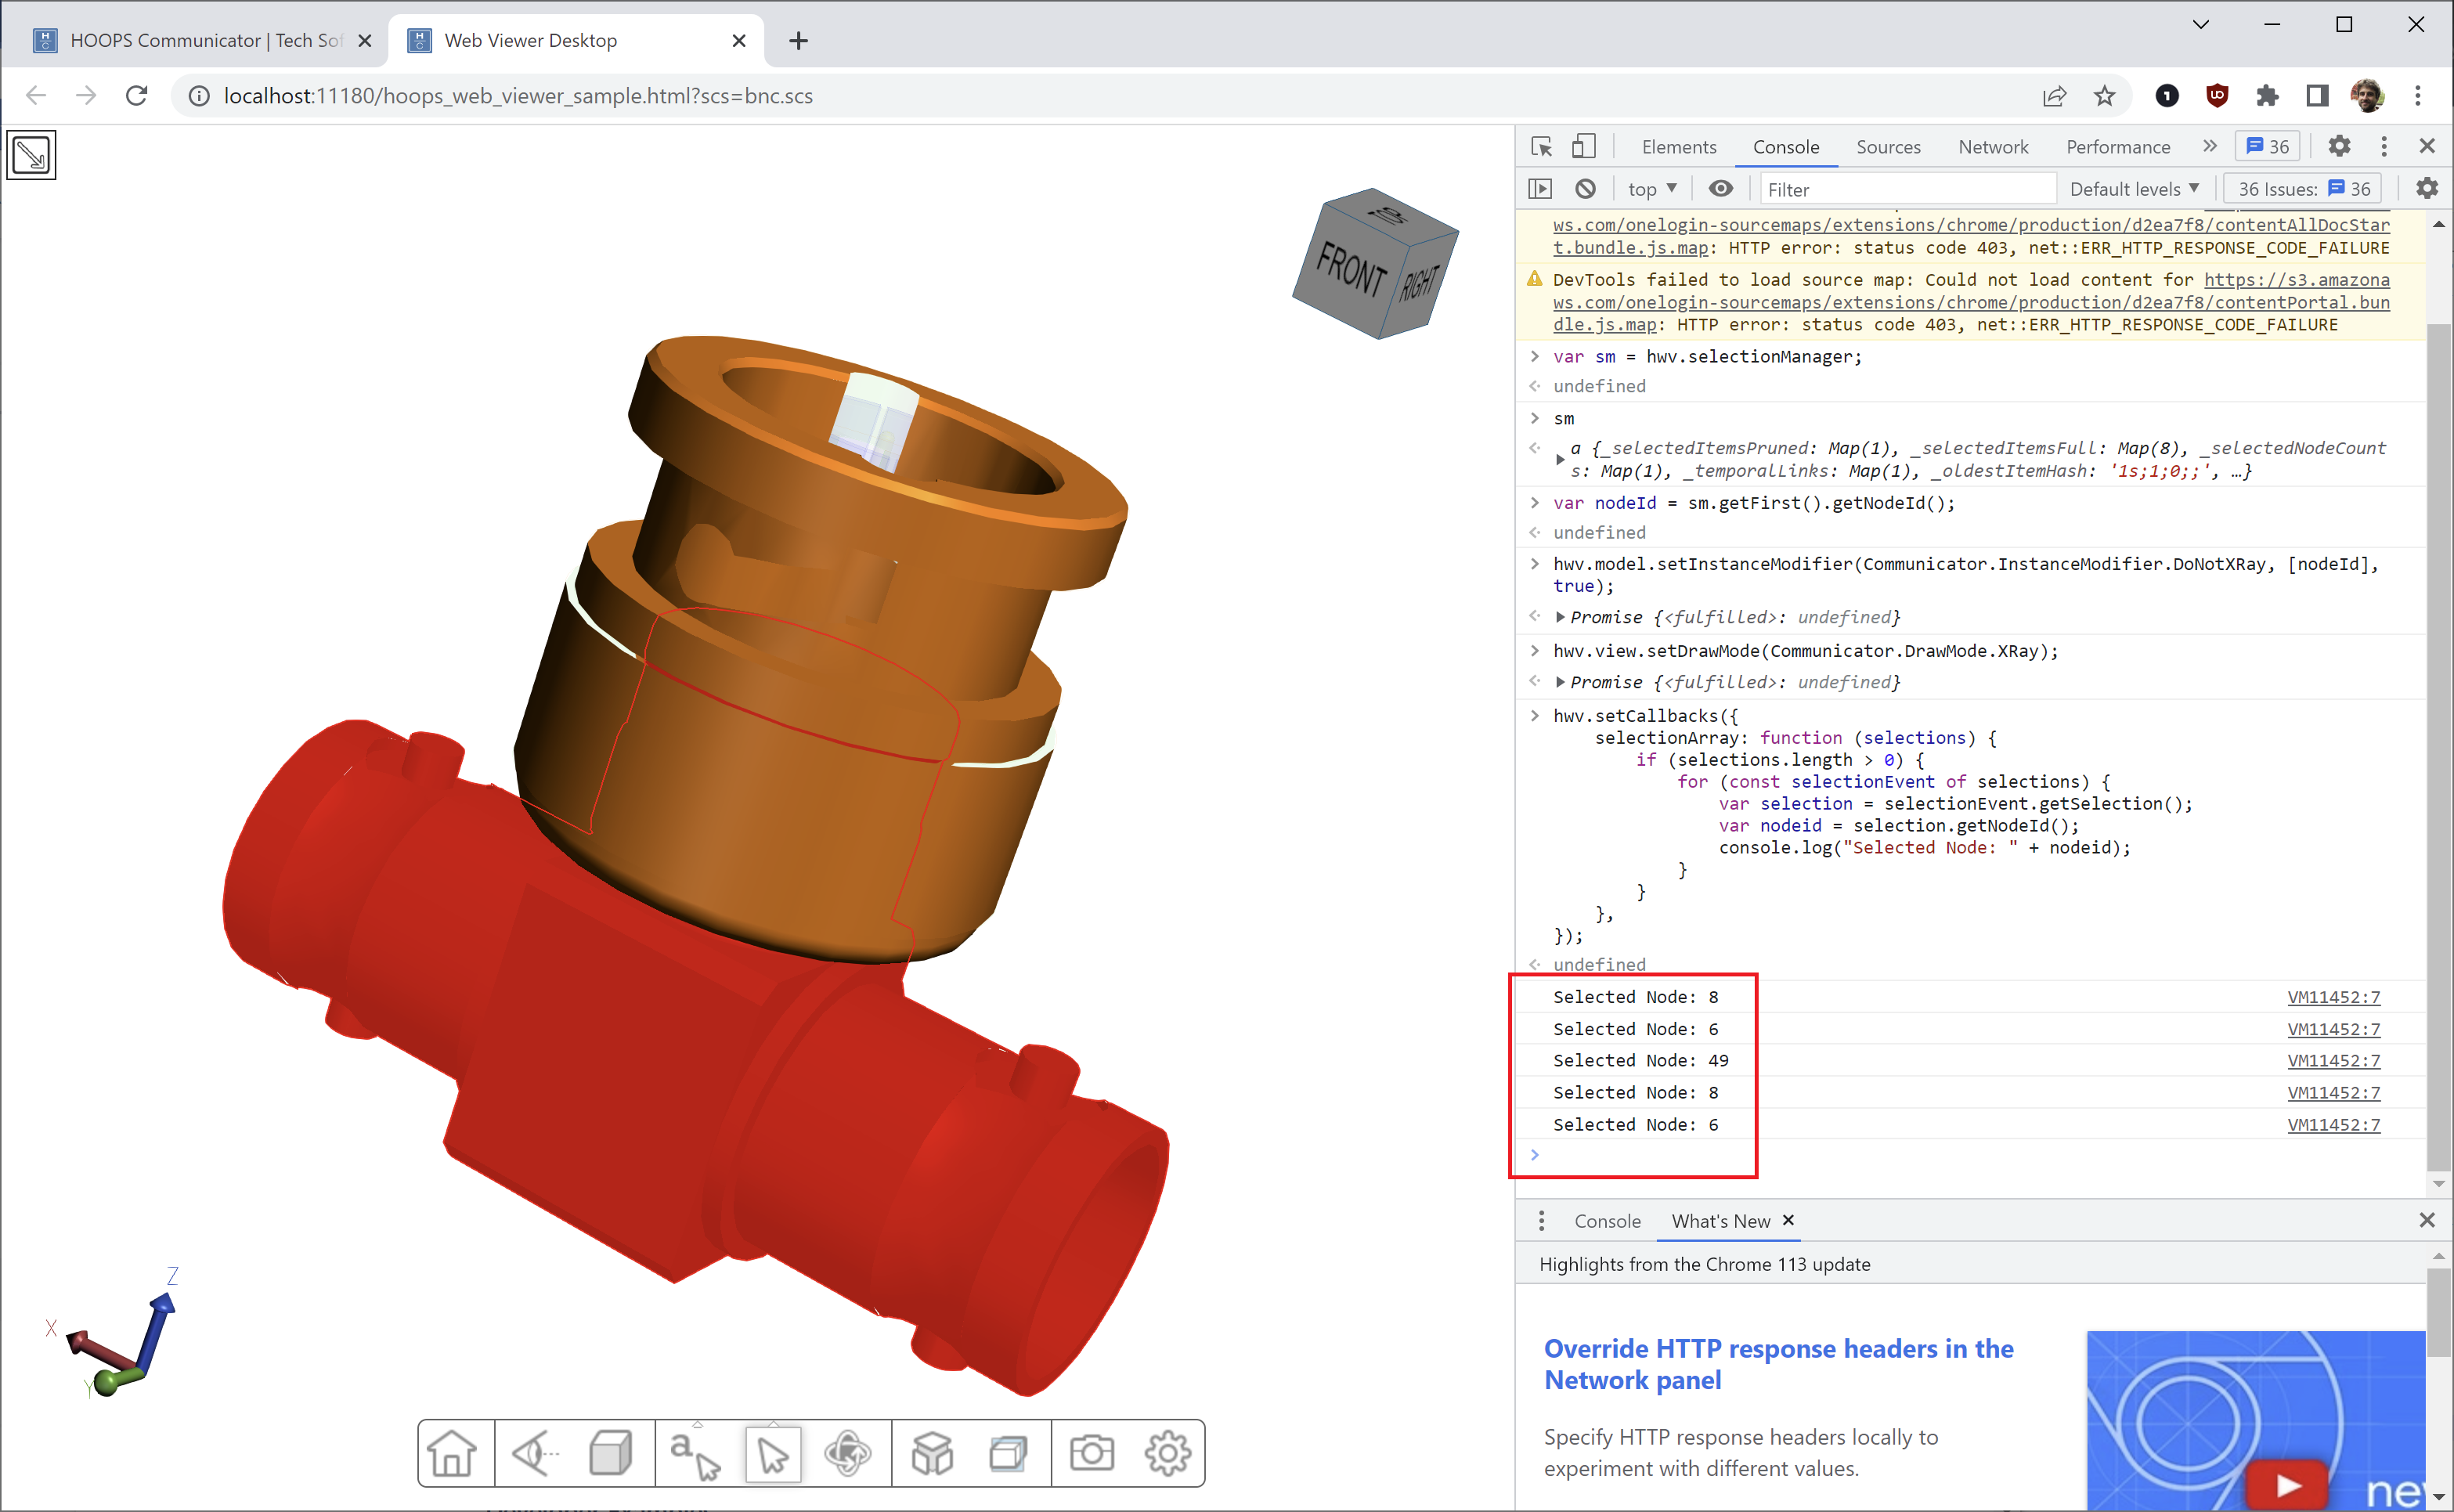
- To make the process of getting the node id of a selection a bit more dynamic and intuitive, we can use a callback:
hwv.setCallbacks({
        selectionArray: function (selections) {
                if (selections.length > 0) {
                        for (const selectionEvent of selections) {
                                var selection = selectionEvent.getSelection();
                                var nodeid = selection.getNodeId();
                                console.log("Selected Node: " + nodeid);
                        }
                }
        },
});
Copy the above snippet directly to the console then make a few selections in the Web Viewer. Notice the node ID is being displayed automatically rather then having to continuously run JavaScript commands in the console.
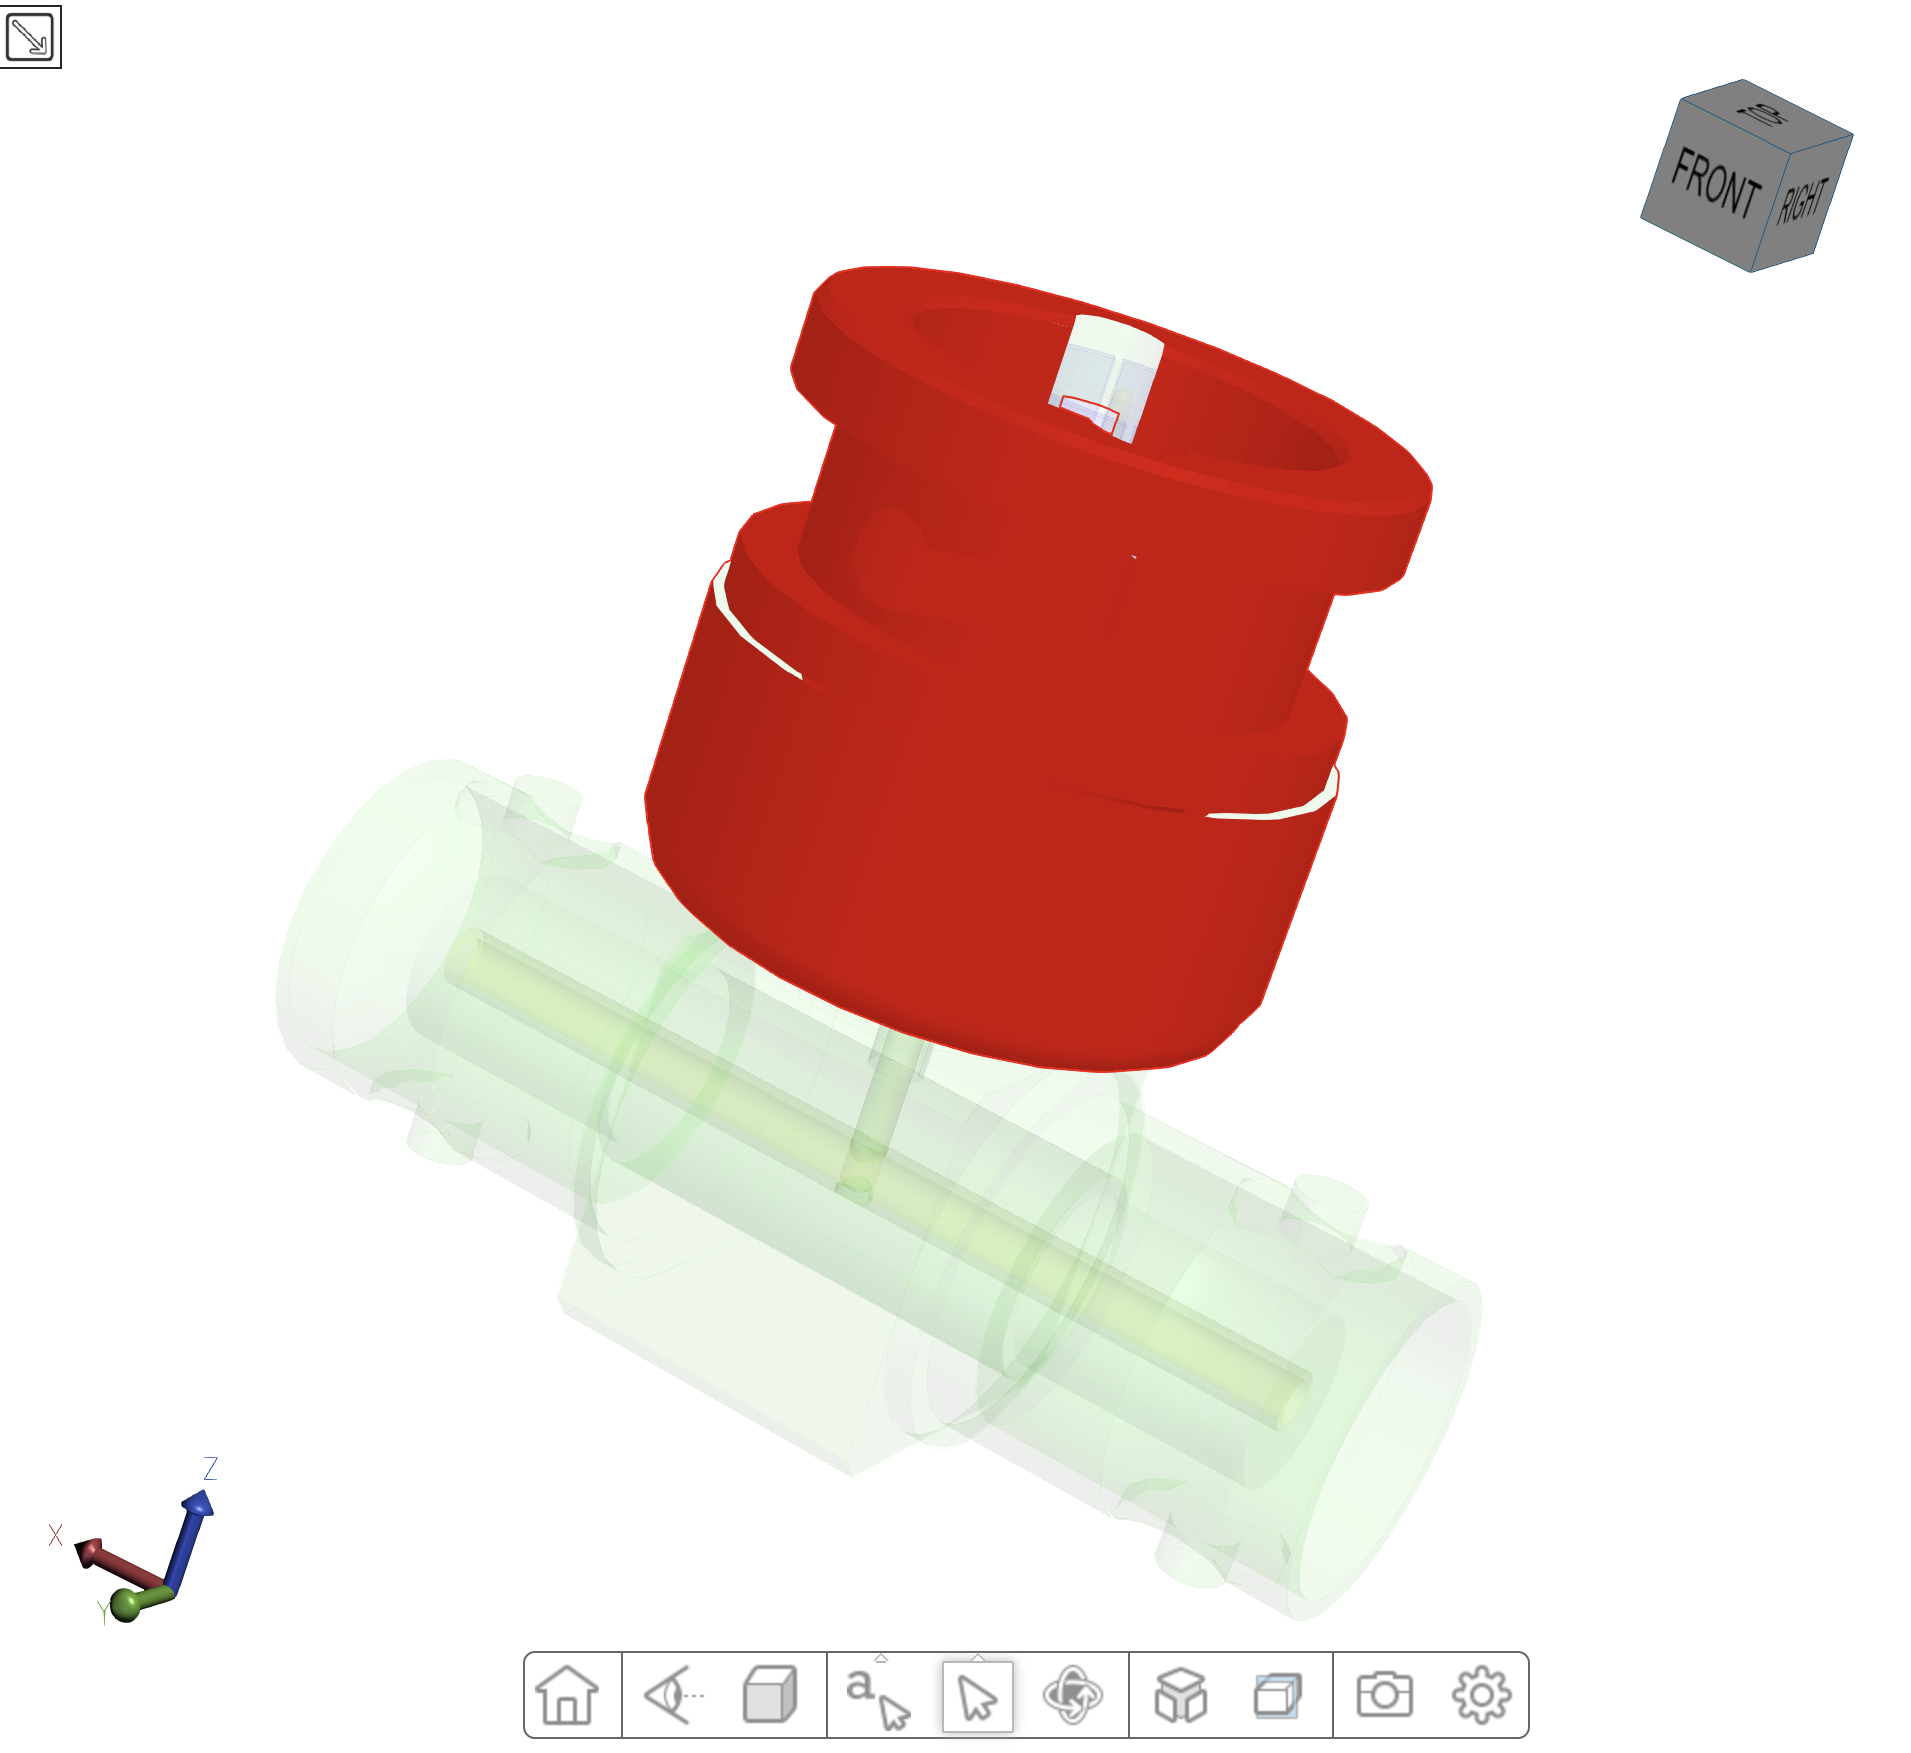
- Change the face color of the selected node to the color red using RGB values. Since we have the node ID, this can be done programmatically using the code below (be sure to substitute your node ID in the array brackets):
hwv.model.setNodesFaceColor([<your_selected_node_id>], new Communicator.Color(255, 0, 0));
After running this line, the part of the model you specified should turn red:
Getting the node ID in this way is useful for many other functions, as well.
ESM header example
When you are ready to create your own web application, you’ll need to import some of the HOOPS Visualize Web classes in order to interact with the libraries. Imagine you have your own JavaScript file called my_javascript_app.js. In that case, you would have something like this at the top of that file:
import {* as Communicator} from './hoops-web-viewer.mjs'};
which will import all HOOPS Visualize Web classes. Alternatively, you can import them individually using:
import { WebViewer } from './hoops-web-viewer.mjs';
Then in your HTML source, reference your JavaScript normally:
<script type="module" src="my_javascript_app.js"></script>
IIFE and UMD support is also included in HOOPS Visualize Web, however, ESM is recommended as it is the most modern way of importing JavaScript. For more information, see our ESM overview and our migration guide.

