
Model Loading and Aggregation
Summary
One of the advantages of using the HOOPS Web Viewer component is that it easily allows for aggregating multiple models into an existing scene. This means that instead of having to convert complex assemblies during authoring time their structure can be generated in your application on-the-fly and passed to the Web Viewer during a running viewing session. This functionality is also useful for configurator scenarios or to combine multiple federated BIM models.
In this section, we explore how to switch between different models and how to aggregate multiple models into the same scene.
Concepts
- Switching between models
- Loading multiple models
- ID mapping with multiple models
- Client-side XML loading
Add UI for Model Switching
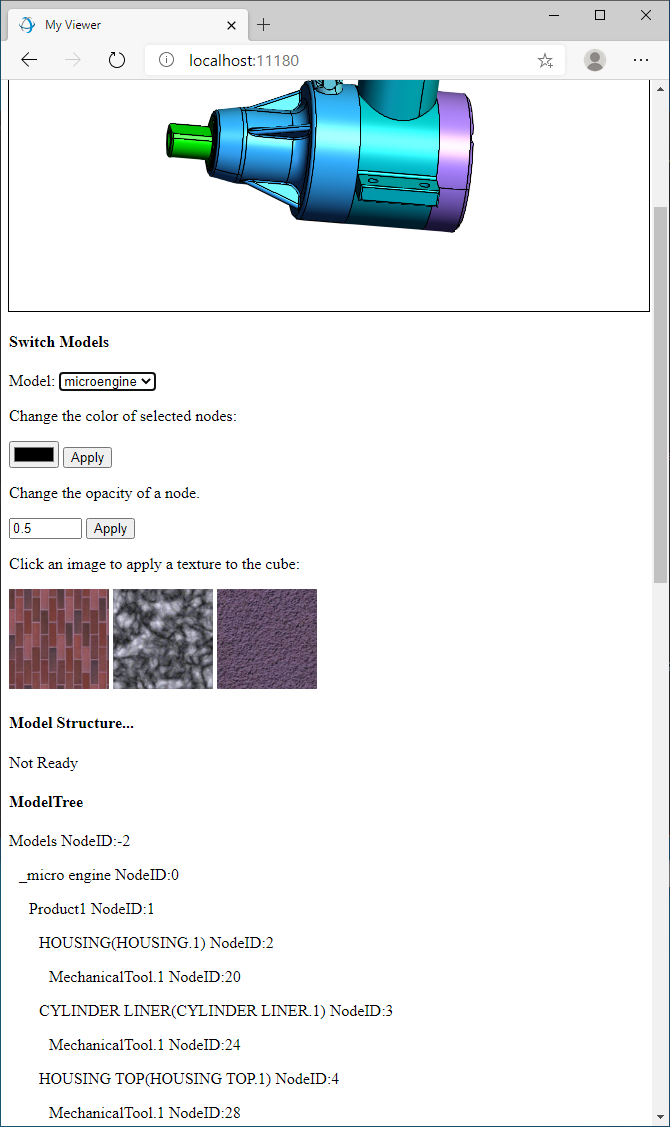
Let’s start by modifying our UI to support switching between multiple models. For that, we add a new <div> element that will hold a select box to choose between the models. For now, let’s just switch between the two SCS files we already have in our project:
<div id="SwitchModels">
        <h4 >Switch Models</h4>
        <div>
                <label for="modelname">Model: </label>
                <select id="modelname">
                        <option value="data/landinggear.scs">landinggear</option>
                        <option value="data/microengine.scs">microengine</option>
                </select>
        </div>
</div>
Handle onchange Event
In the initEvents() function from the previously created Menu.js file, we add functionality to handle the onchange event.
var modelNameSelect = document.getElementById("modelname");
modelNameSelect.onchange = (e) => {
  var model = this._hwv.model;
        model.clear().then(() => {
        var rootNode = model.getAbsoluteRootNode();
        var modelName = e.target.value;
                model.loadSubtreeFromScsFile(rootNode, modelName).then(() => {
                        modelTree.generate();
                });
        });
}
The code above retrieves the name of the model from the DOM element and switches to it with the loadSubtreeFromScsFile function which takes the node into which the model should be loaded as well as the name of the scs file to load. We also must reset the WebViewer component and clear out any existing model data first with the clear function.
The loadSubtreeFromScsFile function also returns a promise which indicates if the model has been successfully loaded. After that promise has returned we regenerate the modelTree that we created in Section 6. Interacting with the model tree.
You will notice that we have to perform the loadsubtree function within the promise of the clear. This is because only after the promise has succeeded has the clear function completed its operation. Making other calls related to the model tree before the promise has executed can lead to unexpected behavior. This principle applies to other functions as well that return promises.
Adding Option for Loading Two Models
Now let’s add two models to the scene at once. For that, we start by adding another option to the switch model Select element.
<select id="modelname">
        <option value="data/landinggear.scs">landinggear</option>
        <option value="data/microengine.scs">microengine</option>
        <option value="combined">combined</option>
</select>
Loading Two Models
In the onchange event handler we now need to add a special case to handle that option in Menu.js:
var modelNameSelect = document.getElementById("modelname");
modelNameSelect.onchange = (e) => {
        var model = this._hwv.model;
        model.clear().then(() => {
                var modelName = e.target.value;
                var rootNode = model.getAbsoluteRootNode();
                if (modelName === "combined") {
                        var nodeid1 = model.createNode(rootNode,"landinggear");
                        var nodeid2 = model.createNode(rootNode,"microengine");

                        var loads = [];
                        loads.push(model.loadSubtreeFromScsFile(nodeid1, "data/landinggear.scs"));
                        loads.push(model.loadSubtreeFromScsFile(nodeid2, "data/microengine.scs"));
                        Promise.all(loads).then(() => {
                                modelTree.generate();
                        });
                } else {
                        model.loadSubtreeFromScsFile(rootNode, modelName).then (() => {
                                modelTree.generate();
                        });
                }
        });
}
In the code above we start by creating two empty nodes as children of the root node of the model. This is the place where we will put the two models we are about to load. We could have also added both models to the root node but this approach allows us to control more precisely where the models are inserted into the tree.
After those nodes have been created when can then kick off the loading of the two models. For maximum performance, we want to load both models simultaneously but still need to know when both of them are ‘ready’ so that we can rebuild the model tree in the DOM at that time. We do that by adding those calls to an array and executing them simultaneously with Promise.All() which triggers its then function if both promises have succeeded. For more information on promises, please see the Programming Guide.
Handling Overlapping Node IDs
You might ask how node IDs are handled if multiple models are loaded into a scene with overlapping node IDs. That is an important question because node IDs in the Web Viewer component are persistent meaning they don’t change between subsequent model loads.
To make it easier to view the node IDs for all nodes, let’s add the node ID info to the model tree. We do that by modifying the function that writes a node to the DOM (the previously created generateRecursive function from ModelTree.js):
generateRecursive(nodeId, level) {
        var type = this._hwv.model.getNodeType(nodeId);
        if (type === Communicator.NodeType.Part ||
                type === Communicator.NodeType.PartInstance ||
                type === Communicator.NodeType.AssemblyNode ||
                type === Communicator.NodeType.BodyInstance) {

          var nodeName = this._hwv.model.getNodeName(nodeId);
          var leftMargin = level * 10;
          this._content += "<p id='" + nodeId + "' onclick=\"modelTree.clicked('" + nodeId +"')\" style='margin-left: " + leftMargin + "px'>" + nodeName + "  NodeID:" + nodeId + "<p\>";
        }

        var children = this._hwv.model.getNodeChildren(nodeId);
        for (var i = 0; i < children.length; i++) {
                this.generateRecursive(children[i], level + 1);
        }
}
When running the application, you will see the node ID displayed alongside the model tree nodes. As you can see, they are for the most part of a sequential nature starting from 0.
When loading the combined model you will notice that the node IDs for the microengine (the second model that has been loaded) have a very high number. This is because they are “offset” by a fixed amount. Every model that is loaded after the first model receives this offset to avoid node IDs clashing when multiple models are loaded. When you try to connect your user data or business logic with a model it can be necessary for your workflow to retrieve the original node IDs for the model before this offset has been applied. To accomplish this, you need to get the “offset” value for a given node and subtract this value from the node ID.
Let’s modify the code that displays the model tree to account for that:
var type = this._hwv.model.getNodeType(nodeId);
if (type === Communicator.NodeType.Part ||
        type === Communicator.NodeType.PartInstance ||
        type === Communicator.NodeType.AssemblyNode ||
        type === Communicator.NodeType.BodyInstance) {

        var offs = this._hwv.model.getNodeIdOffset(nodeId);
        var realNodeId = nodeId - offs;

        this._content += "<p id='" + nodeId + "' onclick=\"modelTree.selectPart('" + nodeId +"')\" style='margin-left: " + (level * 10) + "px'>" + this._hwv.model.getNodeName(nodeId) + "  NodeID:" + realNodeId + "";
        var children = this._hwv.model.getNodeChildren(nodeId);
        for (var i=0;i<children.length;i++) {
                this.generateRecursive(children[i], level+1);
        }
}
In the code above we are retrieving the offset value and subtract it from the node ID for this node to calculate the original node ID.
Generating XML Model Structure File
You have now learned how to switch between models and add multiple models to the Web Viewer programmatically. There is another method for combining models which is to provide an XML file with the relevant model structure information. This is a convenient way to build up a complex assembly and pass its model structure information, along with the associated parts to the HOOPS Web Viewer component in a single function call.
Note
A shattered assembly is an assembly in which all individual parts are represented as SC models (in our case, .scs files) associated with an XML file containing the product structure. When updating parts within this assembly, only the individual .scs files need to be regenerated, not the whole assembly.
Let’s start by generating a “shattered” assembly from a CAD model. View the shattered workflow here.
We are taking one of our assembly models from the package and converting it in shattered mode. For that, simply modify the batch file found in authoring/converter/example/sample.[bat|sh] to the following:
:: This is an evaluation license key which will expire on May 31, 2019
set CONVERTER_LICENSE_KEY="your_license_key"
IF NOT EXIST output mkdir output

:: Prepare the shattered version of a Pro/E Assembly
..\bin\<platform>\converter --input "_data\micro_engine\_micro engine.CATProduct" --prepare_shattered_scs_parts "output\microengine_shattered" --prepare_shattered_xml "output\microengine.xml" --license %CONVERTER_LICENSE_KEY%
Be sure the update the platform in the path provided. Depending on the version of HOOPS Visualize Web you have installed, you may need to remove the single quotes from the license string.
This command-line creates a shattered version of the assembly and places the resulting SCS file into the microengine_shattered directory of the data directory in the authoringconverterexampleoutput directory. It will also generate an XML file containing the product structure of the assembly, which can be used to load this shattered model into the Web Viewer.
Below is a small snippet of that XML file:
<!--HC 7.0-->
<Root>
    <ModelFile>
        <ProductOccurence Id="0" Name="_micro engine" ExchangeId="" Behaviour="1" Children="1" Unit="1.000000" IsPart="false"/>
        <ProductOccurence Id="1" Name="Product1" ExchangeId="" LayerId="65535" Style="65535" Behaviour="1" FilePath="_data\micro_engine\_micro engine.CATProduct" Children="2 3 4 5 6 7 8 9 10 11 12 13 14 15 16" IsPart="false"/>
        <ProductOccurence Id="2" Name="HOUSING(HOUSING.1)" ExchangeId="" LayerId="65535" Style="0" Behaviour="1" FilePath="_data\micro_engine\housing .CATPart" InstanceRef="17" IsPart="false">
            <Transformation RelativeTransfo="1 0 -0 0 -0 1 0 0 0 0 1 0 21.5 -0.5 -0.310000002384185791 1"/>
        </ProductOccurence>
        <ProductOccurence Id="17" Name="" ExchangeId="" Behaviour="1" IsPart="false">
            <ExternalModel Name="housing .CATPart" Unit="0.000000">
                <BoundingBox Min="-21.959007 0.155000 -71.000000" Max="21.959007 57.845001 0.309999"/>
            </ExternalModel>
        </ProductOccurence>
The content of this XML contains the complete top-level product structure information including attributes, matrices and user data. All the geometry data (including part-specific product structure information) is stored in the associated scs files which are referenced by the ExternalModel tags.
While the example-workflow converter creates this file for you from an existing CAD Assembly, in other scenarios (e.g., a PLM application that wants to display different variants of a model) it might be necessary for your application to generate the XML file on the fly from your data.
Add XML Loading Option
Let’s place this XML file into the top level folder of your application alongside the microengine_shattered directory containing the .scs files we have just created. In addition, we will add another loading case to our DOM select element for this XML file:
<select id="modelname">
        <option value="landinggear.scs">landinggear</option>
        <option value="microengine.scs">microengine</option>
        <option value="combined">combined</option>
        <option value="XML">XML</option>
</select>
Load via XML File
Next, let’s add the new code for loading the XML file to the onchange event handler in Menu.js:
var modelNameSelect = document.getElementById("modelname");
modelNameSelect.onchange = (e) => {
        var model = this._hwv.model;
        model.clear().then(() => {
                var rootNode = model.getAbsoluteRootNode();
                var modelName = e.target.value;
                if (modelName === "combined") {
                        var nodeid1 = model.createNode(rootNode, "landinggear");
                        var nodeid2 = model.createNode(rootNode, "microengine");

                        var loads = [];
                        loads.push(model.loadSubtreeFromScsFile(nodeid1, "data/landinggear.scs"));
                        loads.push(model.loadSubtreeFromScsFile(nodeid2, "data/microengine.scs"));
                        Promise.all(loads).then(() => {
                                modelTree.generate();
                        });
                } else if (modelName === "XML") {
                        model.loadSubtreeFromScsXmlFile(rootNode, "microengine.xml", (name) => { return `microengine_shattered/${name}`; }).then(() => {
                                modelTree.generate();
                        });
                } else {
                        model.loadSubtreeFromScsFile(rootNode, modelName).then(() => {
                                modelTree.generate();
                        });
                }
        });
}
Above, we are using another variant of the loadSubtree() function that pulls the XML file from the webserver and uses it to create the assembly by building up the product structure of the model on the client and loading the referenced SCS files.
The third parameter to the loadSubtreeFromScsXmlFile function is a callback that allows us to modify or extend the model name before it gets passed to the loader. We use it here to point the loading code to the appropriate directory where the SCS files are stored relative to the root directory. This path information is not included in the XML file generated by Converter.

