Animation
Quickstart UI example
The Quickstart server contains an Animation example at: http://localhost:11180/animation.html?viewer=csr.
The example provides a sandbox environment with a basic user-interface applying the concepts learned in this article. We encourage you to review the corresponding code found in web_viewer/examples/animation/js/animation/ of the HOOPS Visualize Web package.
Overview
Beginning with HOOPS Communicator’s 2021 SP1 version, HOOPS Visualize Web has the ability to perform simple animations. These animations can be used to demonstrate how assemblies fit together, better show complex parts within a single view, demonstrate how an object changes over time, and more.
Note
As the developer, you have a certain amount control over the complexity and structure of your own scenes, and HOOPS Visualize Web will render frames as fast as the hardware is able. However, please note that while HOOPS Visualize Web can perform simple animations reasonably well, it is first and foremost an engineering visualization engine. High performance, computationally intensive animation involving a large amount of geometry and post-processing is theoretically possible, but is not the goal of the animation API. It follows that such performance should not necessarily be expected. If you require such capability, please contact support to determine the best options for your project.
We have designed the API with the glTF format <https://www.khronos.org/gltf/> in mind. HOOPS Visualize Web has a few different properties that can be animated, including scale, rotation, movement, and attributes. Programmatically speaking, animations are composed of a number of objects which describe how the animation changes over time. From lowest level to highest, these objects are arranged as follows:
Keyframes > KeyframeBuffer > Sampler > Animation > Manager > Player
- Keyframe: Like in traditional animation, a keyframe defines start and end points of an animation, or portions of an animation. In HOOPS Visualize Web, there are a number of different keyframe types, depending on what kind of animation you’re creating. See KeyType for more details.
- KeyframeBuffer: A collection of keyframes the sampler will use to create the animation.
- Sampler: Samples an animation based on keyframes in order to interpolate geometry between its start and end position.
- Animation: Uses one or more animation channels which describe what kind of animation will be occurring in the scene. An animation can have a CameraChannel or NodeChannel.
- Manager: Used to create and manage a Player.
- Player: Plays a specific animation based on a Manager.
In the next section, we’ll look at how these parts fit together. You can find the full source code in our HOOPS Visualize Web Quickstart Samples repository.
Translation animation
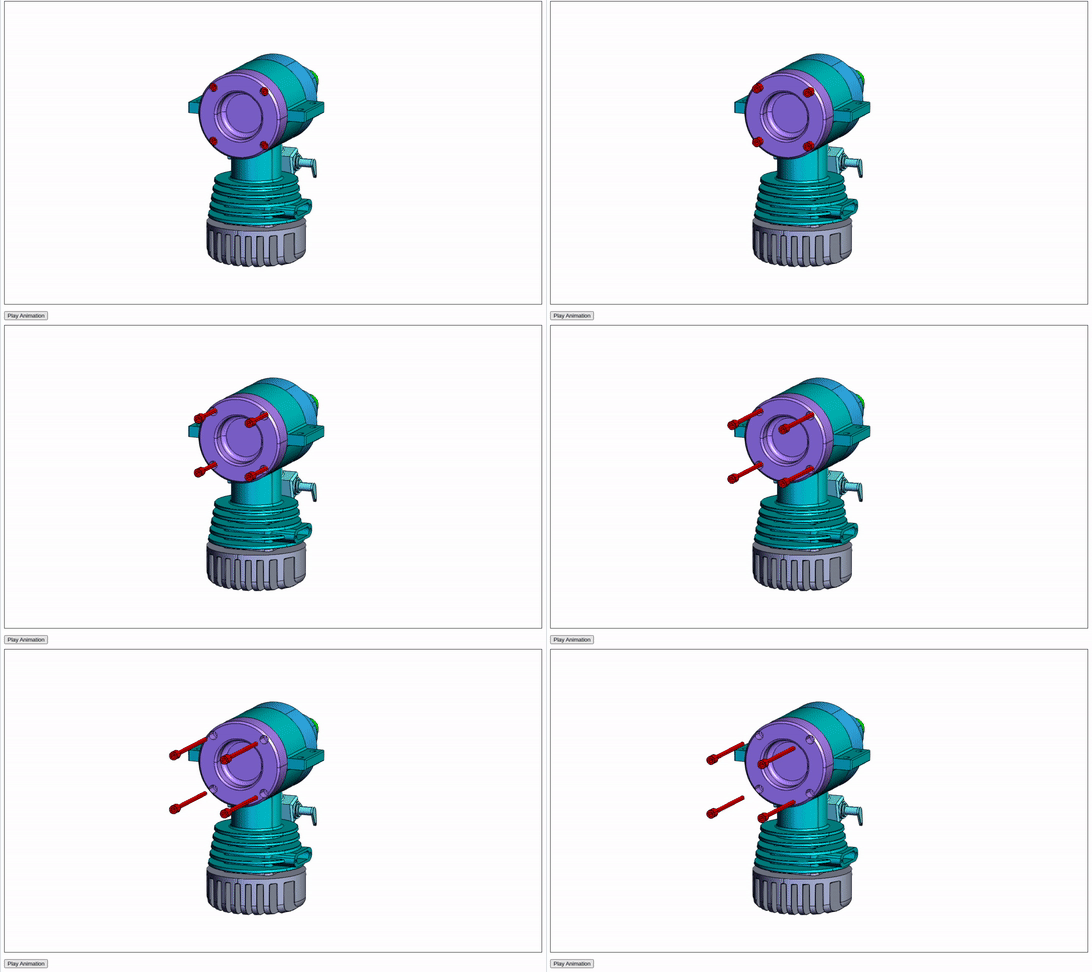
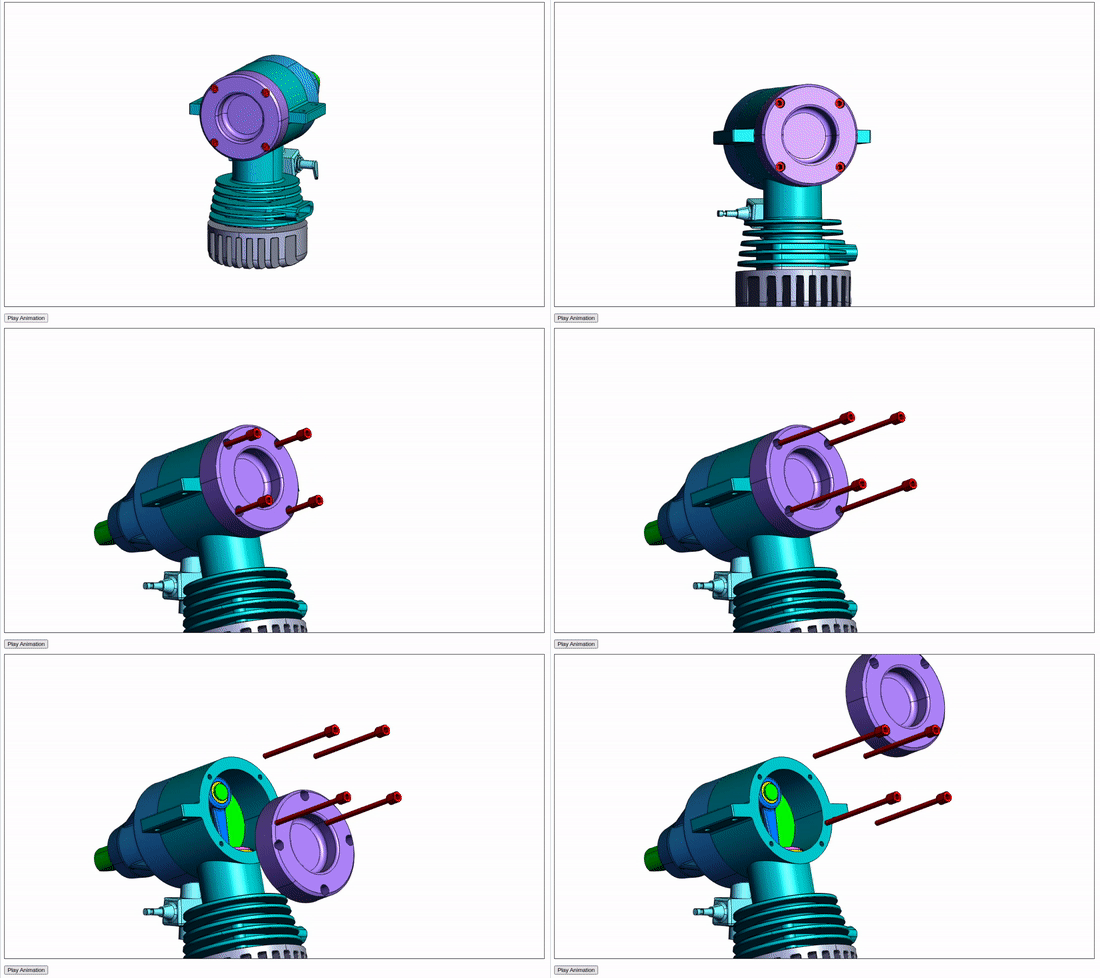
Let’s take a look at a code example that will animate several nodes along the X axis using the microengine model. At this point, our goal is to remove four red screws from the engine.
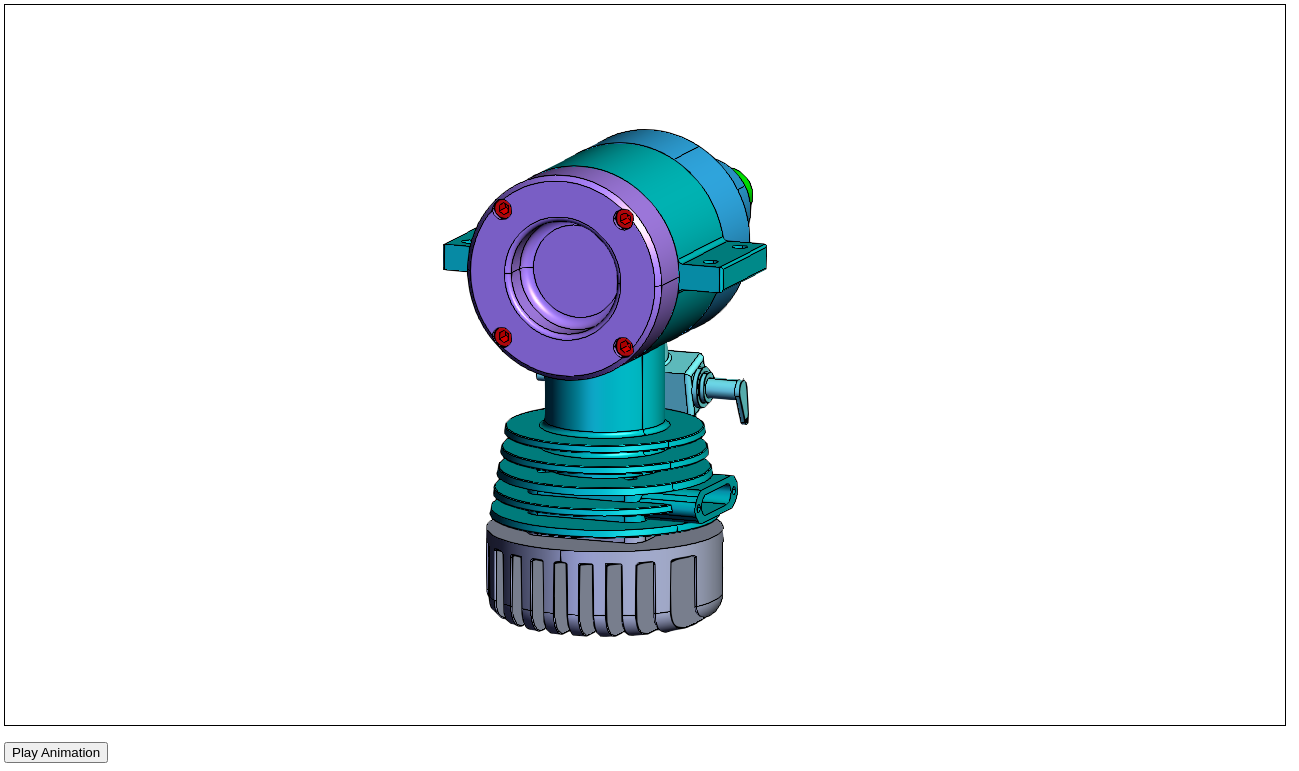
To start, let’s create an Animation and corresponding Player.
// Create the Animation object with a friendly name
let animation = new Communicator.Animation.Animation("my_sample_animation");

// Create the player
let player = viewer.animationManager.createPlayer(animation);
We need five different data points to create the animation, and will provide them to a function that contains all of our translation animation logic:
- The ID of the node(s) we are animating
- Start time of the animation
- Duration of the animation
- Translation vector
- Translation distance
var nodes = [75, 77, 79, 81]; // 75 = topLeft, 77 = topRight, 79 = bottomLeft, 81 = bottomRight
var startTime = 1;
var duration = 2;
var translationVector = new Communicator.Point3(-1, 0, 0);
var translationDistance = 30;

addTranslationAnimation(nodes, startTime, duration, translationVector, translationDistance);
We will animate nodeIDs 75, 77, 79, 81, the animation will start on the 1st second of the animation, and will have a duration of 2 seconds. We will leave the timeframe 0 to 1 for the camera animation.
This function will contain all the logic to set up an animation for a given set of nodes.
function addTranslationAnimation(nodes, startTime, duration, translationVector, translationDistance) {
        for (const nodeId of nodes) {
                // ...
        }
}
For each node, we will do the following:
- Create a NodeChannel
- Set a start keyframe for the node’s initial position
- Convert the translation vector in the local coordinate
- Set a keyframe for the node’s end position
1. Create a NodeChannel
We will define a function that will create a NodeChannel with the appropriate settings for a linear translation.
function createTranslationChannel(nodeId, startTime) {
        // Create a node channel
        const channelName = `Translate-{nodeId}`;
        const buffer = new Communicator.Animation.KeyframeBuffer(Communicator.Animation.KeyType.Vec3);
        const sampler = new Communicator.Animation.Sampler(buffer, Communicator.Animation.InterpolationType.Linear);
        const channel = animationManager.createNodeChannel(channelName, nodeId, Communicator.Animation.NodeProperty.Translation, sampler);
}
Let’s unpack this workflow.
Create a new KeyframeBuffer. We define the KeyType of the animation to be Vec3.
Create a Sampler. We chose Linear for the InterpolationType and pass the newly created KeyframeBuffer.
Create a NodeChannel. The last step is to put it all together. Pass createNodeChannel() a friendly name for the channel being created, the nodeID of the node that will be animated, the NodeProperty we are animating, and the Sampler created earlier.
Note the unique name we give to the channel we are creating. The example user-interface provided with the Quickstart server creates a list of animation details new channels are created and uses a similar naming convention to easily identify the node and type of animation.
2. Set the initial keyframe
Keyframes are maintained in an buffer array so we can insert or append our keyframe. For this example, we will use insertVec3Keyframe(). Note the append function matches the KeyType used when we created the KeyframeBuffer in the previous step.
function createTranslationChannel(nodeId, startTime) {
        // Create a node channel
        const channelName = `Translate-${nodeId}`;
        const buffer = new Communicator.Animation.KeyframeBuffer(Communicator.Animation.KeyType.Vec3);
        const sampler = new Communicator.Animation.Sampler(buffer, Communicator.Animation.InterpolationType.Linear);
        const channel = viewer.animationManager.createNodeChannel(channelName, nodeId, Communicator.Animation.NodeProperty.Translation, sampler);

        // Get initial node matrix
        const nodeMatrix = this._viewer.model.getNodeMatrix(nodeId);

        // Create the start keyframe
        channel.sampler.buffer.insertVec3Keyframe(startTime, nodeMatrix.m[12], nodeMatrix.m[13], nodeMatrix.m[14]);

        return channel;
}
We can now call our function to create the NodeChannel for our translation animation.
function addTranslationAnimation(nodes, startTime, duration, translationVector, translationDistance) {
        for (const nodeId of nodes) {
                // Create a node channel
                const translationChannel = createTranslationChannel(nodeId, startTime);
        }
}
The Animation API is designed for only one channel and property type per node. That is, now that we have created a NodeChannel with NodeProperty.Translation for these nodes we do not want to create another NodeChannel with NodeProperty.Translation for these nodes. Rather, just add additional keyframes to the channel already created.
Earlier we selected body nodes rather than part nodes when calling the addTranslationAnimation() function. If you are using the ID from a part node you will need to set the rotation channel for the node at this step as well. See the Rotation animation example for implementation details.
3. Convert the translation vector in the local coordinate
We must consider the node’s local coordinate when we create the translation matrix. We have provided a helper function to make things easier. This is necessary for any part that has already undergone a translation/rotation or if a parent has.
function addTranslationAnimation(nodes, startTime, duration, translationVector, translationDistance) {
        for (const nodeId of nodes) {
                // Create a node channel for translation
                const translationChannel = createTranslationChannel(nodeId, startTime);

                // Create a node channel for rotation
                const rotationChannel = createRotationChannel(nodeId, startTime);

                // helper function
                function _convertLocalVector(nodeId, vector) {
                        // Compute inverse matrix of the parent node
                        const parentNode = this._viewer.model.getNodeParent(nodeId);
                        const netMatrix = this._viewer.model.getNodeNetMatrix(parentNode);
                        const inverseMatrix = new Communicator.Matrix.inverse(netMatrix);

                        // Convert vector of the parent node
                        const localOrg = Communicator.Point3.zero();
                        inverseMatrix.transform(Communicator.Point3.zero(), localOrg);

                        const localVector = Communicator.Point3.zero();
                        inverseMatrix.transform(vector, localVector);

                        localVector.subtract(localOrg);

                        // Return the local vector
                        return localVector;
                }

                // Convert the translation vector in the local coordinate
                const localVector = _convertLocalVector(nodeId, translationVector);
                localVector.scale(translationDistance);
        }
}
4. Set keyframe for the node’s end position
Last, we calculate and set the ending keyframe given the node’s initial matrix and local vector:
function addTranslationAnimation(nodes, startTime, duration, translationVector, translationDistance) {
        for (const nodeId of nodes) {
                // Create a node channel for translation
                const translationChannel = createTranslationChannel(nodeId, startTime);

                // Create a node channel for rotation
                const rotationChannel = createRotationChannel(nodeId, startTime);

                // helper function
                function _convertLocalVector(nodeId, vector) {
                        // Compute inverse matrix of the parent node
                        const parentNode = this._viewer.model.getNodeParent(nodeId);
                        const netMatrix = this._viewer.model.getNodeNetMatrix(parentNode);
                        const inverseMatrix = new Communicator.Matrix.inverse(netMatrix);

                        // Convert vector of the parent node
                        const localOrg = Communicator.Point3.zero();
                        inverseMatrix.transform(Communicator.Point3.zero(), localOrg);

                        const localVector = Communicator.Point3.zero();
                        inverseMatrix.transform(vector, localVector);

                        localVector.subtract(localOrg);

                        // Return the local vector
                        return localVector;
                }

                // Convert the translation vector in the local coordinate
                const localVector = _convertLocalVector(nodeId, translationVector);
                localVector.scale(translationDistance);

                // Update node matrix and set to buffer
                const translationMatrix = new Communicator.Matrix();
                translationMatrix.setTranslationComponent(localVector.x, localVector.y, localVector.z);
                const matrix = Communicator.Matrix.multiply(nodeMatrix, translationMatrix);

                // Create the end keyframe
                channel.sampler.buffer.insertVec3Keyframe(startTime + duration, matrix.m[12], matrix.m[13], matrix.m[14]);
        }
}
The only step left is to play the animation using the Player created earlier! We will reload the the Player to ensure it starts at the beginning of the animation.
player.reload();
player.play();
The result:
Rendering speed HOOPS Visualize Web will do its best to keep your animation running according to your specification. However, updates scheduled by the animation API are not interrupted if they cannot be completed before the next frame is scheduled. Therefore, if the hardware is unable to keep up with the rendering demands of the scene, frames will be skipped. For example, let’s say you set a “milliseconds-per-tick” value of 1000 with ten keyframes which occur at ticks 1-10 (keyframe value changes occur every second), but the hardware needs two seconds to complete each update. In this case, you would see the animation render every other tick.
Player methods The animation player object can be paused, stopped, resumed, and waited. Consult the API Reference Manual for more information about Player and Player states.
Camera animation
The goal of this example is to animate the camera into a better viewing position of the microengine model before the screws are removed. We need three different data points to animate the camera:
- End camera position
- Start time
- Duration
Earlier, we started animating the screws after the animation played for one second. This time, we will start and end the camera animation before the animation for the screws starts.
 // Load camera infromation from JSON with end position
const camaraJson = JSON.parse('{"position":{"x":-40.79396992044921,"y":82.7693393081149,"z":13.664941852404809},"target":{"x":16.655386566906614,"y":6.510726189166171,"z":-41.14015999906124},"up":{"x":0.3404564032582882,"y":-0.36597162248928816,"z":0.8661144318235252},"width":110.08816117336428,"height":110.08816117336428,"projection":0,"nearLimit":0.01,"className":"Communicator.Camera"}');
const camera = Communicator.Camera.fromJson(camaraJson);

// Animate the current camera to the new camera provided
const starTime = 0;
const duration = 1;

addCameraAnimation(camera, starTime, duration);
Next, let’s build all the logic to set up the camera animation.
function addCameraAnimation(camera, startTime, duration) {
        // Returns an array camera channels for each camera property
        const channels = Communicator.Animation.Util.createCameraChannels(animation, "Camera", Communicator.Animation.InterpolationType.Linear);

        // Get current camera from current view
        var currentCamera = this._viewer.view.getCamera();

        // Add initial camera keyframes using a convenience method that will update keyframe buffers for animation channels created with "createCameraChannels()" from above
        Communicator.Animation.Util.keyframeCamera(startTime, currentCamera, animation);

        // Add end camera at startTime+duration
        if (0 < duration) {
                Communicator.Animation.Util.keyframeCamera(startTime + duration, camera, animation);
        }

        this._currentCamera = camera;
}
The result:
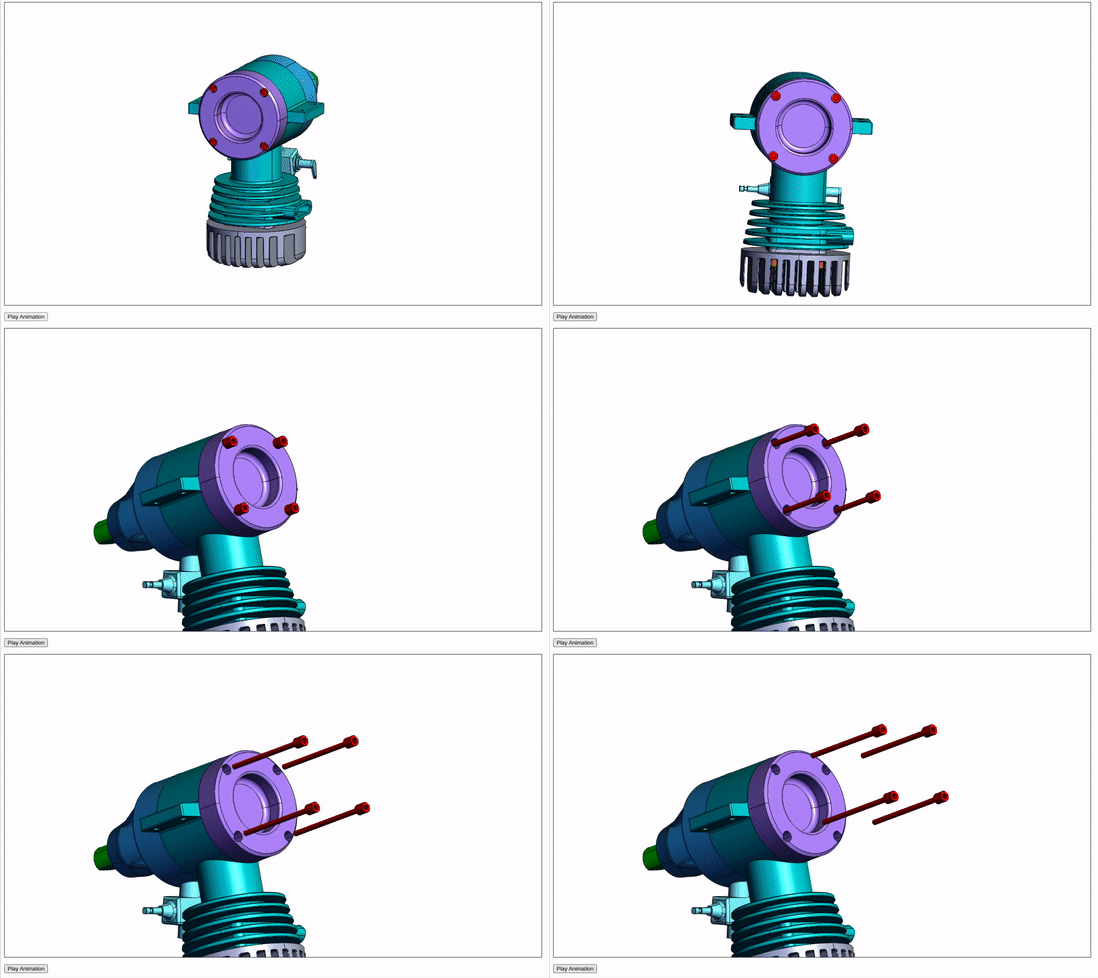
The utility function createCameraChannels() will create a CameraChannel for each of the camera properties that can be animated. Likewise, we use the utility function keyframeCamera() to create a keyframe for each property at the same time.
Rotation animation
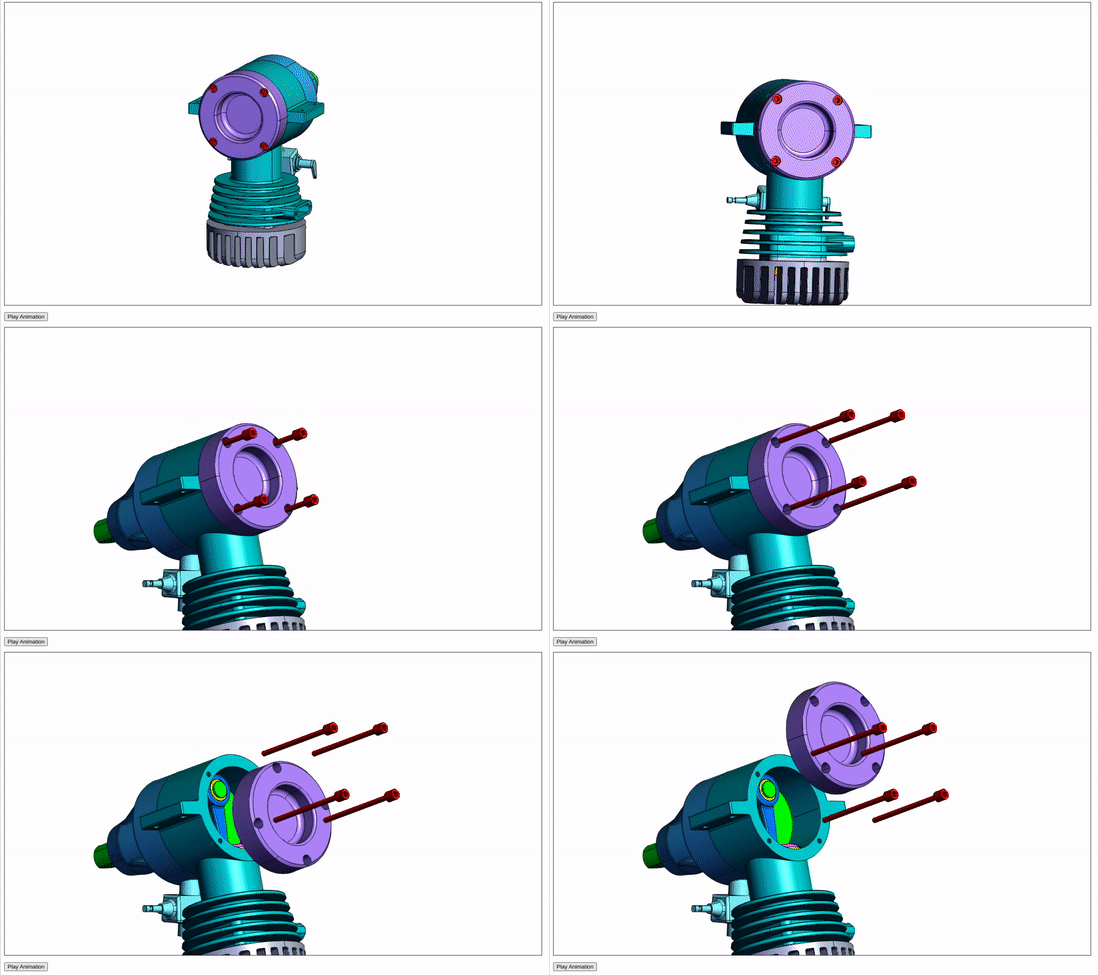
This example will rotate a node of the microengine model.
By default, a node will use its center as the pivot point but in this example we will set a custom pivot point. For this animation we need six different data points:
- The ID of the node(s) we are rotating
- Start time of the animation
- Duration of the animation
- Rotation axis
- Rotation center
- Rotation angle
This animation will begin after the camera and screws have finished their animation.
const nodes = [6];
const startTime = 3;
const duration = 1;

// Rotation parameters in the world coordinate
const rotationAxis = new Communicator.Point3(1, 0, 0);
const rotationCenter = new Communicator.Point3(5, 16, -7.5);
const rotationAngle = -180;

addRotationAnimation(nodes, startTime, duration, rotationAxis, rotationCenter, rotationAngle)
For each node, we will do the following:
- Create a NodeChannel
- Set a start keyframe for the node’s initial position
- Convert the rotation parameters in the local coordinate
- Set a pivot point
- Set the quaternion axis angle
- Set a keyframe for the node’s end position
These steps should be familiar if you have reviewed the node animation example above. For this example, we will present all the code at once and review each step at the end. Our goal is to rotate the purple backing with the top-right screw position as the pivot point.
function createRotationChannel(nodeId, startTime) {
        // Create a node channel
        const channelName = `Rotate-${nodeId}`;
        const buffer = new Communicator.Animation.KeyframeBuffer(Communicator.Animation.KeyType.Quat);
        const sampler = new Communicator.Animation.Sampler(buffer, Communicator.Animation.InterpolationType.Linear);
        const channel = animation.createNodeChannel(channelName, nodeId, Communicator.Animation.NodeProperty.Rotation, sampler);

        // Get initial node matrix
        const nodeMatrix = this._viewer.model.getNodeMatrix(nodeId);

        // Set initial keyframe
        const rotation = Communicator.Quaternion.createFromMatrix(nodeMatrix);
        channel.sampler.buffer.appendQuatKeyframe(startTime, rotation.x, rotation.y, rotation.z, rotation.w);

        return channel;
}

function addRotationAnimation(nodes, startTime, duration, rotationAxsis, rotationCenter, rotationAngle) {
        for (const nodeId of nodes) {
                // Create a node channel for rotation
                const rotationChannel = createRotationChannel(nodeId, startTime);

                // Create a node channel for translation
                const translationChannel = createTranslationChannel(nodeId, startTime);

                // helper function, consider a node's local coordinate for rotation
                _convertLocalRotation(nodeId, beforeMatrix, rotationAxsis, rotationCenter, rotationAngle) {
                        // Compute inverse matrix of the parent node
                        const parentNode = this._viewer.model.getNodeParent(nodeId);
                        const netMatrix = this._viewer.model.getNodeNetMatrix(parentNode);
                        const inverseMatrix = new Communicator.Matrix.inverse(netMatrix);

                        // Conpute rotatation vector in the parent node
                        const localAxis0 = Communicator.Point3.zero();
                        inverseMatrix.transform(Communicator.Point3.zero(), localAxis0);

                        const localAxis = Communicator.Point3.zero();
                        inverseMatrix.transform(rotationAxsis, localAxis);

                        localAxis.subtract(localAxis0);

                        // Create local rotation matrix
                        const rotationMatrix = Communicator.Matrix.createFromOffAxisRotation(localAxis, rotationAngle);

                        // Node matrix * rotation matrix
                        const multiplyMatrix = Communicator.Matrix.multiply(beforeMatrix, rotationMatrix);

                        // Compute local center point
                        const localCenter = Communicator.Point3.zero();
                        inverseMatrix.transform(rotationCenter, localCenter);

                        // Compute local center point after rotation
                        const rotatePoint = Communicator.Point3.zero();
                        rotationMatrix.transform(localCenter, rotatePoint);

                        // Create translation matrix to shift the node arond rotation center after rotation
                        const translationMatrix = new Communicator.Matrix();
                        translationMatrix.setTranslationComponent(localCenter.x - rotatePoint.x, localCenter.y - rotatePoint.y, localCenter.z - rotatePoint.z);

                        // Compute the node matrix of after rotation (multiplyMatrix * translationMatrix)
                        const afterMatrix = Communicator.Matrix.multiply(multiplyMatrix, translationMatrix);

                        return {
                                localAxsis: localAxis,
                                localCenter: localCenter
                        };
                }

                // Convert the rotation parameters in the local coordinate
                const localRotation = _convertLocalRotation(nodeId, nodeMatrix[nodeId], rotationAxsis, rotationCenter, rotationAngle);

                // Set rotation center point as pivotPoints
                animation.pivotPoints.set(nodeId, localRotation.localCenter);

                // Rotate the node counter-clockwise a half-turn
                function _setQuatAxisAngle(out, axis, rad) {
                                rad = rad * 0.5;
                                let s = Math.sin(rad);
                                out.x = s * axis.x;
                                out.y = s * axis.y;
                                out.z = s * axis.z;
                                out.w = Math.cos(rad);

                                return out;
                }

                // Set the quaternion axis angle
                const q = Communicator.Quaternion.identity();
                _setQuatAxisAngle(q, localRotation.localAxsis, Math.PI * rotationAngle / 180);

                // Set the end keyframe
                channel.sampler.buffer.appendQuatKeyframe(startTime + duration,  q.x, q.y, q.z, q.w);
        }
}
1. Create a NodeChannel
Notice the KeyType.Quat for the KeyframeBuffer.
2. Set the initial rotation keyframe
Using the node’s initial matrix, we set the initial keyframe of the rotation animation with the help of Communicator.Quaternion.createFromMatrix().
3. Convert the rotation parameters in the local coordinate
We will use another helper function to consider the local coordinates of the rotating node. The function will get the local axis and center for us.
4. Set a pivot point
Now that we have the local center we would like to rotate the node about we can set the pivot point.
5. Set quaternion axis angle
We set the quaternion axis angle with the local axis provided by our helper function.
6. Set keyframe for the node’s end position
Last, we set the ending keyframe.
The following animation does not set a custom pivot point, rather it uses the default center of the rotating node.
Export/Import
Two functions are provided with the Animation class that allow you to export and import your animations. You can provide exportAnimations() an array of Animation objects and it will return a JSON object that can be serialized with JSON.stringify().
You can provide importAnimations() the JSON object created from exportAnimations() to recreate the Animation objects. And don’t forget to use JSON.parse() if you serialized the exported JSON object.

