Interacting with the Model Tree
Summary
Every model loaded into the Web Viewer component has a product structure that contains a tree-like hierarchy of nodes as well as node properties and drawing attributes.
In this section, we’ll explore how to parse the model tree and how to support bidirectional highlighting. We also learn how to switch between CAD Views.
Concepts
- Model Structure Concepts
- How to Parse the Model Tree
- Selection Callbacks
- Bidirectional Selection
- Parsing CAD Views
Creating the Model Tree Class
Once again, we start with an empty JS file which will contain our model tree class and is responsible for displaying the model tree. In the constructor, we will pass the id of the <div> element that we want to use for displaying the model tree. We also reserve a variable for the actual HTML content which we will be generating when parsing the tree.
class ModelTree {
        constructor(hwv, startdiv) {
                this._hwv = hwv;
                this._startelement = document.getElementById(startdiv);
                this._content = "";

                window.modelTree = this;
        }
}
Add the new JS file to your application. In the code below the new JS file was named ModelTree.js:
<script type="module">
    import * as Communicator from "/js/hoops/hoops-web-viewer.mjs";
    import { Menu } from "/js/Menu.js";
    import { SelectOperator } from "/js/SelectOperator.js";
    import { MeasureOperator } from "/js/MeasureOperator.js";
    import { ModelTree } from "/js/ModelTree.js";
    ...
</script>
Function to Generate Model Tree in the DOM
Let’s add a function that generates the model tree called generate. Simply add it to the new ModelTree class.
generate() {
        this._content = "";
        var rootid = this._hwv.model.getAbsoluteRootNode();
        this.generateRecursive(rootid, 0);
        this._startelement.innerHTML = this._content;
}
This function will then kick off the recursive process of going through all the model tree nodes and writing them to the DOM:
generateRecursive(nodeId, level) {
        var type = this._hwv.model.getNodeType(nodeId);
        if (type === Communicator.NodeType.Part ||
                type === Communicator.NodeType.PartInstance ||
                type === Communicator.NodeType.AssemblyNode ||
                type === Communicator.NodeType.BodyInstance) {

                this._content += `<p style="margin-left: ${(level * 10)}px">${this._hwv.model.getNodeName(nodeId)}`;
                var children = this._hwv.model.getNodeChildren(nodeId);

                for (var i = 0; i < children.length; i++) {
                        this.generateRecursive(children[i], level + 1);
                }
        }
}
Every node in the Web Viewer component is identified by a NodeId, which is a unique identifier that is created during conversion/authoring and will not change between subsequent loads.
The top-level node can be queried via the getAbsoluteRootNode function. From there, all children of a node can be iterated over recursively via getNodeChildren down to the leaf nodes of the tree.
Aside from messages, no part of the HOOPS Visualize Web model tree is ever instanced - each node in the tree only has one parent.
In this example, we first determine the type of a node to see if it is relevant for the model tree, then get its name to add it to the node list in the DOM. From there, we query its children and process each one until the leaf nodes of the tree are reached and there are no further children. Please see the Programming Guide for more information on the different Node Types.
Generating the Model Tree
To generate the model tree, we first initialize the variable during startup in the main file of the application right before the HOOPS Web Viewer gets started:
let menu = new Menu(hwv);
modelTree = new ModelTree(hwv, "modeltree");
hwv.start();
Then, in the modelStructureReady callback, we can generate the model tree:
modelStructureReady: () => {
        document.getElementById('ModelStructureReady').innerHTML = 'Model Structure Ready';
        modelTree.generate();
},
Add the following code to the body of your HTML page. Ensure the id matches the one used in the ModelTree constructor.
<div>
        <h4>ModelTree</h4>
        <div id="modeltree"></div>
</div>
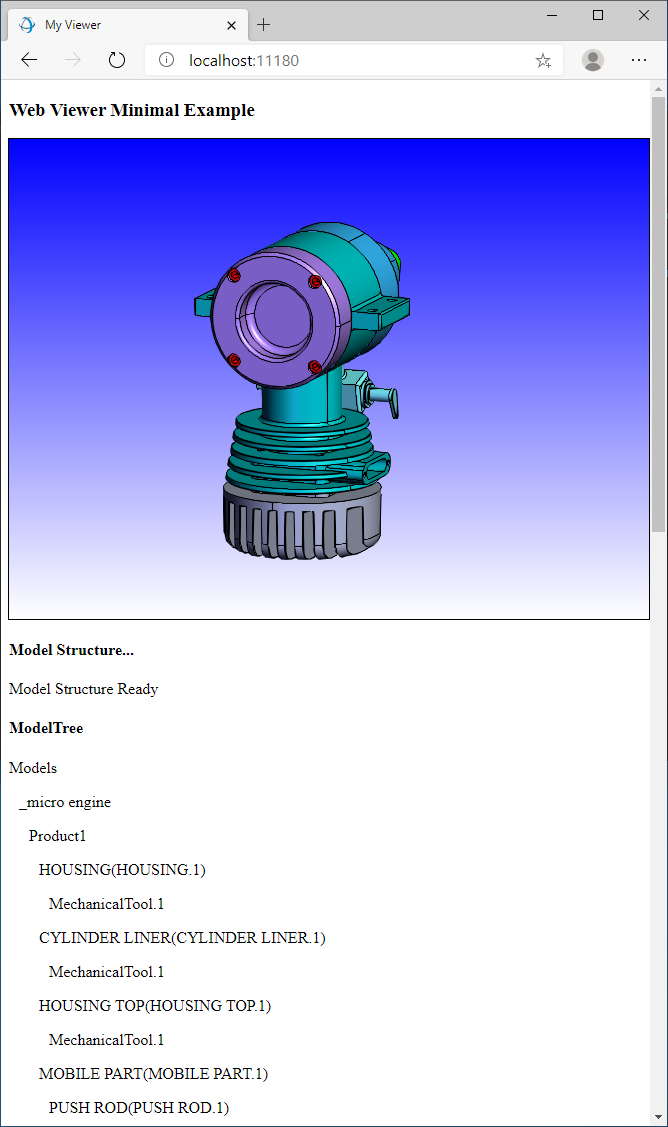
If you run the application the result should now look like this:
Adding Node IDs to DOM Elements
Let’s add some code to allow for a bidirectional selection so that if we click on a node in the tree the corresponding element(s) in the view will be highlighted and vice versa. Let’s start with selection from the model tree. To facilitate that we need to modify the code that generates the model tree a bit:
if (type === Communicator.NodeType.Part ||
        type === Communicator.NodeType.PartInstance ||
        type === Communicator.NodeType.AssemblyNode ||
        type === Communicator.NodeType.BodyInstance) {

        this._content += `<p id="${nodeId}" onclick="modelTree.clicked(${nodeId})" style="margin-left: ${(level*10)}px;">${this._hwv.model.getNodeName(nodeId)}`;
        var children = this._hwv.model.getNodeChildren(nodeId);
        for (var i = 0; i < children.length; i++) {
                this.generateRecursive(children[i], level + 1);
        }
}
We are giving every <div> tag an ID corresponding to the NodeId of the node it is associated with and setting up an onclick callback that gets triggered when the node text is selected.
Selection from DOM
The next step is to add the function that gets executed when the node has been clicked on to the ModelTree class (add as a member function to ModelTree):
clicked(nodeid) {
        if (this._lastid !== ""){
                document.getElementById(this._lastid).style.color = "black";
        }

        document.getElementById(nodeid).style.color = "red";
        this._hwv.selectPart(parseInt(nodeid));
        this._lastid = nodeid;
}
This function simply uses the NodeId of the selected node in the model tree and highlights the associated part. It also changes the color of the DOM element. There is some additional logic (using the lastid variable) to ensure that a previously selected item is correctly deselected. For that we need to add an additional variable to the constructor:
constructor(hwv, startdiv) {
        this._hwv = hwv;
        this._startelement = document.getElementById(startdiv);
        this._content = "";
        this._lastid = "";
}
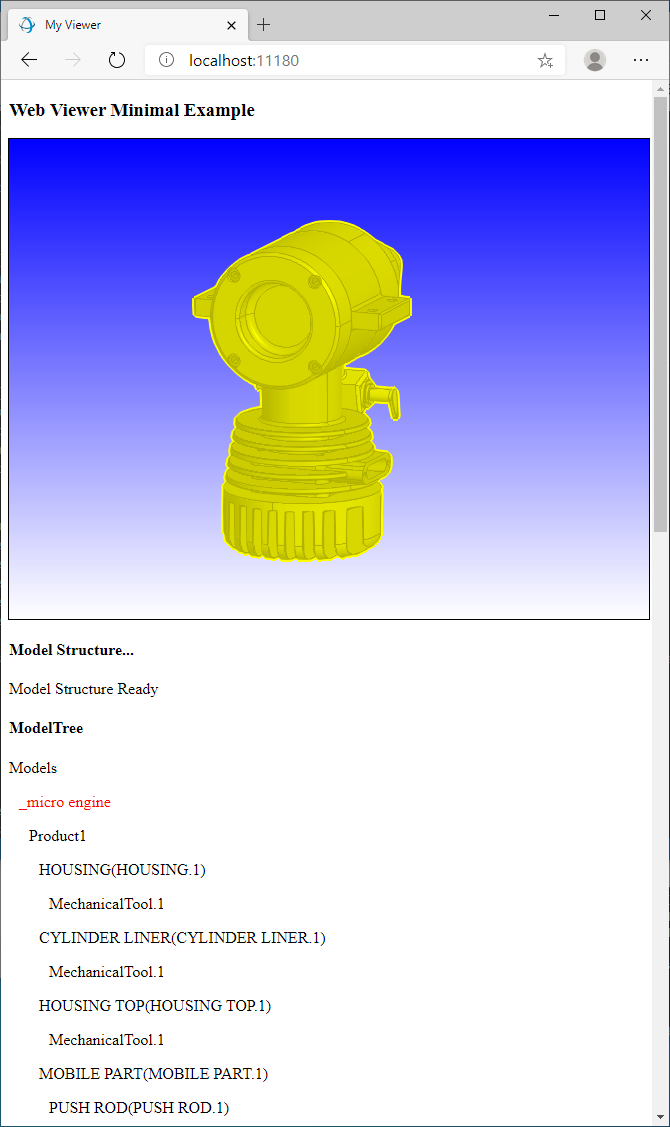
Run the application again. You should be able to click on a node in the model tree and see the associated element highlighted in the view:
Handle Selection from the Web Viewer Component
Let’s add selection from the view as well so that the DOM element associated with a piece of geometry in the view is highlighted when that element is selected by the user.
First, let’s add a function to the ModelTree class that gets called when a selection has occurred in the Web Viewer.
onSelection(selectionEvent) {
        if (this._lastid !== "") {
                document.getElementById(this._lastid).style.color = "black";
        }

        if (selectionEvent !== null) {
                var selection = selectionEvent.getSelection();
                var nodeid = selection.getNodeId();
                var element = document.getElementById(nodeid.toString());
                if (element !== null) {
                        element.style.color = "red";
                        this._lastid = nodeid.toString();
                }
        }
}
This function takes a selection event and retrieves its NodeId and then highlights the appropriate element in the DOM. It also ensures that a previous highlighted element is deselected.
Wiring up Selection Callback
Now we need to wire up the selection callback so that whenever a selection occurs the onSelection function is triggered. To do this we need to add another callback handler in our main document:
selectionArray: (selectionItems) => {
        if (selectionItems.length > 0) {
                for (const selectionItem of selectionItems) {
                        modelTree.onSelection(selectionItem);
                }
        } else {
                modelTree.onSelection(null);
        }
},
If you start the application again, you should see that if you click on an element in the Web Viewer window, the associated model tree node is highlighted and vice versa.
Displaying CAD views
Other important parts of the model tree are the CAD views of a model. Let’s add those to the DOM as well. For that we will be using a different model that has CAD Views embedded which can be found here:
/quick_start/converted_models/standard/scs_models/landinggear.scs
Copy this file into the data folder, and make sure to load this file instead of microengine on startup:
hwv = new Communicator.WebViewer({
        containerId: "viewer",
        endpointUri: "data/landinggear.scs"
});
To gather the CAD Views we create another very straightforward function. As you can see CAD views are queried via a separate function call and are not part of the main tree (add as a member function to ModelTree):
generateCadViews() {
        if (typeof this._hwv.model.getCadViewMap == "function") {
                var cadViews = this._hwv.model.getCadViewMap();
                cadViews.forEach((name, id) => {
                        this._content += `<p id="${id}" onclick="modelTree.viewsClicked(${id});" style="margin-left: 0px;">${name}`;
                });
        }
}
Now let’s make sure that we call this new function when generating the tree:
generate() {
        this._content = "";
        this.generateCadViews();
        var rootid = this._hwv.model.getAbsoluteRootNode();
        this.generateRecursive(rootid,0);
        this._startelement.innerHTML = this._content;
}
The CAD views get their own callback to handle selection:
viewsClicked(viewid) {
        if (this._lastViewId !== "") {
                document.getElementById(this._lastViewId).style.color = "black";
        }
        document.getElementById(viewid).style.color = "red";
        this._hwv.model.activateCadView(parseInt(viewid));
        this._lastViewId = viewid;
}
In addition, they need their own variable to handle a previous selection state:
constructor(hwv, startdiv) {
        this._hwv = hwv;
        this._startelement = document.getElementById(startdiv);
        this._content = "";
        this._lastid = "";
        this._lastViewId = "";
}
You now have created a rudimentary version of a bidirectional model tree that allows for highlighting from the tree, as well as the Web Viewer window. As mentioned earlier the HOOPS Web Viewer ships with a full UI which includes a much more sophisticated model tree. It is your decision if you want to use this model tree in your application or write your own. For more information on parsing the assembly tree, please consult the Programming Guide.

