User Interface
While the HOOPS Web Viewer supports viewing functionality, it is primarily a library with an API for developing any kind of browser-based application which requires 3D (or 2D) engineering graphics. Every feature in the default UI maps to a publicly exposed function or set of functions in the API, making it easy to integrate the HOOPS Web Viewer into your web-application, using your own UI framework.
Default UI
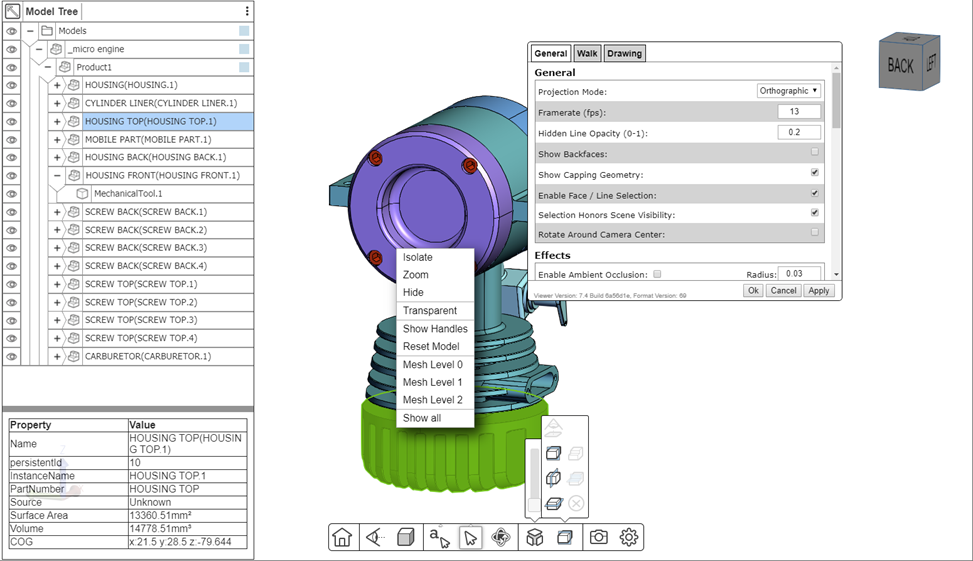
The HOOPS Web Viewer with some of its default UI components.
The HOOPS Web Viewer includes a complete viewing-oriented user interface with a navigation bar, a model tree and other useful functionality. It utilizes jQuery UI, but most of its components (like the Model tree) are written from scratch. While the UI is not part of the public API of the HOOPS Web Viewer, its source code can be found in /web_viewer/deprecated/src/js/web_viewer_ui.js. Please note that the JS source for the UI assumes a specific DOM structure that is defined in web_viewer/deprecated/src/hoops_web_viewer_sample.html. If your plan is to modify or tweak the existing UI your best bet currently is to make changes in these two files directly. We are working on a more component-based architecture for the default UI, which would make it easier to modify and extend existing functionality without altering the source code.
Writing your own model tree
A functional model tree is one of the more complex UI components in any application. To understand the basics of how to implement a model tree please see the Model tree Programming Guide article as well as Section 6. Interacting with the model tree of the Building a Basic Application tutorial.
The tutorial only scratches the surface of implementing a fully functional model tree. It does not deal with synchronization between the tree and 3D Model in case of attribute changes, or if a new subtree is loaded into an existing node. The following callbacks are important for keeping the model tree updated with changes in the 3D model:
This callback is executed after the model tree has been loaded and parsed after a call to switchToModel. In response to this callback you should clear out all existing nodes in the Model Tree UI and repopulate the tree.
This callback is executed after loading and parsing of the model tree in response to one of the loadSubtreeFrom... functions. In response to this callback you should append the new subtree at the insertion node in the model tree.
When this callback is executed you should remove the subtree that has been deleted from the model tree.
Apart from those specific callbacks that directly get triggered by changes in the model tree hierarchy, you also should make sure that your application responds to the various callbacks related to selection and visibility changes, as well as handle the creation of new markup elements.
Model tree UI performance optimizations
Dealing with a complex product structure hierarchy and keeping the model tree up-to-date can have performance implications. In order to mitigate those, you should only create DOM elements for model tree nodes that are actually visible, or are about to be opened by the user. For example, the default model tree only creates DOM elements for the first few top level nodes in the hierarchy, and only creates any nodes further in the hierarchy in an “on-demand” fashion, as the user opens its children.
You should also consider grouping nodes on the same hierarchy level into a single “container node”, as each DOM element has a memory overhead and might take a while to be displayed.
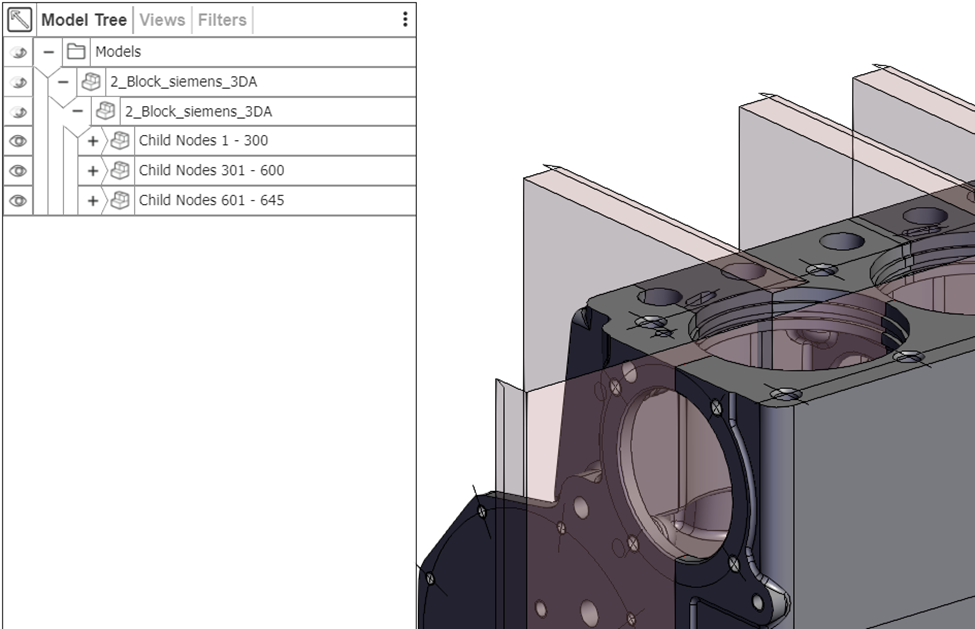
A large number of child nodes grouped together in the default UI to improve performance and memory footprint.
Integrating with modern UI toolkits
We know that a lot of our Web Developers use UI toolkits such as react.js, vue.js, meteor, polymer or others. The HOOPS Web Viewer should integrate well with those libraries using the steps described in the Minimal application section of the Building a basic application tutorial. Just to summarize them again here:
- Include hoops_web_viewer.mjs with a script tag.
- Create a new
constructorand pass it the correct model and endpoint, as well as the id of the canvas you want the HOOPS Web Viewer to render into. - Start the HOOPS Web Viewer.
If you are running into any issues with a particular UI Toolkit, please don’t hesistate to contact us for assistance.

