
Loading Models
Summary
In this chapter, we will provide code for you to load and add models to your application.
Concepts
- Creating model thumbnail UI elements
- Inserting models into the scene
- Encapsulate event listeners
Set Event Callbacks
In the previous section, we waited for the modelStructureReady callback to fire before enabling the “Load Model” input button. We can now put some functionality behind this input button. This section of code has quite little to do with HOOPS Visualize Web, so we will not delve too deeply into it, but of course it is provided below. The idea is that we will create a file input element and listen for the onchange call when it is clicked. This will recognize a new file has been uploaded. We will then create the necessary thumbnail element, check if there is a model thumbnail image present, and set it in the thumbnail if found. We will then make the thumbnail clickable, and when clicked, it will call a modelLoad function we will write.
document.getElementById("open-model-button").onclick = () => {
        // Proxy to override the default behavior of file input type
        document.getElementById('file-input').click();
};
document.getElementById("file-input").onchange = (e) => {
        // Once a file has been selected by the user, use the file information to
        // gather the associated relevant data like thumbnails
        let fileChoice = e.target.value;
        let filename = fileChoice.replace(/^.*[\\\/]/, '');
        let modelThumbnail = document.createElement('a');
        let modelname = filename.split(".", 1)[0];
        modelThumbnail.id = modelname;
        modelThumbnail.href = "";
        modelThumbnail.className = "model-thumb";
        modelThumbnail.setAttribute("model", modelname);
        let imgPath = "/data/thumbnails/" + modelname + ".png";
        // Check to see if the selected model has a corresponding thumbnail made
        fetch(imgPath)
                .then((resp) => {
                if (resp.ok) {
                        let modelImg = document.createElement('img');
                        modelImg.src = imgPath;
                        modelThumbnail.appendChild(modelImg);
                }
                else {
                        modelThumbnail.innerHTML = modelname;
                        console.log("No Image for this Model was found.");
                }
        });
        document.getElementById("models-scroller").appendChild(modelThumbnail);
        // Now update the event callbacks for the thumbnails
        const thumbnailElements = document.getElementsByClassName("model-thumb");
        for (let thumbnail of thumbnailElements) {
                let thumbnailElement = thumbnail;
                thumbnailElement.onclick = (e) => {
                        e.preventDefault();
                        let elem = e.currentTarget;
                        let modelToLoad = elem.getAttribute("model");
                        // Load the model into the scene when clicked
                        this.loadModel(modelToLoad);
                };
        }
        ;
};
Loading the Model into the Assembly Tree
Since we will potentially be loading an arbitrary number of models in our application, we can abstract the loading into its own loadModel function, as a part of the main class. The loadModel function will take one parameter – the model name to be loaded.
Within the function, we want to be sure we are adding our model to the model tree in a smart manner. Much like in the Getting Starting guide, we will create a new model node off the root node, name it, and load our model to that node. First, we must clear the current model state, so we can then load a new model. We can use the promise returned from the clear command to then continue to load our model. Please note that in an SCS workflow, you cannot use the switchToModel API on the Model class – this will only work in a Stream Cache Server workflow.
We also want to ensure that our camera is fit to the model boundaries, so we will use the then() method on the returned promise from loadSubtreeFromScsFile to fit the camera.
Lastly, since we will have the model loaded, we can use HOOPS Visualize Web to query the file type and model name, and populate those HTML elements in our template.
loadModel(modelName) {
        this._viewer.model.clear()
                .then(() => {
                const nodeName = "Model-" + modelName;
                const modelNodeId = this._viewer.model.createNode(null, nodeName);
                this._viewer.model.loadSubtreeFromScsFile(modelNodeId, "/data/database/" + modelName + ".scs")
          .then(() => {
                this._viewer.view.fitWorld();
           // Get and set the rest of the model level info
           const modelRoot = this._viewer.model.getNodeChildren(modelNodeId)[0];
           const modelFileName = this._viewer.model.getModelFileNameFromNode(modelRoot);
           const modelFileFormat = this._viewer.model.getModelFileTypeFromNode(modelRoot);
           document.getElementById("model-file-name").innerHTML = modelFileName || "N/A";
           document.getElementById("model-file-type").innerHTML = Communicator.FileType[modelFileFormat] || "N/A";
          });
        });
}
Encapsulate the Event Listeners
We now have the two pieces we need to load models, we just need to set the callbacks in the application. Since we will have several UI elements we need to hook up when the application loads, we will create a function called setEventListeners with our event listener code, and call this function in the application constructor.
setEventListeners() {
document.getElementById("open-model-button").onclick = () => {
        // Proxy to override the default behavior of file input type
        document.getElementById('file-input').click();
};
document.getElementById("file-input").onchange = (e) => {
        // ...
}
In the constructor, you can make a call to the setEventListeners function.
this.setEventListeners();
Once you have placed your event listeners within the setEventListeners function, and called this function in your main constructor, run your application and try to load the “Moto” model. Remember that it will populate a thumbnail with your model image first, and clicking on that model thumbnail will actually load it into the viewer.
If you take a look over at our application, you will see the viewer with the model loaded and rendered!
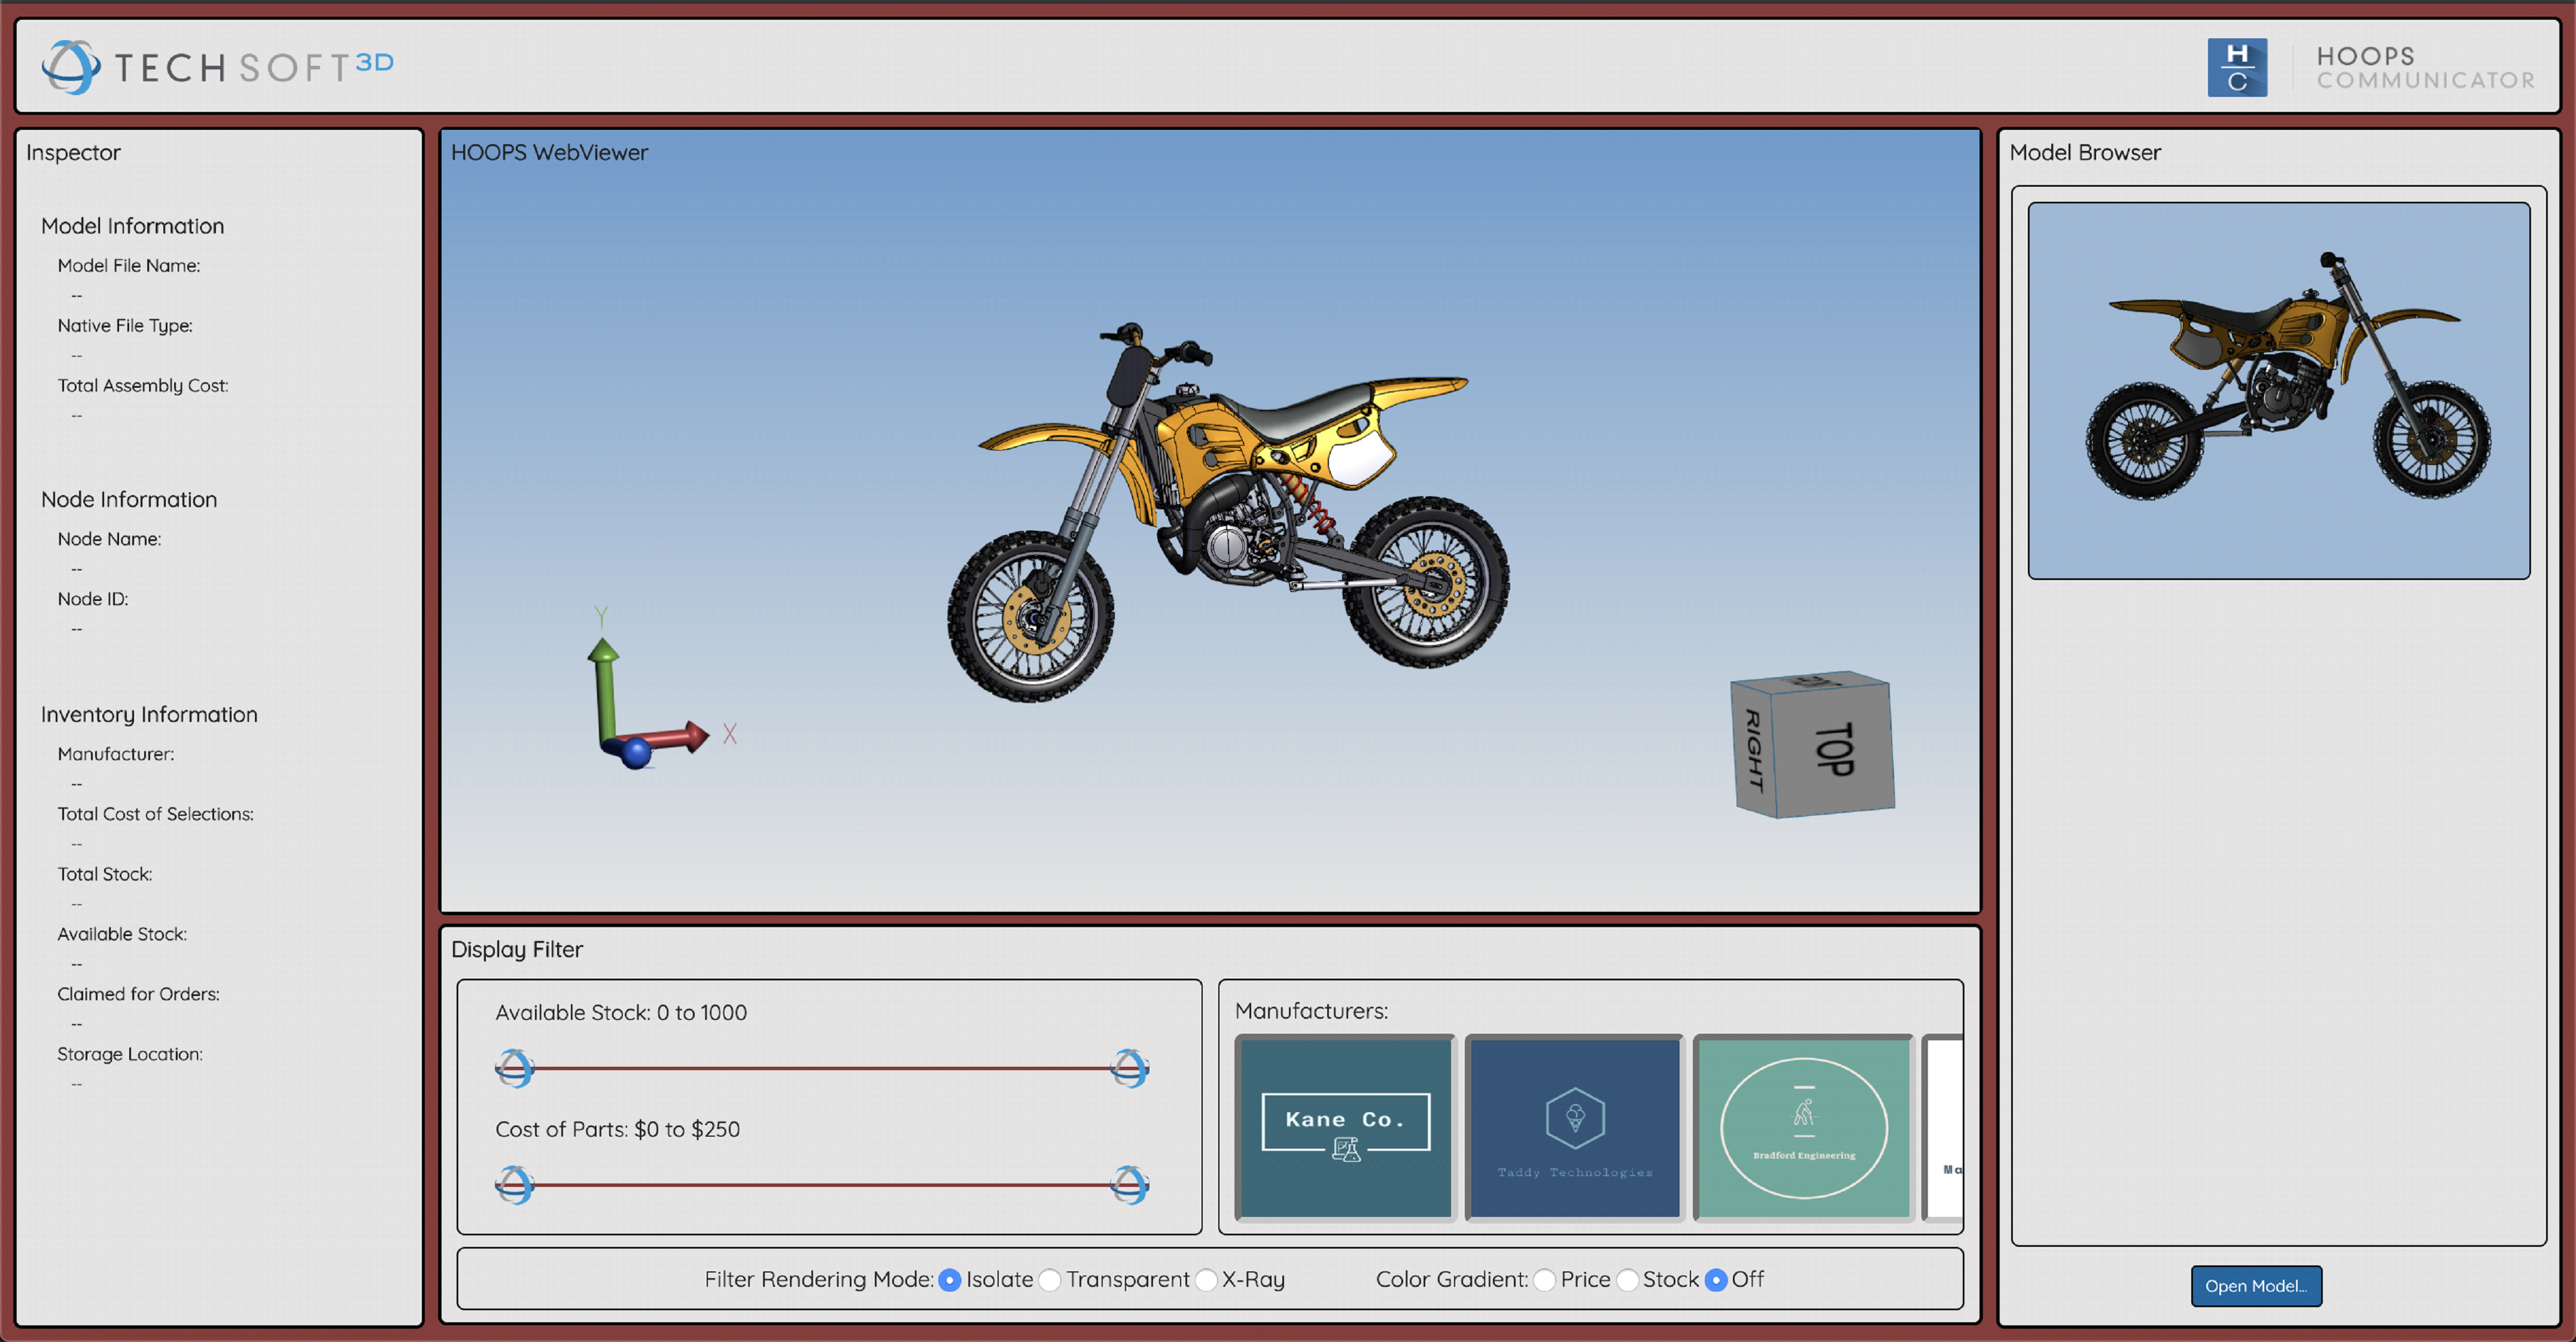
You should also now be able to navigate and make selections on the model within the WebViewer component. If you would like, feel free to load more models in the sidebar and click between the thumbnails to see how the application switches between models.

