Linking to Application Data
Summary
In this chapter, we will walk through how to link our database application data to HOOPS Visualize Web.
Concepts
- Loading the application data
- Inserting models into the scene
Retrieve supplemental database information
Now that we have a running WebViewer and have successfully loaded a model into that viewer, we want to bring in the supplemental part data from our “database”. By using identical naming between the model .SCS file and the .JSON database files, we can use the loaded model name to request the part specific database information. It makes sense to do this when we request the model. We can use the then() method of the returned promise from loadSubtreeFromScsFile to fetch our data, as shown below.
this._viewer.model.loadSubtreeFromScsFile(modelNodeId, "/data/" + modelName + ".scs")
.then(() => {
this._viewer.view.fitWorld();
fetch("/data/database/" + modelName + ".json")
.then((resp) => {
if (resp.ok) {
resp.json()
.then((data) => {
});
}
else {
alert("No JSON data for this Model was found.");
}
});
Storing retrieved data
The data variable contains the NodeData JSON object we created earlier. In order to minimize the number of asynchronous requests to this database, we will store the data we need in a Map structure. The keys of the map will be the Node IDs and the values which contain the rest of the data object and its members. We will loop through the array of NodeData objects, and store each in the Map.
First let’s define the Map as a member of our main class.
class main {
constructor() {
// Initialize a Map to quickly reference nodeId -> external app data
// The Map will be populated when a model is loaded
this._modelData = new Map();
// Instantiate the viewer
this._viewer = new Communicator.WebViewer({
containerId: "viewer",
empty: true,
enginePath: "https://cdn.jsdelivr.net/gh/techsoft3d/hoops-web-viewer@latest",
});
Now, back within the loadModel function and the then() block of the parsed JSON response, we will clear (if populated already) and populate this Map. While we are looping through, we will also aggregate the price of all the parts, so we can display the total cost as well.
resp.json()
.then((data) => {
let nodeData = data.NodeData;
let numEntries = nodeData.length;
let clippedID;
let totalCost = 0;
this._modelData.clear();
for (let i = 0; i < numEntries; ++i) {
clippedID = nodeData[i].ID;
this._modelData.set(clippedID, nodeData[i]);
totalCost += nodeData[i].Price;
}
// Display the total cost of the assembly
document.getElementById("inv-total-cost").innerHTML = `$ ${totalCost.toFixed(2)}`;
});
Filling application data
With the new _modelData map populated, we can use the selectionArray callback to query our additional part data when a selection is made. The selectionArray callback will return an array of node IDs when a selection operation is made by the user. Using these node IDs, which are identical to the node IDs in our _modelData object, we can retrieve the corresponding part data for the selection. Since the selectionArray callback can contain multiple entries, we will just display the first entry’s information.
selectionArray: (selectionEvents) => {
// Reset info fields if no selection item was chosen
if (selectionEvents.length == 0) {
document.getElementById("node-id").innerHTML = "--";
document.getElementById("node-name").innerHTML = "--";
document.getElementById("inv-manufacturer").innerHTML = "--";
document.getElementById("inv-select-cost").innerHTML = "--";
document.getElementById("inv-total-stock").innerHTML = "--";
document.getElementById("inv-avail-stock").innerHTML = "--";
document.getElementById("inv-claimed").innerHTML = "--";
document.getElementById("inv-location").innerHTML = "--";
return;
}
// Otherwise, display node information for the first node in the selection array
const nodeId = selectionEvents[0].getSelection().getNodeId();
document.getElementById("node-id").innerHTML = nodeId.toString() || "Unknown";
document.getElementById("node-name").innerHTML = this._viewer.model.getNodeName(nodeId) || "Node Name Not Defined";
// If the selection nodeId is found in the application data, populate the inspector fields
if (this._modelData.has(nodeId)) {
let nodeData = this._modelData.get(nodeId);
document.getElementById("inv-manufacturer").innerHTML = nodeData.Manufacturer;
document.getElementById("inv-select-cost").innerHTML = `$ ${nodeData.Price.toFixed(2)}`;
document.getElementById("inv-total-stock").innerHTML = nodeData.Stock.toString();
document.getElementById("inv-avail-stock").innerHTML = (nodeData.Stock - nodeData.Reserved).toString();
document.getElementById("inv-claimed").innerHTML = nodeData.Reserved.toString();
document.getElementById("inv-location").innerHTML = nodeData.Location;
}
}
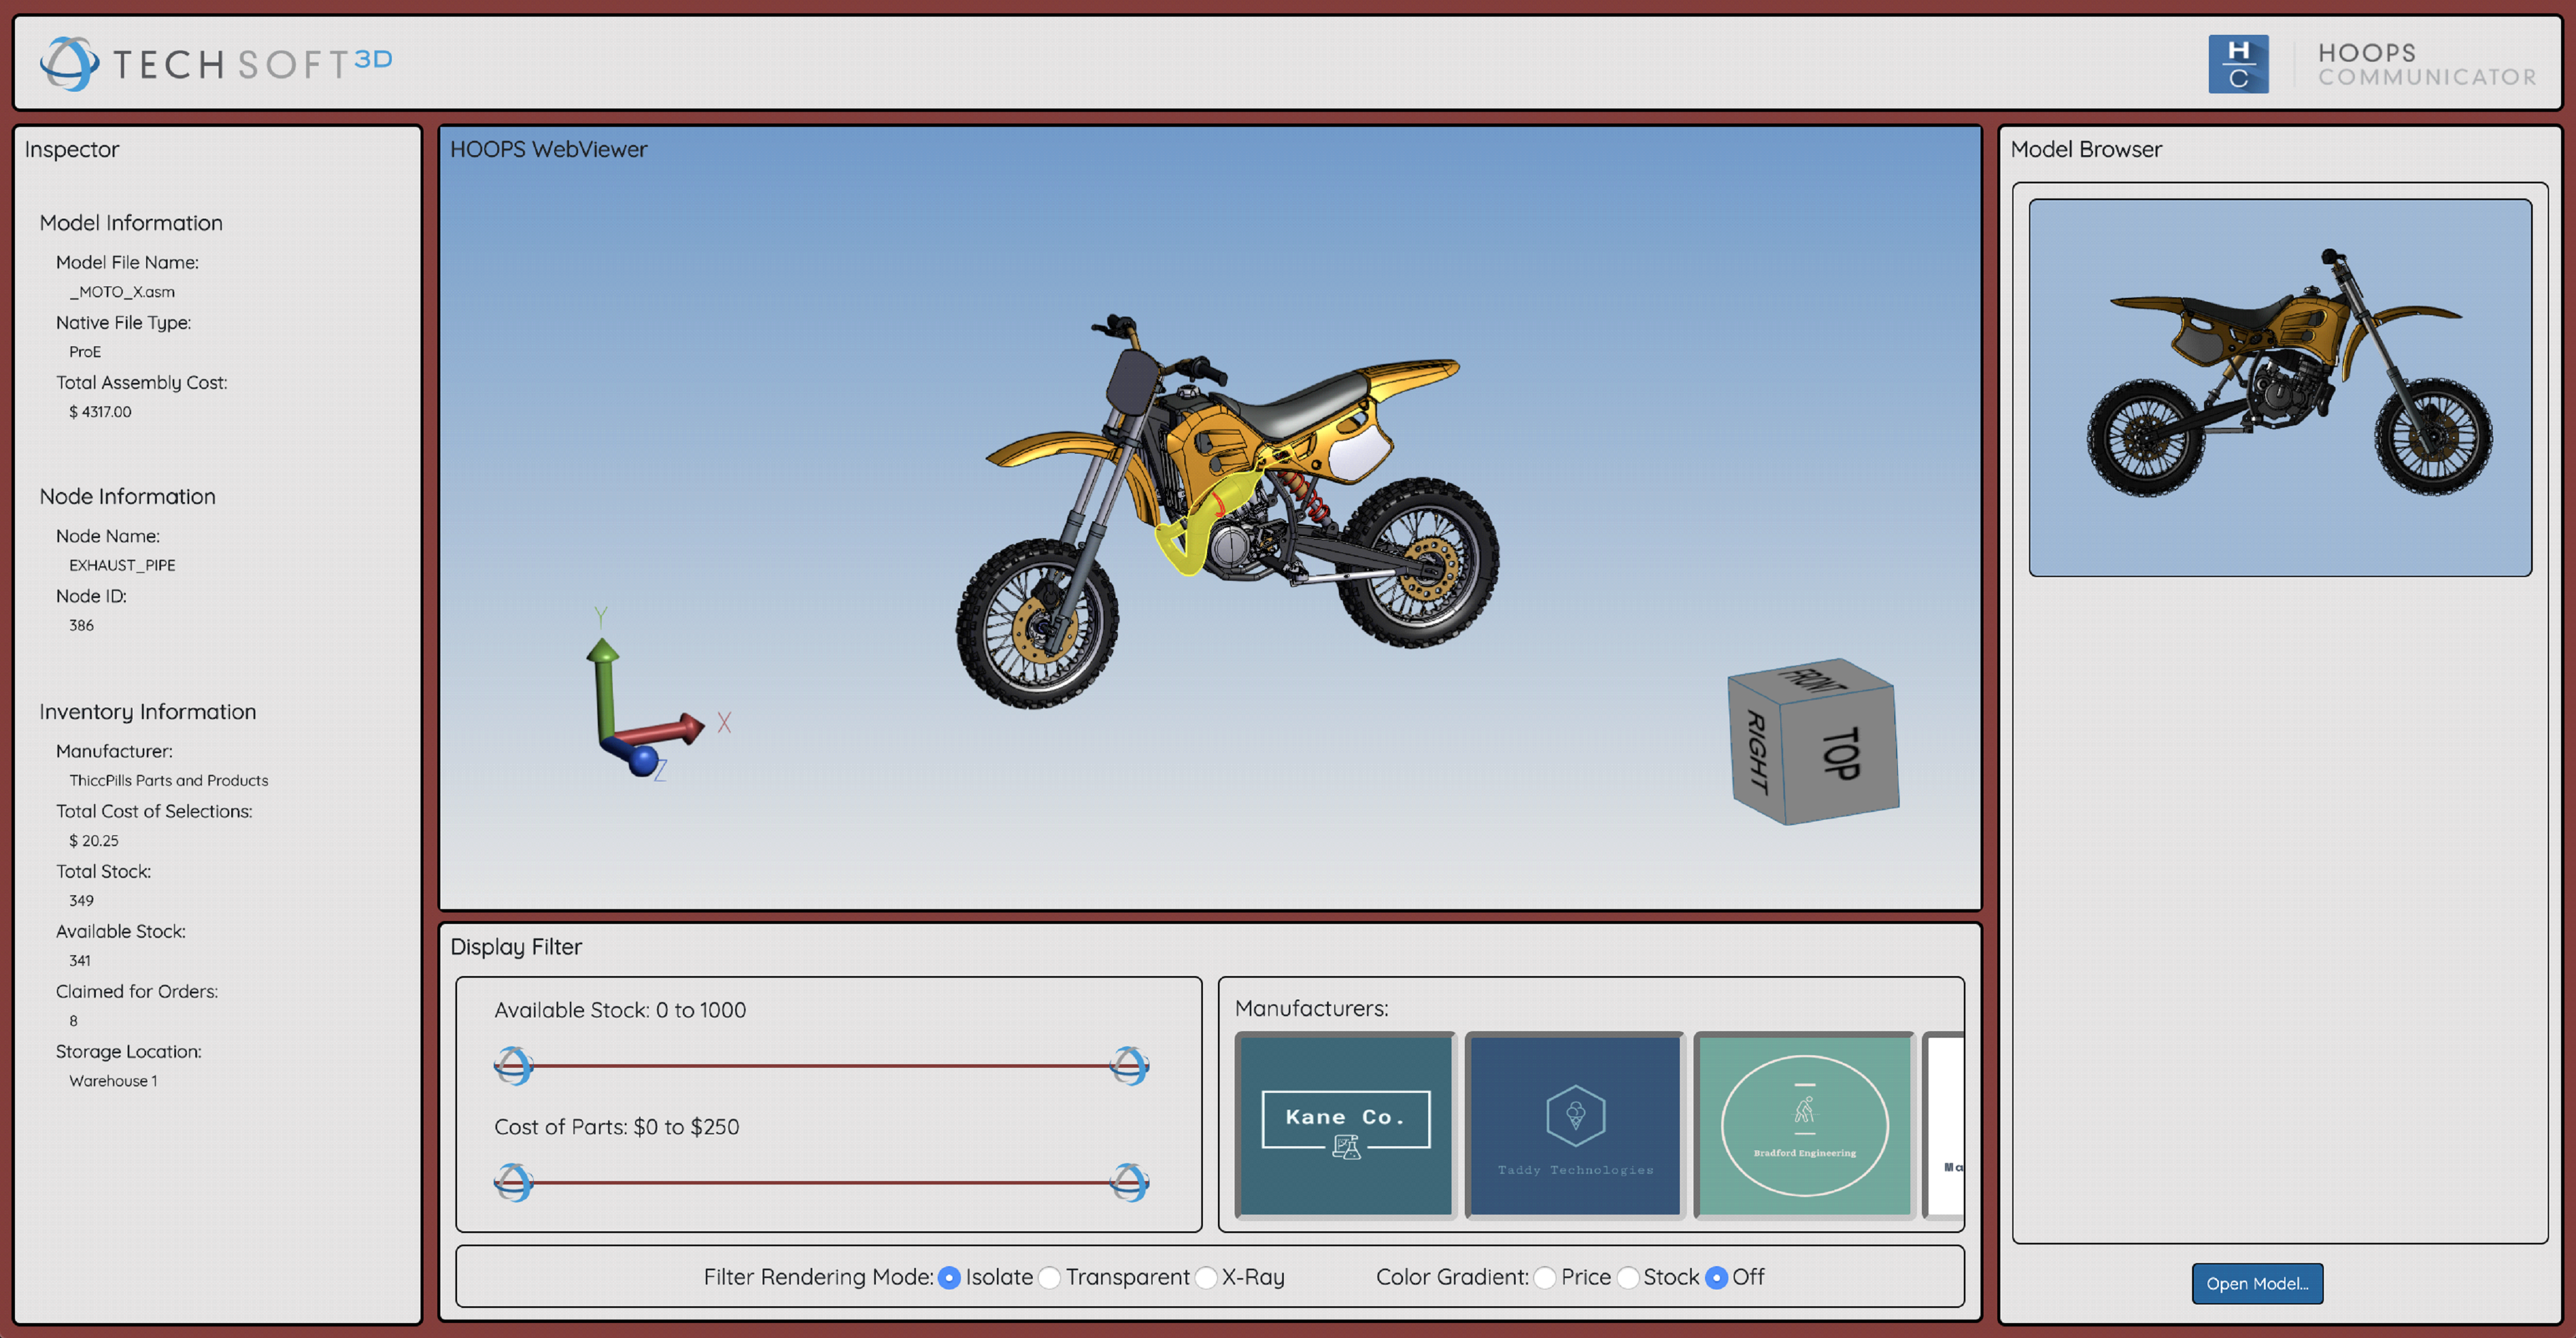
If we reload our application, load the “microengine” or “Moto” model, and select a part on the model, we will see the inspector fields populate. Selecting other parts (or no part at all), updates this information based on the selection. We have successfully brought in external application data and showed an example of linking this data with node IDs.


