Loading Models
Summary
In this chapter, we will write code for you to load and add models to your application.
Concepts
- Creating a model load function
- Enabling the event listeners for model thumbnails
Write the loadModelPreview Function
We can structure our application such that each thumbnail element uses the same load module when clicked.
By specifying an attribute called model on each anchor element in the HTML, we can retrieve that attribute to read the model filename when the anchor is clicked.
We can then use this filename in our load model function.
The loadModelPreview function will take one parameter – the model name to be loaded.
<a class="model-thumb" href="#" model="jabberpeggy" name="Bradford Jabberpeggy">
        <img alt="jabberpeggy" src="data/scs/jabberpeggy.png" />
</a>
Notice that the model attribute value matches the name of the file (less the .scs extension).
Within the function, we want to be sure we are adding our model to the model tree in a smart manner.
Much like in the Building A Basic Application tutorial, we will create a new model node off the root node, name it, and load our model to that node.
First, we must clear the current model state (in case a model was already loaded), so we can then load a new model.
We can use the promise returned from the clear() command to continue to load our model.
Please note that in an SCS workflow, you cannot use the switchToModel API on the Model class – this will only work in a Stream Cache Server workflow.
We also want to ensure that our camera is fit to the model boundaries, so we will use the then method on the returned promise from loadSubtreeFromScsFile to fit the camera.
// Function to load models
loadModelPreview(modelName, transform = undefined) {
        this._compViewer.model.clear()
                .then(() => {
                const nodeName = "Model-" + modelName;
                const modelNodeId = this._compViewer.model.createNode(null, nodeName);
                this._compViewer.model.loadSubtreeFromScsFile(modelNodeId, "/data/scs/" + modelName + ".scs")
                        .then(() => {
                        this._compViewer.view.fitWorld();
                });
        });
}
Encapsulating the Anchor Event Listeners
We now have the code to navigate through our components, and code to load those components. However, we are still not able to see a model loaded. That is because we need to set the callbacks for the thumbnail anchors and fire the loadModelPreview function when clicked. We gather the thumbnail anchors and set event listeners on those elements.
setEventListeners() {
let pills = document.getElementById("pills-tab");
let pillsRefs = pills.getElementsByTagName("a");
let pillsContent = document.getElementById("pills-tabContent");
let contentPanes = pillsContent.getElementsByTagName("div");
let modelThumbnails = pillsContent.getElementsByTagName("a");
for (let ref of pillsRefs) {
        ref.onclick = (e) => {
                for (let ref of pillsRefs) {
                        ref.classList.remove("active", "show");
                }
                for (let pane of contentPanes) {
                        pane.classList.remove("active");
                }
                let elem = e.currentTarget;
                elem.classList.add("active");
                let tag = elem.getAttribute("content-id");
                document.getElementById(tag).classList.add("show", "active");
        };
}
for (let thumbnail of modelThumbnails) {
let thumbnailElement = thumbnail;
thumbnailElement.onclick = (e) => {
e.preventDefault();
let elem = e.currentTarget;
let modelToLoad = elem.getAttribute("model");
let component = elem.parentElement.id;
// Load the model into the scene when clicked
this.loadModelPreview(modelToLoad);
this._componentType = component;
this._selectedComponent = modelToLoad;
this._selectedComponentName = elem.getAttribute("name");
};
}
}
As we described earlier, you can see we are reading the model attribute from the anchor element that was clicked and using that model attribute to load the appropriate model via the loadModelPreview function.
You may also notice we assign a few additional class property variables - _componentType, _selectedComponent, and _componentName. When the user clicks on one of these thumbnails, we want our application to track the information associated with that thumbnail.
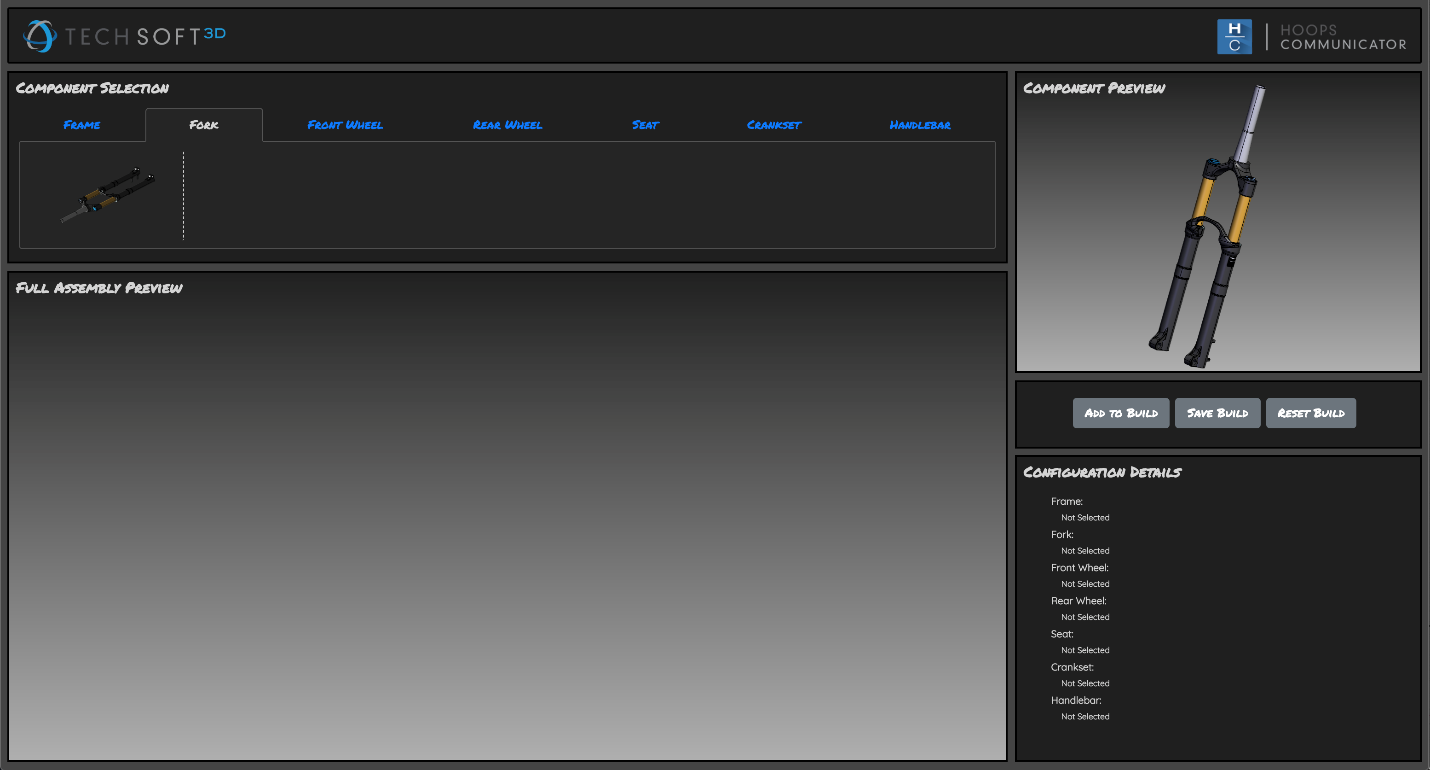
In the constructor, you can make a call to the setEventListeners function.
Once you have placed your event listeners within the setEventListeners function and called this function in your main constructor, run your application and try clicking on one of the bike frames. You should see the component preview viewer populate with the model of the thumbnail image you just clicked. By default, navigation and selection are enabled, so feel free to interact with the model. Clicking through different pills tabs should load the respective thumbnails and clicking these thumbnails should successfully switch the model displayed in the component viewer. Below we have navigated to the set of potential Fork components and loaded the available option in the component preview.