Color and Transparency
Summary
In this section, you will learn to change both the color and transparency of model nodes.
Concepts
- Setting part color
- Setting part transparency
Switch the model back to the microengine:
hwv = new Communicator.WebViewer({
        containerId: "viewer",
        endpointUri: "data/microengine.scs"
});
Functions to set node colors
Let’s start by adding a new file called Material.js to the js folder of your application and add the following code:
import * as Communicator from "./hoops/hoops-web-viewer.mjs";

export class MaterialManager {
        constructor(hwv) {
        this._hwv = hwv;
        this._initEvents();
        }

        _initEvents() {
                document.getElementById("apply_color").onclick = () => {
                        this.setNodeColor(
                        this.getSelectedNodeId(),
                        document.getElementById("color").value
                        );
                };
        }

        getSelectedNodeId() {
                const selectionItem = this._hwv.selectionManager.getFirst();
                if (selectionItem !== null) {
                        const nodeId = selectionItem.getNodeId();
                        return nodeId;
                }
                return null;
        }

        hexToRgb(hex) {
                const result = /^#?([a-f\d]{2})([a-f\d]{2})([a-f\d]{2})$/i.exec(hex);
                if (result !== null) {
                        const r = parseInt(result[1], 16);
                        const g = parseInt(result[2], 16);
                        const b = parseInt(result[3], 16);
                        return new Communicator.Color(r, g, b);
                }
                return Communicator.Color.black();
        }

        async setNodeColor(nodeId, hexColor) {
                if (nodeId !== null) {
                        const color = this.hexToRgb(hexColor);
                        const colorMap = new Map();
                        colorMap.set(nodeId, color);
                        await this._hwv.model.setNodesColors(colorMap);
                }
        }
}
In the first function above, we determine the currently selected entity and return its NodeId if something is selected. The hexToRgb function takes a 6-digit hex code in the form of #000000 and returns a Communicator color object. Every two digits after # represent one RGB (red, green or blue) value in the range of 00 – FF. The HOOPS Visualize Web color object expects each RGB value in the range of 0 – 255. To convert from hex to integer, we first use a regular expression to parse each hex value. Then use the parseInt function to convert from hex to integer values. Once we have integer values, we use the corresponding RGB to create a color object.
The setNodeColor() function we’ve defined takes a NodeId and hex color, and uses the setNodesColors function to set the provided color on a part. This function requires one argument: Map < NodeId, Color >, where Color is an RGB value in the range of 0-255. To create colorMap, we first use hexToRgb to convert the hex color to a HVW color object. Then we create a new Map and set the color to the provided Communicator.NodeId. If there were multiple colors and NodeIds that we wanted to set at the same time, we could continue adding them to the color map before calling setNodesColors.
Add functionality from material.js to your application by adding this line to your HTML page:
import { MaterialManager } from "./js/Material.js";
// ...
const materialManager = new MaterialManager(hwv);
Creating HTML for color picker
We still need some HTML to interact with these functions. Add the following elements to the HTML page inside the container div after the viewer div.
This adds a standard color input box for the color value (defined by the input type “color”) and a button to apply the selected color. When the apply button is clicked, it calls setNodeColor() with the NodeId value from getSelectedNodeId() and the color value from the color input box.
<div id="buttons">
        <div>
                <!-- color -->
                Change the color of selected nodes:
                <input type="color" id="color">
                <input type="button" id="apply_color" value="Apply" />
        </div>
</div>
Running the application
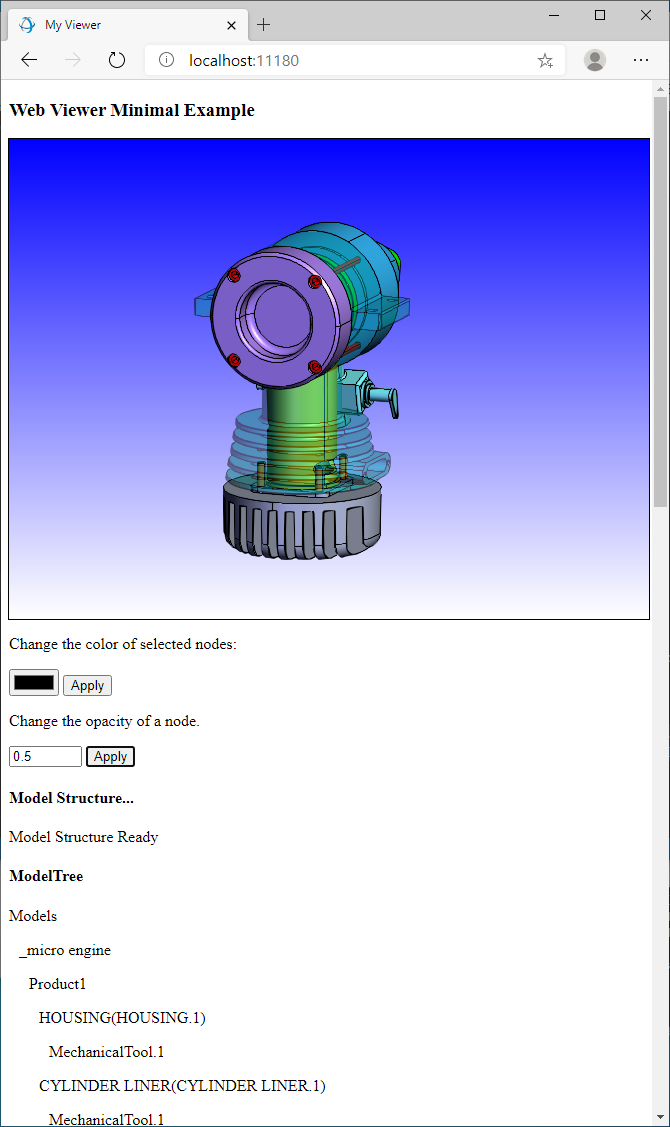
Load the application again, and you should now see an HTML color picker, and an apply button. Select a part on the model and try setting its color.
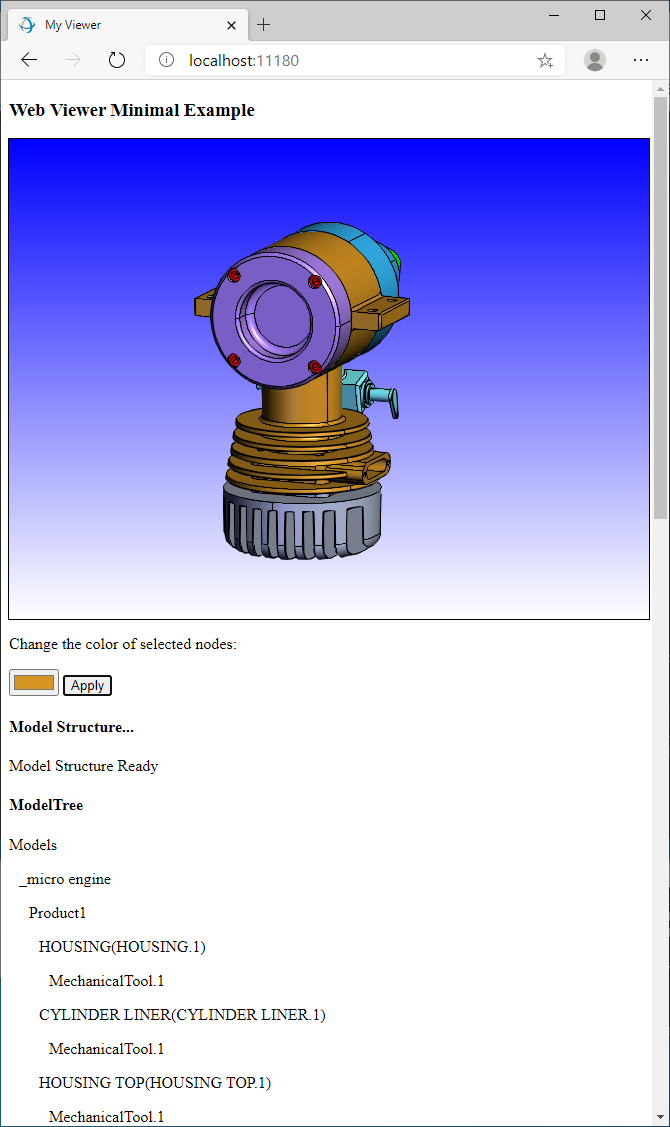
If you set a color on a non-leaf node, it will automatically be pushed down to all the leaf nodes that contain geometry and applied there. In that case, the color will not be stored on the node itself.
Setting node opacity
Now, we will add functionality to set a node’s opacity. Add the following code to js/material.mjs:
function setNodeOpacity(nodeId, opacity) {
        if (nodeId !== null) {
                hwv.model.setNodesOpacity([nodeId], opacity);
        }
}
setNodeOpacity takes a NodeId and opacity value between 0 – 1. If a NodeId of null is provided, no opacity changes will take effect. An opacity value of 0 will hide a part, and an opacity value of 1 will make a part completely opaque.
HTML for opacity button
The next step is to add some HTML code at the end of the button’s <div> we created above.
This adds an input box for the opacity value and a button to apply the opacity value. When the apply button is clicked, it calls setNodeOpacity with the NodeId value from getSelectedNodeId and the opacity value from the input box.
<div>
        <!-- opacity -->
        Change the opacity of a node.
        <input type="number" id="opacity" min="0" max="1" step="0.1" value="0.5">
        <input type="button" id="apply_opacity" value="Apply" />
</div>
Load the application again, and you should now see an input box for opacity level. Select a part on the model and try setting its opacity!