Selection
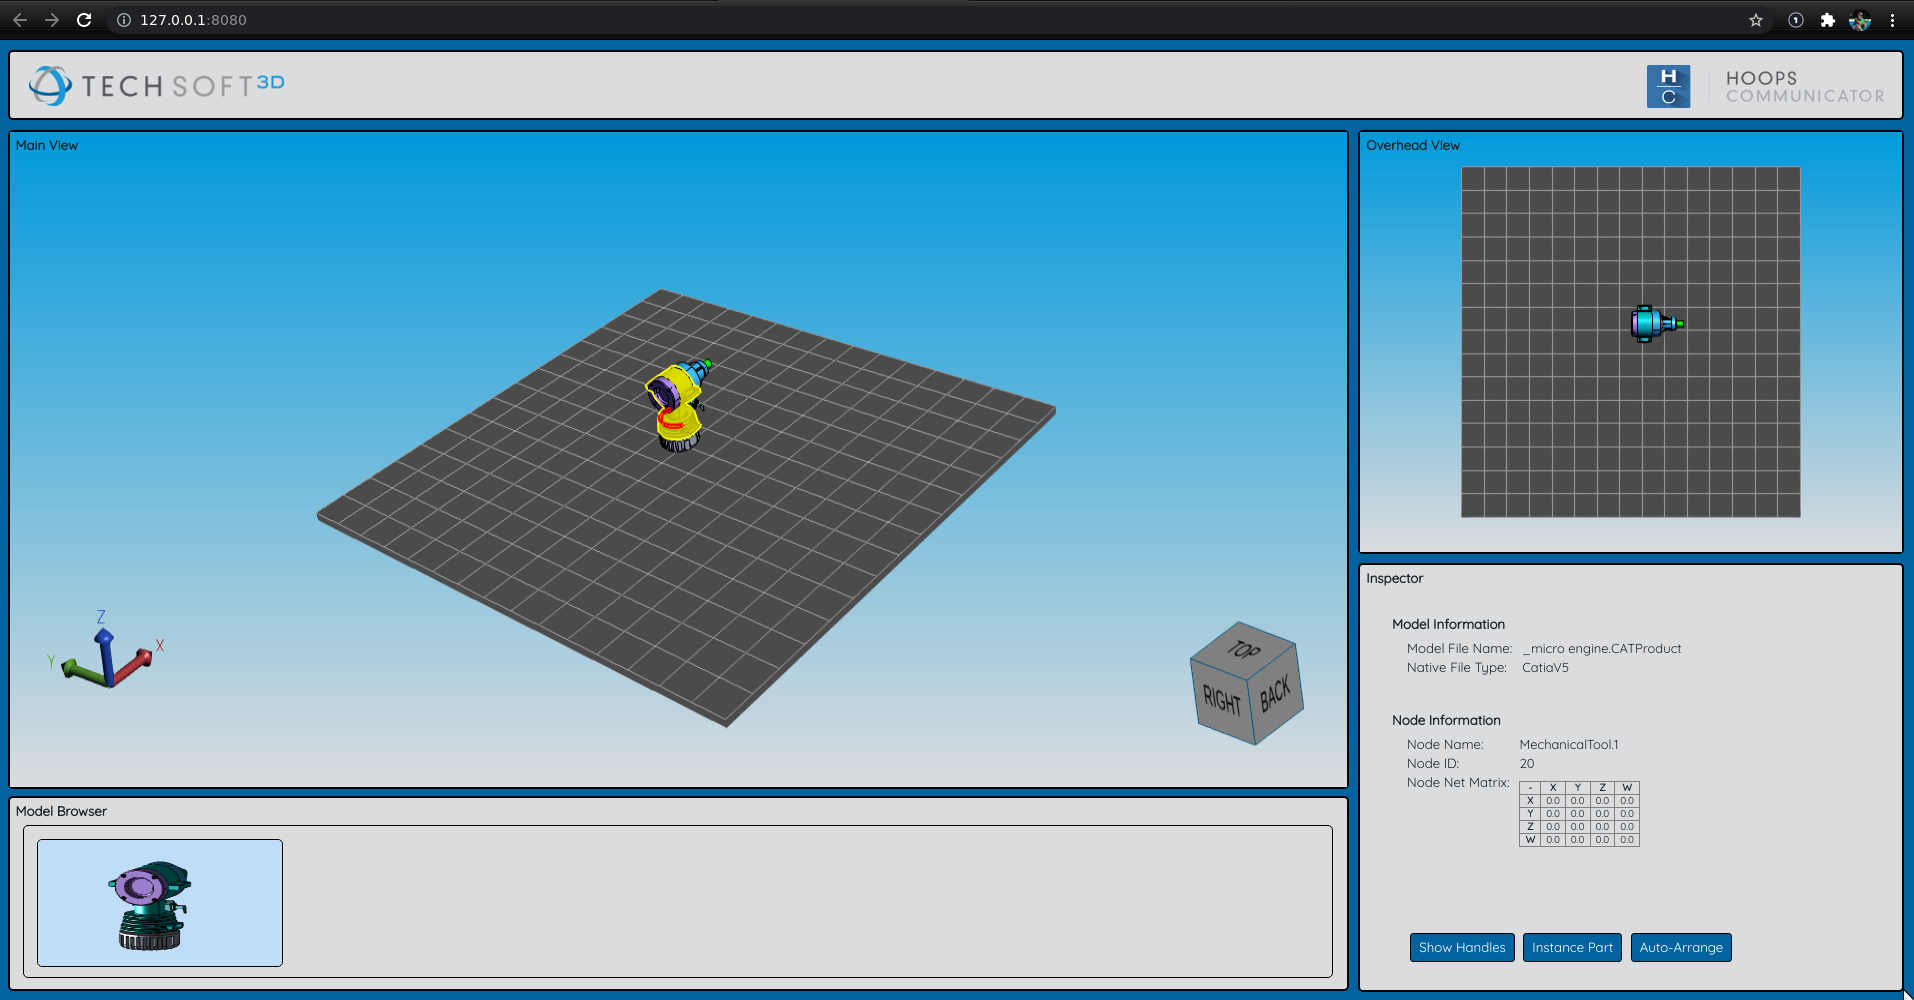
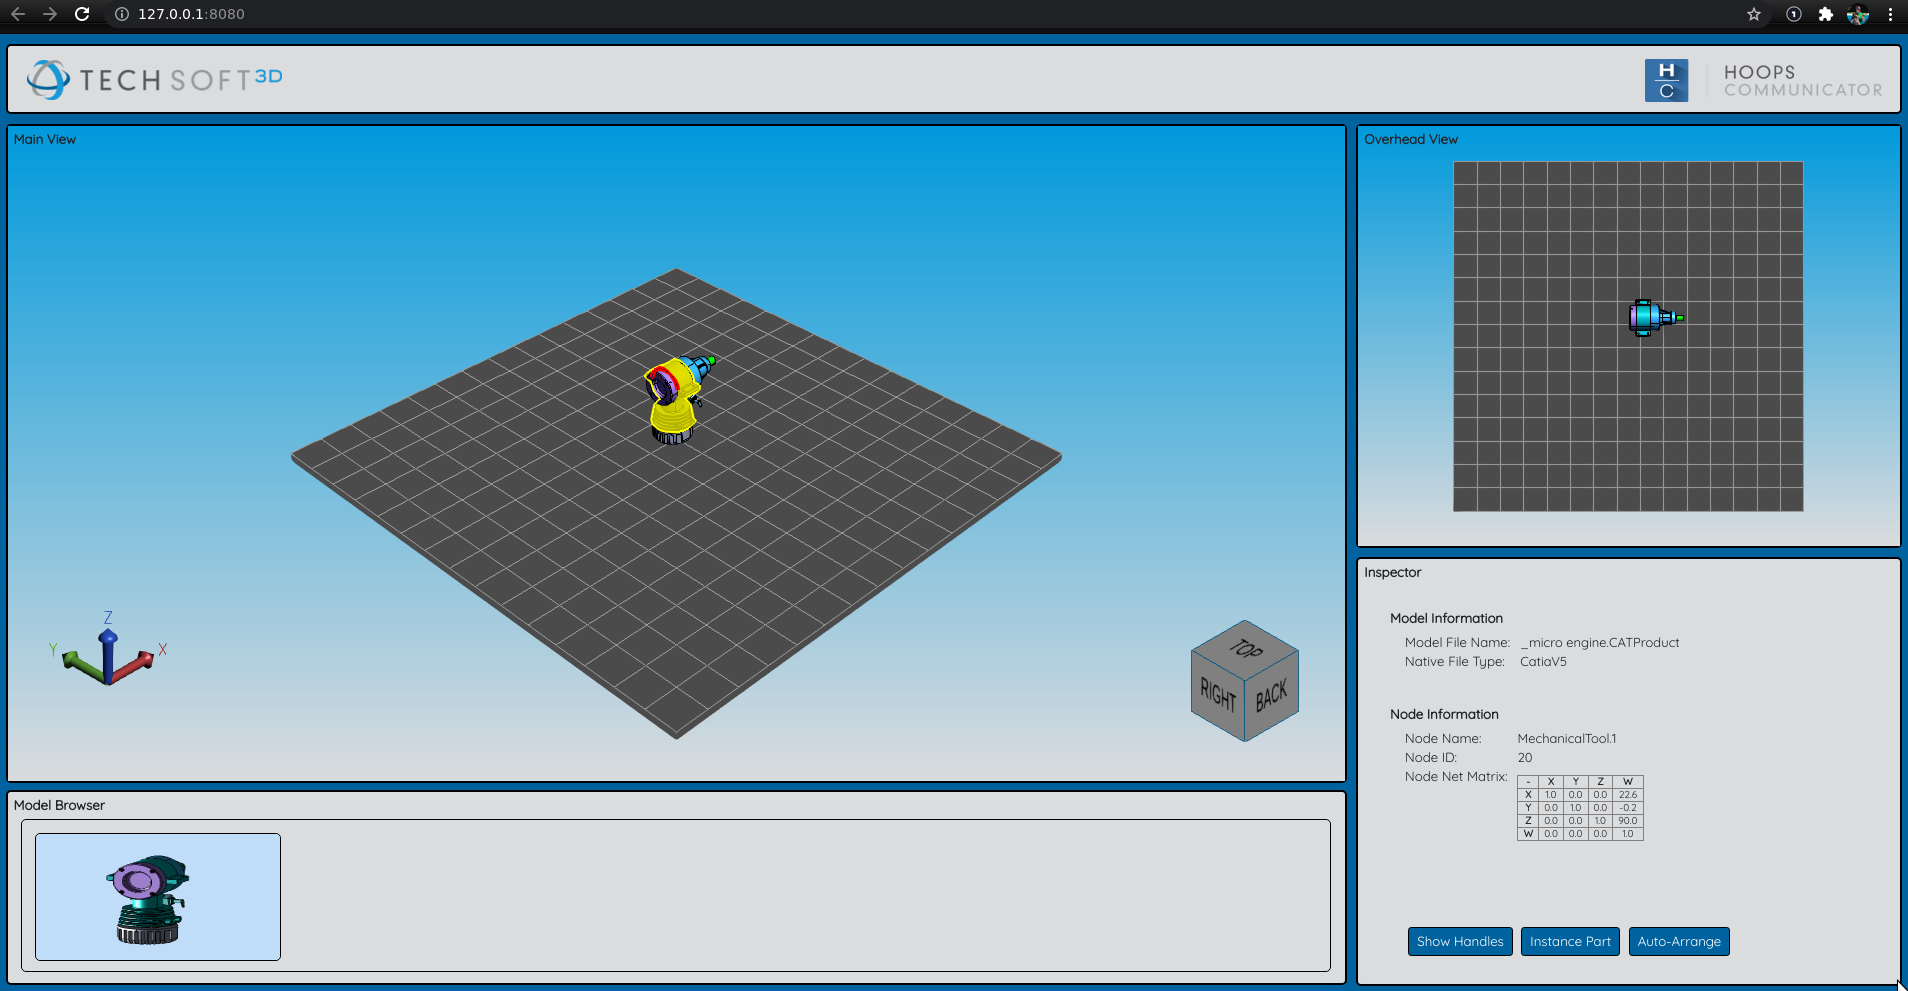
There are a few differnt types of selection available in HOOPS Visualize Web. This tutorial employs the simplest form - “pick from point”, which selects the object under the cursor. Selection results are return in selection events, which we will intercept to interpret and highlight them.
In order to do this, we’ll need to set up an event callback for the selectionArray event. Notice here that if we detect a selection on the printing plane, we explicitly remove it from the selection results, as the plane is something we don’t want to select.
this.hwv.setCallbacks({

// ...

selectionArray: (selectionEvents) => {
    const ppNodeId = this.printingPlane.getNodeId(); // Node Id of the build plane

    // Return the selection IDs for the current selections, check if the printing plane
    // was selected in the results - if so, remove it
    const selectionIds = selectionEvents.map((sEvent) =>
        sEvent.getSelection().getNodeId()
    );
    const foundIndex = selectionIds.indexOf(ppNodeId!);

    if (foundIndex != -1) {
        this.hwv.selectionManager.remove(selectionEvents[foundIndex].getSelection());
        selectionEvents.splice(foundIndex, 1);
    }

    // If the printing plane was the only result, then no other selections fired
    // this callback, so exit
    if (selectionEvents.length == 0) {
        return;
    }

    const nodeId = selectionEvents[0].getSelection().getNodeId();
    const modelFileName = this.hwv.model.getModelFileNameFromNode(nodeId);
    const modelFileFormat = this.hwv.model.getModelFileTypeFromNode(nodeId);

    document.getElementById("model-file-name")!.innerHTML = modelFileName || "N/A";
    document.getElementById("model-file-type")!.innerHTML = FileType[modelFileFormat!] || "N/A";
    document.getElementById("node-id")!.innerHTML = nodeId.toString() || "Unknown";
    document.getElementById("node-name")!.innerHTML = this.hwv.model.getNodeName(nodeId) || "Node Name Not Defined";

    // ...
Assuming the user selected a valid object, the line const nodeId = selectionEvents[0].getSelection().getNodeId(); will assign the selection to the NodeId variable. You can then use this value to perform any related processing your application requires. In our case, we are using it to get the filename and file format, then using it to update information in some of the UI widgets.
Note that selection and the visual response (usually highlighting of some kind) are two separate actions. The operator in the tutorial application does its highlighting using the selection operator. An operator is what performs an action in response to user input, usually in response to some kind of callback event.
More about selection can be found here.
Lastly, notice the last part of the function updates the matrix text at the lower right portion of the window:
    // ...

    this.setMatrixText(this.hwv.model.getNodeNetMatrix(nodeId));

},

// ...

setMatrixText(matrix) {
const ids =
   ['m11', 'm21', 'm31', 'm41',
    'm12', 'm22', 'm32', 'm42',
    'm13', 'm23', 'm33', 'm43',
    'm14', 'm24', 'm34', 'm44'];
for (let [index, id] of ids.entries()) {
    document.getElementById(id).innerHTML = matrix.m[index].toFixed(1);
}
Selection Handles
Selection handles are small controls located around a selected object. These controls allow the user to manipulate the selected object independently of the others. For example, the user is able to translate and rotate an individual part using an object’s handles.
The following video demonstrates what we will be building in this section.
In order to show the object handles in the tutorial application, first select the object, then click the “Show Handles” button in the lower right panel. The logic to link that button to the logic can be seeing in Application.ts:
document.getElementById("handles-button")!.onclick = () => this.addHandle();

// ...

addHandle() {
    // Need to gather the selected node IDs to know which nodes
    // will be affected by the transformation
    let nodeIds: number[] = [];
    const selectionItems = this.hwv.selectionManager.getResults();
    selectionItems.map((selectionItem) => {
        nodeIds.push(selectionItem.getNodeId());
    });

    // Ensure the user has made a selection before trying to add handles
    if (selectionItems.length !== 0) {
        let handlesOp = this.hwv.view.operatorManager.getOperator(OperatorId.Handle);
        handlesOp.addHandles(nodeIds);
        handlesOp.showHandles();
        this.hwv.view.operatorManager.push(OperatorId.Handle);
    }

    // ...
}
The logic associated with manipulating the selection handles are managed by the HandleOperator. Of course, your application can use any logic it needs to perform these actions. The HandleOperator that is packaged with HOOPS Visualize Web simply demonstrates one way to do it.

