Amazon EC2 Quick Start
This guide will walk you through the basic steps of configuring a fresh Amazon EC2 instance and running the HOOPS Visualize Web QuickStart on it. This guide covers client-side rendering for Windows server 2018 and Ubuntu Server 18.04. Please refer to Supported Platforms page for additional instructions for configuring GPU instances for use with Server side rendering.
Note that the setup presented in this guide is intended for illustrative purposes only. This setup is a very basic way for you to evaluate performance or functionality in HOOPS Visualize Web in a real world environment over the internet. For a detailed discussion regarding real world deployment scenarios please refer to: Deployment Scenarios.
Provisioning an Instance
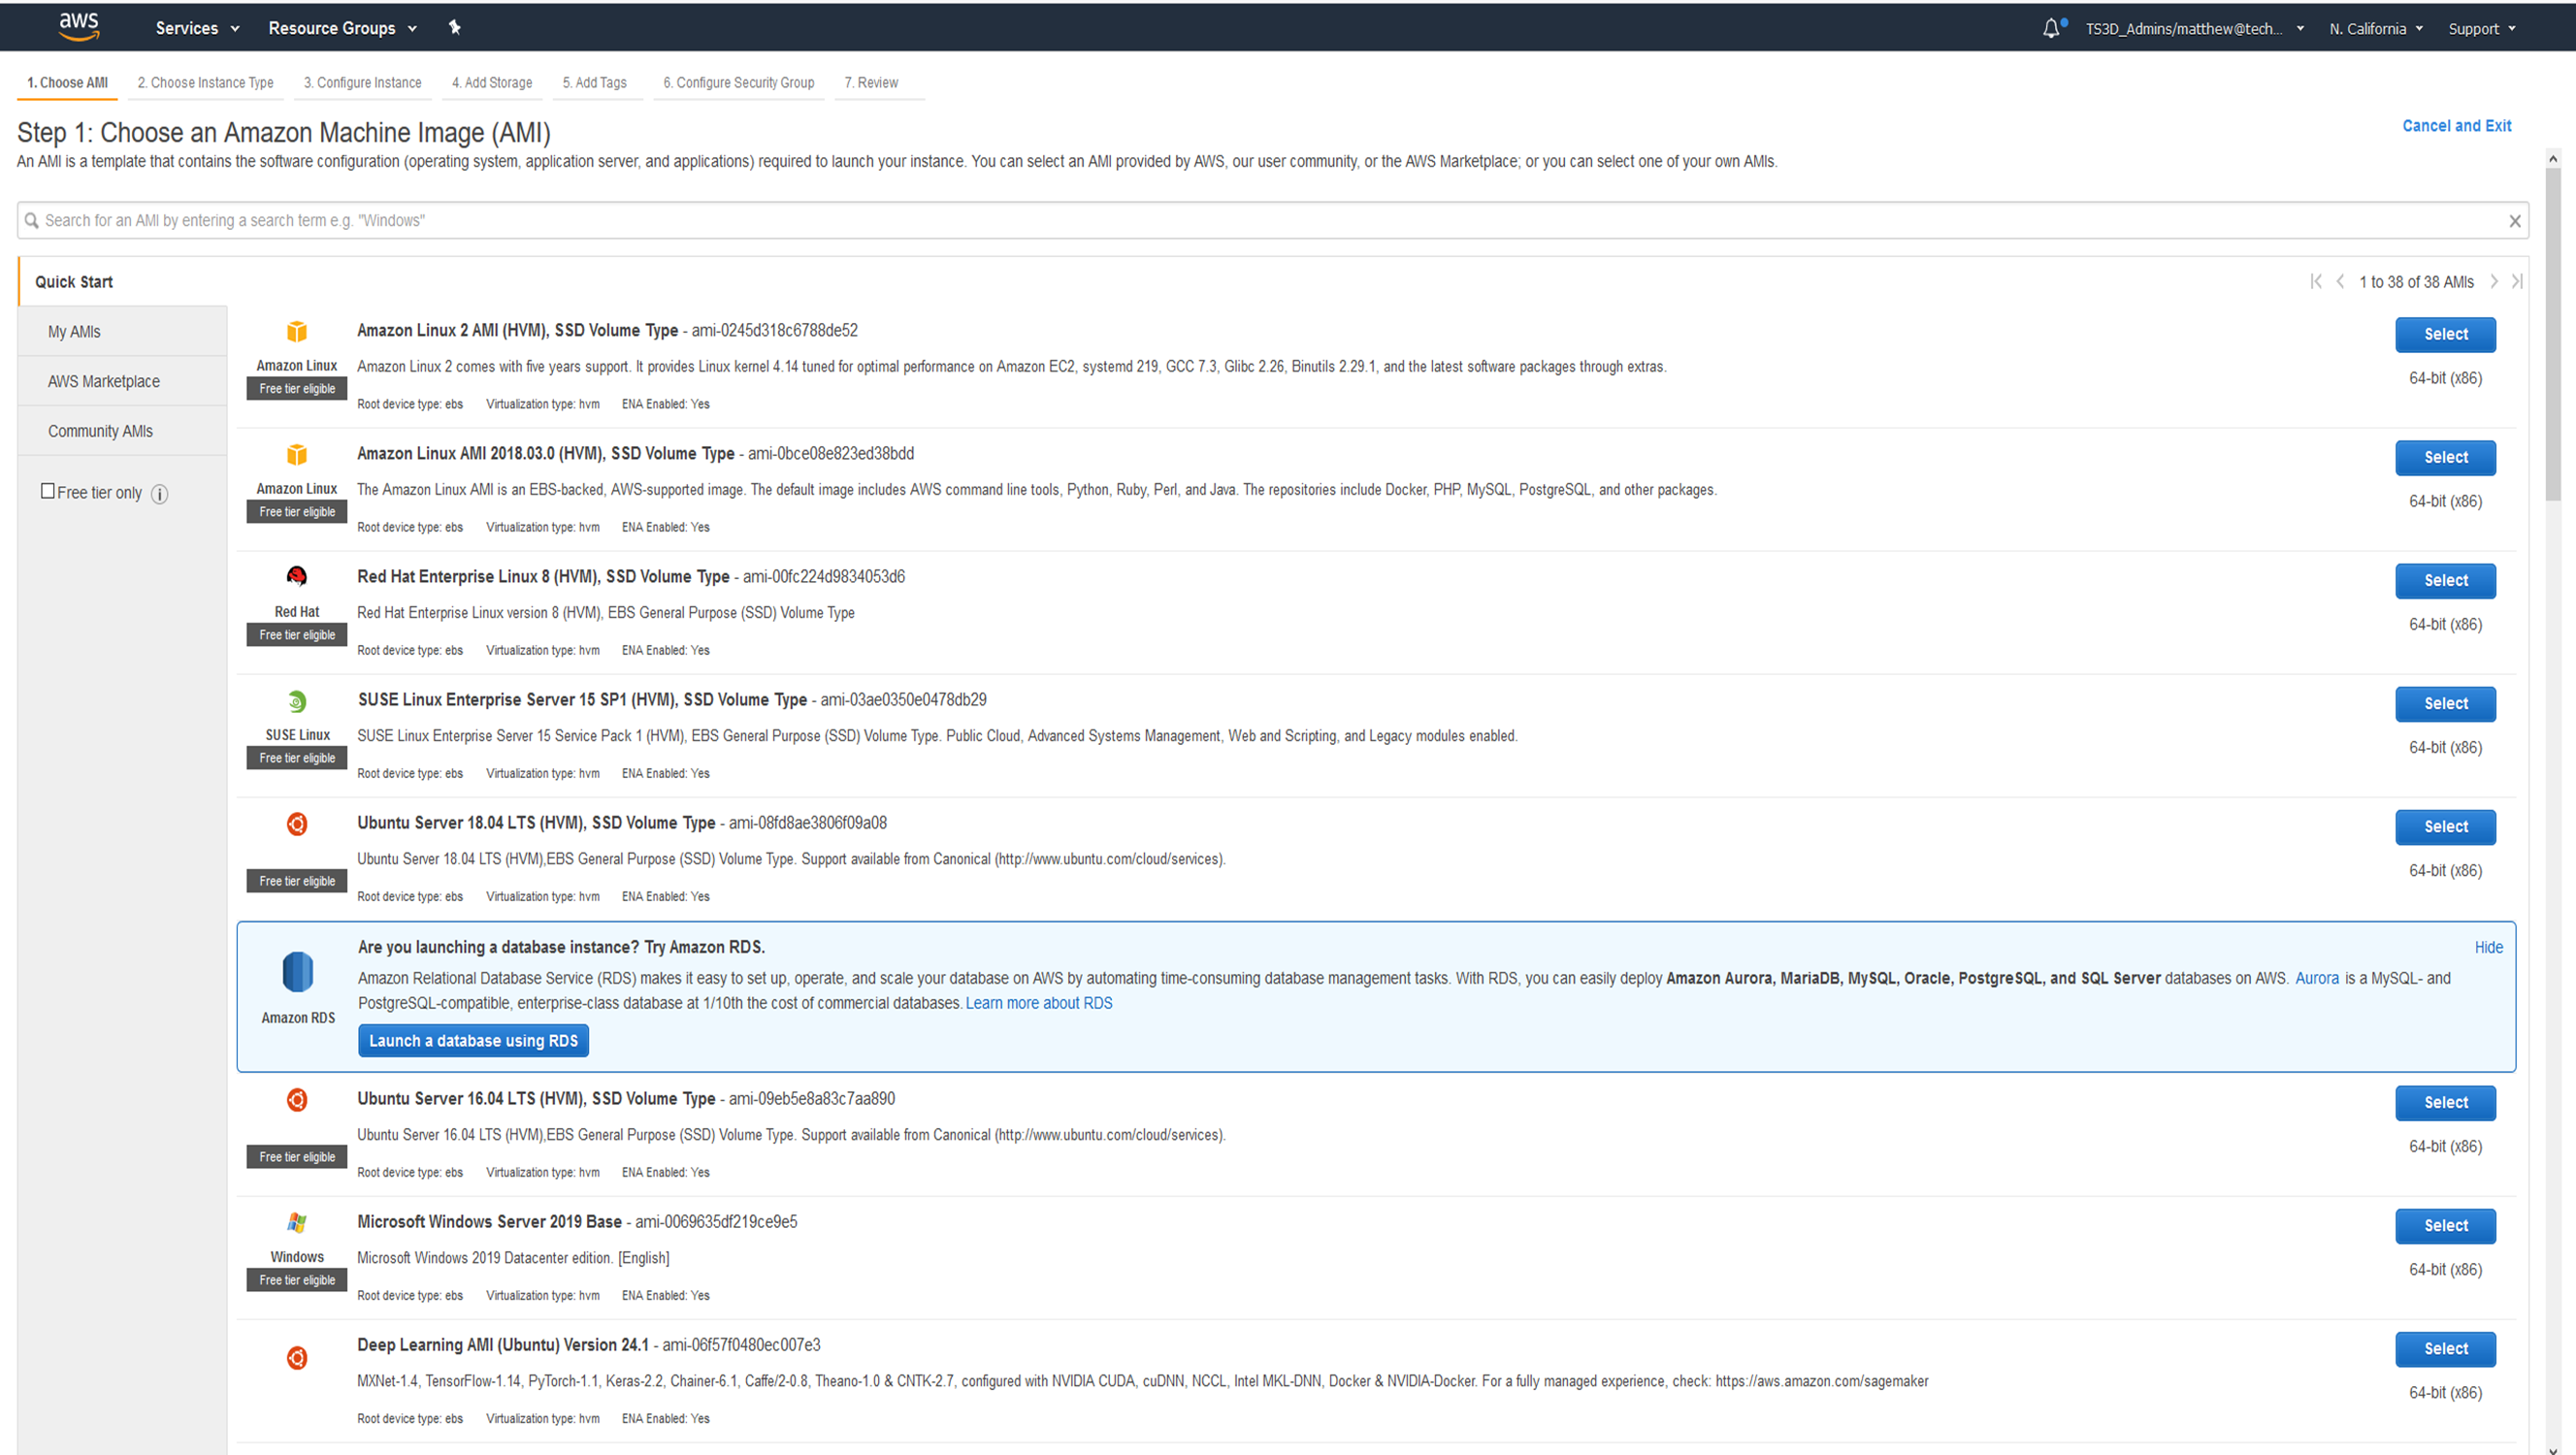
The first step is to provision a new Amazon EC2 instance. Select “EC2” from the “Services” dropdown menu of the AWS Web Console. From the EC2 Service screen, click the “Launch Instance” Button. You will be presented with a screen presenting various operating system options. Choose Either Windows Server 2019 Base or Ubuntu Server 18.04 LTS.
Fanyapps’ fancybox implementation
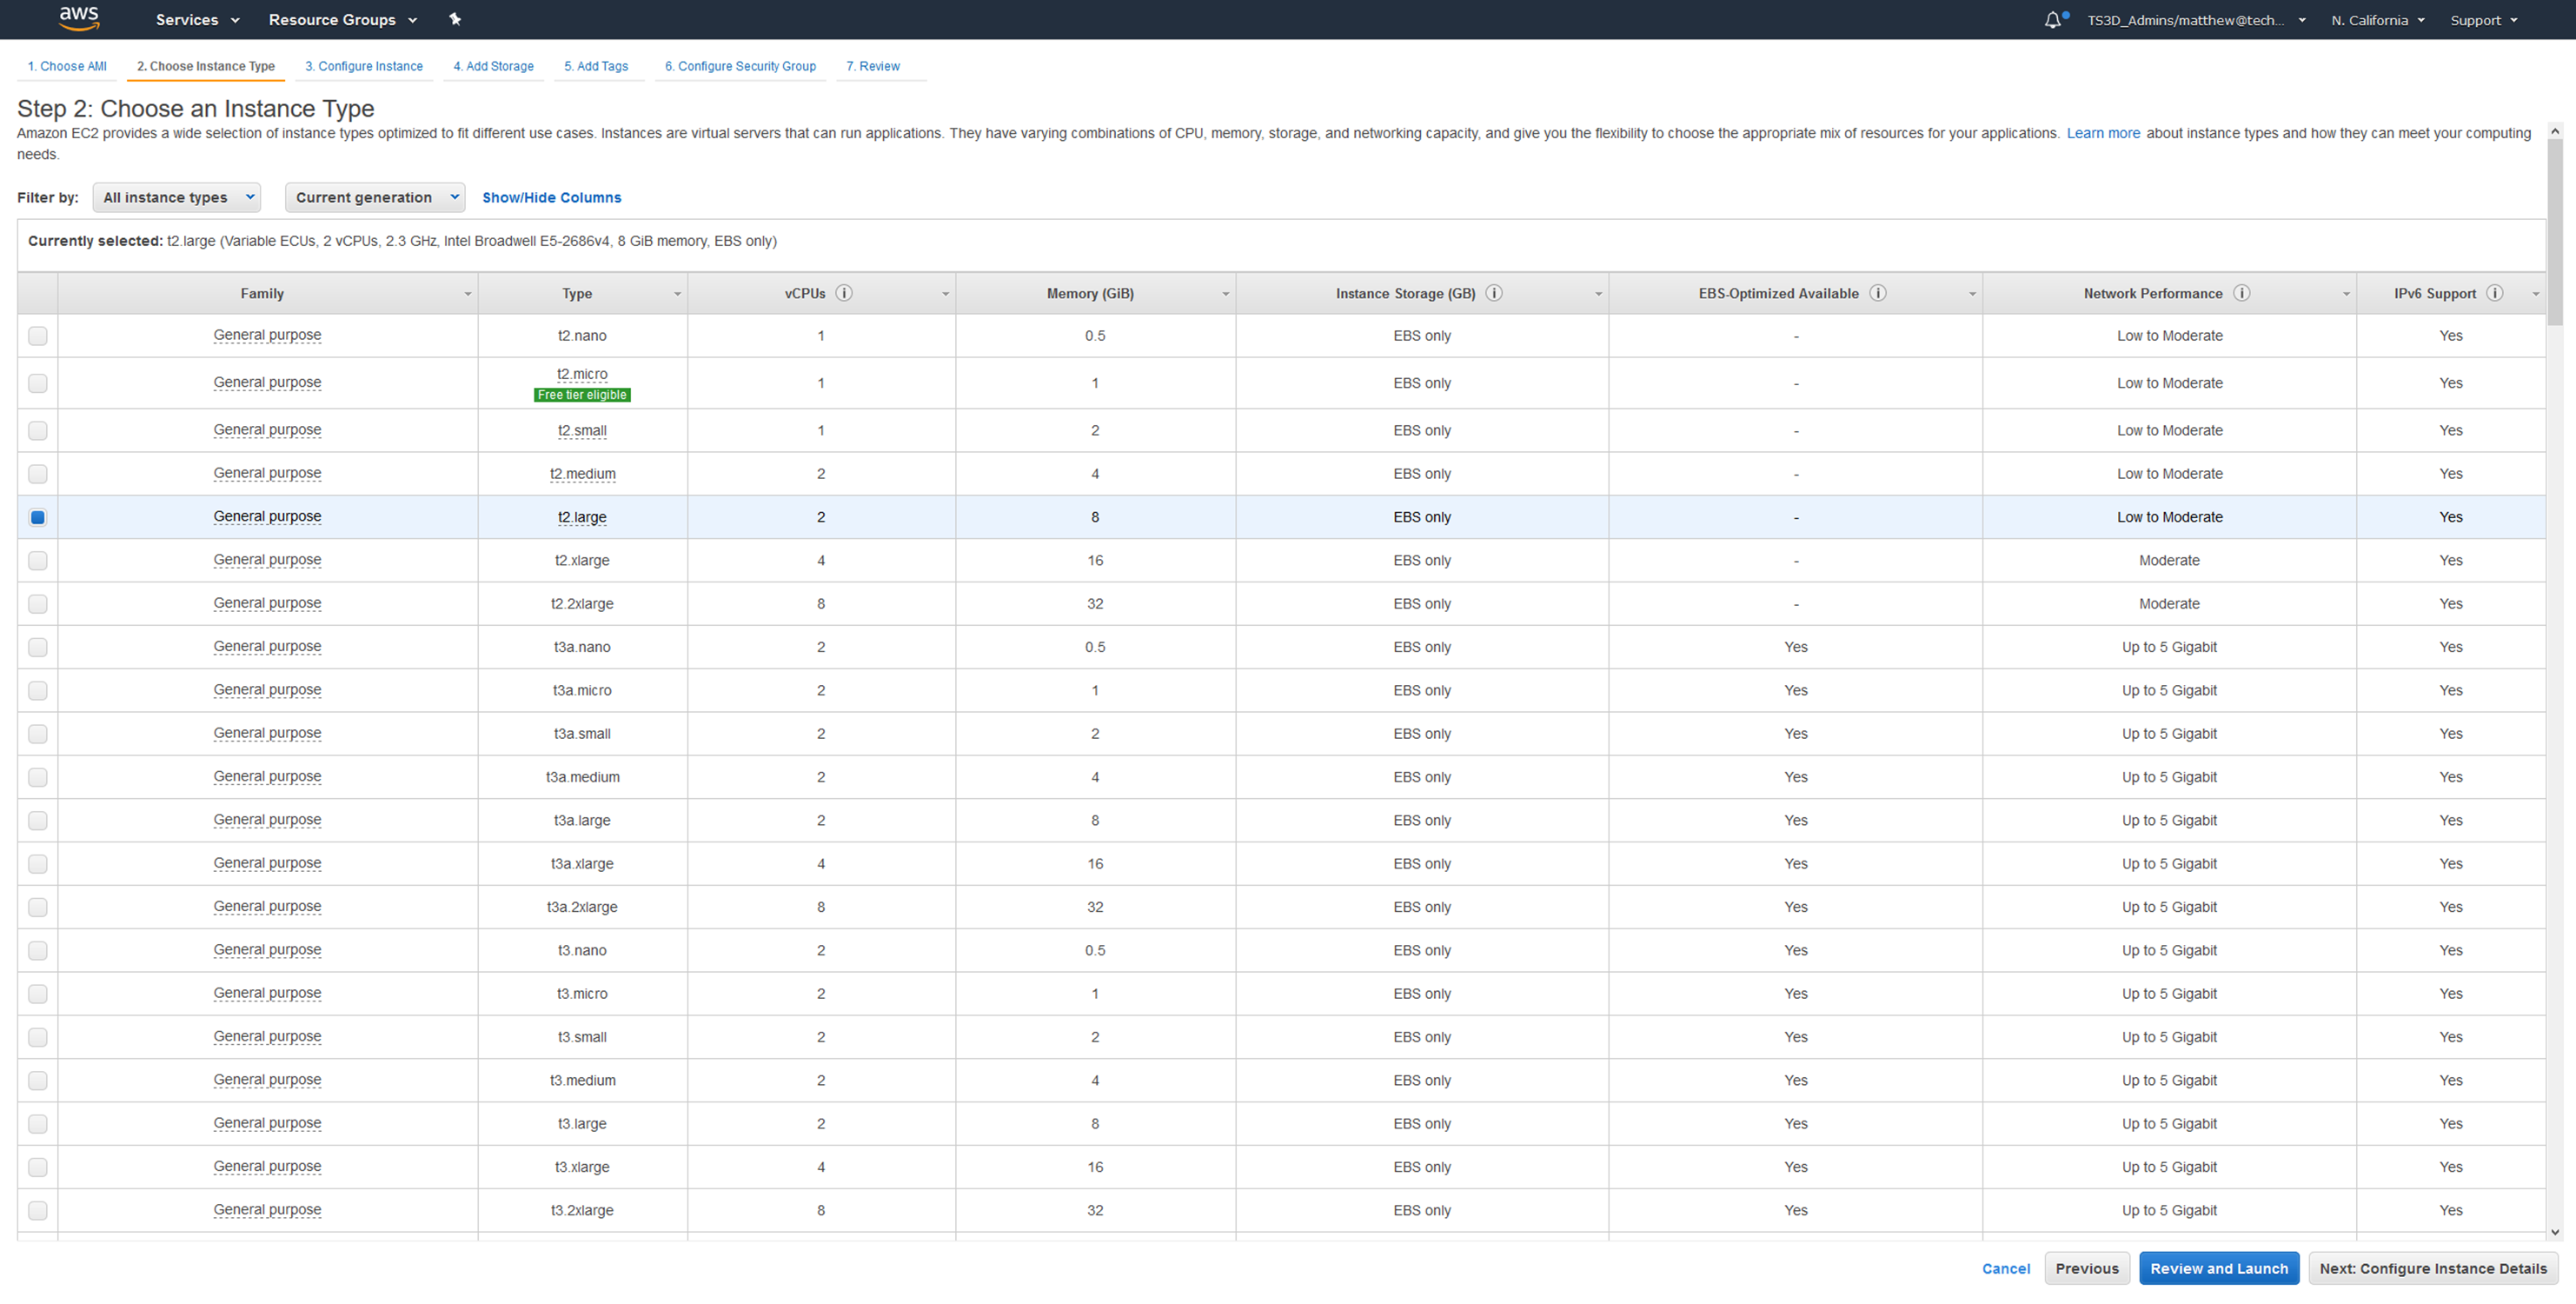
For demonstration and evaluation purposes, the t2.large instance type will be sufficient. Select the checkbox for instance type and click the next button.
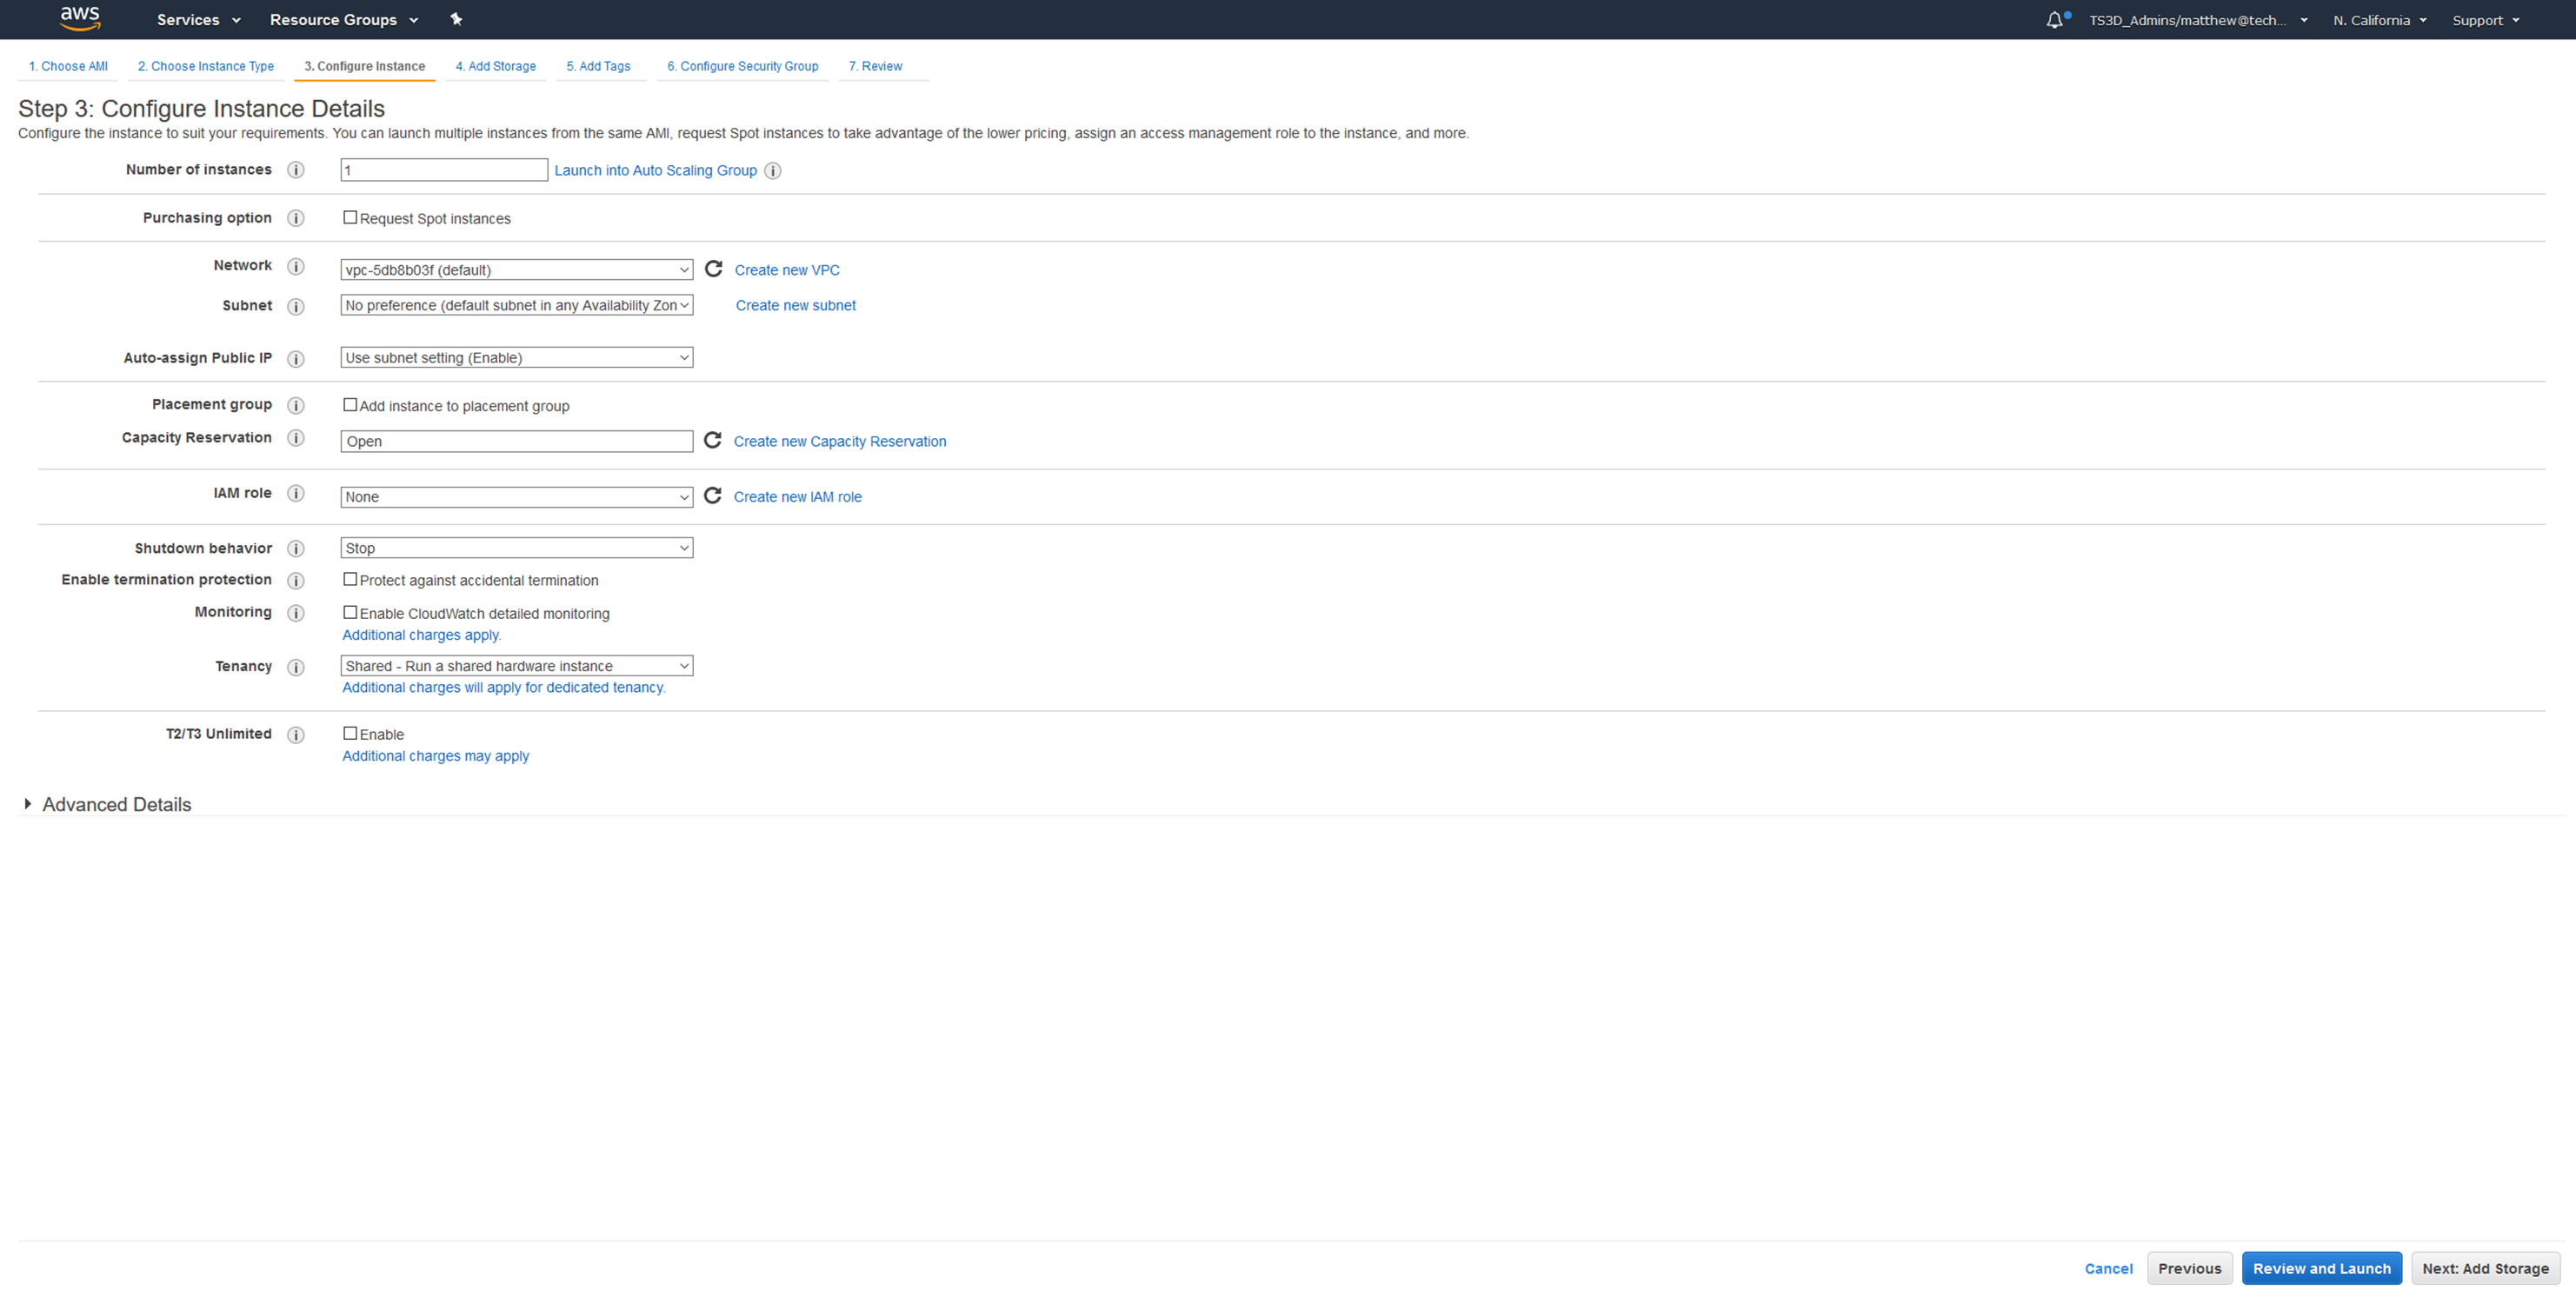
The next screen allows you to configure instance details. For our purposes, the defaults will suffice. You can simply click next on this screen.
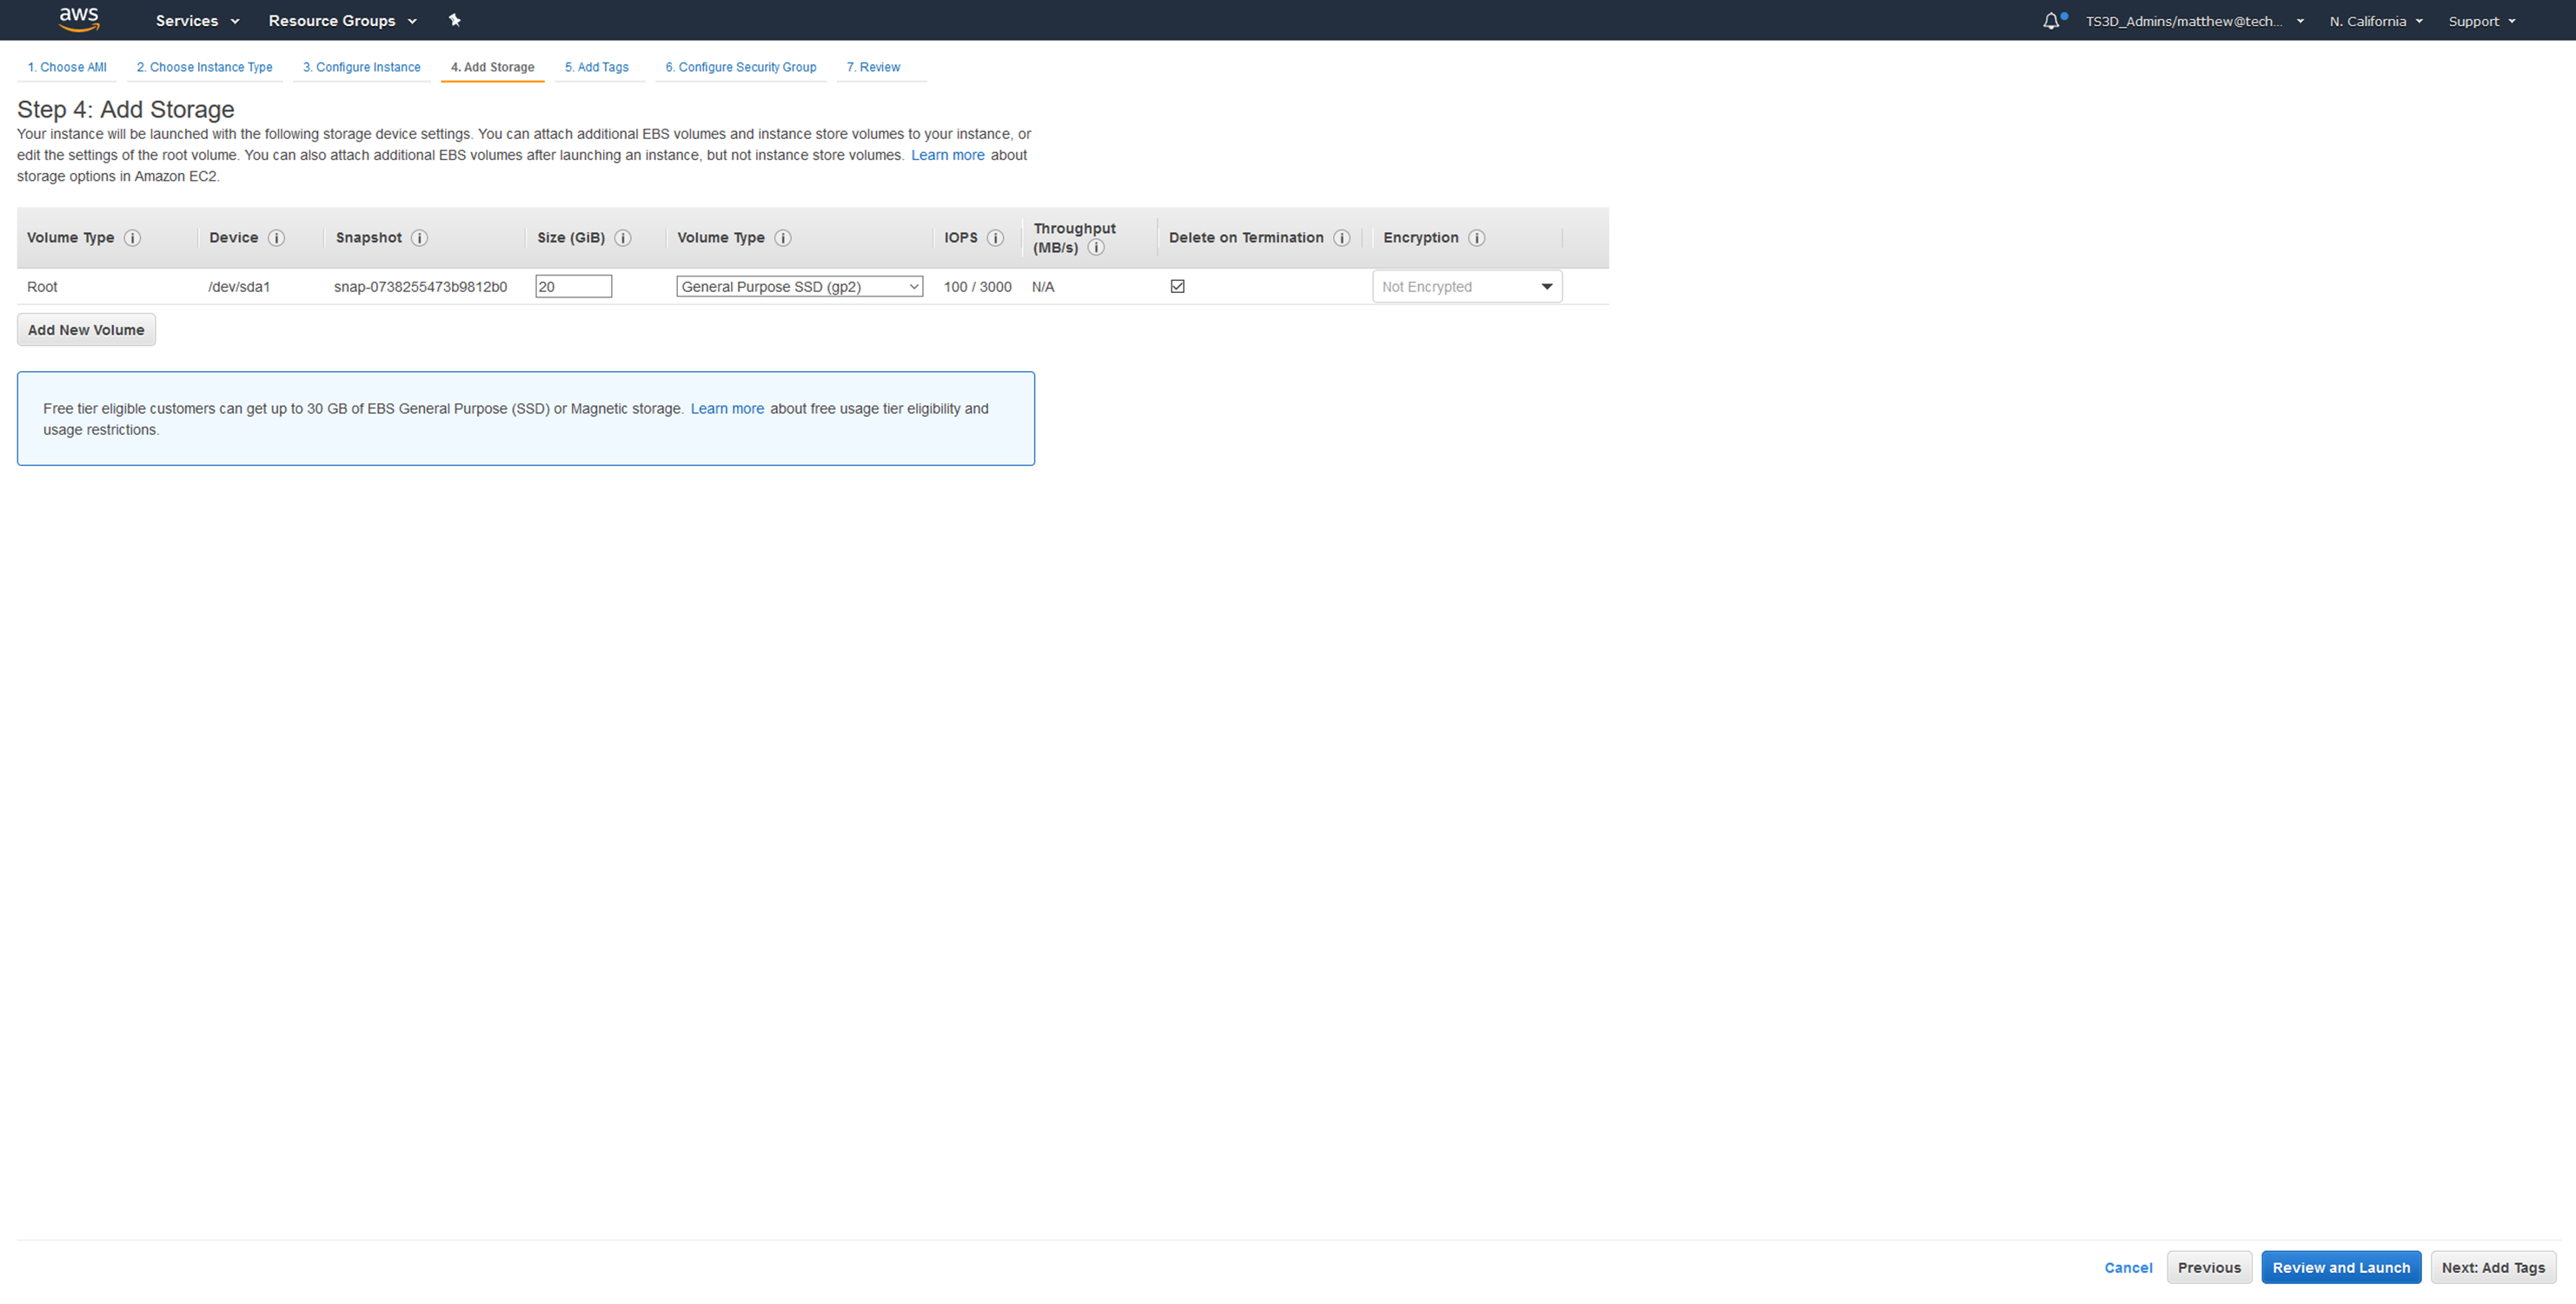
The next screen allows you to configure storage for your new instance. In order to ensure that there is enough space to comfortably install HOOPS Visualize Web and any test models you may have, bump up the storage to 20GB.
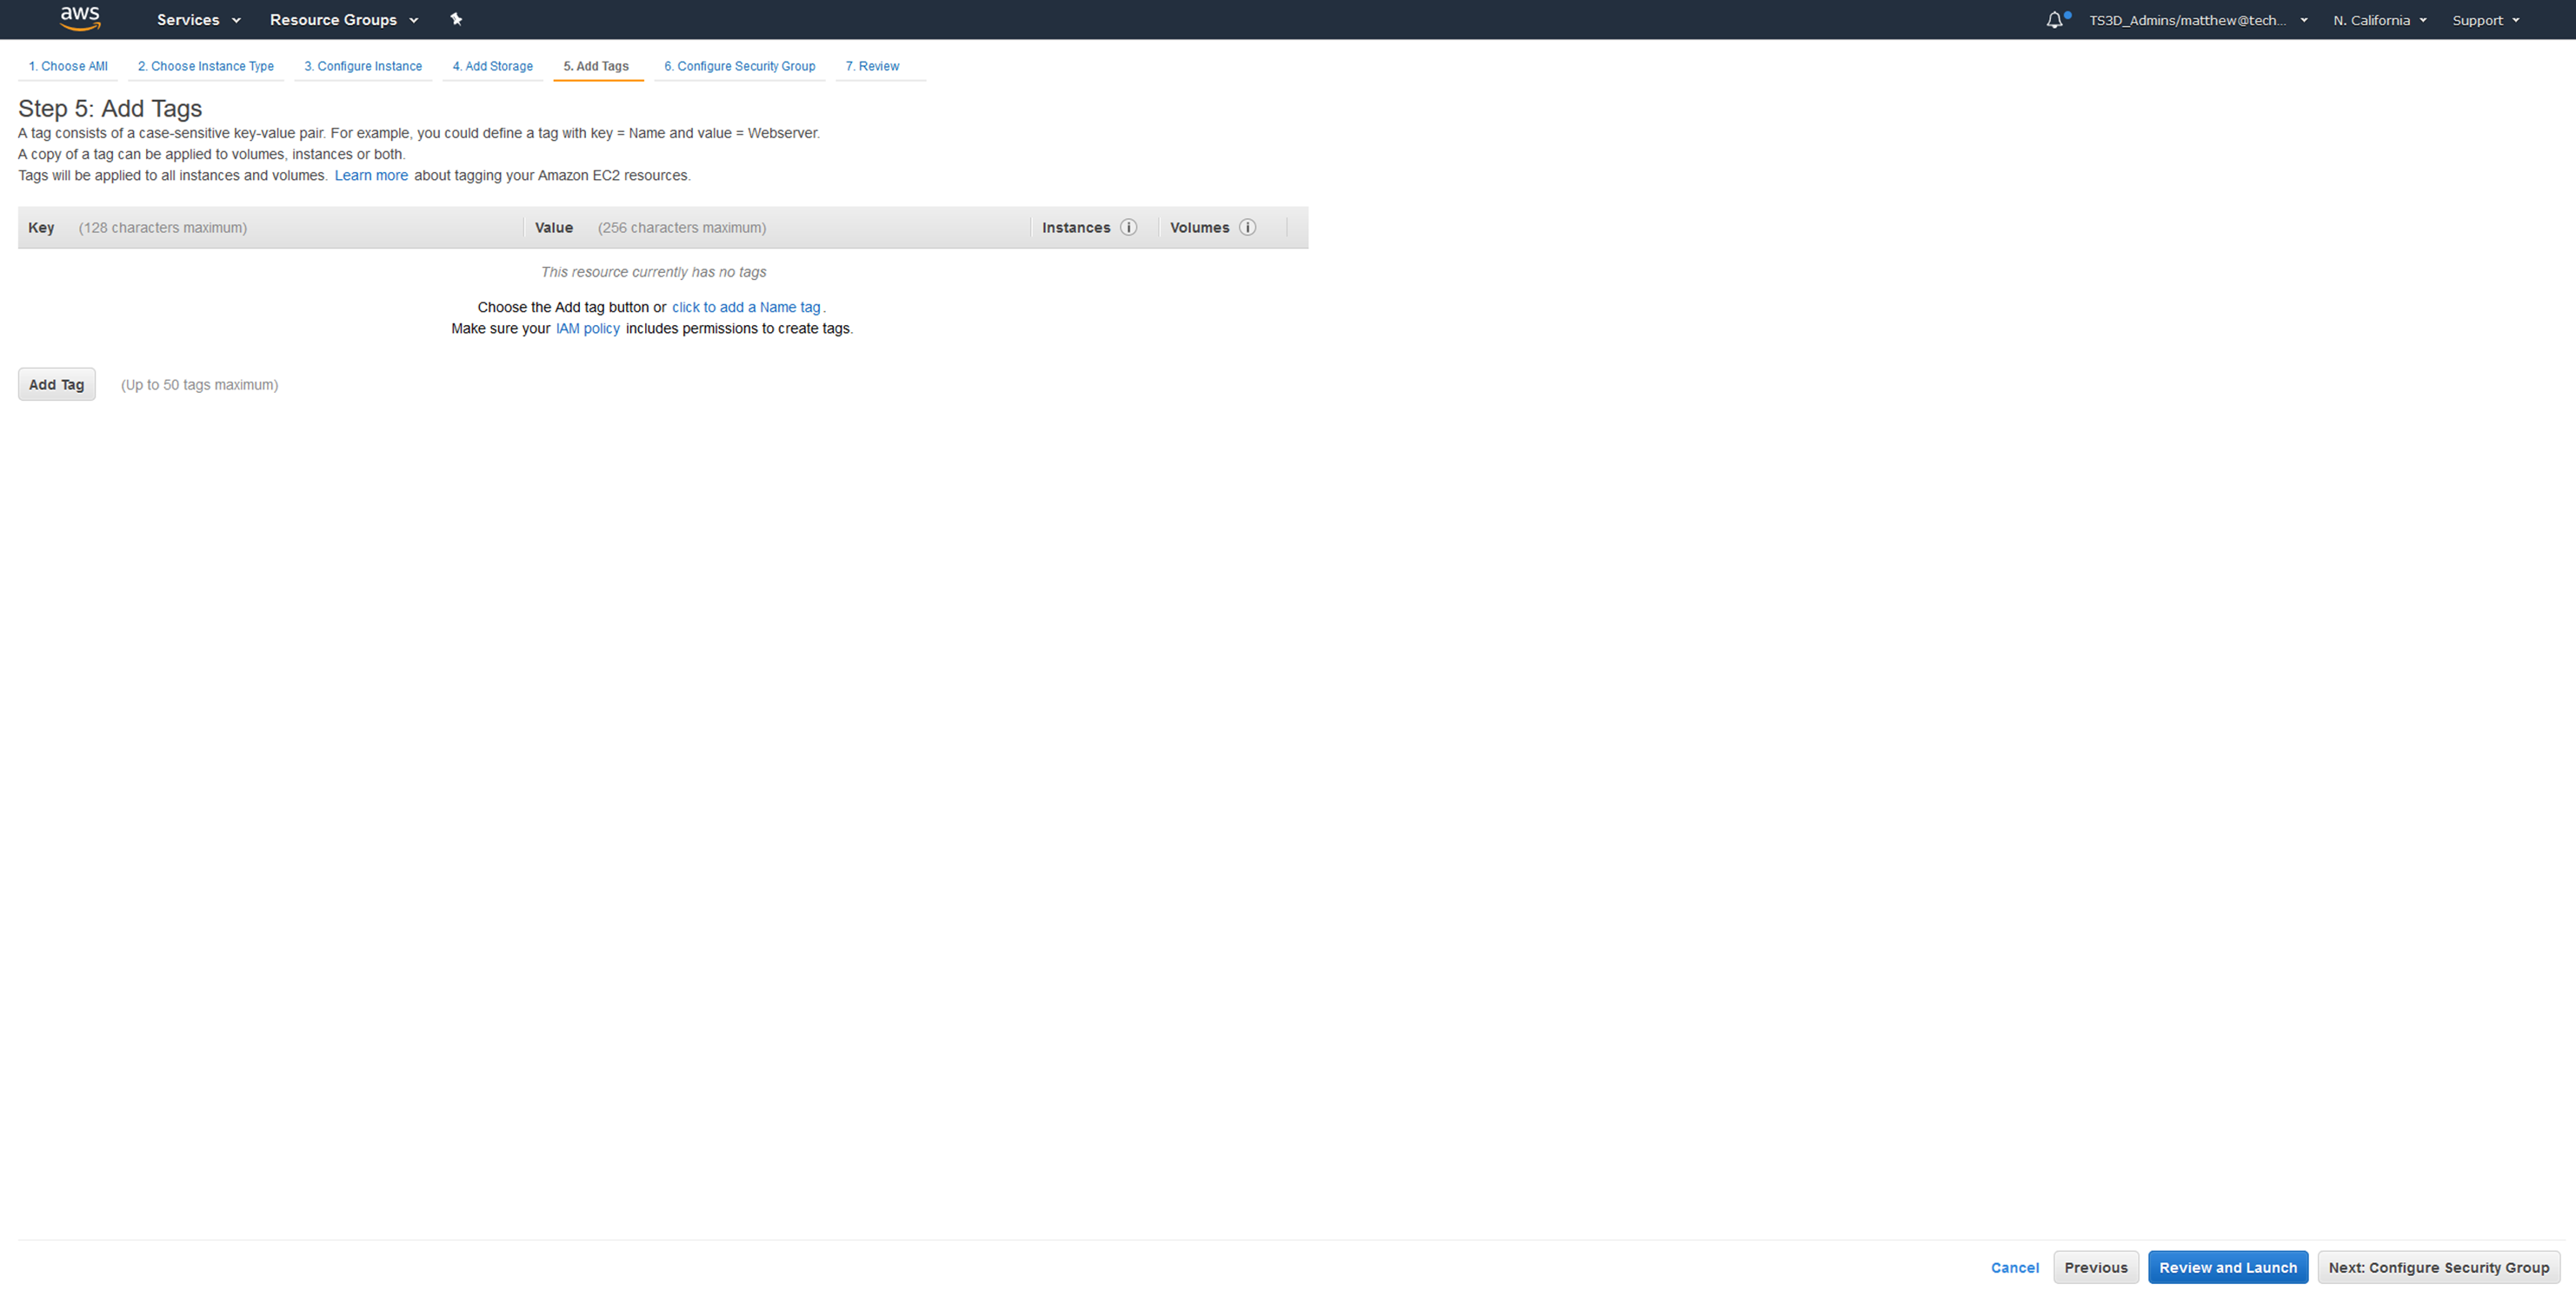
You now have the option to tag your new instance for organizational purposes. This has no effect on HOOPS Visualize Web. You may add any tags you wish or skip this step entirely.
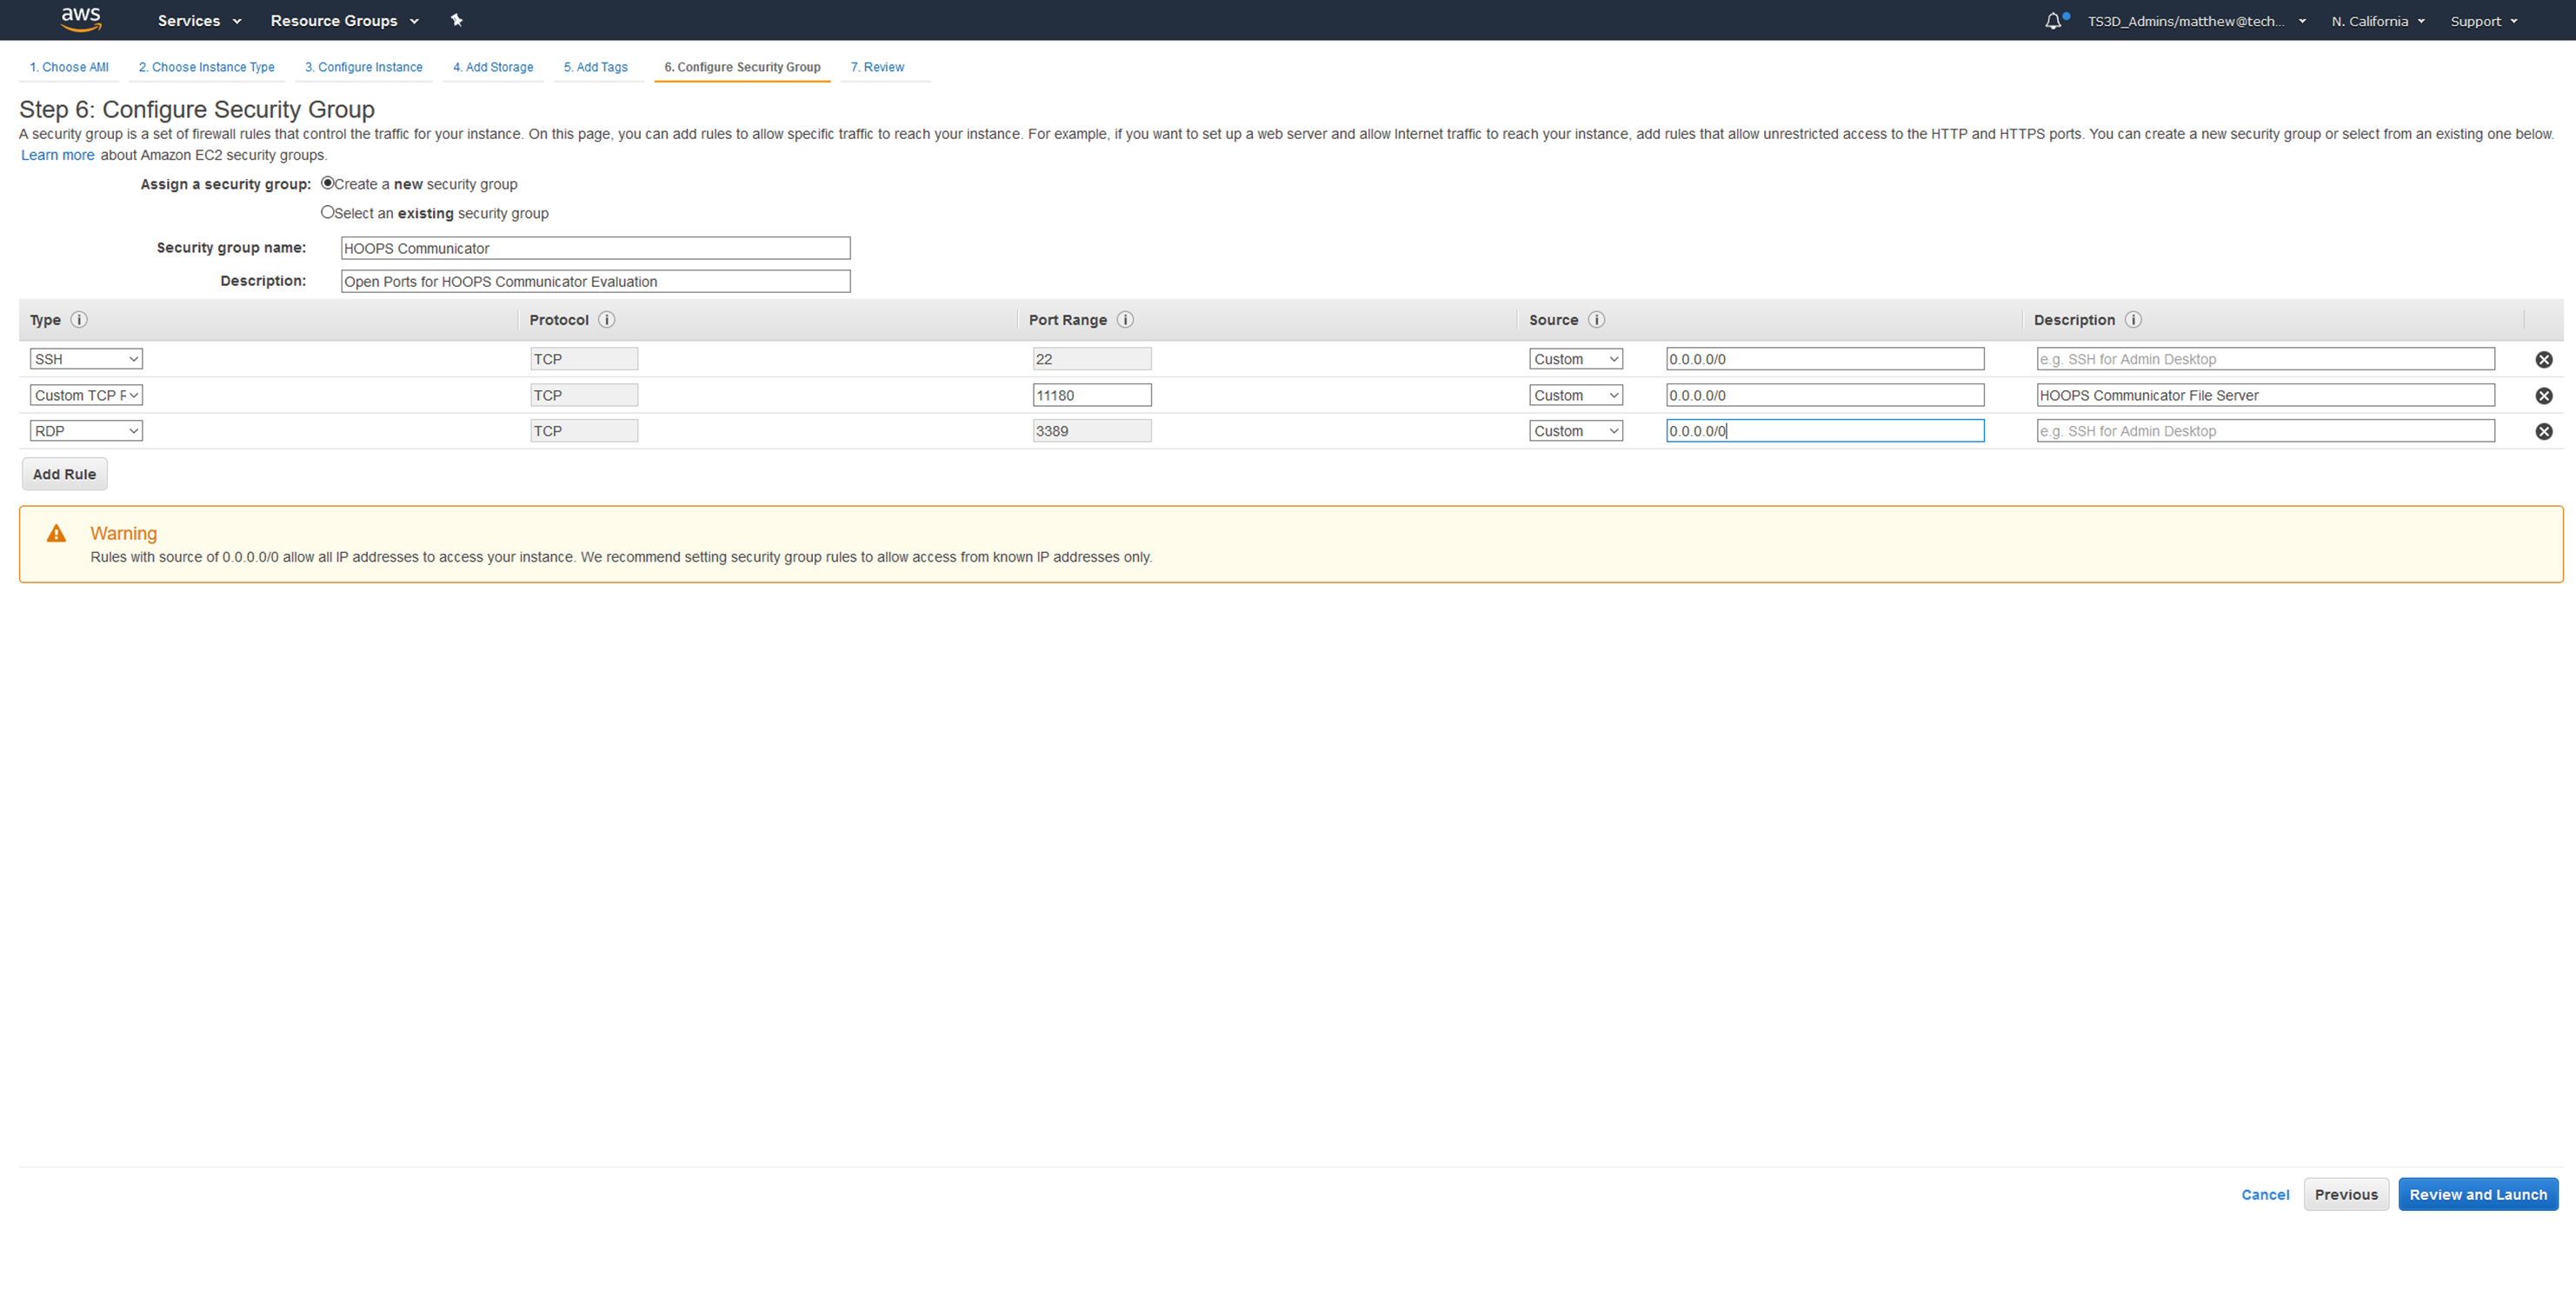
The next screen is where you will configure the Security Group for the new instance. Security groups grant port level access to your instance. For this basic example we are using the HOOPS server’s proxy ability so we only need a single port open. To complete this step, enter the values as shown in the screenshot. This security group can be saved if you need to repeat this process in the future. Note that if you are launching a windows instance you will not need to add an exception for RDP.
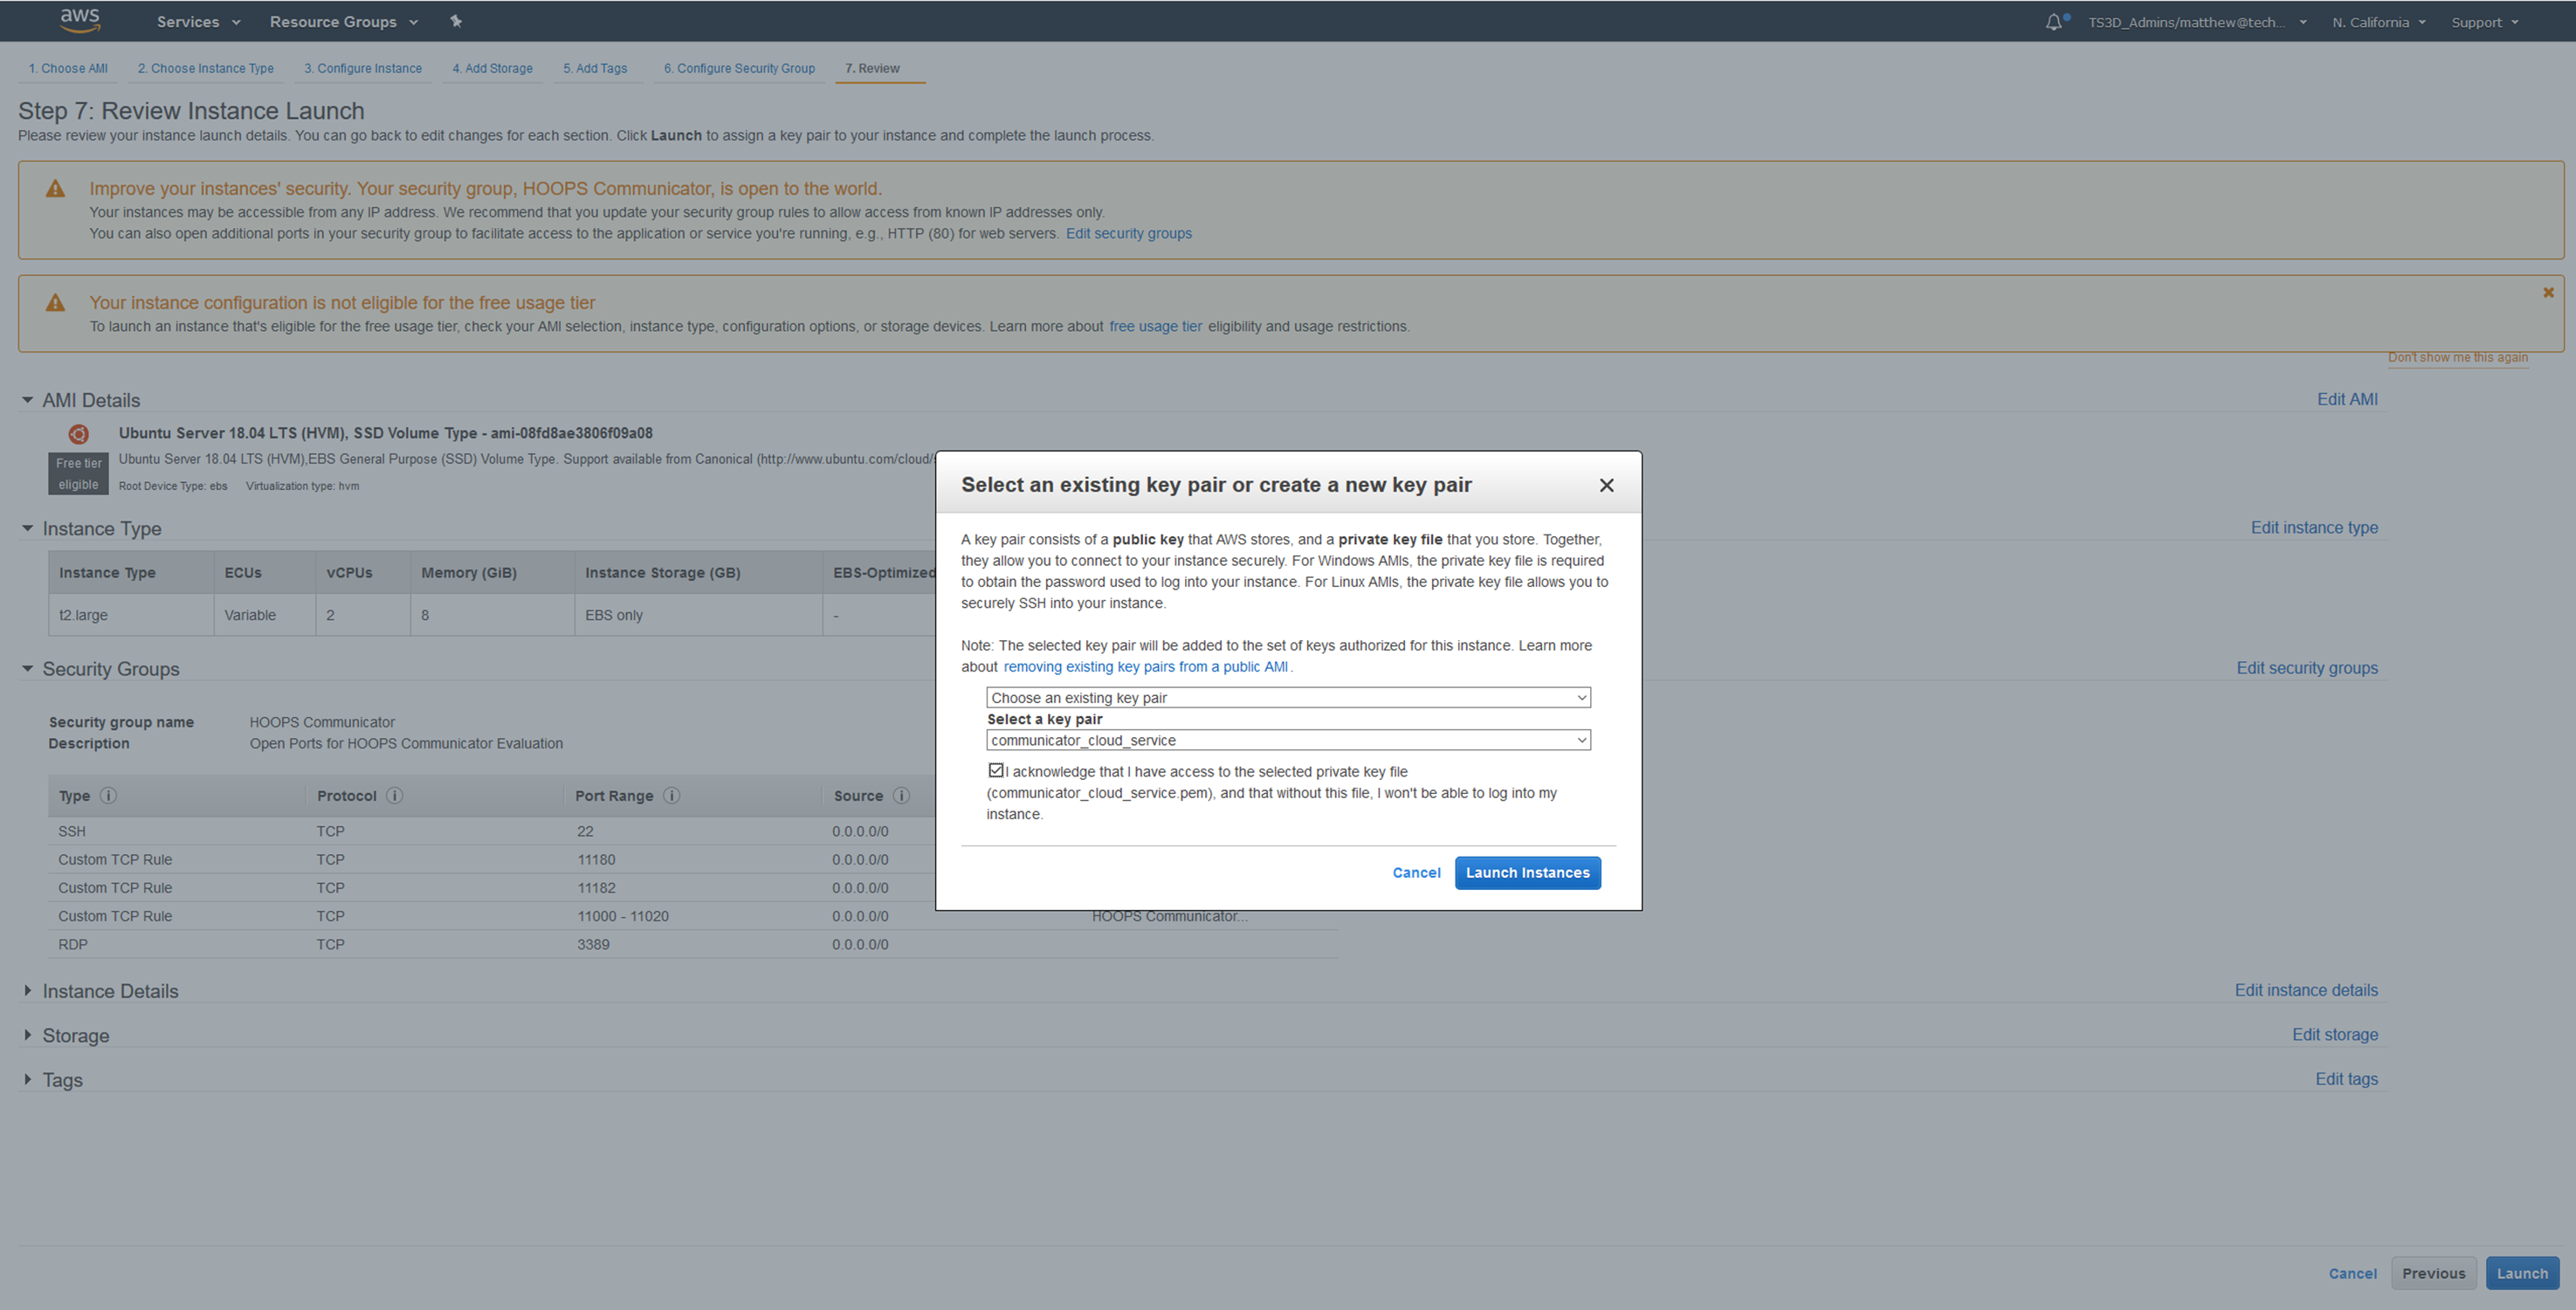
The next screen will allow you to review all the settings you have configured for the new instance and require you to specify your keyfile to launch it
At this point, your new instance will begin launching and be available for use shortly.
Installing the Package on Ubuntu Server
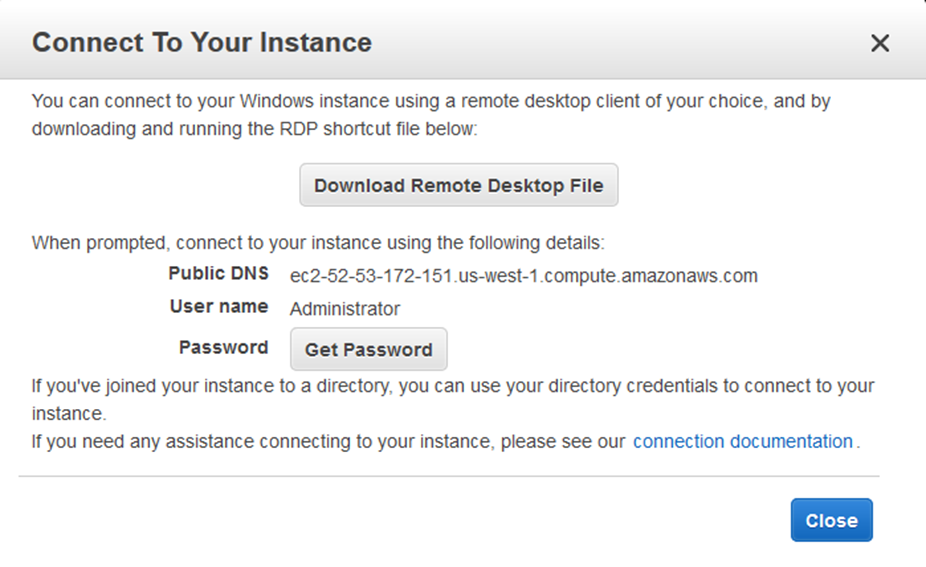
Details for the newly launched server can be retrieved by right clicking on the server in the EC2 Server list and selecting “Connect” from the context menu. The popup menu will give you detailed information on how to connect to the instance.
The first step to running the package on the server is to copy it to the EC2 instance via SCP. The following example command shows values for this example instance. You will need to change the paths to your keyfile, HOOPS Visualize Web Package, and the DNS of your ec2 instance it to work in your case.
scp -i "communicator_cloud_service.pem"
HOOPS_Communicator_2020_Linux.tar.gz ubuntu@ec2-54-153-91-95.us-west-1.compute.amazonaws.com:~/HOOPS_Communicator_2020_Linux.tar.gz
Once the package has been uploaded to the server, connect to it via ssh. Again, the paths and DNS will need to be updated for your own instance:
ssh -i "communicator_cloud_service.pem" ubuntu@ec2-54-153-91-95.us-west-1.compute.amazonaws.com
Extract the HOOPS Visualize Web package by running the Following Command:
tar -xzvf HOOPS_Communicator_2020_Linux.tar.gz
Now that the package is extracted run the start server script:
cd HOOPS_Communicator_2020/quick_start/

./start_server.sh
You can now stream a model from the server to your local machine (Update the URL to match your EC2 instance as in the previous steps):
http://ec2-54-153-91-95.us-west-1.compute.amazonaws.com:11180/hoops_web_viewer_sample.html?model=microengine
Installing the Package on Windows Server
You can easily connect to your new Windows Server instance by right clicking on the server in the EC2 Server list and selecting “Connect” from the context menu. Use your keyfile to unlock the Windows Administrator password and copy it to the clipboard. Now download and open the remote desktop file to connect to your server.
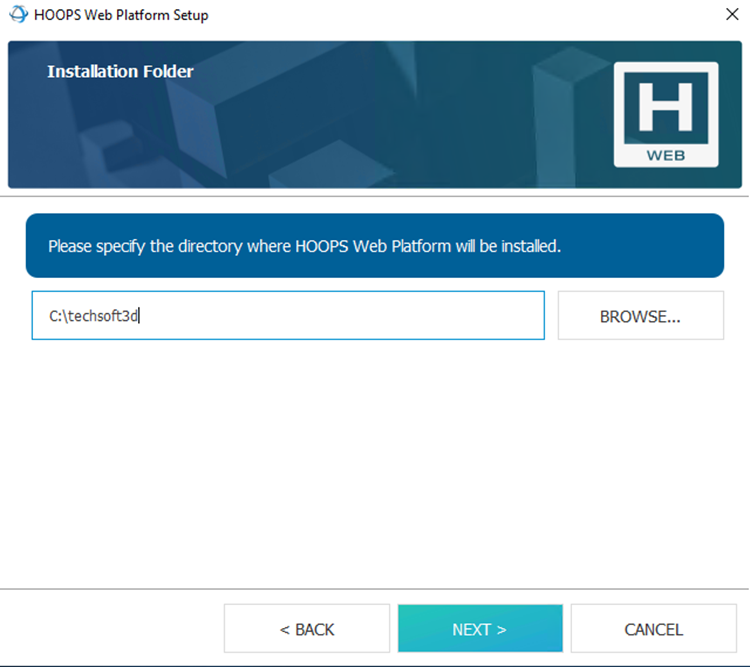
The recommended way to install HOOPS Visualize Web on a fresh server is to use the Installer, as this will handle installing any additional dependencies that are not present on your system. You can easily transfer the installer to your server using RDB my copying the installer file from your local machine’s file explorer and pasting it into the file explorer of your server. Once the installer has been transferred to the remote machine, run it and follow the steps to complete your installation. Note that for the remainder of this walkthrough it will be assumed the install path was set to C:/techsoft3d.
Once setup is complete, we will need to add some exceptions in the Windows firewall to allow the HOOPS Server to service requests from the outside world. Add an inbound rule to the windows firewall for port 11180 as shown in the screenshot:

Now that the firewall is configured, you can start the server. From the HOOPS_Communicator_2020/quick_start directory, you can double click the start_server.bat file to launch the server.

A command window will display showing the server startup information:

You can now stream a model from the server to your local machine (Update the URL to match your EC2 instance as in the previous steps):
http://ec2-52-53-172-151.us-west-1.compute.amazonaws.com:11180/hoops_web_viewer_sample.html?model=microengine

