Setting Up Views
Summary
In this chapter, we will walk through setting up the main focus of our application: the viewers.
Concepts
- Instantiating and starting the WebViewers
- Setting callbacks
- Configuring additional WebViewer options
Project Setup
You can now install the necessary packages directly from npm or from a local installation method with the customer package.
Option A: Direct npm installation
Install the necessary packages directly from npm:
npm install @ts3d-hoops/common @ts3d-hoops/web-viewer
Option B: Local installation from customer package
Copy the <INSTALL_DIR>/web_viewer/@ts3d-hoops directory from our HOOPS Visualize Web package to somewhere accessible to the tutorial project. We will be using <INSTALL_DIR>/tutorials/inventory_management/ as the destination, but you can choose any location that is convenient.
Then install the necessary packages from these paths using a command prompt:
npm install <PROJECT_PATH>/@ts3d-hoops/common <PROJECT_PATH>/@ts3d-hoops/web-viewer
Engine Setup
Next, make your server (or bundler) serve the engine as static assets. In our case, with Vite this is done as follows:
npm install -D vite-plugin-static-copy
Then use it in your vite.config.ts:
// vite.config.ts

import { defineConfig } from "vite";
import { viteStaticCopy } from "vite-plugin-static-copy";

// https://vitejs.dev/config/
export default defineConfig({
  plugins: [
    viteStaticCopy({
      targets: [
        // For Option A (npm installation): copy from node_modules
        {
          src: "node_modules/@ts3d-hoops/sc-engine/engine.esm.wasm",
          dest: "@ts3d-hoops/sc-engine/",
        },
        // For Option B (local installation): use these paths
        // {
        //   src: "path/to/@ts3d-hoops/sc-engine/engine.esm.wasm",
        //   dest: "@ts3d-hoops/sc-engine/",
        // },
      ],
    }),
  ],
});
Instantiating the WebViewer
We’ll use two different views for this project: a main view where we can manipulate the camera, and an overhead reference view. We’ll also add the axis triad and navigation cube. First, we use our main class called Application as a starting point in Application.ts:
First, you’ll notice the import statement. Make sure this points to the location where you copied the @ts3d-hoops directory:
import { Point3, Color, Matrix, Box } from "@ts3d-hoops/common";
Inside the Application class, you’ll see the member elements and the contructor where we get references to both the main and the overhead views. This associates the HTML elements on our page with the Typescript variables representing the views:
mainViewElm: HTMLElement;
overheadViewElm: HTMLElement;

// ...

constructor() {
    const mainViewElm = document.getElementById("main-view");
    if (!mainViewElm) {
      throw new Error("Main view not found");
    }
    this.mainViewElm = mainViewElm;

    const overheadViewElm = document.getElementById("overhead-view");
    if (!overheadViewElm) {
      throw new Error("Overhead view not found");
    }
    this.overheadViewElm = overheadViewElm;
  }
Now that we have the references, we can instantiate them as WebViewer objects. We’ll start with the main view using a call to new WebViewer. Notice we provide the HTML element that will be associated with the view as well as the path the HOOPS engine:
this.hwv = new WebViewer({
    container: this.mainViewElm,
    empty: true,
    enginePath: "/@ts3d-hoops/sc-engine",
});
At this point, the view is created, but it can’t display anything because it has no associated model. Loading a model can be done in a number of ways, however, for this tutorial, we’ll load the microengine.scs model included in the package with the tutorial.
Note
HOOPS Web Viewer uses a set of callback functions to indicate when certain events have occurred. Intercepting these events will give you important information on the status of your application. A list of all callbacks can be seen in the CallbackMap class.
In order to know when the model is ready, we’ll use one of these callbacks. In this case, we are waiting for the modelStructureReady callback to load the model:
this.hwv.setCallbacks({
  modelStructureReady: async () => {
    await Promise.all([
      this.printingPlane.init(this.hwv),
      this.loadModel("microengine"),
    ]);
  },
Now let’s initialize our overhead view. Here we are waiting for the sceneReady callback before assigning it to the overheadViewElm element:
sceneReady: async () => {
    this.overheadView = await this.hwv.addView({
      container: this.overheadViewElm,
    });
Setting the Cameras
This application will use two views, and a good time to initialize their cameras is during the sceneReady event. Continuing from our last code snippet, we associate both mainCamera and overheadCamera to their respective views:
sceneReady: async () => {

    // ...

    const mainCamera = Camera.create(
        new Point3(-1000, -1000, 1000),
        new Point3(0, 0, 0),
        new Point3(0, 0, 1),
        1, 720, 720, 0.01);

    this.hwv.view.setCamera(mainCamera);

    const overheadCamera = Camera.create(
        new Point3(0, 0, 1000),
        new Point3(0, 0, 0),
        new Point3(0, 1, 0),
        1, 720, 720, 0.01);

    this.overheadView.setCamera(overheadCamera);
},
More information about the Camera object can be found in our Programming Guide.
Instancing
In this part, we will walk through building our own custom “instance operator”. This will be a custom operator that copies geometry.
A common additive manufacturing use case may be to replicate parts on the plane for printing multiple copies. To do this visually, we can instance selected nodes and allow the user to place them on the plane with the mouse.
The InstanceOperator.ts file has been provided with the code for our InstanceOperator class. Our custom operator class will implement the Operators.OperatorBase interface within HOOPS Visualize Web to our specific needs. We will create member variables for where the user clicked, the current nodes we want to instance, and the Z position of the inserted nodes.
constructor(hwv: WebViewer) {
    super(hwv, hwv.view);
    this._mainViewer = hwv;
    this._ptDown = Point2.zero();
    this._currentNodes = [];
    this._nodePosZ = 0;
}
We want the user to be able to select a node, click on the plane, and insert the node where the user clicked. For this tutorial, we will use the onMouseDown and onMouseUp event callbacks in the Operator class. We use both to ensure that the user is clicking and not dragging the mouse. If the mouse down position is equal to the mouse up position, we can insert the node into the scene.
onMouseDown(event: MouseInputEvent) {
    this._ptDown.assign(event.getPosition());
}

onMouseUp(event: MouseInputEvent) {
    const position = event.getPosition();

    if (position.equals(this._ptDown)) {
      const config = new PickConfig(SelectionMask.Face);
      this._mainViewer.view.pickFromPoint(position, config)
        .then((selectionItem) => {
          if (
            selectionItem.isEntitySelection() &&
            this._mainViewer.model.getNodeName(selectionItem.getNodeId()) ===
              "printingPlane"
          ) {
            this._insertGeometry(selectionItem.getPosition());
          }
          else {
            alert("Please select a point on the printing plane.");
          }
        });
    }
}
This function will ensure that the user has picked a point on the PrintingPlane surface, and not elsewhere in world space. If the user did select the PrintingPlane, we continue to insert the geometry.
The InstanceOperator class will need another function called _insertGeometry that uses the mouse click event position on the selection item to dictate where the geometry should be inserted.
To insert the geometry, we will follow the same general steps outlined in the Building A Basic Application. tutorial. We will obtain the mesh IDs, then use those mesh IDs to set mesh instance data and create the mesh instance.
async _insertGeometry(position: Point2) {
    const meshIds = await this._mainViewer.model.getMeshIds(this._currentNodes);

    meshIds.forEach(async (meshId, index) => {
        const color = await this._mainViewer.model.getNodeEffectiveFaceColor(this._currentNodes[index], 0);

        let netMatrix = this._mainViewer.model.getNodeNetMatrix(
            this._currentNodes[index]
        );

        netMatrix.m[12] = position.x; // Add translation to the X-axis.
        netMatrix.m[13] = position.y; // Add translation to the Y-axis.
        netMatrix.m[14] = this._nodePosZ;

        return this._mainViewer.model.createMeshInstance(
            new MeshInstanceData(
            meshId,
            netMatrix,
            "Node " + this._currentNodes + " Instance",
            color,
            Color.black())
            );
    });
}
Lets write our last member function, setNodesToInstance. This function gathers the selection node IDs, then recursively gathers and dependent leaf nodes we may need to instance alongside it.
setNodesToInstance(nodeIds: number[]) {
    this._currentNodes = this._gatherChildLeafNodes(nodeIds);
    this._mainViewer.model.getNodesBounding(this._currentNodes).then((box) => {
      this._nodePosZ = box.max.z - box.min.z;
    });
}
With this, we have the application logic to instance nodes in the scene. But we still need to instantiate the operator itself and connect it to the UI button. Instancing is handled below:
const instanceOp = new InstanceOperator(this.hwv);
const handle = this.hwv.registerCustomOperator(instanceOp);
const instanceBtn = document.getElementById("instance-button")!;
Now, let’s connect it to the UI:
instanceBtn.onclick = () => {

  // Use the button to push and pop the operator from the operator stack
  if (instanceBtn.innerHTML.includes("Instance Part")) {
    // Gather nodes to be instanced
    let nodeIds: number[] = [];
    const selectionItems = this.hwv.selectionManager.getResults();
    selectionItems.map((selection) => {
      nodeIds.push(selection.getNodeId());
    });

    if (selectionItems.length !== 0) {
      instanceBtn.innerHTML = "Disable Instancing";
      instanceOp.setNodesToInstance(nodeIds);
      // Remove the selection operator from the stack while instancing
      this.hwv.view.operatorManager.push(handle);
      this.hwv.view.operatorManager.remove(OperatorId.Select);
      this.hwv.selectionManager.setHighlightNodeSelection(false);
      this.hwv.selectionManager.setHighlightFaceElementSelection(false);
      this.hwv.selectionManager.setPickTolerance(0);
    }
    else {
      alert(
        "Try Again. Please first select nodes from the model to instance!"
      );
    }
  }
  else {
    instanceBtn.innerHTML = "Instance Part";
    // Remove the instance operator from the stack and reenable selection and highlighting
    this.hwv.selectionManager.clear();
    this.hwv.view.operatorManager.remove(handle);
    this.hwv.view.operatorManager.push(OperatorId.Select);
    this.hwv.selectionManager.setHighlightNodeSelection(true);
    this.hwv.selectionManager.setHighlightFaceElementSelection(true);
  }
};
The src/js/app.js file will contain our main application logic, as well as manage the setup and handling of our WebViewer objects.
We have provided the starter code and will implement each function in the following steps.
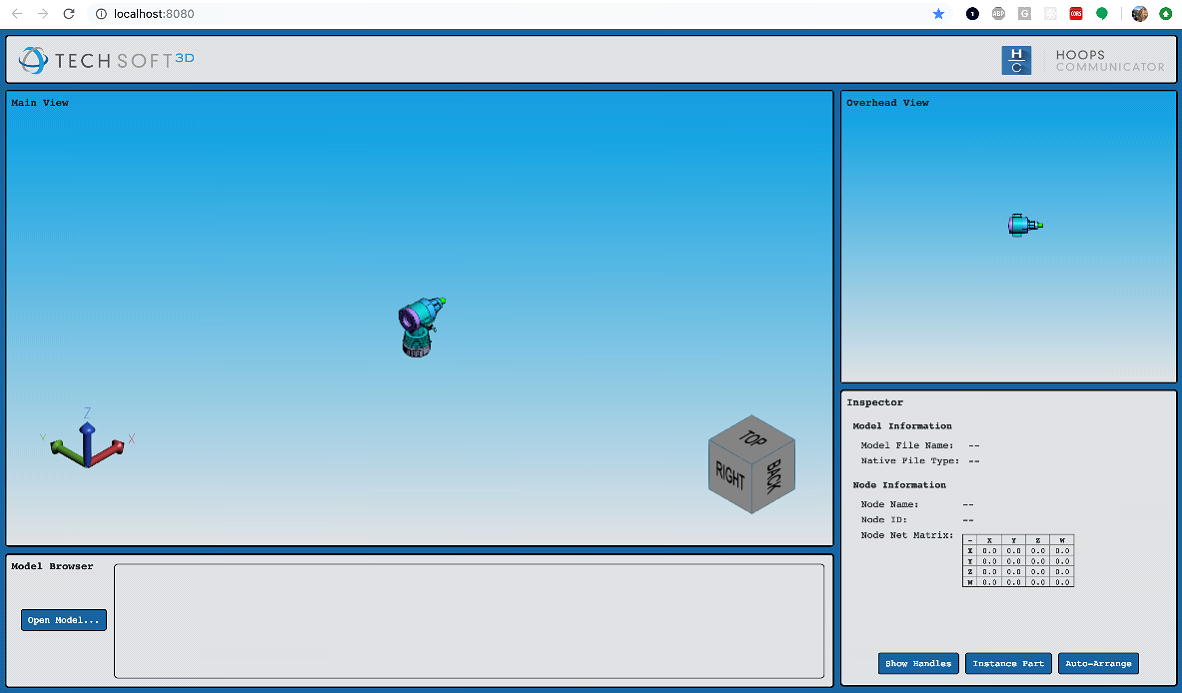
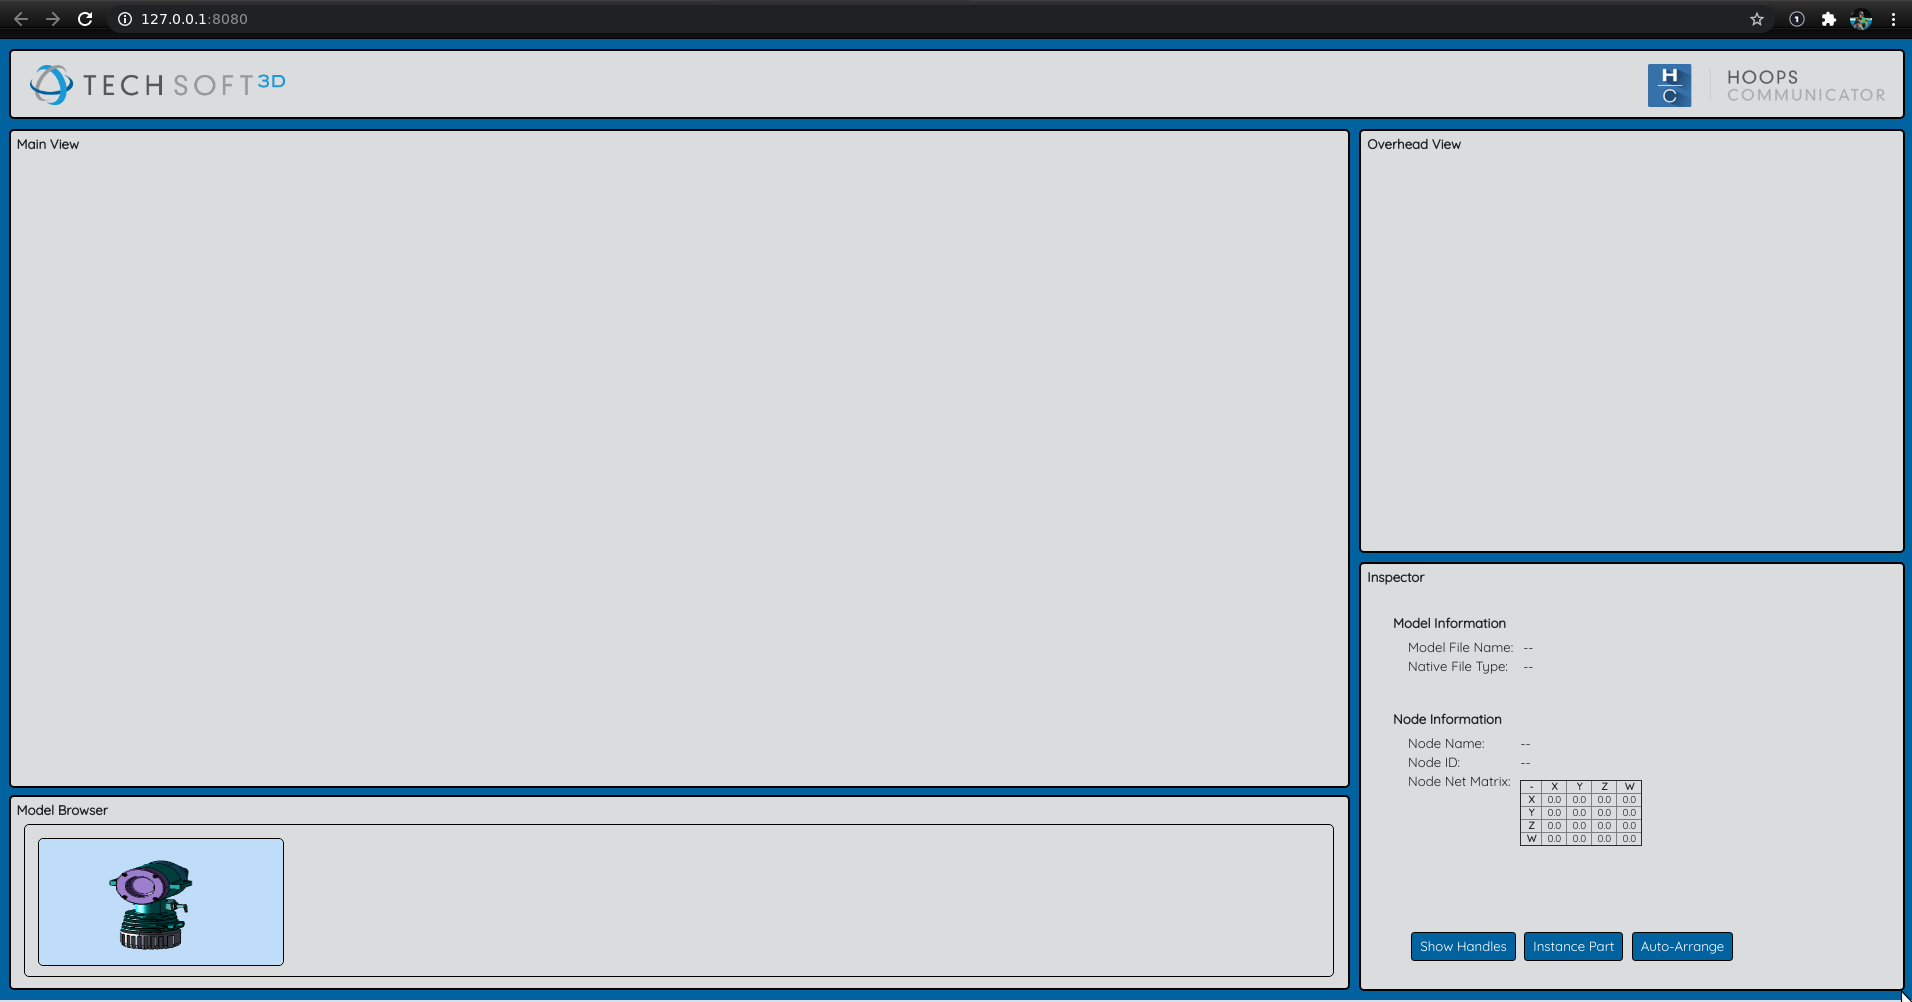
At this point, you can run npm start on the command line to start the development server provided with the tutorial. The server will automatically update the browser as you save changes. You should see this:
Note
Make sure you run npm install before starting the server!
As you can see, our template has both a “Main View” and an “Overhead View”. The main viewer will provide user interaction with the scene and provide the canvas for user control. The overhead viewer will serve as another camera in the scene, fixed above the scene, pointing straight down the -Z scene axis. The overhead viewer will not have user interaction (though you could enable it, if so desired).
In the HTML provided, you can see <div> elements present that will serve as containers for our Web Viewers.
<!-- Main Viewer Component w/ Interaction -->
<div id="canvas" class="comp-container">
        <div id="viewer"></div>
        <div id="viewer-label" class="comp-label">Main View</div>
</div>

<!-- Overhead Viewer Component for a Top-Down View -->
<div id="subcanvas" class="comp-container">
        <div id="subviewer"></div>
        <div id="subviewer-label" class="comp-label">Overhead View</div>
</div>
The container IDs we are interested in are viewer and subviewer. The following code will be added to the constructor of your main class, using the viewer and subviewer div IDs. We will store each WebViewer object in an array.
Add the following to the beginning of the constructor() starter code provided in the file app.js:
class main {

        constructor() {
                // Instantiate two viewers for two different views
                const mainViewer = new Communicator.WebViewer({
                        containerId: "viewer",
                        empty: true
                });
                const overheadViewer = new Communicator.WebViewer({
                        containerId: "subviewer",
                        empty: true
                });

                // Set class properties
                this._viewerList = [mainViewer, overheadViewer];

                // Start viewers
                this._viewerList.map( (viewer) => viewer.start() );

                // Set up viewers
                this.setViewerCallbacks();
                this.configureOperators();
                this.setEventListeners();

        } // End main constructor

} // End main class
If you look back at your web application, you will see nothing has changed. At this point we have started the viewers but have not loaded a model. A lot of the initial setup between both viewers is going to be the same, so we can use Array.prototype.map() to apply the common logic to each viewer. We have provided the function setViewerCallbacks() in the starter code, which is where we will add this logic.
To start, we will create named instances of our viewers within setViewerCallbacks():
setViewerCallbacks() {
        let mainViewer = this._viewerList[0];
        let overheadViewer = this._viewerList[1];
}
Next, we will set up the map() callback function. For each viewer, we will set a Web Viewer callback for modelStructureReady and sceneReady. By using callbacks, we can ensure our set up and configuration logic is executed at the appropriate time during the Web Viewer lifecycle. You can find additional details in our Programming Guide article about callbacks.
Append the following to setViewerCallbacks():
this._viewerList.map( (viewer) => {

  viewer.setCallbacks({

        modelStructureReady: () => {
          // Create Printing Plane
          // Load Model
        },

        sceneReady: () => {
          // Set the cameras for the two viewers
          // Background color for viewers
        }

  }); // End Callbacks on Both Viewers

}); // End map
You can see from the comments what we intend for each callback. Let’s work through each one, though we will skip the printing plane for now – we will implement that in the next section.
We can abstract the loading process into its own loadModel() function, as a class method of main. The loadModel() function will take two parameters – the model name to be loaded, and the WebViewer the model should be loaded into.
Within the function, we want to be sure we are adding our model to the model tree in a smart manner. We will create a new model node off the root node, name it, and load our model to that node.
Add the following to the loadModel() function provided in the starter code:
// Function to load models and translate them so they are loaded
// at the origin and above the printing plane
loadModel(modelName, viewer) {
        const modelNum = viewer.model.getNodeChildren(viewer.model.getAbsoluteRootNode()).length;
        const nodeName = "Model-" + (modelNum + 1);
        const modelNodeId = viewer.model.createNode(null, nodeName);
        this._modelList.push(modelName);
        viewer.model.loadSubtreeFromScsFile(modelNodeId, "./data/" + modelName + ".scs")
                .then(() => {
                        let loadMatrix = viewer.model.getNodeNetMatrix(modelNodeId);
                        viewer.model.getNodeRealBounding(modelNodeId)
                                .then((box) => {
                                        loadMatrix.setTranslationComponent(box.min.x * -1, box.min.y * -1, box.min.z * -1);
                                        viewer.model.setNodeMatrix(modelNodeId, loadMatrix, true);
                        });
        });
}
We can call now call our new function in the modelStructureReady callback:
this._viewerList.map( (viewer) => {

  viewer.setCallbacks({

        modelStructureReady: () => {
          // Create Printing Plane
          // Load Model
          this.loadModel("microengine", viewer);
        },

        sceneReady: () => {
          // Set the cameras for the two viewers
          // Background color for viewers
        }

  }); // End Callbacks on Both Viewers

}); // End map
Note, the newly created class property _modelList to track the list of loaded models. Add the new class property to the constructor():
// Set class properties
this._viewerList = [mainViewer, overheadViewer];
this._modelList = [];
Recall from Building a Basic Application using the modelStructureReady callback. For more information, consult our API Reference for the CallbackMap.
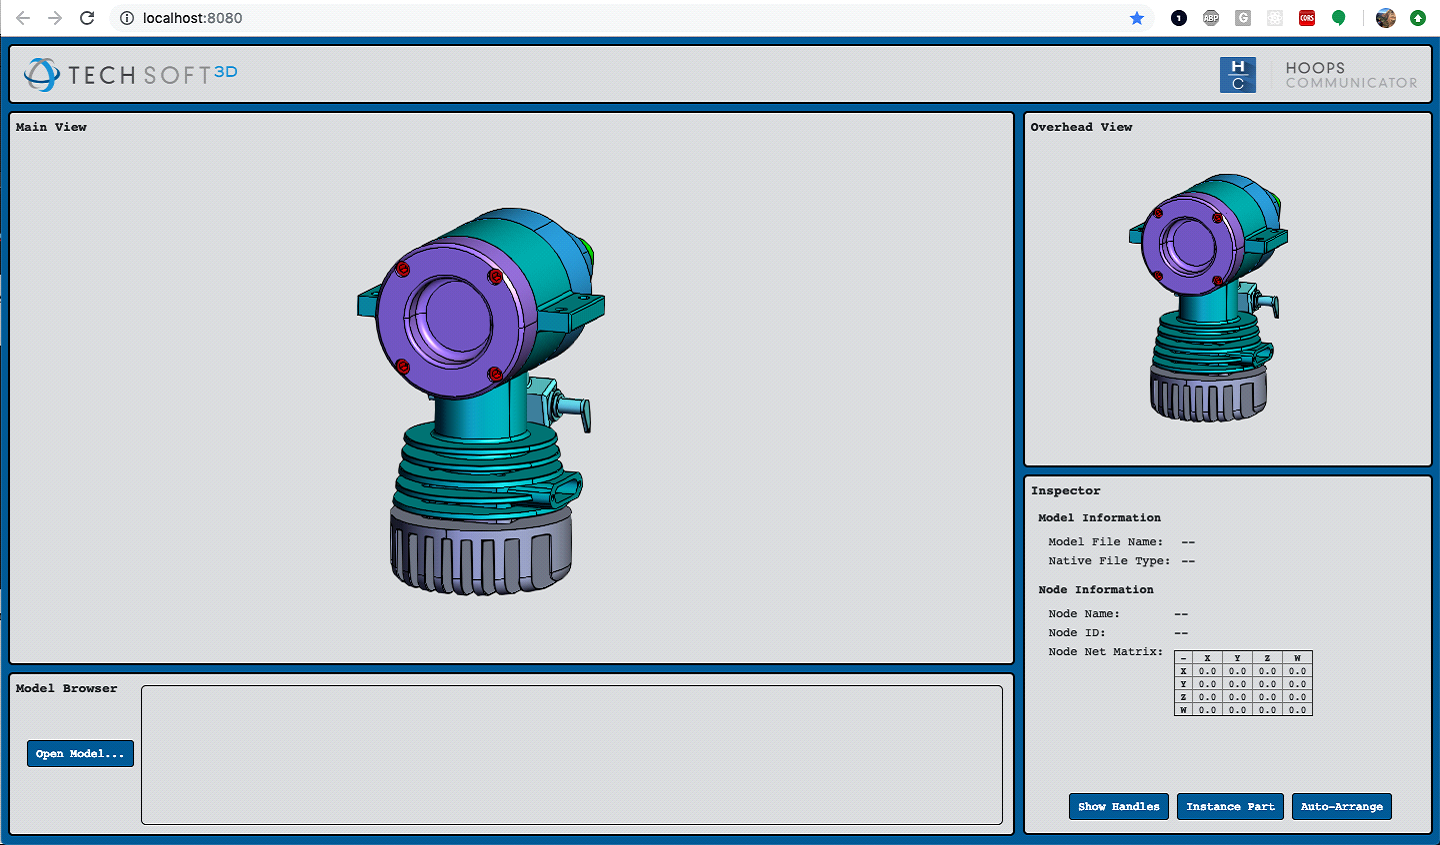
At last! Reload your browser and you will see both viewers with the model loaded and rendered! But notice the camera position is not very helpful, so let’s address that next.
By default, both viewers will load the model identically, but we know we would like to have two separate camera views for these viewers. To make a new Camera view, we need to specify all the parameters that make up the Camera state. This consists of three main vectors:
- Position in world space
- Target at which to point
- What direction should be considered “up”
Also, we specify the projection mode and the camera view width and height. Last, we can optionally provide a near clipping limit, where anything within that distance to the camera will be clipped. For the sake of this tutorial, we have provided the camera parameters for you, but you can adjust these as you wish. Add the following to the sceneReady callback because we do not want to update the scene until it is ready, which may happen after the modelStructureReady event. You should see your application update to reflect these camera changes.
sceneReady: () => {

  // Set the cameras for the two viewers
  let camPos, target, upVec;
  switch (viewer) {
        case mainViewer:
          camPos = new Communicator.Point3(-1000, -1000, 1000);
          target = new Communicator.Point3(0, 0, 0);
          upVec = new Communicator.Point3(0, 0, 1);
          break;
        case overheadViewer:
          camPos = new Communicator.Point3(0, 0, 1000);
          target = new Communicator.Point3(0, 0, 0);
          upVec = new Communicator.Point3(0, 1, 0);
          break;
        default:
          alert('Error: No WebViewer Objects Detected.');
  }
  const defaultCam = Communicator.Camera.create(camPos, target, upVec, 1, 720, 720, 0.01);
  viewer.view.setCamera(defaultCam);
}
Finally, we will spice up our viewers by adding a colored background consistent with our UI theme. This can be done by calling setBackgroundColor on the View object. You can specify a single background color, or make a gradient from top to bottom by providing two colors. We will choose to make the gradient. Add this last line to sceneReady:
// Background color for viewers
viewer.view.setBackgroundColor(new Communicator.Color(0, 153, 220), new Communicator.Color(218, 220, 222));
This completes the callback functions that apply to both viewers (except for the printing plane, which we will address in the next section). Your setViewerCallbacks() should look like this:
setViewerCallbacks() {
  let mainViewer = this._viewerList[0];
  let overheadViewer = this._viewerList[1];

  this._viewerList.map((viewer) => {
        viewer.setCallbacks({

          modelStructureReady: () => {
                // Create Printing Plane

                // Load Model
                this.loadModel("microengine", viewer);
          },

          sceneReady: () => {

                // Set the cameras for the two viewers
                let camPos, target, upVec;
                switch (viewer) {
                  case mainViewer:
                        camPos = new Communicator.Point3(-1000, -1000, 1000);
                        target = new Communicator.Point3(0, 0, 0);
                        upVec = new Communicator.Point3(0, 0, 1);
                        break;
                  case overheadViewer:
                        camPos = new Communicator.Point3(0, 0, 1000);
                        target = new Communicator.Point3(0, 0, 0);
                        upVec = new Communicator.Point3(0, 1, 0);
                        break;
                  default:
                        alert('Error: No WebViewer Objects Detected.');
                }
                const defaultCam = Communicator.Camera.create(camPos, target, upVec, 1, 720, 720, 0.01);
                viewer.view.setCamera(defaultCam);

                // Background color for viewers
                viewer.view.setBackgroundColor(new Communicator.Color(0, 153, 220), new Communicator.Color(218, 220, 222));
          }

        }); // End Callbacks on Both Viewers
  }); // End map
}
We can add additional callbacks for our main viewer, that we don’t want to show in the overhead viewer. We can do this a number of ways, but here we will write another modelStructureReady callback outside our map function for just the main viewer. You can set multiple callback functions on the same event without issue, so let’s demonstrate that.
Append the following to setViewerCallbacks() below this._viewerList.map(...) function:
// Set additional callbacks for main viewer only
mainViewer.setCallbacks({
  sceneReady: () => {
        // Additional options for sceneReady that we do not want in both viewers
        mainViewer.view.getAxisTriad().enable();
        mainViewer.view.getNavCube().enable();
        mainViewer.view.getNavCube().setAnchor(Communicator.OverlayAnchor.LowerRightCorner);
  }
}); // End Callbacks on main viewer
When the sceneReady callback is executed, we should be able to add some additional elements to our scene, like a navigation cube and axis triad. By default, you can access the navigation cube and axis triad via the View object in the WebViewer. We will retrieve these objects, enable them, and move the navigation cube from its default position to the lower right corner of the scene.
Notice we are only setting this callback on the mainViewer object, not both like before.
With that, we should have a good start to our application. We will revisit this code as needed throughout the rest of the tutorial.