User Guide
Using the Product
Translation Configuration
It is recommended that the INVENTOR to Creo View Adapter be run from a pre-created configuration. Theorem have adopted the standard PTC Configuration tools which will create a batch script for running the Adapter on the command line and also a worker script to allow the Adapter to be run with Windchill.
To take full advantage of the configuration tools and to configure the Adapter for use as a Windchill Worker please contact your PTC representative to provide the Windchill Installation and Configuration Guide Inventor Creo View.
Default Translation
Default Translation – via the Command Line
Running a translation via the command line can be carried out without using a pre-created configuration. This will use the default translator settings. This is achieved by directly running the script file located in the <installation_directory>\bin directory. The format of the command is as follows:
<Translator_installation_directory>\bin\ inventor_pv.cmd <input_files> -p <output_path> -o <output_file>
The example above will translate a sample file provided within the installation and produce the following screen output:

The file will be output to the target location. In this case:
C:\temp\test.jt
Configuring the INVENTOR Creo View Adapter using the Recipe Editor
For completeness this section of the User Guide describes the available configuration options provided by the recipe editor.
A recipe is a set of user-defined rules that drive the individual CAD Adapter. The recipe concept provides a solution to the problem of efficiently converting CAD data into a form suitable for viewing on a wide range of computer platforms. Like its analogy in cooking, gaining a desired result requires cooking to a specific recipe. While most CAD parts will convert into an efficient form for large-scale visualization, some parts require modifications to the standard visualization recipe to be viewed effectively.
The INVENTOR Adapter is provided with a master or default recipe file. This file is preconfigured to allow the visualization of most objects. The master recipe file should not be edited. Instead, additional new recipes can be created from this default file using Save As function in the recipe editor (rcpedit) provided with the translator.
For full details concerning the Recipe Editor, please refer to the ‘Creo View MCAD Adapters Installation and Configuration Guide’ document, which can be obtained via the PTC Reference Documents Site at https://www.ptc.com/appserver/cs/doc/refdoc.jsp.
Theorem’s Creo View Adapters use the standard PTC mechanism to Configure translation options. The basic concepts and available options are covered here for convenience.
Theorem provide a configuration script to allow a recipe file to be created. Running the following script will launch the Recipe Editor Configuration Tool:
<Translator_installation_directory>\bin\inventor_pv_config.cmd
The panel below will be displayed:
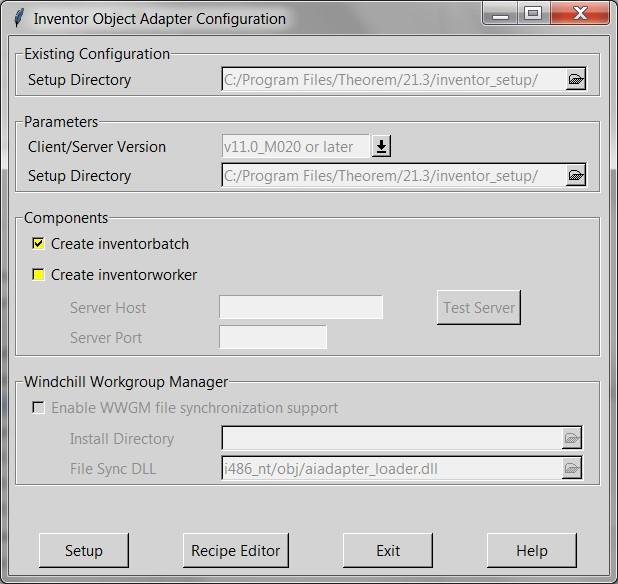
The Configuration Tool allows the INVENTOR Creo View Adapter to be configured for use in batch (via the command line) and/or for use in a Windchill environment (inventorworker). Please contact your PTC representative to provide the Windchill Installation and Configuration Guide INVENTOR_Creo View for full details on configuring in a Windchill environment. This guide will focus on running the translator from the command line, but all of the configuration options are available in both environments.
The ‘Create inventorbatch’ selection will create a recipe file for batch and the ‘Create inventorworker’ will create a recipe file for a Windchill invocation. Having selected either of these options (and provided a valid Windchill Host and Port) the ‘Setup’ button will become active. Selection of the ‘Setup’ button will launch the following panel:
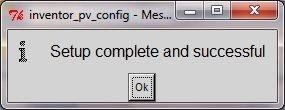
This can be accepted and the ‘Recipe Editor’ button will become active.
The ‘Setup’ action will create a new directory beneath the translator installation directory. So, the user that creates new configurations will need write access to the translator installation directory. The first configuration directory will be named inventor_setup. Subsequent configurations will be named inventor_setup[n] (where ‘n’ is a unique number). In this manner many different configurations can be created. The configuration directory will contain an invocation script that will deliver a default Configuration that uses default translation settings. Selection of the ‘Recipe Editor’ button will allow the user to set specific translation settings.
The contents of a Configuration folder are:
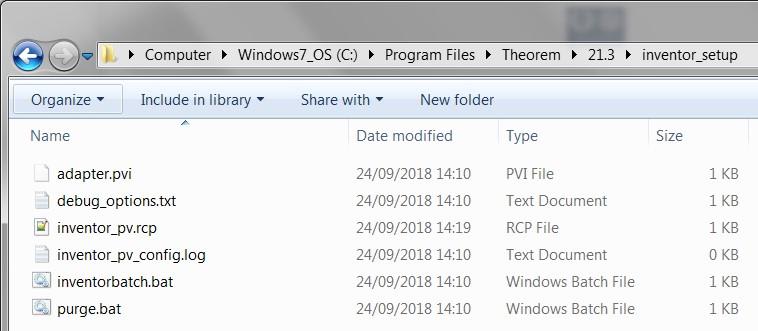
The inventorbatch.bat script will be used in preference to the Theorem provided script discussed in the Default Translation – via the Command Line section and will use configuration options specified in the inventor_pv.rcp (recipe) file.
Running a translation using the inventorbatch.bat script can be achieved using the following command
<Translator_installation_directory>\inventor_setup\inventorbatch.bat <input_files> -p <output_path> -o <output_file>
The results and screen output will be the same as that noted for the Default Translation.
Changing the translation options in the configuration recipe file is achieved by selecting the ‘Recipe Editor’ button.

This action will display a number of panels that are of interest to the Theorem INVENTOR Creo View Adapter.
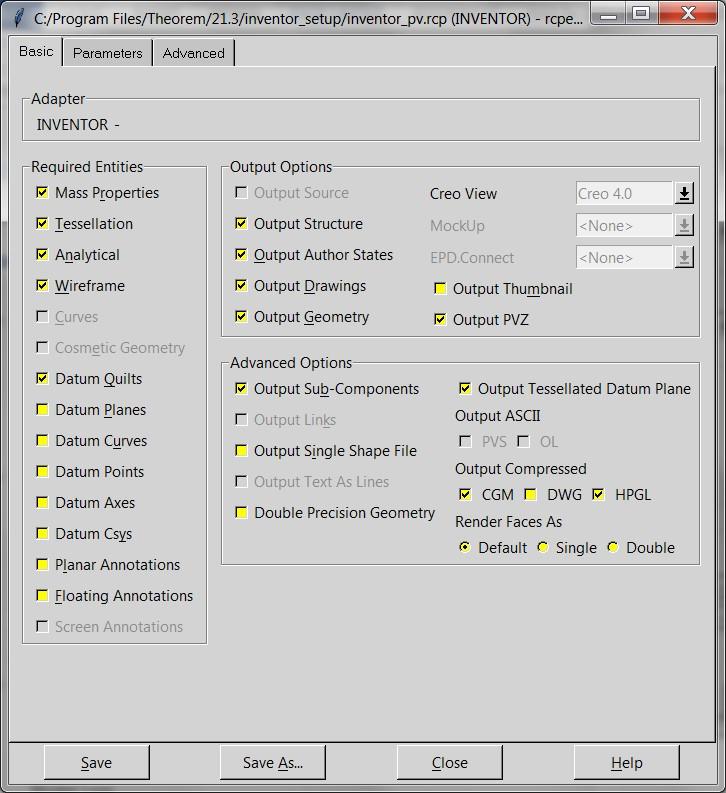
The main page provides standard PTC options that we will not discuss in this document, as these are well documented in PTC’s ‘Creo View MCAD Adapters Installation and Configuration Guide’ document, which can be obtained via the PTC Reference Documents Site at https://www.ptc.com/appserver/cs/doc/refdoc.jsp.
Instead, we will focus on the Theorem specific settings that effect the output. These are accessible via the Advanced Tab and Theorem Options sub-tab.
Theorem Options – General translation settings
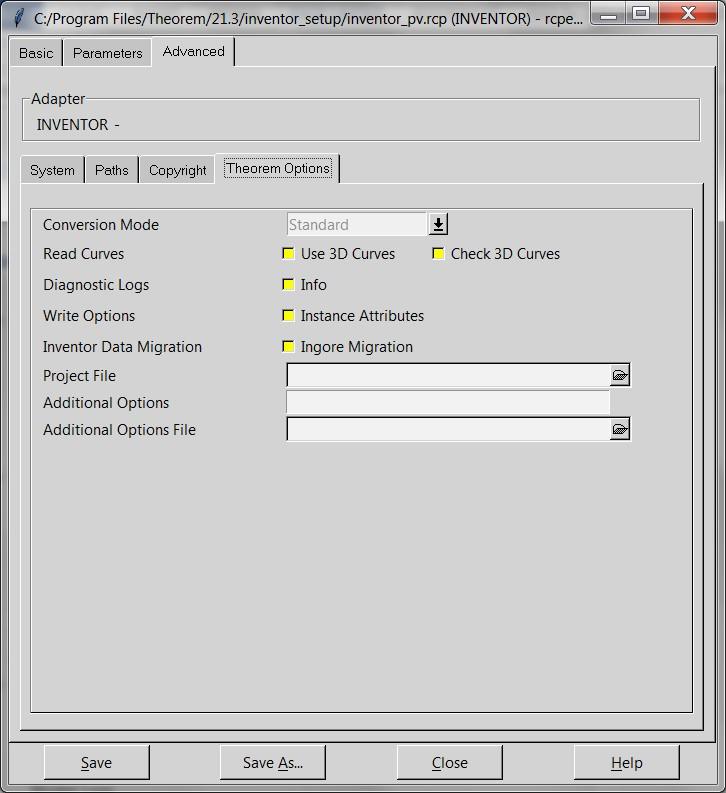
Each of these options is described below:
Option |
Description |
|---|---|
Conversion Mode |
The user has the option to process Assembly information in one of 2 modes:
Standard: The default method for assembly processing reads an INVENTOR assembly and its entire geometry contents into memory, before writing out all of the data to Creo View. Minimum Memory: A more efficient way of processing the data has been provided via the Minimum Memory conversion mode selection. This mechanism reads in the assembly data then processes each “.ipt” file referenced by the assembly on a part by part basis. |
Use 3D Curves |
This option allows Creo View API to generate its own 2D curves. This option is most likely only ever used as a work-around when poor data is encountered. |
Check 3D Curves |
This option allows the Adapter to test the data and if necessary automatically enable Use 3D Curves. A default tolerance of 0.01 (1%) face/surface overlap being used for these checks. This tolerance can be adjusted with validate_3D_curve_tol <value> in the additional option field. |
Info |
Generate a more verbose log files |
Instance Attributes |
This option enables the writing of any instance attributes. |
Ignore Migration |
This option allows the check for data migration to be omitted. |
File Name (Project File) |
This allows the user to specify an Inventor project file (*.ipg) which details search paths for parts within an assembly amongst other Inventor settings. |
Options (Additional Options) |
This allows the user to specify any advanced options that are not given here by default. Generally these are used for Support purposes. |
File Name (Additional Options File) |
This allows the user to specify a text file that contains a number of advanced options listed line by line. |
Processing INVENTOR Assemblies (.iam files)
Assuming that the input to the Adapter was a single assembly named test_assembly.iam related to many subordinate parts (.ipt) files then the output from the translator will be a single Creo View assembly file test_assembly.pvs plus many geometry .ol files, one for each part file processed.
Given that the example assembly file had additional assembly files subordinate to it then all of the accumulated assembly hierarchy information would be output into the top level Creo View .pvs file.
The INVENTOR Creo View Adapter takes advantage of the latest Creo View dAPI which writes .pvs files (Creo View binary assembly structure files) by default. If a user wishes to write out earlier .pvs versions or .ol files, this can be achieved via the appropriate setting the recipe editor.
Processing INVENTOR Parts (.ipt files)
For each part (.ipt) file processed individually then the output from the translator will be a single Creo View assembly .pvs file and a single geometry .ol file. Therefore assuming that the file being processed was named test_component.ipt then the output would be test_component.pvs and test_component.ol
Processing INVENTOR Drawings (.idw files)
For each drawing (.idw) file processed individually the translator will output a (by default) DXF (.dxf) file per sheet found in the .idw file. The final output to the user is a Creo View assembly file and one or many .dxf format files.
Therefore, assuming that the file being processed was named test.idw then the output would be test.pvs and test_sheet1.dxf, test_sheet2.dxf, etc.
The user can alternatively elect to output drawing files in either CGM, HPGL, PDF or TIF formats. This can be selected via the recipe editor.
PTC Adapter Support
PTC Adapter Options
In order to support the PTC Windchill interface, Theorem have also adopted the PTC Adapter command line syntax, a full list of available options is shown below and can be displayed by issuing the following command:
<Translator_installation_directory>\bin\inventor_pv.exe -h
Setting |
Result |
|---|---|
<@File> |
Read Options from the response file <file> |
-?-h |
For basic help page. |
-d <depth> |
Set the conversion file depth. When converting an assembly file determines to what depth the hierarchy should be traversed. The default is all. |
-H |
For extended help options |
-o <name> |
Set output file base name (number of input files must be 1). |
-p <path> |
Set output base path. |
-r <recipe file> |
Set recipe to <name> |
-vc |
Disable all console print-out. |
-vc1 |
Redirect all console print-out to stdout. |
-vc2 |
Redirect all console print-out to stderr (default) |
-ve[n] |
Increment or set (if[n]is given) the error reporting level. –ve0 disables all error reporting, default 1. |
-vl <file> |
Direct all printed output to <file> |
-vL <file> |
Concatenates all printed output to <file> |
-vn <file> |
Direct all printed output to new log file <file>-#.log. |
-vp <n> |
Set the process verbosity flag. List the modules by –I. Flags are listed in the source code. |
-vw [n] |
Increment or set the warning reporting level, see -vc |
-vt |
Give the current date/time stamp with all print outs. |
-j <name> |
Get job from <name> .paj file |
-epdconnect |
Enable EPD.Connect orientated conversion. |
-mockup |
Enable MockUp oriented conversion process |
Restart
When the Adapter is used in a Windchill context, in some circumstances the worker process may require a restart. This behaviour can enabled by a recipe setting:
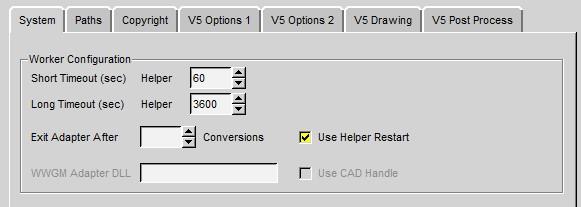
In addition to the recipe setting an environment variable setting is required to ensure that the end-user deliberately wants to switch on the restart functionality.
Variables can also be set to run a user defined script that can carry out specific actions at the time of restart, e.g. stopping other processes and cleaning temporary directories
Variable |
Value |
Description |
|---|---|---|
TS_CREOVIEW_RESTART_CONFIG |
1 |
Switch on Windchill Restart |
Worker Logs
If –vm <level> worker logs are enabled and not re-directed to a log file, then these messages will default to stderr and be written to the ts_v5_pc_stderr.log
PVZ Output
PVZ Output can be enabled by selecting the ‘Output PVZ’ options from the ‘Output Options’ section of the Recipe Editor in the ‘Basic’ tab or adding the recipe editor setting as:
adapter/outputPvz=1