User Guide
Latest Release: Version V28.0
Using the Unified Interface
The Unified Interface can be started via the Start Menu – if a shortcut was added during installation.
Alternatively, the Unified Interface can be run via a Windows Explorer selection in:
<UI_installation_directory>\bin\Unified_Interface.cmd
The following interface will be launched:
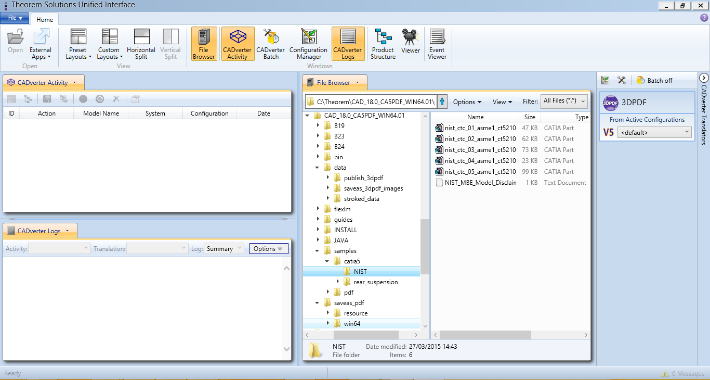
The default layout is split into 4 primary areas, which can be altered to the users prefer:
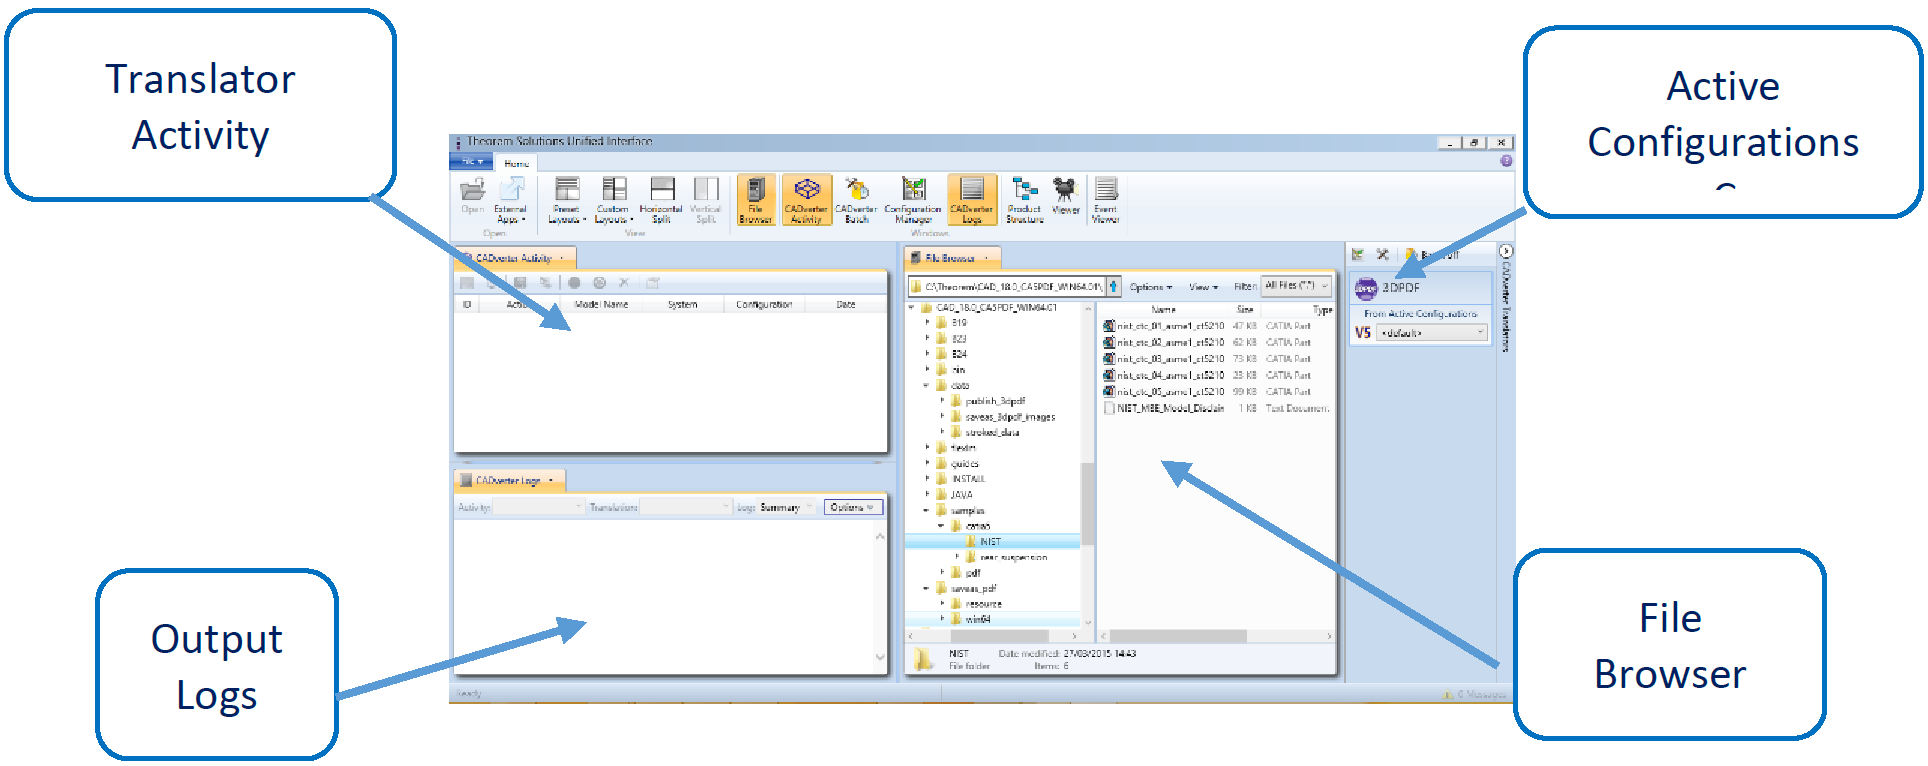
Performing a Translation
The simplest way to translate a file is to drag a file from the File Browser panel on to a compatible Active Configuration Translator. This will create a file based using the default configuration.
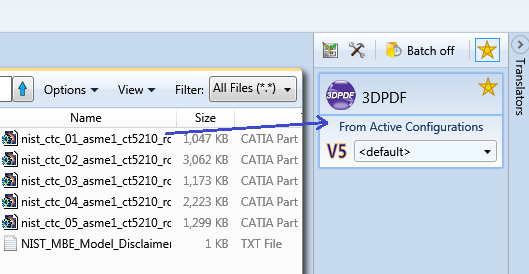
On completion, the Unified Interface will display the activity information and details from the log file created during the translation, if requested, in the Translation Activity and Output Log panes, respectively.
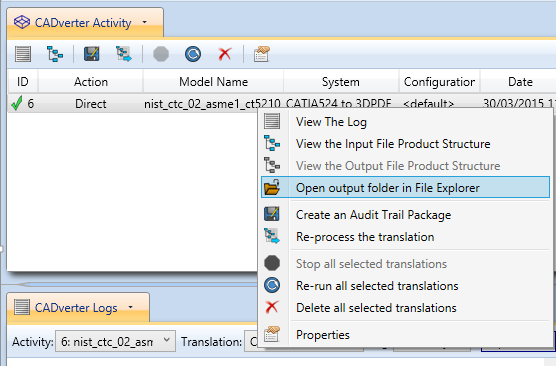
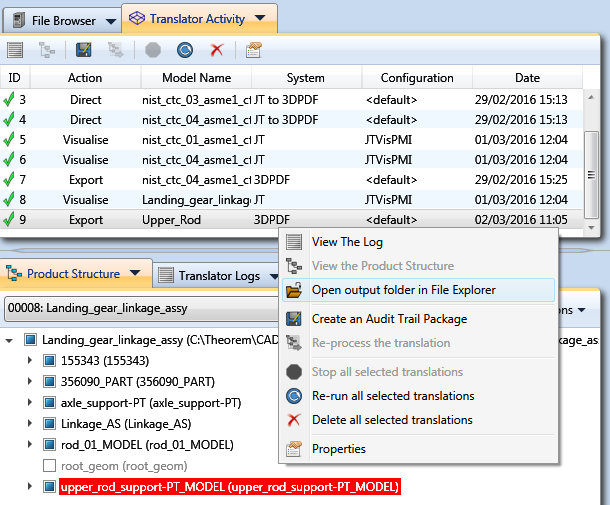
The generated output data can be located by selecting the translation from the Activity pane and opening the output folder:
Visualising and Exporting via the Viewer
Select the Visualisation pre-set layout and from the file browser, drag and drop (or right click and visualise) a part into the Viewer, this will begin the visualisation process, the progress of which can be seen in the Product Structure window.
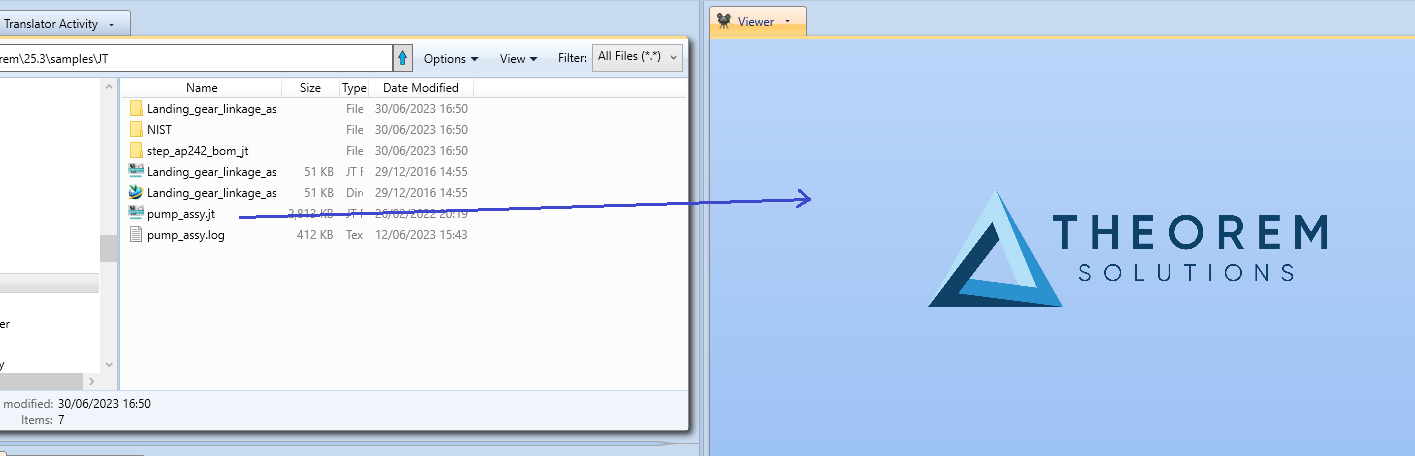
Once a part has been loaded into the viewer, the cursor can be used to manipulate the part. The basic default movement commands are:
Left mouse button – Rotate
Scroll Wheel - Zoom
Scroll wheel button - Pan
The check box in the Product Structure window signifies parts that are loaded in the Viewer. Clicking on a part in the viewer or the Product Structure tree highlights it. Ctrl + Click can be used to select multiple parts. Once the required parts have been selected, click export in the Product Structure panel to open the Export menu.
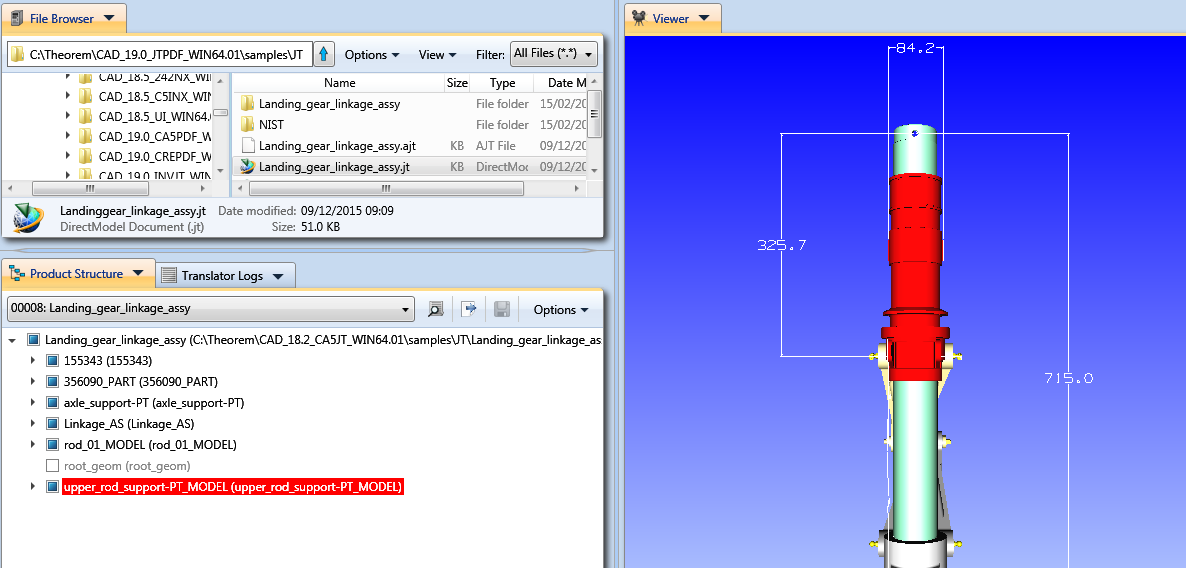
Alternatively, the export menu can be opened by right clicking on the Product Structure Tree or the part in the Viewer and choosing export from the Right Click Menu.
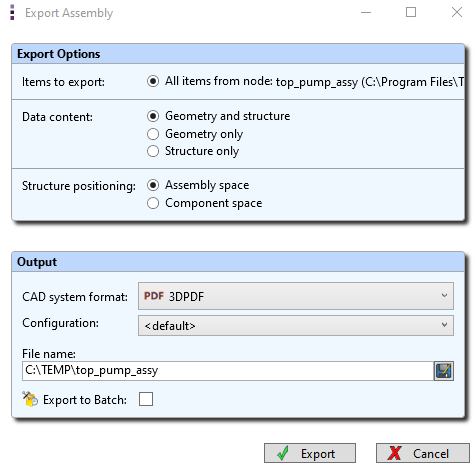
Select the desired options on what to export and click Export. The generated output data can be located by selecting the translation from the Activity pane and opening the output folder:
Creating a New Configuration
The Configuration Manager panel can be launched via the Active Configuration Pane or from the Ribbon Configuration Manager Button:
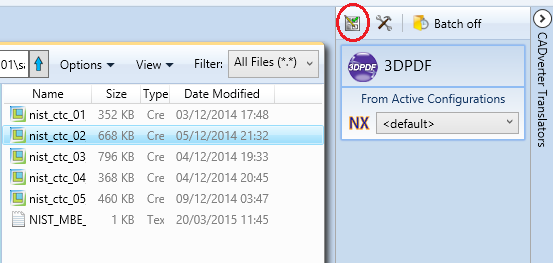
OR

Select the ‘Configuration Manager’ option from the ribbon menu at the top of the Unified Interface. This will then display the ‘Configuration Manager’ pane.
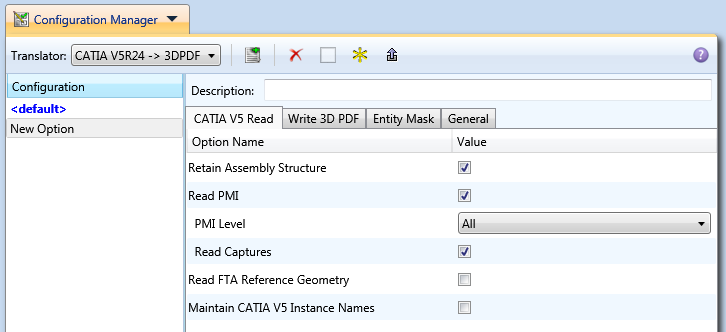
The Configuration Panel allows new configurations to be created based upon all available options within the selected application. Selecting the New Configuration icon will allow the user to change any option. For details on each option, refer to the Translator’s User Guide or click the help icon in the Configuration Manager.
A configuration can be set as the active by clicking the yellow asterisk icon. Alternatively, it can be set as the Active Configuration setting for the translator must be changed to the required configuration on the translator toolbar:
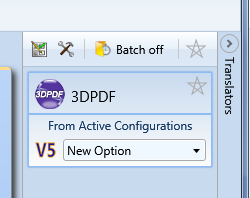
Once this has been done the translation can be invoked in the same manner as standard translations, now with the new options used.
Common Configurations
A common configuration path can be set, so that users can use and create configurations available to others.
To set the common configuration path, navigate to the Unified Interface installation bin directory and open TheoremProps_UI.txt.
Navigate to the following lines, unhash and amend as required.

Setting the first option (e.g. “Theorem.CommonConfigurations=T:\SharedConfigurations”) will allow the user to see and use common configurations, whilst still allowing the user to view their personal configurations. Any new configuration created will be create in the user’s local area.
Setting “Theorem.WriteToCommonConfigurations=true” will allow the user to create configurations in the common area. Note that with this mode set, the user will no longer see the local configurations.
Creating a Custom Layout
Creating a custom layout can be extremely useful as it allows the user to only have open the windows that they require and in an order that works best for them.
To create a custom layout select a pre-set layout that resembles the format you wish the UI to be displayed. Descriptions of each of these can be found on the Default Layouts page.
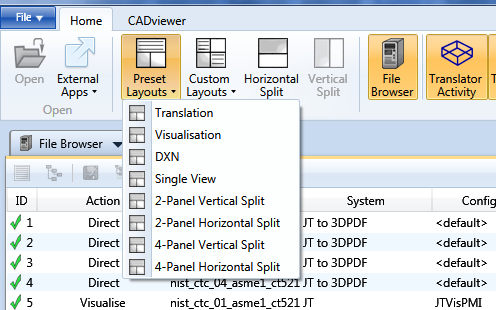
Toggle on/off the required windows from the Windows pane on the Home Ribbon tab.

When the required windows have been selected, they can be moved into the desired panel within the UI by clicking on the drop down arrow of the window
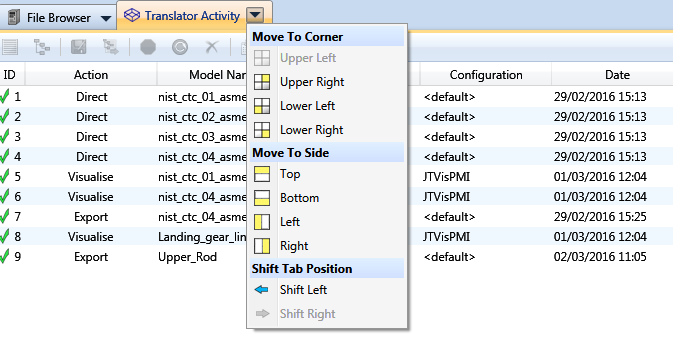
Once all windows are in the required position, select Save Current Layout from the Custom Layouts drop-down box.
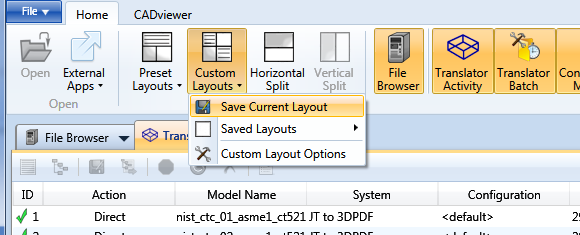
Enter a unique name and click OK to save.
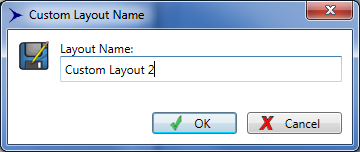
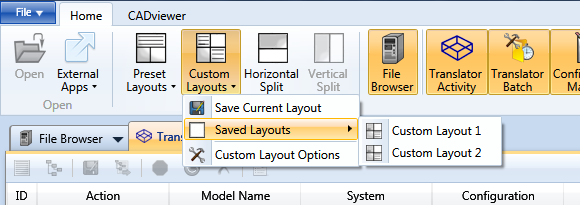
The saved layout can now be accessed from the Custom Layouts drop-down box
Navigating the Unified Interface
File Menu
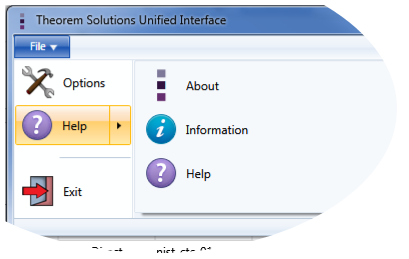
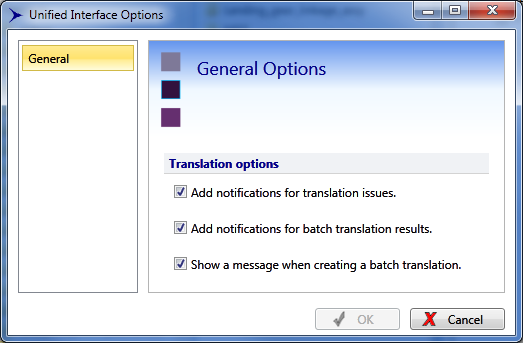
Options will show the General Options for the UI that control what notifications are displayed:
Translator Panel
The Translator panel is the collapsible panel found on the right hand side of the UI.
The translators shown in the panel correspond to available write legs and dropping files onto a translator box will write the file to that format, using the configuration shown in the dropdown menu.
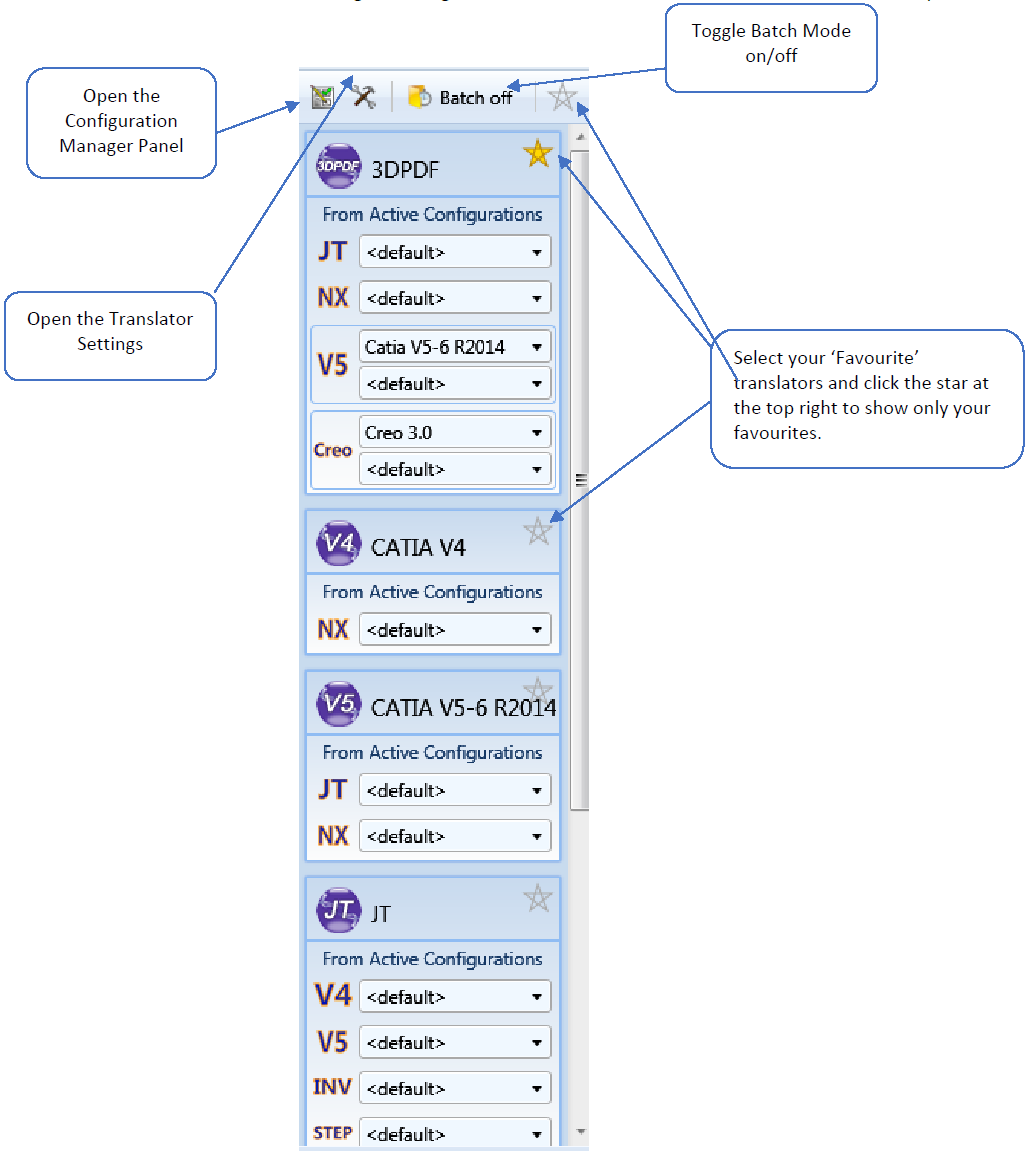
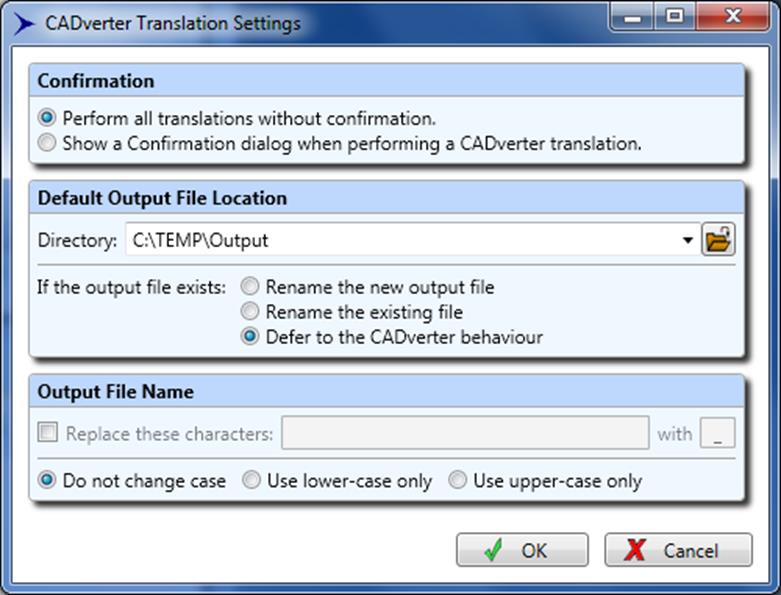
Translator Options
This will allow the users to set general options for the translators. The user can change the output location and how the translator deals with writing to existing files. It also provides the ability to replace characters and alter the case of the output files.
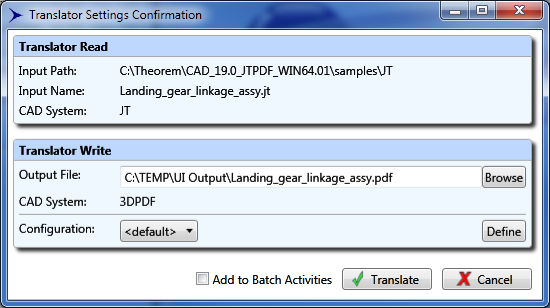
The confirmation dialog will be shown when a translation has been actioned. The output path and configuration can be changed here and the file can be added to the batch activities.
The Ribbon Bar

Open
The file open area has two features:
Open allows the selected file in the File Browser to be opened in its native external application. E.g. a CATPart will be launched in CATIA V5, a Word document in MS Word, etc.
External Apps allows the user to configure external applications to work in conjunction with the UI.
Layouts
The configuration of all layouts is found in the view area of the ribbon toolbar.
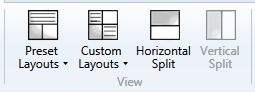
This allows the user to specify the number of panes and the layout of those panes. It also allows the layout and content (see Windows Area) to be saved as a named Layout. These layouts can be modified, re-saved and deleted as required.
Preset Layouts
Shipped with the UI are three default layouts for working within the UI. Along with this are 5 pre-set layouts that give the full range of general layouts of the windows that can be used as a basis for creating a layout which can be further customised and saved as per the user’s requirements.
Translation
This allows the user to drag and drop files from the File Browser into the Translator Panel to perform a translation. The Translator Activity window shows the status of the translations and the logs are shown in the Log Viewer.
Visualisation
This allows the user to drag and drop files from the File Browser into the Product Structure or Viewer Panel. The Product Structure window shows the structure of the visualised file whilst the logs for the visualisation activity are show in the Log Viewer.
Data Exchange Navigator
The DXN layout as shipped. This allows the user to select an existing assembly file from the Product Structure window drop down box and visualise and manipulate the data.
Single View
The Single View layout as shipped. Here all windows are displayed in one panel.
2-Panel Vertical Split
The 2-Panel Vertical Split layout as shipped. Here all windows are displayed over two panels, split vertically.
2-Panel Horizontal Split
The 2-Panel Horizontal Split layout as shipped. Here all windows are displayed over two panels, split horizontally.
4-Panel Vertical Split
The 4-Panel Vertical Split layout as shipped. Here all windows are displayed over four panels, split vertically.
4-Panel Horizontal Split
The 4-Panel Horizontal Split layout as shipped. Here all windows are displayed over four panels, split horizontally.
Custom Layouts
The custom layout dropdown gives access to 3 options. The options are used for creating a custom layout.
Horizontal and Vertical Split
The Horizontal and Vertical Split buttons control whether the main split between the windows is vertical or horizontal. Note that in a Single Window View these options are not available.
Windows
File Browser

The UI File Browser is used similarly to Windows File Browser. It has an address bar, the left side is the navigation pane, allowing easy access through the folders. The main window is the main browser window displaying the current folder.
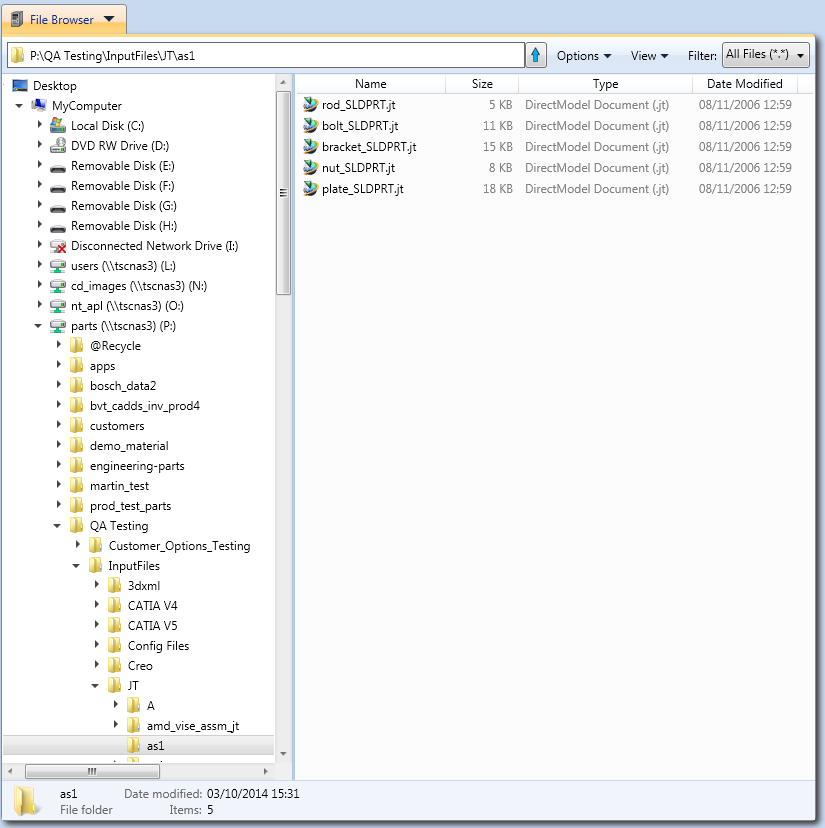
Address Bar
The address bar shows the current folder path; this can be entered manually for direct navigation. Clicking the arrow goes to the directory one level up.

Options
There are three options from the drop-down menu:
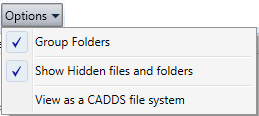
Group Folders allow the user to select whether to group folders together, or to sort them in order
with all other files. - Show Hidden files and folders shows protected and hidden files. Warning: editing these files could cause your system to become inoperable. - View as a CADDS file system is used when browsing a CADDS file system.
View Options
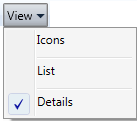
Select whether to display files as Icons, in a list or in a view with details.
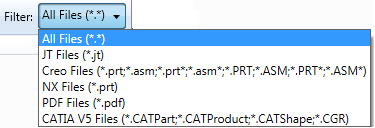
Filter
Set a filter to only display files that have compatible translators installed.
Right Click Menu
Selecting a file in the File Browser and right-clicking shows the right click menu.
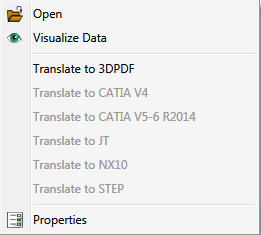
The available options are:
Open the file in its default application
Visualise Data in the Viewer
Translate to… writes the file to compatible CAD systems
Properties opens a window displaying properties about the file.
Translator Activity

The Translator Activity window list all translation activities that have occurred. The list provides a translation ID, the type of action performed for a translation, the Model Name, the CAD system associated with the model, the configuration used (defined by the configuration manager) and the date of the activity.
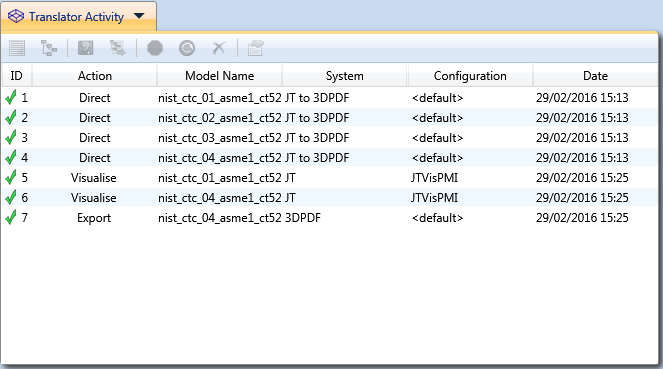
The results of activities are shown in the ID column:
✓ means success.
❓ means completed with errors.
❌ means errors and not completed.
Multiple activities can be selected using Ctrl + click or Shift + click.
Ribbon Bar
The top bar of this window has the following functions that are available when an activity has been selected.

View the log displays the log file for the selected activity in the Translator Logs window.
View Product Structure opens the Product Structure window and loads the selected part and consequently it is loaded into the viewer. This is only available for Structure Action.
Create an Audit trail package allows the user to package all input and output files associated with the selected activity, along with the log files and a text file detailing the activities and command line options used, into a zip file.
Re-process the translation allows the user to perform the translation again with a different configuration.
Stop the current activity being performed.
Rerun all selected files activities with the same configuration.
Remove all selected activities.
Properties displays the properties of the activity.
Note that right clicking on an activity provides the same options, along with an extra option allowing the user to open outputted files in windows explorer.
Translator Batch

The Translator Batch window lists all batch translation activities that have been added to the batch. Files are added to a batch by switching on Batch Mode and performing a translation in the usual way. The list provides a translation ID, the type of action performed for a translation, the Model Name, the CAD system associated with the model, the configuration used (defined by the configuration manager) and the date of the activity.
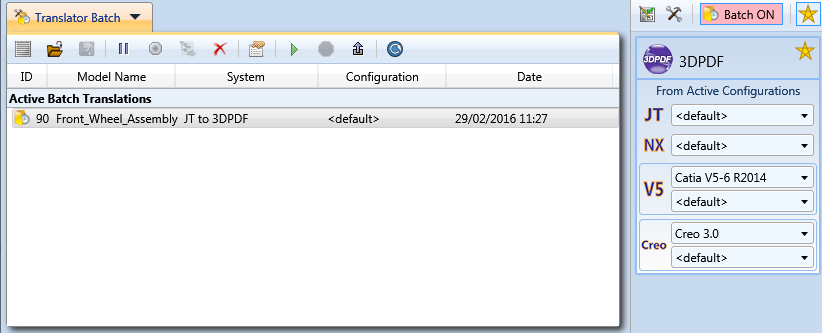
Active translations are shown under the Active Batch Translations section and always have the pending icon.
When a batch activity has been performed, the activity will be transferred into the Translation Activity Window.
The results of completed activities are shown in the ID column of the Translator Activity:
✓ means success.
❓ means completed with errors.
❌ means errors and not completed.
The status of active Batch Translations are shown by:
 means ready for batch processing
⏸ means the file has been put on hold and is currently inactive.
Multiple activities can be selected using Ctrl + click or Shift + click.
Ribbon Bar
The top bar of this window has the following functions that are available when an activity has been selected.

Put selected Activity on hold to omit certain activities temporarily from a batch translation.
Release from hold to return the selected activity to the active batch list.
Remove all selected activities.
Properties displays the properties of the activity.
Run all active batch translations.
Stop the current batch activity being performed.
Export all active batch translations to a batch command file, which can be run externally to the UI.
Refresh the status of all activities.
Note that right clicking on an activity provides the same options.
Configuration Manager
The Configuration Manager panel allows the user to edit the settings for both the read and write translators and save them in a configuration file. Configurations files can also be deleted.
Ribbon Toolbar

The top bar of this window has the following functions that are available
Translator drop-down menu allows the user to select which translator to manage the configuration of. Note that if the favourites toggle is activated on the Translator Panel, then only ‘favourite’ translators will be displayed here.
Add a New Configuration to create a new configuration with the same options used in the previous configuration
Delete selected Configuration will permanently delete the configuration.
Clear Options to revert to the translator default options.
Make Active to make the selected configuration the active configuration.
Generate Visual & Export Options for direct translator configurations so these options can be used when visualising and exporting data.
Translator Logs

The Translator Logs displays the log files from all previous available translation activity. The activity can be selected and either the Summary file or tabulated information can be displayed for any of the translator processes.
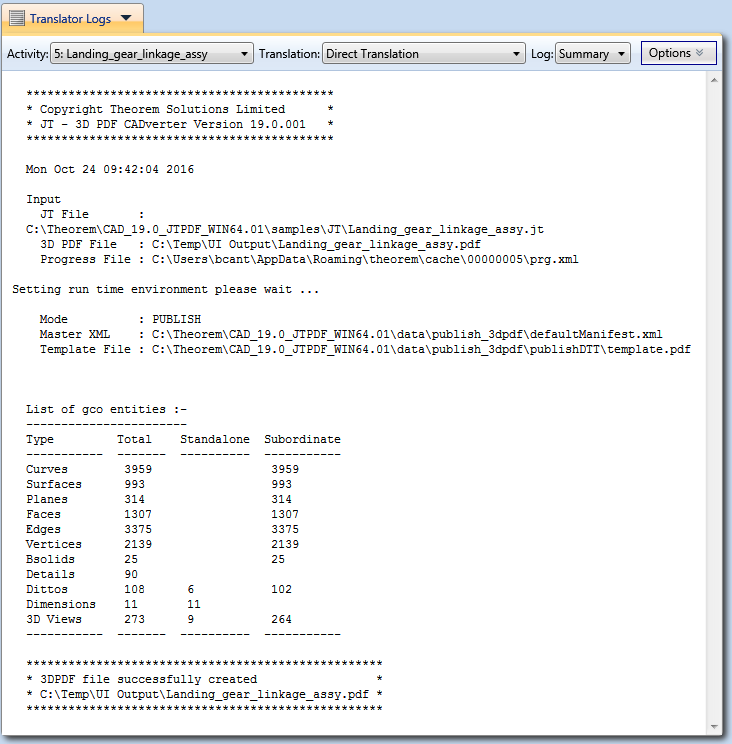
Activity List
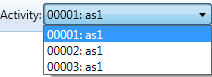
Select an activity from the Activity drop-down list. These correspond to the list displayed in the Translator Activity window.
Translation

The Translation drop-down lets the user select what part of the translation activity they would like to view the logs for. The selection choice here varies on what action (shown in the Translator Activity window) has been performed:
Direct will only show Direct Translation log. This details the activity from the full translation.
Visualise will show Translator Read log & Structure Write. Translator Read details the activity from reading the file in its native format and writing it to Theorems Generic CAD Object (GCO). Structure Write details writing the GCO file into a format the Viewer can utilise.
Export will show Structure Export & Translator Write, Structure Export details data from a visualised file to GCO file, and Translator Write will detail the GCO to the output format translation logs.
Log Type
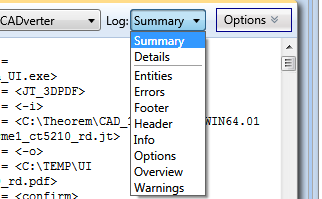
The Log drop-down lets the user select what information they would like to see about regarding the selected translation:
Summary an overview of the translation in text format, including the date of translation, files used, entity list and result.
Details shows the full unformatted log file in XML format.
Entities a table of all entities processed during translation.
Errors a list of errors (if any) that occur during translation.
Footer details of the output file.
Header details of the input file.
Info a list of all information processed by the translator.
Options shows a list of all options used for the translation.
Overview combines Header, Entities and Footer lists.
Warnings a list of warnings (if any) that occur during the translation.
Options
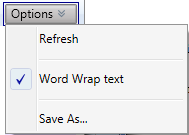
The options drop-down has the following options available:
Refresh refreshes the currently displayed log file. This may need to be used when viewing a log that has recently completed.
Word Wrap switches on/off word wrapping in the log files.
Save as opens a dialog box that allows the user to save the currently displayed log file to a specified location.
Product Structure

The Product Structure tab displays the assembly structure of a visualised part. The structure can be loaded from the selection bar if the part has already been visualised, or a new file can be dragged and dropped into the window.
The check box signifies parts that are loaded in the Viewer. Clicking on a part in the structure will highlight it, and all its sub-nodes in the structure tree and the Viewer.
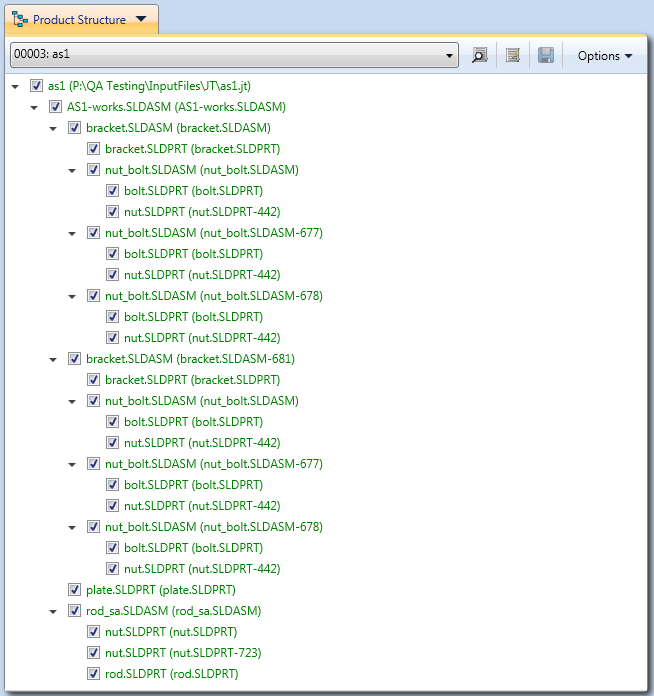
Selection Bar
Select a file that has been visualised to display its structure. When a file is loaded, you can clear it from the Product Structure and Viewer window by selecting (Clear View)

Find
Finding specific parts within a large assembly can be tedious, click the Find icon to open a window allowing specific parts to be easily searched. Alternatively click inside the Product Structure window and use the Ctrl + F shortcut.
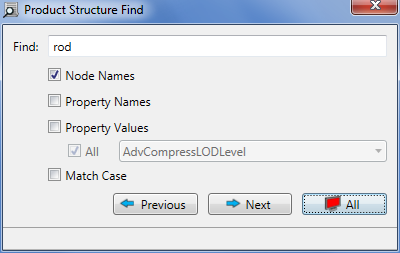
Select the criteria you wish to search and matching parts will be highlighted, use ‘Next’ and ‘Previous’ to browse through matching parts, or highlight them all by clicking All.
Export
A single part or assembly can be exported to a different format by selecting the node from the tree, clicking the right mouse button and entering “Export from node”. Alternatively, the export button can be clicked.
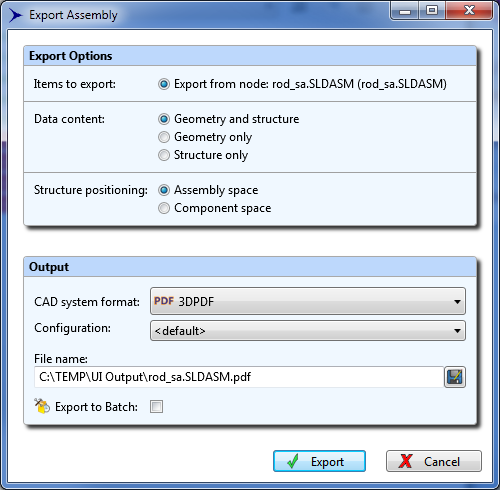
The Export Assembly interface will then open and the user can select which data content will be exported and whether the structure positioning of the exported node should be relative to the original assembly space, or to the selected component space.
The data can be exported to any CAD system format that has a compatible Theorem Translator installed with available configurations created by the user.
Save
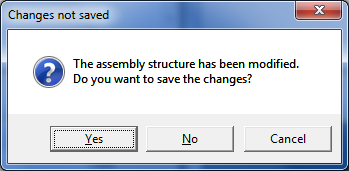
When a part has been modified in the Viewer/Product Structure window, clicking the save icon will save any changes made.
The user will also receive a warning message if they try to clear the view after changes have been made.
Options
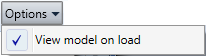
“View Model on Load” option allows the user to choose whether they would like the Product Structure to be automatically loaded into the viewer when loading the Product Structure. It is recommended to switch this option off when using DXN to export data from Large Assemblies as this means unnecessary parts will be loaded into the Viewer.
Right Click Menu
Right clicking on a node in the product structure tree displays the right click menu.
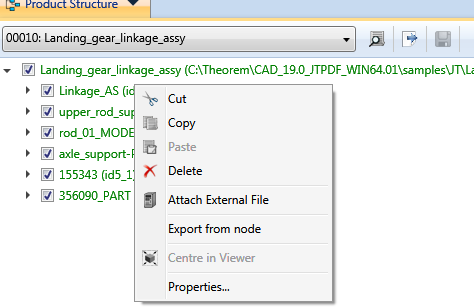
Cut, Copy & Paste lets the user move and copy existing nodes throughout the structure. Copying one part and pasting it under a different sub-assembly will use the original co-ordinate system of the part and then place it in the Structure relative to the sub-assembly co-ordinate system. Note that these features are only available with a DXN license.
Delete will permanently delete the node from the Product Structure.
Attach External File allows the user to import an external part, and place it into the specified location in the loaded structure.
Export from Node allows the user to export the selected node, as detailed above.
Centre in Viewer centres the selected node in the Viewer.
Properties displays the properties of that selected node, including all attributes and the Transform Matrix. New attributes can be added and deleted here as well as modifying existing attributes.
Viewer

The Viewer allows the user to view the contents of many different formats of CAD data, including assemblies. It can be used in conjunction with the “Product Structure” option to view single nodes of an assembly, the top level or sub-assemblies.
Right Click Menu
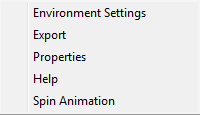
There are further options that are available by right clicking in the Viewer window.
Environment Settings
This allows the editing of the Light Intensity of parts loaded into the viewer and the highlight and background colours.
Export
Opens up the Export Assembly interface and the user can select which data content will be exported and whether the structure positioning of the exported node should be relative to the original assembly space, or to the selected component space.
The data can be exported to any CAD system format that has a compatible Theorem Translator installed.
Properties
Displays the properties of that selected node, including all attributes and the Transform Matrix. New attributes can be added and deleted here as well as modifying existing attributes.
Spin Animation
Select this option to initialise the animated spin of the geometry following a rotate command.
Viewer Ribbon Tab
Select the Viewer ribbon to show all the available tools for working with in the Viewer.

Manipulation
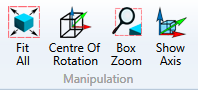
Fit All - loaded part will be fitted to the screen size i.e. a zoom-in or zoom-out will be performed as necessary.
Centre of Rotation - click this button and then somewhere on the loaded part to define the clicked area as the new centre of rotation.
Box Zoom - allows the user to ‘draw a box’ and zoom into the selected area.
Show Axis - a toggle to show or hide the modelling coordinate axis system marker. The axis colours are Green, Red and Blue indicating X,Y,Z axes respectively.
Part Manipulation
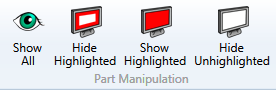
Show All - shows all Geometry
Hide Highlighted - hides any geometry that is highlighted.
Show Highlighted - shows geometry that has been highlighted in the Product Structure tree.
Hide Unhighlighted - hides all geometry that is not highlighted.
Home View

Save - saves the current view as the ‘Home’ view.
Home - reverts back to the ‘Home’ view.
Viewing Mode
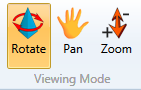
These options define what default action of clicking and holding the left mouse button (or using arrow keys) when in the Viewer.
Rotate - rotates the part about its centre of rotation.
Pan - drags the part relative to the cursor movement.
Zoom - zooms in and out relative to the cursor moving up and down. Move the cursor down the screen to zoom-in or up the screen to zoom-out.
Standard Views
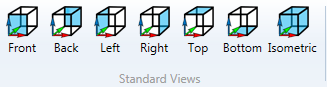
Displays the model as seen from the specified location.
Event Viewer

The diagnostics of the UI are shown here including the Version, Start Time, Platform, Log File location and showing which Translator processes have been validated.
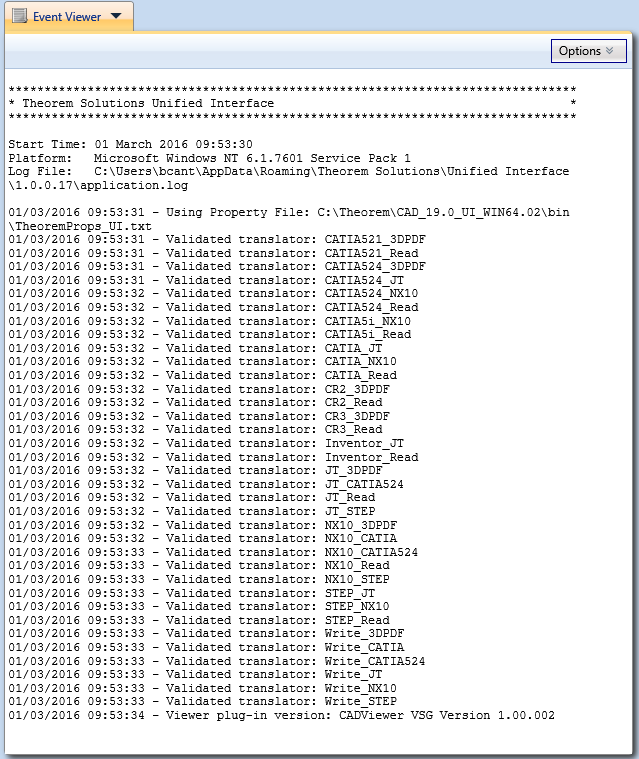
Options allows the user to switch line wrap on/off and gives the option to save the Event Viewer log to a specified location.