
Geometry Markers
The simplest geometry in HOOPS is a marker, which marks a single location in space. The location is drawn with a symbol such as an box, a dot, or a circle. You can use markers to mark data points in a graph (such as the filled-in circles in the graph in the figure below), or locations on a map.
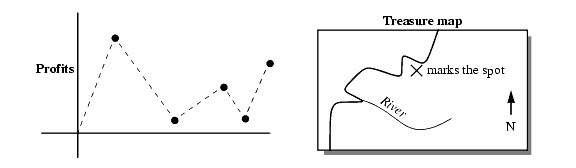
Markers.
Note that the two examples are 2D, but markers are actually points in 3D space. HOOPS provides a large number of marker symbols, from which you can choose with the Set_Marker_Symbol command. The default marker is a small open circle.
Markers are considered to be annotation, rather than part of a scene. Thus, markers are always drawn in screen space, oriented to face the camera. That is, the marker’s 3D position in the scene is transformed into a 2D position on the screen, and the marker is drawn there, upright and with a fixed size. Consequently, when a marker moves within a scene, only its position on the screen changes; its size and orientation remain fixed. As markers get farther away from the camera, they do not get smaller, and, if the scene rotates, the markers continue to face the camera (so that they are always readable).
You can change the color of the marker symbols in a segment using Set_Color. For example:
HC_Set_Color("markers=blue");
Visibility of markers is controlled by setting the ‘markers’ option in Set_Visibility. For example:
HC_Set_Visibility("markers=off");
You can change the size of the marker symbols using the Set_Marker_Size command. This will cause markers to be drawn in a fixed (screen space) size, and they will not scale as the object scales. However, HOOPS/3dGS also supports markers which will scale as the object is scaled or the camera changes. This is enabled by calling Set_Variable_Marker_Size.
In addition to setting variable sizes for markers, HOOPS gives you the ability to specify a fixed orientation in world space for your markers via the Edit_Geometry_Options function. When calling Edit_Geometry_Options, pass the key to the target marker and an orientation plane to project the marker. The orientation plane can be defined in two ways. You can simply pass a normal vector when the glyph rotation around the normal is unimportant. To be more precise about the marker orientation, provide a normal and an up vector. Markers with an orientation are fully transformable, honoring the effects of rotation, translation and scaling. Orientations are legal on both markers with built-in symbols and with user-defined glyphs. The following code snippet shows how you can create a transformed marker:
    // Setting the marker to a variable size
    HC_Set_Variable_Marker_Size("3 oru");

    // Defining a glyph and setting it as a marker symbol
    HC_Define_Glyph("StickFigure", sizeof(StickFigure), StickFigure);
    HC_Set_Marker_Symbol("StickFigure");

    // Inserting a marker
    HC_KEY key = HC_Insert_Marker(10, 10, 10);

    // Specifying the orientation of the marker wit the normal vector (0.707, 0.707, 0) and
    // an up vector of (0,0,1)
    HC_Set_Geometry_Options(key, "orientation=(0.707,0.707,0, 0,0,1)");

A custom glyph applied to a variable size marker with an orientation.
There is no command to insert multiple markers. In the case of markers, there is no difference between multiple markers and multiple instances of single markers, so there is no need for a routine to insert multiple markers. If you want one, you can define it as follows:
void HC_Insert_Polymarker(int size, Point array[])
{
    for (int i = 0; i < size; i++)
        HC_Insert_Marker(array[i].x, array[i].y, array[i].z);
}
You can also insert multiple markers using a mesh with face and edge visibility turned off. This technique is slightly more efficient in terms of space, and produces identical results. The mesh primitive is discussed later in this chapter.
If you have inserted a large number of markers into your scene (on the order of 100,000 or more), you might face some performance issues. We suggest that you explore using vertex markers as an alternative way to represent your data. This feature offers more efficient rendering as well as hardware acceleration capabilities.
Images as Glyphs
HOOPS Visualize also allows you to create a custom glyph from an image using the Define_Image_Glyph function. Importing the raw image data can be accomplished in any number of ways. The code snippet below shows demonstrates how to do it using the HOOPS HIO library.
Like other definitions, image glyph definitions inherit down the segment tree, so make sure your custom glyph is accessible before using it.
    HInputHandler* handler = HDB::GetHIOManager()->GetInputHandler("jpg");

    HInputHandlerOptions options;
    options.m_pImageFormat = "rgba";
    options.m_pImageName = "my_glyph_pattern";
    options.m_pHBaseView = view;
    options.m_bLocal = true;
    HFileIOResult result = HIO_Fail;

    // import the image
    result =
        handler->FileInputToImageKey(H_FORMAT_TEXT("%s/%s", HMF_MASTER, "pattern.jpg"), &imageKey, view->GetViewKey(), &options);

    // define the glyph using the image data as the source
    HC_Define_Image_Glyph("custom_glyph", "source=my_glyph_pattern, no fixed scaling");

    // set the active marker symbol as the glyph you just defined
    HC_Set_Marker_Symbol("custom_glyph");
    HC_Set_Visibility("markers=on");
    HC_Insert_Marker(0, 0, 0);

