Applying materials
For optimum performance, materials are best used at the segment level, though it is also possible to apply them to individual entities or subentities. Before using a material palette to decorate geometry, it must defined in a portfolio and the portfolio must be set as active on the segment. Portfolios inherit from parent to child segment, so a single portfolio can be shared as long as it is made active at some point in the hierarchical ancestry.
The MaterialMappingControl allows you to set materials “by index”. This is a convenient way to apply many materials to a set of objects, or to reuse materials in different parts of your scene using the same palette. The alternative would be to set materials individually using MaterialKit, which is fine when you only need to apply a single material. Otherwise, you would need to keep a reference to the material and pass it between scopes in order to apply it in another part of the scene. Material palettes solve this problem because the materials contained within them are accessible through a portfolio.
Applying Materials at Various Levels
Although setting materials at the segment level is the recommended way to apply materials for highest performance, you may find you need finer control over how they are applied. This section discusses how materials are applied at various levels of granularity.
Assigning Materials at the Segment Level
Assigning a material to a segment is similar to setting a simple color on a segment: all geometry within the segment and its subsegments will also inherit the material. To assign a material this way, you need to use a material palette. Material palettes are like an array in that the materials within are indexed by insertion position. To assign a material at the segment level, use one of the SetMaterialByIndex variants:
    HPS::MaterialKitArray myMaterialKitArray(3);
    myMaterialKitArray[0].SetDiffuse(HPS::RGBAColor(1, 0, 0, 1));
    myMaterialKitArray[1].SetDiffuse(HPS::RGBAColor(0, 1, 0, 1));
    myMaterialKitArray[2].SetDiffuse(HPS::RGBAColor(0, 0, 1, 1));

    HPS::MaterialPaletteDefinition mpd = myPortfolio.DefineMaterialPalette("my_palette", myMaterialKitArray);

    mySegmentKey.GetPortfolioControl().Push(myPortfolio);

    mySegmentKey.GetMaterialMappingControl().SetFaceMaterialByIndex(1);
HPS.MaterialKit[] myMaterialKitArray = new HPS.MaterialKit[3];
for (int i = 0; i < myMaterialKitArray.Length; i++)
	myMaterialKitArray[i] = new MaterialKit();
myMaterialKitArray[0].SetDiffuse(new HPS.RGBAColor(1, 0, 0, 1));
myMaterialKitArray[1].SetDiffuse(new HPS.RGBAColor(0, 1, 0, 1));
myMaterialKitArray[2].SetDiffuse(new HPS.RGBAColor(0, 0, 1, 1));

HPS.MaterialPaletteDefinition mpd = myPortfolio.DefineMaterialPalette
    ("my_palette", myMaterialKitArray);

mySegmentKey.GetPortfolioControl().Push(myPortfolio);

mySegmentKey.GetMaterialMappingControl().SetFaceMaterialByIndex(1);
If you only want to set a simple color on a segment without bothering to set up a MaterialKit, HOOPS Visualize Desktop offers a simplified interface to achieve this. A segment-level color means that all geometry in a particular segment will have that color. Faces, edges, and vertices can be colored in this way. Using the MaterialMappingControl, you can set segment-level color with the following code:
    // setting color for all faces
    mySegmentKey.GetMaterialMappingControl().SetFaceColor(HPS::RGBAColor(0.75f, 0.4f, 0.24f, 0.5f));

    // setting edge color
    mySegmentKey.GetMaterialMappingControl().SetEdgeColor(HPS::RGBAColor(0, 0, 1));
// setting color for all faces
mySegmentKey.GetMaterialMappingControl().SetFaceColor
    (new HPS.RGBAColor(0.75f, 0.4f, 0.24f, 0.5f));

// setting edge color
mySegmentKey.GetMaterialMappingControl().SetEdgeColor
    (new HPS.RGBAColor(0, 0, 1));
Assigning Materials at the Geometry Level
Materials can be set for individual geometry if the geometry is a shell or mesh. Setting a material on a particular shell or mesh requires using a MaterialMappingKit. You can set any material property on a MaterialMappingKit, but for this example, we’ll keep it simple and just set color. To do this, build a kit and apply it to the particular shell key that you want to be different:
    HPS::MaterialMappingKit myMaterialMappingKit;
    myMaterialMappingKit.SetFaceColor(HPS::RGBAColor(0, 0, 1));

    myShellKit.SetMaterialMapping(myMaterialMappingKit);
HPS.MaterialMappingKit myMaterialMappingKit = new HPS.MaterialMappingKit();
myMaterialMappingKit.SetFaceColor(new HPS.RGBAColor(0, 0, 1));

myShellKit.SetMaterialMapping(myMaterialMappingKit);
Setting material at the geometry level does incur a performance penalty relative to setting materials at the segment level.
Assigning Materials to Individual Faces and Vertices
If you need even finer control over materials, HOOPS Visualize Desktop also allows you to apply them at the subentity level. To do this, you’ll need two arrays: one that defines the indices of the faces you’d like to color and another array that indexes the material palette itself. In the following snippet, materials 0, 1, and 2 are applied to shell faces 0, 1, and 2 respectively:
    HPS::SizeTArray faceIndices(3);
    faceIndices[0] = 0;
    faceIndices[1] = 1;
    faceIndices[2] = 2;

    HPS::FloatArray materialIndices(3);
    materialIndices[0] = 0;
    materialIndices[1] = 1;
    materialIndices[2] = 2;

    myShellKit.SetFaceIndexColorsByList(faceIndices, materialIndices);
ulong[] faceIndices = new ulong[3];
faceIndices[0] = 0;
faceIndices[1] = 1;
faceIndices[2] = 2;

float[] materialIndices = new float[3];
materialIndices[0] = 0;
materialIndices[1] = 1;
materialIndices[2] = 2;

myShellKit.SetFaceIndexColorsByList(faceIndices, materialIndices);
A single shell with multiple materials
Setting materials on individual edges is not supported.
Examples Showing How to Color Specific Faces
Often, it is desirable to color a specific face to distinguish it from other faces in the same object. Faces on a shell can be individually colored, however, as mentioned previously, individual faces of cylinders and spheres cannot. Consider the shell pictured below, which is composed of five faces:

A simple shell
Now, assume the fourth face needs to be highlighted. Using the shell key, HOOPS Visualize Desktop only needs the face number and the color that is desired. In the code below, note that the fourth face is being altered using the parameter ‘3’. This is because shell face lists are always zero-based.
shellKey.SetFaceRGBColorsByRange(3, 1, RGBColor(1, 0.5f, 0)); // setting the fourth face to orange
shellKey.SetFaceRGBColorsByRange(3, 1, new HPS.RGBColor(1, 0.5f, 0)); // setting the fourth face to orange

A simple shell with one face colored
Proceeding with this example, it is becomes relatively simple to assign arbitrary colors to arbitrary faces. Use the alternative version of SetFaceColors that accepts a face index array and a color array.
    HPS::SizeTArray faceIndices;
    faceIndices.resize(2); // two faces will be changed
    faceIndices[0] = 3; // fourth face
    faceIndices[1] = 0; // first face

    HPS::RGBColorArray colorArray;
    colorArray.resize(2);
    colorArray[0] = RGBColor(1, 0.5f, 0); // orange
    colorArray[1] = RGBColor(1, 0, 0); // red

    shellKey.SetFaceRGBColorsByList(faceIndices, colorArray);
ulong[] faceIndices = new ulong[2];
faceIndices[0] = 3;      // fourth face
faceIndices[1] = 0;      // first face

HPS.RGBColor[] colorArray = new HPS.RGBColor[2];
colorArray[0] = new HPS.RGBColor(1, 0.5f, 0);  // orange
colorArray[1] = new HPS.RGBColor(1, 0, 0);     // red

shellKey.SetFaceRGBColorsByList(faceIndices, colorArray);

Shell with arbitrarily colored faces
It is also possible to set color on a range of faces. For instance, to change color on the first three faces, call SetFaceColors with the start face index and the number of faces to color.
shellKey.SetFaceRGBColorsByRange(0, 3, RGBColor(1, 0.5f, 0));
shellKey.SetFaceRGBColorsByRange(0, 3, new HPS.RGBColor(1, 0.5f, 0));

Shell with colors set on a range of faces
NOTE: To set face colors that are partially or fully transparent, the use of a material palette is required. See the discussion on this topic here.
Example Showing How to Color Vertices
Color can be applied to individual vertices in a shell or mesh. There are many ways to do this using any of the SetVertexColors overloads. In the example below, the color of the first four vertices of the shell have been modified, as specified in the vertexIndices array. The vertexIndices array contains the specified colors. The vertex color will override any color set on the face at a higher level.
    SizeTArray vertexIndices(4);
    vertexIndices[0] = 0;
    vertexIndices[1] = 1;
    vertexIndices[2] = 2;
    vertexIndices[3] = 3;

    RGBColorArray colorArray(4);
    colorArray[0] = RGBColor(0.24f, 0.48f, 0.56f); // 1st vertex - blue
    colorArray[1] = RGBColor(0.67f, 0.07f, 0.64f); // 2nd vertex - purple
    colorArray[2] = RGBColor(1, 0.5f, 0); // 3rd vertex - orange
    colorArray[3] = RGBColor(0, 0, 0); // 4th vertex - black

    shellKey.SetVertexRGBColorsByList(vertexIndices, colorArray);
ulong[] vertexIndices = new ulong[4];
vertexIndices[0] = 0;
vertexIndices[1] = 1;
vertexIndices[2] = 2;
vertexIndices[3] = 3;

HPS.RGBColor[] colorArray = new HPS.RGBColor[4];
colorArray[0] = new HPS.RGBColor(0.24f, 0.48f, 0.56f);  // 1st vertex - blue
colorArray[1] = new HPS.RGBColor(0.67f, 0.07f, 0.64f);  // 2nd vertex - purple
colorArray[2] = new HPS.RGBColor(1, 0.5f, 0);           // 3rd vertex - orange
colorArray[3] = new HPS.RGBColor(0, 0, 0);              // 4th vertex - black

shellKey.SetVertexRGBColorsByList(vertexIndices, colorArray);

Shell with vertex colors set
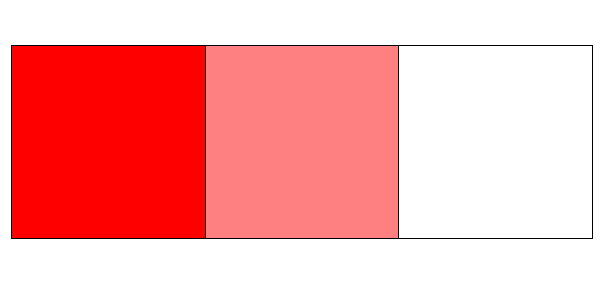
Using Textures as Materials
Textures are used as materials in the same way that RGBAColor-defined materials are. Load and define the texture as discussed on this page. Once the texture is loaded and named, use the name to define the material. After you have the name, the process is as simple as assigning it to a material:
    materialKitArray[0].SetDiffuse(RGBAColor(1, 0, 0, 1));
    materialKitArray[1].SetDiffuseTexture("my_texture"); // this material is now a texture
    materialKitArray[2].SetDiffuse(RGBAColor(1, 0, 0, 0));
materialKitArray[0].SetDiffuse(new HPS.RGBAColor(1, 0, 0, 1));
materialKitArray[1].SetDiffuseTexture("my_texture");              // this material is now a texture
materialKitArray[2].SetDiffuse(new HPS.RGBAColor(1, 0, 0, 0));
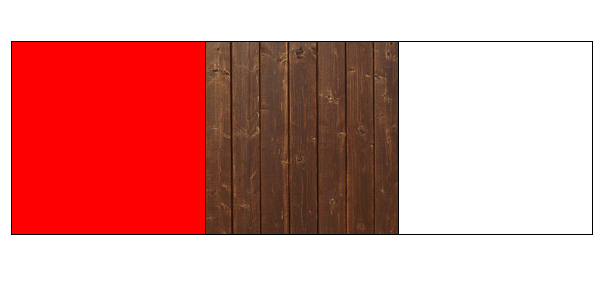
A single shell with a texture on one face only
Note that when texturing faces, you are still required to apply the texture coordinates to the vertices as if you were texturing a whole shell. In HOOPS Visualize Desktop, there is no way to programmatically apply an alpha value to a texture. If your texture requires alpha transparency, it must be baked in to the texture itself. Fractional material index values are not supported for textures.
Interpolating Materials
Note that the materialIndices array above is a float array. Using a float array enables colors to be interpolated across faces. For example, if you have two materials defined and a strip of shell faces, you can use the array to specify a fractional color for the intermediate faces. Here, red and yellow are used to form a color strip:
    MaterialKitArray materialKitArray(2);
    materialKitArray[0].SetDiffuse(RGBAColor(1, 0, 0, 1)); // red
    materialKitArray[1].SetDiffuse(RGBAColor(1, 1, 0, 1)); // yellow

    FloatArray materialIndices(5);
    materialIndices[0] = 0;
    materialIndices[1] = 0.25f;
    materialIndices[2] = 0.5f;
    materialIndices[3] = 0.75f;
    materialIndices[4] = 1;
    shellKit.SetFaceIndexColorsByList(faceIndices, materialIndices);
HPS.MaterialKit[] materialKitArray = new HPS.MaterialKit[2] { new HPS.MaterialKit(), new HPS.MaterialKit() };
materialKitArray[0].SetDiffuse(new HPS.RGBAColor(1, 0, 0, 1)); // red
materialKitArray[1].SetDiffuse(new HPS.RGBAColor(1, 1, 0, 1)); // yellow

float[] materialIndices = new float[] { 0, 0.25f, 0.5f, 0.75f, 1 };
shellKit.SetFaceIndexColorsByList(faceIndices, materialIndices);
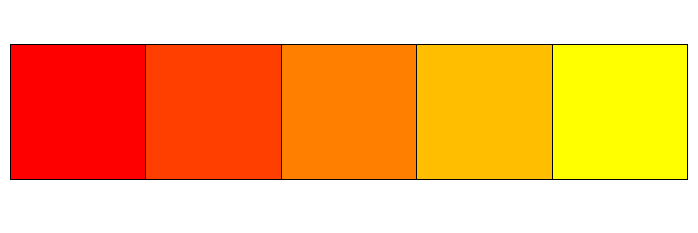
A single shell with a material interpolated across its faces

