Selection and Highlighting
In many applications, a user needs to be able to select an object in a 3D scene in order to interact with it in some way. Typically, it is desirable to provide some kind of visual feedback to the user after the selection is made. HOOPS Visualize Desktop provides a highlighting mechanism that can be used to provide this feedback. Selection and highlighting operate independently - that is - you can select an object without highlighting it, and you can highlight an object without selecting it.
This tutorial will demonstrate how to select and highlight geometry in a HOOPS Visualize Desktop scene. It is assumed that you have a scene set up with a view hierarchy and a segment available to accept the geometry and attributes that will be demonstrated below. If you don’t have such a scene, you can use the either the mfc_sandbox or the wpf_sandbox as a framework for running through the tutorial.
4.1 Building a Highlight Style
A style is a collection of attributes that are applied to an object as a set. The first step toward creating a selection highlighting mechanic is to create a style that will indicate the object is selected. For example, you could define a style that will color the selected object yellow with red edges when selected. Styles are referred to by a name that you provide upon creation. Additionally, all styles live in a portfolio.
The code snippet below demonstrates how to create a style that makes the faces of an object yellow with red edges:
    HPS::PortfolioKey myPortfolio = HPS::Database::CreatePortfolio();
    mySegmentKey.GetPortfolioControl().Push(myPortfolio);

    HPS::NamedStyleDefinition myHighlightStyle = myPortfolio.DefineNamedStyle("myStyle", HPS::Database::CreateRootSegment());
    myHighlightStyle.GetSource().GetMaterialMappingControl().SetFaceColor(HPS::RGBAColor(1.0f, 1.0f, 0.0f));
    myHighlightStyle.GetSource().GetMaterialMappingControl().SetEdgeColor(HPS::RGBAColor(1.0f, 0.0f, 0.0f));
    myHighlightStyle.GetSource().GetVisibilityControl().SetFaces(true).SetEdges(true);

    mySegmentKey.GetStyleControl().PushNamed("myStyle");
HPS.PortfolioKey myPortfolio = HPS.Database.CreatePortfolio();
mySegmentKey.GetPortfolioControl().Push(myPortfolio);

NamedStyleDefinition myHighlightStyle = myPortfolio.DefineNamedStyle("myStyle", HPS.Database.CreateRootSegment());
myHighlightStyle.GetSource().GetMaterialMappingControl().SetFaceColor(new HPS.RGBAColor(1.0f, 1.0f, 0.0f));
myHighlightStyle.GetSource().GetMaterialMappingControl().SetEdgeColor(new HPS.RGBAColor(1.0f, 0.0f, 0.0f));
myHighlightStyle.GetSource().GetVisibilityControl().SetFaces(true).SetEdges(true);

mySegmentKey.GetStyleControl().PushNamed("myStyle");
To execute this code, first load a model into the sandbox (using File > Load is fine). In this case we have loaded samples/data/cube.hsf.
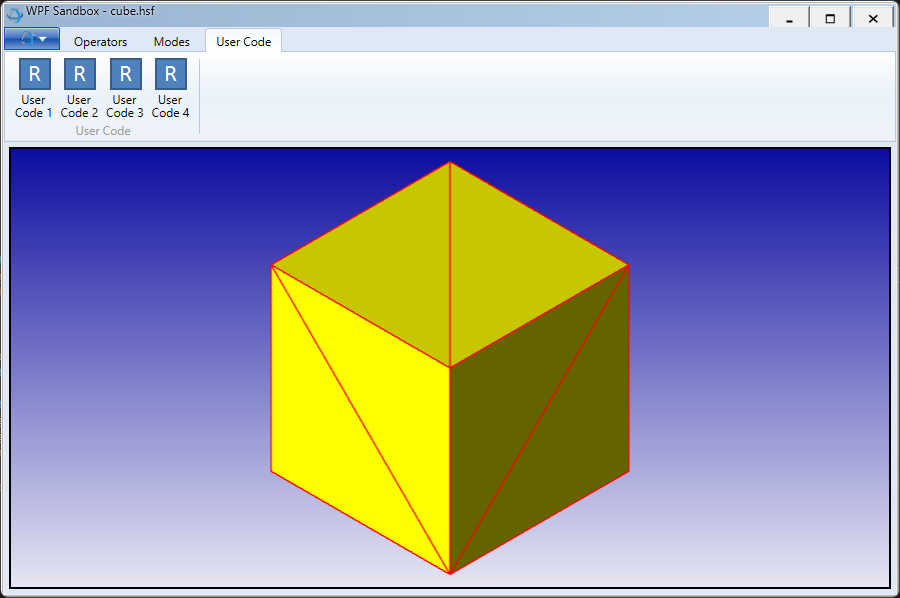
Cube demonstrating use of NamedStyleDefinition to make faces yellow and edges red.
4.2 Using a selection operator
Consider the simple scene below:
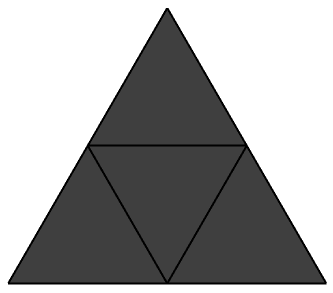
A shell composed of a few triangles
To begin an interactive selection, you must instantiate an operator and make it active to the HPS::View object. For applicatons that host multiple views, be aware that a single instance of an operator can only be attached to one view. For this example, we will use the HPS::HighlightOperator to select the shell pictured in the image above. See the code snippet below for how it is activated. This is a pre-built operator available as part of the HOOPS Visualize Desktop library and operates upon a simple mouse click.
    // Get a reference to your View object. In this case I'm using the View from the mfc_sandbox application.
    HPS::View myView = GetCanvas().GetAttachedLayout().GetAttachedView();

    HPS::HighlightOperator* myHighlightOperator = new HPS::HighlightOperator();

    // operator becomes 'active' after pushing it onto the operator stack
    myView.GetOperatorControl().Push(myHighlightOperator);

    // set the highlight style, which we previously defined
    HPS::HighlightOptionsKit hok("myStyle");

    myHighlightOperator->SetHighlightOptions(hok);
// Get a reference to your View object. In this case I'm using the View from the mfc_sandbox application.
HPS.View myView = GetCanvas().GetAttachedLayout().GetAttachedView();

HPS.HighlightOperator myHighlightOperator = new HPS.HighlightOperator();

// operator becomes 'active' after pushing it onto the operator stack
myView.GetOperatorControl().Push(myHighlightOperator);

// set the highlight style, which we previously defined
HPS.HighlightOptionsKit hok = new HPS.HighlightOptionsKit("myStyle");

myHighlightOperator.SetHighlightOptions(hok);
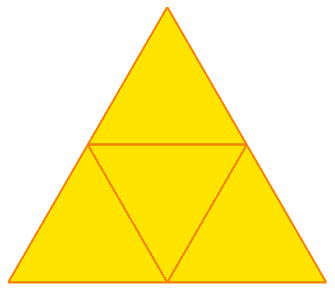
The highlight style is activated on the shell, applying the highlight style when you click it
Note that you are not required to use one of the pre-built operators. You can define your own custom operator with any type of functionality as long as it derives from the HPS::Operator base class. For more information on custom operators, see the custom operators section of the Programming Guide.
Whatever type of operator you end up using, note that the operator will remain active until it is explicitly detached. Multiple operators can also be active on a HPS::View simultaneously, and events are passed between each of them until they are consumed.
Selecting By Area
Frequently, it is desirable for the user to be able to perform a box-selection by dragging the mouse over the scene. In this case, there is no difference in the application’s logic - you simply use a different type of operator. An operator is provided for this purpose, the HPS::HighlightAreaOperator. The HPS::HighlightAreaOperator will select any object within or partially within the box you draw.
4.3 Processing Selection Results
Selection results are always based around keys. When performing a selection, HOOPS Visualize Desktop will return a HPS::SelectionResults object which contains the keys of any objects that were found by the operator. After obtaining the key, you can then use it to do any additional processing. Obtain the key to the selected item or items in the following way:
    HPS::SelectionResults selectionResults = myHighlightOperator->GetActiveSelection();

    HPS::SelectionResultsIterator it = selectionResults.GetIterator();
    while (it.IsValid()) {
        HPS::SelectionItem selectionItem = it.GetItem();
        HPS::Key key;
        if (selectionItem.ShowSelectedItem(key)) {
            if (key.Type() == HPS::Type::ShellKey) {
                HPS::ShellKey shellKey(key);

                // perform your selection logic here using the key that was selected in this loop
            }
        }
        it.Next();
    }
HPS.SelectionResults selectionResults = myHighlightOperator.GetActiveSelection();

HPS.SelectionResultsIterator it = selectionResults.GetIterator();
while (it.IsValid())
{
    HPS.SelectionItem selectionItem = it.GetItem();
    HPS.Key key;

    if (selectionItem.ShowSelectedItem(out key))
    {
        if (key.Type() == HPS.Type.ShellKey)
        {
            HPS.ShellKey shellKey = new HPS.ShellKey(key);

            // perform your selection logic here using the key that was selected in this loop
        }
    }
    it.Next();
}
Performing Selection Programmatically
If you want to perform a selection programmatically, without the use of an operator, please see the selection section of the Programming Guide for a detailed explanation.
4.4 Summary
These examples have all dealt with selection and highlighting as part of a single procedure in response to a selection event. Note that you can also select an object without highlighting it by using alternate version of the operators. For example, instead of using HPS::HighlightOperator or HPS::HighlightAreaOperator, you would simply use HPS::SelectOperator or HPS::SelectAreaOperator.
Highlighting an object without having to select it first can also be done by simply applying a style directly. This is discussed in the styles section of the Programming Guide.

