Using HOOPS Luminate’s Material Editor
REDMaterialEditor is an application that lets you create, save & edit realistic-based materials. You can either work in a wysiwyg environment or in command line mode.
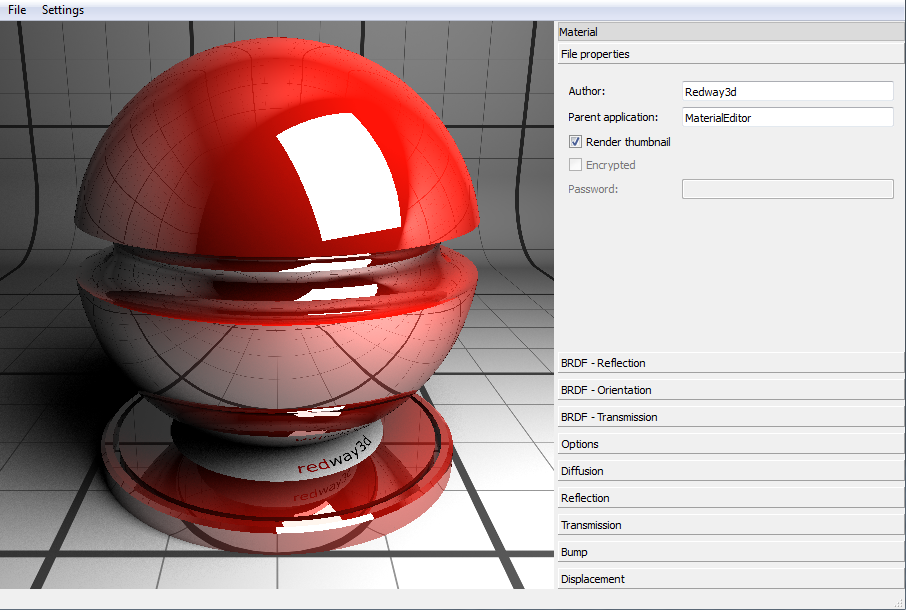
The GUI of the REDMaterialEditor
This tool is delivered as part of the HOOPS Luminate library of materials as it relies on one of them: the realistic material. The realistic material is intended to always produce good-looking materials with a small set of parameters while being still able to simulate various real-life surfaces (see Using the Realistic Material). The tool gives a concise view of the realistic material parameters that enables the user to quickly create many high quality new materials for its application.
As a standalone product, the RedMaterialEditor can be deployed over customers machines (but still need a per-machine license).
Creation of New Materials
The material editor uses the realistic material from the library and displays all its properties allowing the user to change any of them. A complete view of all the realistic material properties can be seen in the section Realistic Material Properties in the doc Using the Realistic Material.
The panel at the right of the screen gives access to the material parameters sorted by categories, while the rest of the application window interactively displays the current material. Some global options are accessible through the Settings menu (Anti-Aliasing, Global Illumination and Caustics).
At any time, the user has the ability to save his customized material in a .red file via the application File menu or reset the editor to its default parameters.
As for all the .red files of the material library, the created .red file will contain the parametrized realistic material (RED::IMaterial) as well as its material controller (RED::IMaterialController) to give access to the properties.
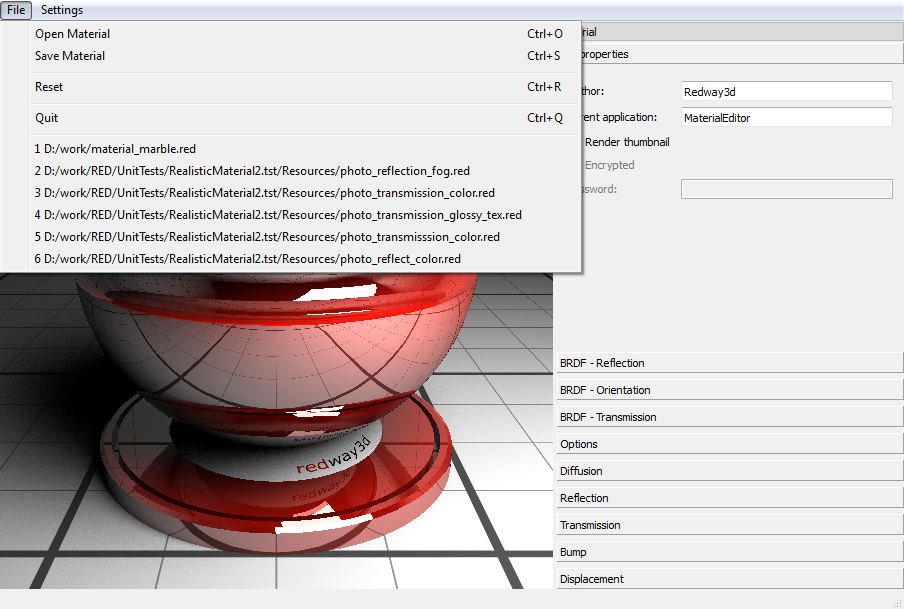
Open menu to save the customized realistic material
Review of the Material Editor Categories
File Properties
Because materials you created are your own materials, you can add specific information about the material creation process. In the File properties group, you’ll find how to setup the material author and the name of the application they are intended for. There is also a Render thumbnail check box which lets you decide if a thumbnail for the material has to be computed at saving time or not.
Diffusion, Reflection and Transmission
The material main components share the same GUI where users can choose between various sources of data. For colored components like diffusion for example, users can choose between color> or texture. Depending on the choice the big button on the left of the combo box becomes a media selector. If color is selected, a color picker will be opened on button clicks, otherwise an image file selection dialog will rise. If a texture is chosen, Offset, Scale and Rotation parameters are used to transform the texture mapping.
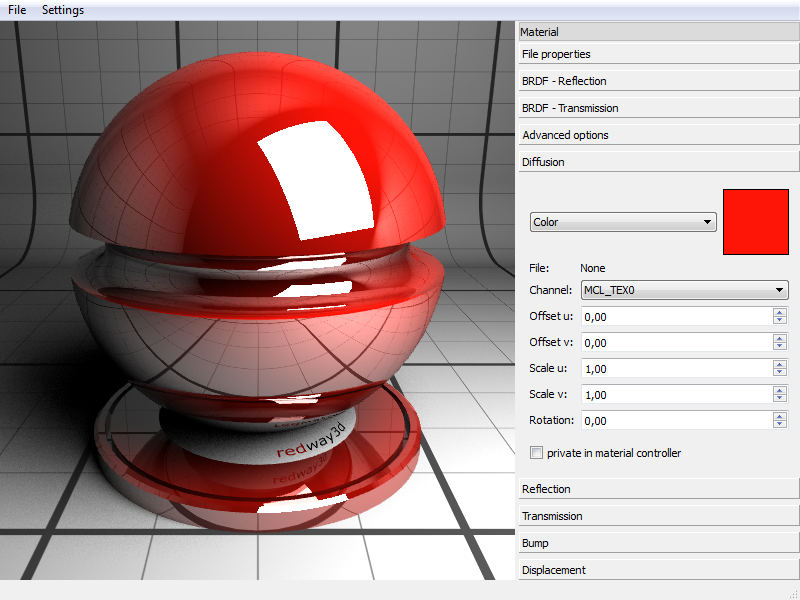
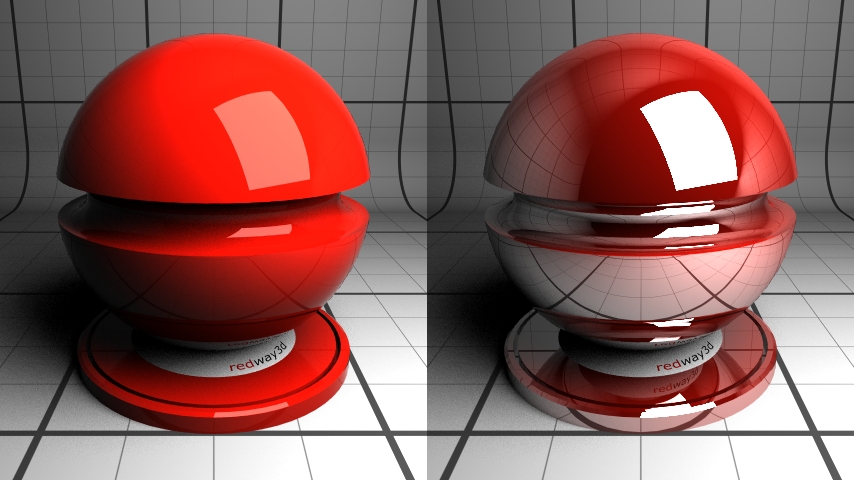
Diffusion properties of the realistic material
BRDF - Reflection
This group lets you set the glossiness parameter of reflection. The glossiness parameters control how much the reflections/transmissions are blurry. Depending on the chosen glossiness values, the results may vary a lot:
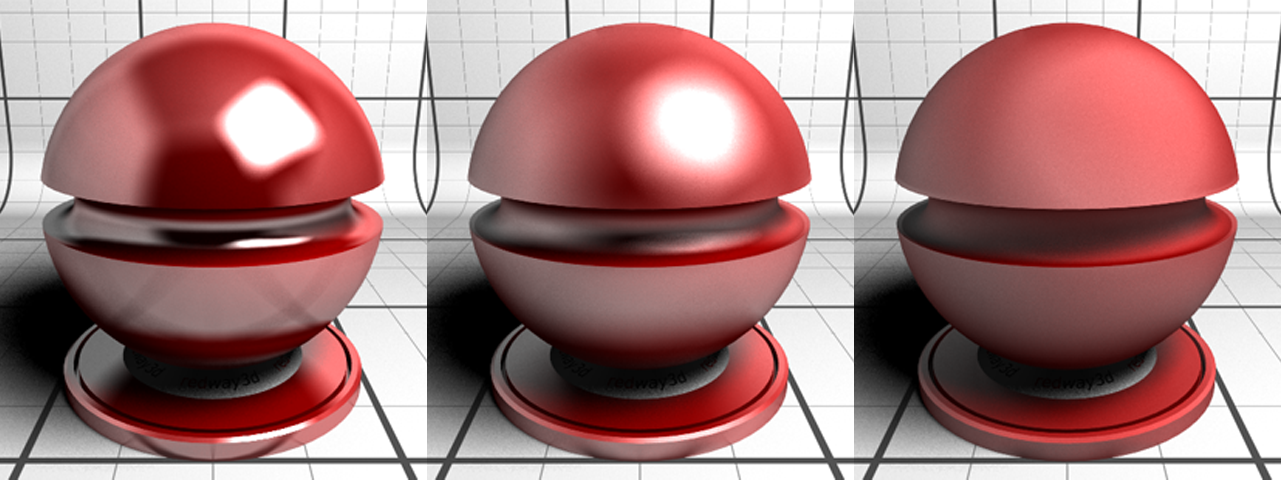
Different reflection glossiness settings
Glossiness is achieved by increasing the “Anisotropy in U” and “Anisotropy in V” parameters. If both parameters are identical, then, the reflection is isotropic. If both parameters have different values, the reflection is anisotropic, like on a CD-ROM surface or on hairs and furs.
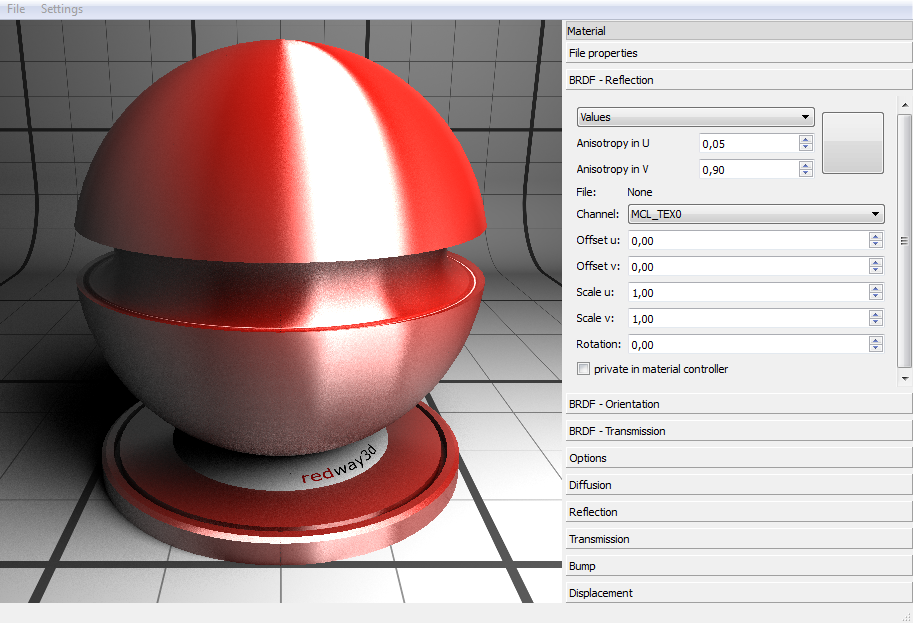
Parameters for a strong anisotropy
BRDF - Orientation
The following parameter defines the anisotropy direction.
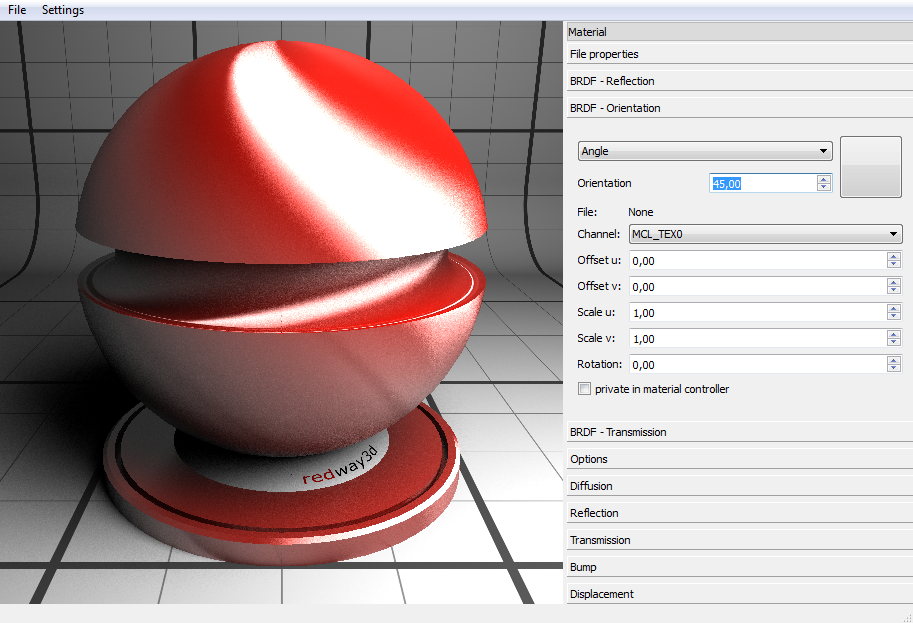
Different reflection anisotropic settings
BRDF - Transmission
Like for the BRDF - Reflection group, this one lets you set the glossiness parameter for the transmission. The IOR (Index Of Refraction) is exposed to control the amount of refraction. A table of current real-life indices of refraction can be found here: Using HOOPS Luminate’s Material Editor under the section Table of Common Indices of Refraction.
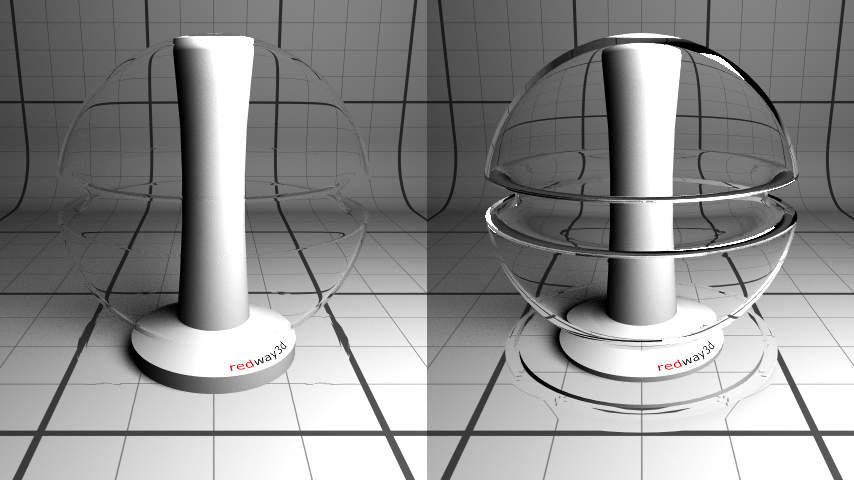
A transparent material with different IOR
Bump and Displacement
For bump or displacement, things are a little bit different as those channels can’t be color-based. The combo box is then adjusted to propose only the texture mode. The height of the bump/displacement can be set via a parameter.
Like the previous material channels, Offset, Scale and Rotation parameters are used to transform the texture mapping.
Note
The height factor of the bump component is applied to the texture data themselves while converting to a normal map. The height information is then discarded from the material properties. However, in order to keep track of the applied scaling factor, it is stored as a hint in the material controller (see RED::IMaterialController) under the name BumpScale.
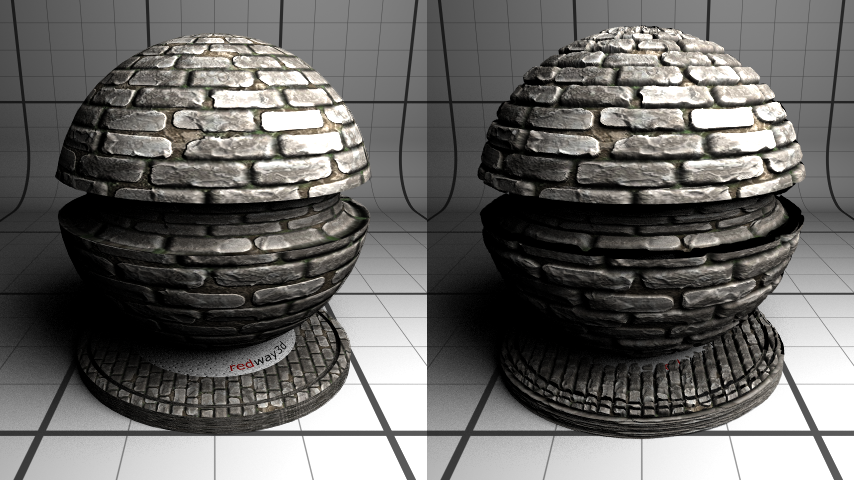
Difference between Bump (on the left) and Displacement (on the right)
Advanced Options
When it comes to setup reflection/transmission, Fresnel support is essential. It describes the way real surfaces interacts with the light. The strength of the reflection generally depends on the viewing angle (the angle between the observer and the surface normal). For example, see how your office window panes or car paint reflect more when viewed under grazing angles rather than when front facing.
Difference between Fresnel (on the left) and non-Fresnel (on the right) reflections
This is also the place where you can turn on Caustics generation (both reflective and refractive) for your material.
A glass material with caustics turned on (on the left) or off (on the right)
Note
In order for the caustics to be computed in the preview window, you need to enable them both at the material level (in the Advanced options group) and at the editor level through the Settings menu.
A Double sided option is also available in this category to set the back-face rendering of the shape.
Most main material component groups in the GUI have an associated check box named private in the material controller. It shows how the users of the material will be able to interact with it. If the check box is checked, the associated parameters will be declared as private in the HOOPS Luminate API (see RED::IMaterialControllerProperty::SetPrivate), otherwise they’ll be public. This lets the application to control how a custom material could be displayed to its users (private fields can be kept hidden for example, making the material view more simple and user-friendly).
Batch Processing Materials using Templates
Once a generic material (template) has been carefully defined (finished wood, or exterior tiles for example), one can use its definition to create a lot of similar materials with different settings. The command line mode lets the user change color and/or texture parameters of a material while keeping the other parameters identical. This accelerates a lot the process of converting existing materials into realistic ones. If several wood textures are supplied for one wood shading model, the user can proceed like follows:
- create a shading model of the wood using the editor in wysiwyg mode, and save it to the disk;
- run the editor in command line mode through a script with the template and wood textures in parameters.
Here is a list of the various command line options:
- -template [RED file]: Set the file containing a realistic material definition to be used as template for other materials
- -output [RED file]: Set the name of the editor output file
- -help: Display the help screen summarizing all the commands
- -thumbnail: Renders a thumbnail of the material that will be saved along with its definition
- -aa [factor]: Forces anti-aliasing for the thumbnail taking up to [factor] x [factor] samples per pixel (factor is in [1, 4])
- -gi: Enables global illumination while rendering the material thumbnail
- -caustics: Enables caustics while rendering the material thumbnail
- -diffuse [color]: Set the diffuse color of the material to [color]
- -diffuseTexture [Image file]: Set the diffuse texture of the material to [Image file]
- -reflect [color]: Set the reflection color of the material to [color]
- -reflectTexture [Image file]: Set the reflection texture of the material to [Image file]
- -refract [color]: Set the transmission color of the material to [color]
- -refractTexture [Image file]: Set the transmission texture of the material to [Image file]
- -bumpTexture [Image file]: Set the bump texture of the material to [Image file]
- -displacementTexture [Image file]: Set the displacement texture of the material to [Image file]
The color values are expressed in hexdecimal format: RRGGBB. Hence, pure green can be written as 00FF00.
The image files must be of one of the REDMaterialEditor supported formats: BMP, GIF, JPEG, PNG or TIFF.
Here is an example of how to use the editor in command line:
REDMaterialEditor -template generic_wood.red -output veneer01.red -thumbnail -aa 3 -gi -reflect AAAAAA -diffuseTexture veneer01.png
This will produce the file ‘veneer01.red’, including a globally lighted anti-aliased thumbnail, of the generic_wood material using the veneer01.png image as diffuse texture and the (R=170, G=170, B=170) color as reflection amount.

