Building a Geometry - Part 4 - Adding Reflection Probes
After loading a geometry (Building a Geometry - Part 1 - Loading a Source Scene), setting up GI and AO data (Building a Geometry - Part 2 - Setting Up a GI Cache) and activating lights (ref wf_building_a_geometry_part_3_adding_lights), it is time to add reflections to the scene.
The reflections in REDart are mainly done using reflection probes set in the scene. These are specific REDart objects and can’t be loaded directly from the original source graph. This tutorial will show how to create probes and render environment maps from them.
Creating Probes an Adding Them to the Geometry
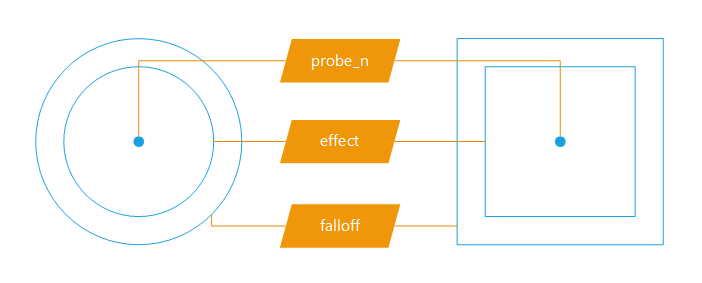
A reflection probe can be easily created using the ART::Factory. The ART::IReflectionProbe interface allows to set several parameters.
A probe is defined by:
- its position and orientation: where the environment maps are rendered
- its effect area: all the geometry inside the area is affected by the probe
- its falloff area: fade out zone outside of the effect area
Sphere and box reflection probes details
Reflection probes can be of two types: sphere or box. Sphere probes have “infinite” reflections. They are suited for single objects. Box probes are suited for interior room.
ART::IGeometry* igeometry = g_geometry->As< ART::IGeometry >();

const RED::Matrix& mgeo = igeometry->GetRootMatrix();

// Create a first reflection probe in the main room of the first floor.
RED::Object* probe = ART::Factory::CreateInstance( CID_ARTReflectionProbe );
if( probe == NULL )
    RC_TEST( RED_ALLOC_FAILURE );

ART::IReflectionProbe* iprobe = probe->As< ART::IReflectionProbe >();

RED::Matrix transform;
transform.SetTranslation( RED::Vector3( 0.0, -1.0, 1.75 ) );
transform = mgeo * transform;
RED::Vector3 effectMin( -9.0, -3.7, -1.75 );
RED::Vector3 effectMax( 9.6, 4.2, 2.15 );
RED::Vector3 falloffMin( -9.3, -3.74, -1.8 );
RED::Vector3 falloffMax( 9.63, 4.8, 2.2 );
RC_TEST( iprobe->InitializeBox( transform, effectMin, effectMax, falloffMin, falloffMax ) );

RC_TEST( igeometry->AddReflectionProbe( probe ) );
For a house with multiple rooms like in this tutorial, several box probes are placed in each area. The probe is positionned at the center of the room. The size of the box fits the size of the room. The falloff goes through the wall to blend between adjacent rooms at the door positions.
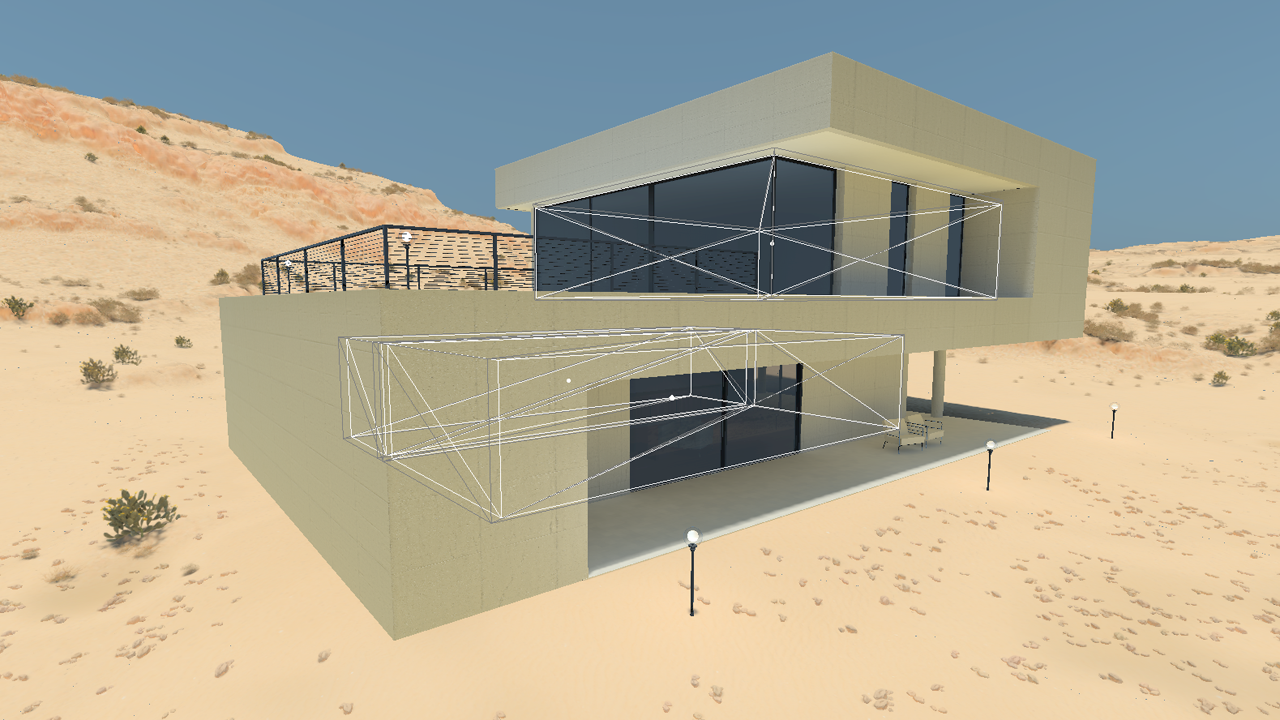
Positions and area of the three reflection probes.
Generating Reflection Probes Maps
Once the probes are created and the areas are set, we need to render and set their environment maps. This can be done with a single call to ART::IAssetManager::GenerateReflectionProbeMaps.
RED::Vector< RED::Object* > envMaps;
RED::Vector< RED::Object* > envMapsIndex;

RED::Object* probe;
ART::IReflectionProbe* iprobe;
RED::Object* map;
RED::Object* mapIndex;

// Deactivate all the reflection probes before starting.
// We want only one depth of reflections.
// For multiple depths, call the generate function multiple times with reflections activated.
for( int i = 0; i < count; ++i )
{
    probe = igeometry->GetReflectionProbe( i );
    iprobe = probe->As< ART::IReflectionProbe >();

    iprobe->SetActive( false );
}

// Generate all the reflection probes.
for( int i = 0; i < count; ++i )
{
    probe = igeometry->GetReflectionProbe( i );
    iprobe = probe->As< ART::IReflectionProbe >();

    RC_TEST( iassetmgr->GenerateReflectionProbeMaps( map, mapIndex, probe, 512, false, g_sundir, REDartProgressCB, NULL ) );

    RC_TEST( envMaps.push_back( map ) );
    RC_TEST( envMapsIndex.push_back( mapIndex ) );
}

// Reactivate the reflections.
for( int i = 0; i < count; ++i )
{
    probe = igeometry->GetReflectionProbe( i );
    iprobe = probe->As< ART::IReflectionProbe >();

    iprobe->SetActive( true );
}

// Setting the reflection maps in the probe object.
for( int i = 0; i < count; ++i )
{
    RED::Object* probe = igeometry->GetReflectionProbe( i );
    ART::IReflectionProbe* iprobe = probe->As< ART::IReflectionProbe >();
    RC_TEST( iprobe->SetEnvironmentMap( envMaps[i], envMapsIndex[i] ) );
}
Note
The ART::IAssetManager::GenerateReflectionProbeMaps method works on the current state of the world. Please make sure that the geometry is well placed on the planet and the world is running correctly when calling it.
The method returns two maps: an atlas containing multiple reflections for multiple sun positions and the map containing atlas indexing data.
Saving and Loading Reflection Probes Maps
Once multiple reflection probes maps have been rendered, we can easily save them into one single file:
// Saving the reflection maps.
if( count > 0 )
{
    RC_TEST( iassetmgr->SaveReflectionProbesMaps( envMaps, envMapsIndex, "../Resources/House_Reflection.red" ) );
}
The loading of the file is as simple as the saving:
// Loading the reflection probes.
RED::Vector< RED::Object* > envMap;
RED::Vector< RED::Object* > envMapAtlas;
unsigned int ctx;
RC_TEST( iassetmgr->LoadReflectionProbesMaps( envMap, envMapAtlas, ctx, "../Resources/House_Reflection.red" ) );

count = igeometry->GetReflectionProbesCount();

if( count != envMap.size() )
    RC_TEST( RED_FAIL );

// Setting the reflection maps in the probe object.
for( int i = 0; i < count; ++i )
{
    RED::Object* probe = igeometry->GetReflectionProbe( i );
    ART::IReflectionProbe* iprobe = probe->As< ART::IReflectionProbe >();
    RC_TEST( iprobe->SetEnvironmentMap( envMap[i], envMapAtlas[i] ) );
}
Each map is finally set to its associated reflection probe object.
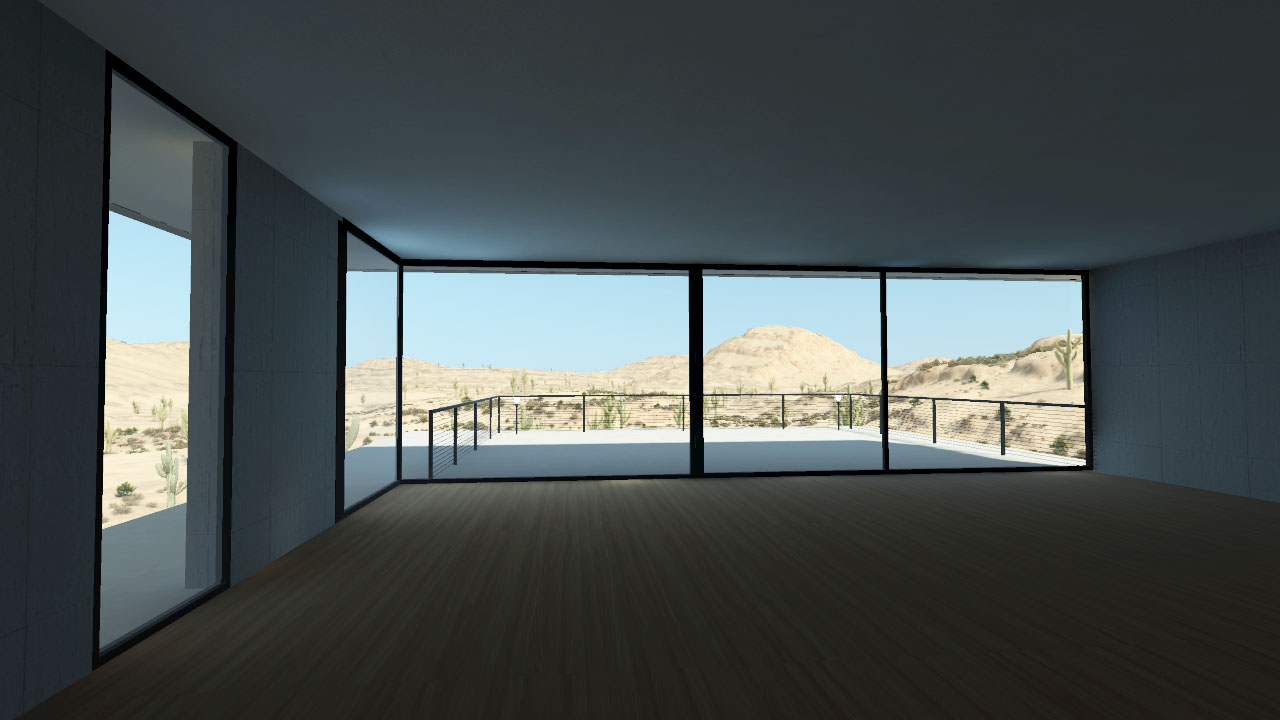
The house without reflections
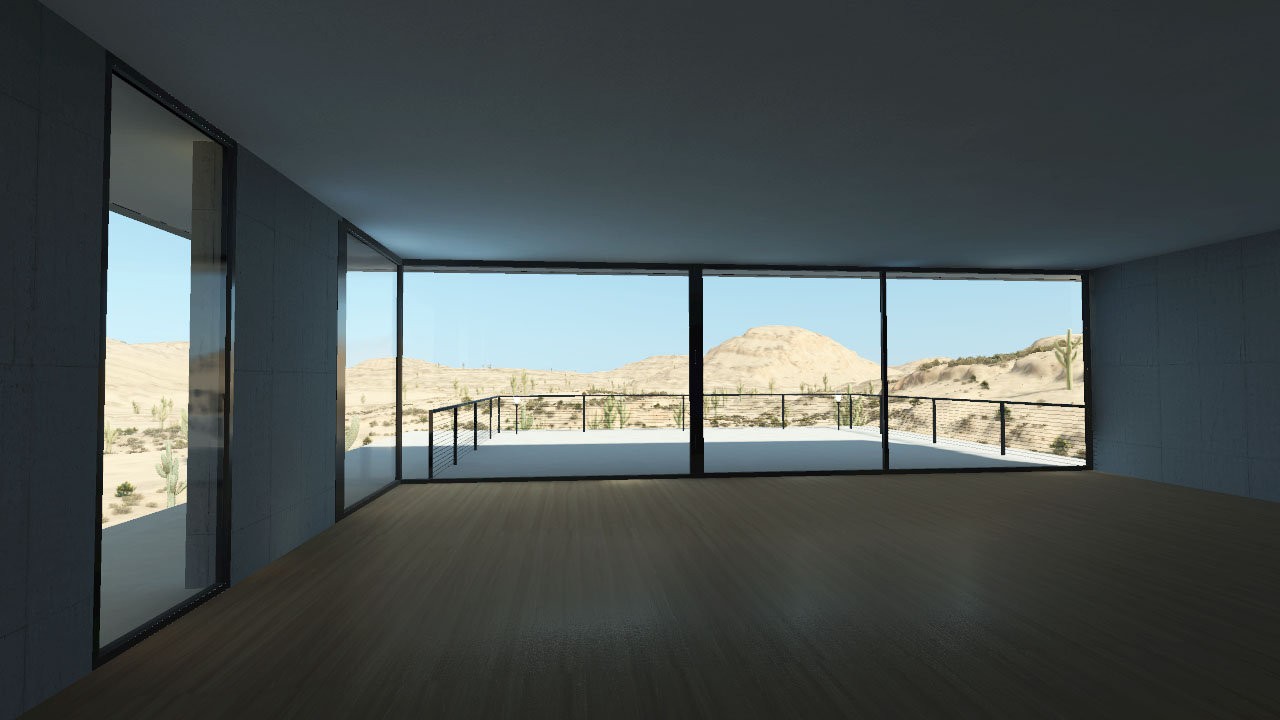
The house with reflections