Rendering Volumetric Effects
The goal of this tutorial is to learn the steps to add volumetric effects in a scene. The second objective is also to well understand the role of the different parameters defining it.n Volume rendering will then allow to create effects like dust, fog or light shafts.
We will first load a basic scene into HOOPS Luminate, activate volume rendering and add volumetric effects. Finally we will see how to change the medium properties and volume parameters.
Scene Setting
The first step is to load a scene and set some rendering options. Nothing new here: we render using software loop, we turn on anti-aliasing and enable ray-traced shadows.
// Load the scene:
unsigned int context;
RC_TEST( RFK::TutorialApplication::LoadREDFile( camera, context, NULL, "../resources/Volumetric.red" ) );
icamera = camera->As< RED::IViewpoint >();

RC_TEST( RFK::TutorialApplication::SetViewpoint( camera ) );

// Enable shadows:
RED::IOptions* icamopt = icamera->As< RED::IOptions >();
RC_TEST( icamopt->SetOptionValue( RED::OPTIONS_RAY_PRIMARY, true, state ) );
RC_TEST( icamopt->SetOptionValue( RED::OPTIONS_RAY_SHADOWS, 1, state ) );
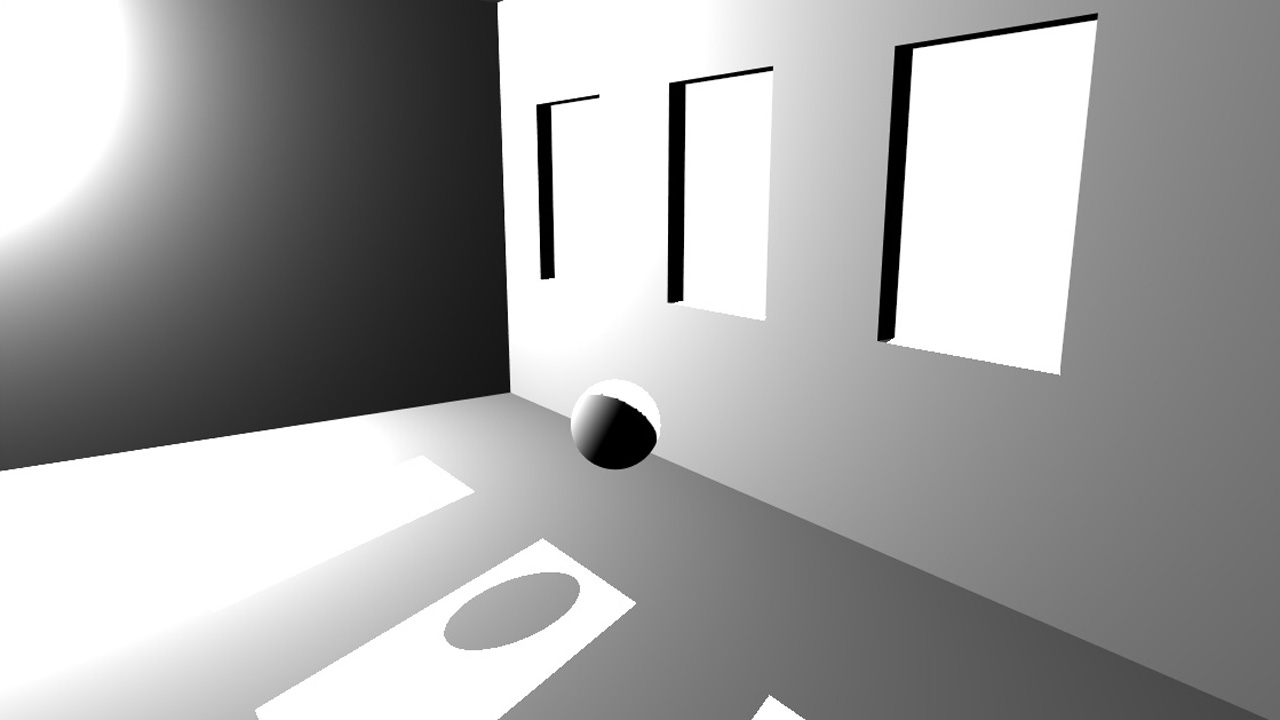
Simple scene
The scene contains a box with windows, a beam light outside and a point light inside. The two lights are voluntary powerful in order to well enlighten le medium later.
The volumetric rendering is enabled using one option:
// Enable volumetric rendering:
RC_TEST( icamopt->SetOptionValue( RED::OPTIONS_RAY_VOLUME, 1, state ) );
The parameter is the rendering depth. Setting 0 disables the volumetric rendering, setting more than 1 will draw volume in reflections.
The scene is composed of two lights: A beam light and a point light. We want to take into account the beam light only into the volume rendering process, so we will remove the point light from volume calculations.
// Get root:
RED::Object* root;
RC_TEST( icamera->GetRootShape( root ) );
RED::IShape* irootshape = root->As< RED::IShape >();

// Get beam light:
RED::Object* beam;
RC_TEST( irootshape->GetChildByID( beam, "Beam" ) );
RED::IShape* ishape = beam->As< RED::IShape >();
RC_TEST( ishape->GetChild( beam, 0 ) );
RED::ILightShape* ibeam = beam->As< RED::ILightShape >();

// Disable shadow mapping as we have ray-traced shadows:
RC_TEST( ibeam->SetShadowMapping( false, state ) );

// Define volume for volumetric effect:
RC_TEST( ibeam->SetRenderMode( RED::RM_DEFINE_VOLUME, true, state ) );
RC_TEST( ibeam->SetRenderMode( RED::RM_ENLIGHTEN_VOLUME, true, state ) );

// Get omni light:
RED::Object* omni;
RC_TEST( irootshape->GetChildByID( omni, "Omni" ) );
ishape = omni->As< RED::IShape >();
RC_TEST( ishape->GetChild( omni, 0 ) );
RED::ILightShape* iomni = omni->As< RED::ILightShape >();

// Disable volume for this light:
RC_TEST( iomni->SetRenderMode( RED::RM_DEFINE_VOLUME, false, state ) );
RC_TEST( iomni->SetRenderMode( RED::RM_ENLIGHTEN_VOLUME, false, state ) );
As we can see, the lights have two render modes controlling volume rendering:
RED::RM_DEFINE_VOLUME: this option tells that the light volume will be filled with medium. This parameters is used with the specific volumetric effectRED::VolumetricEffectLightVolume. In our example, the medium will be contained inside the beam cylinder volume.RED::RM_ENLIGHTEN_VOLUME: this option tells that the light will be used to compute light scattering in the volume and enlighten it.
Disabling these two options for the point light allows to speed up the calculation as the most important light here is the beam one. By default, these parameters are true so activate them in the beam light was actually not necessary.
Adding Medium
The second step is to add a medium inside the volume defined by the beam light. To do this, a special RED::IShape is added to the scene: RED::IVolumeShape. This type of shape should have only one occurrence in the scene graph and will add medium in all the volumes of the scene. It will contain the list of RED::VolumetricEffect and some parameters to control the volume rendering.
// Get root:
RED::Object* root;
RC_TEST( icamera->GetRootShape( root ) );
RED::ITransformShape* iroot = root->As< RED::ITransformShape >();

// Create a volume shape to hold volumetric effect:
RED::Object* volume = RED::Factory::CreateInstance( CID_REDVolumeShape );
RED::IVolumeShape* ivolume = volume->As< RED::IVolumeShape >();

// Set volume rendering parameters:
RC_TEST( ivolume->SetRayMarchingStep( 1, state ) );
RC_TEST( ivolume->SetRayCutoff( 0.001, state ) );
RC_TEST( ivolume->SetScatteringSamples( 128, state ) );

// Add the shape to the scenegraph:
RC_TEST( iroot->AddChild( volume, RED_SHP_DAG_NO_UPDATE, state ) );
The volume shape has some parameters:
- Ray marching step: this parameter defines the length of the steps used to sample the volume. Our scene is of size 400cm, a good assumption is then to take samples every 1cm.
- Ray marching cutoff: this parameter allows to stop useless volume processing when the lighting value is below the cutoff.
- Scattering samples: this important parameter defines the number of samples taken along the ray to compute light scattering inside the volume. Increasing it permits to increase the visual quality but the drawback is a longer processing time. Nice values for a scene of size 400cm like ours begin with 64 to 128 samples.
Once the RED::IVolumeShape is added to the scene we have to feed it with a RED::VolumetricEffect.
A volumetric effect is characterized by several parameters:
- sigma a: the absorption coefficient of the medium, i.e. how much it will absorb the light entering it
- sigma s: the scattering coefficient of the medium, i.e. how much it will in-scatter and out-scatter the light entering it
- density: the density of the medium, i.e. the amount of particles contained in the volume
- phase: function that defines how light scatters in the medium (
see RED::VolumetricEffect::GetPhase)
To have more details about these properties, please have a look at the RED::VolumetricEffect documentation.
// Set volumetric effect properties:
g_effect.SetSigmaA( RED::Vector3( g_sigma_a ) );
g_effect.SetSigmaS( RED::Vector3( g_sigma_s ) );

// Add the volumetric effect:
RC_TEST( ivolume->AddVolumetricEffect( &g_effect, state ) );
In this tutorial, we use the RED::VolumetricEffectLightVolume. This particular effect creates medium inside light volumes:
- cone for spot light
- cylinder for beam light
- sphere for point light
This effect is homogeneous and have a fixed density of 1 and a fixed isotropic phase function. It only allows to change the sigma a and sigma s properties.
Increasing sigma a will make the volume darker as it will absorb the light. Sigma s defines the medium probability to scatter light. The light is partly deviated to the viewer and so the volume will appear enlightened but it is also deviated in all directions. For this reason, sigma s allows to enlighten the volume where it receives a lot of light and darkened it elsewhere.
HOOPS Luminate allows to differentiate in-scattering and out-scattering by giving two different coefficients with the two functions RED::VolumetricEffectLightVolume::SetSigmaSIn and RED::VolumetricEffectLightVolume::SetSigmaSOut. To be physically accurate in this example, we give them the same value using the function RED::VolumetricEffectLightVolume::SetSigmaS.
Increasing only ‘sigma s in’ enlighten the volume whereas increasing only ‘sigma s out’ darken the volume.
These parameter units are inverse model units. As our scene is in centimetres and the two sigmas are in meter<sup>-1</sup>, we need to set values between 0.00m<sup>-1</sup> and 0.01m<sup>-1</sup>.
Sigma a and sigma s are defined per colour channels. In this tutorial, we use the same value for all three channels but setting different values allows to define several absorption and scattering behaviours per colour.
Note
It is important to understand that all the volume parameters are really dependent on the scene size and units. There are no default values working for all scenes and properties must be set accordingly to the model.
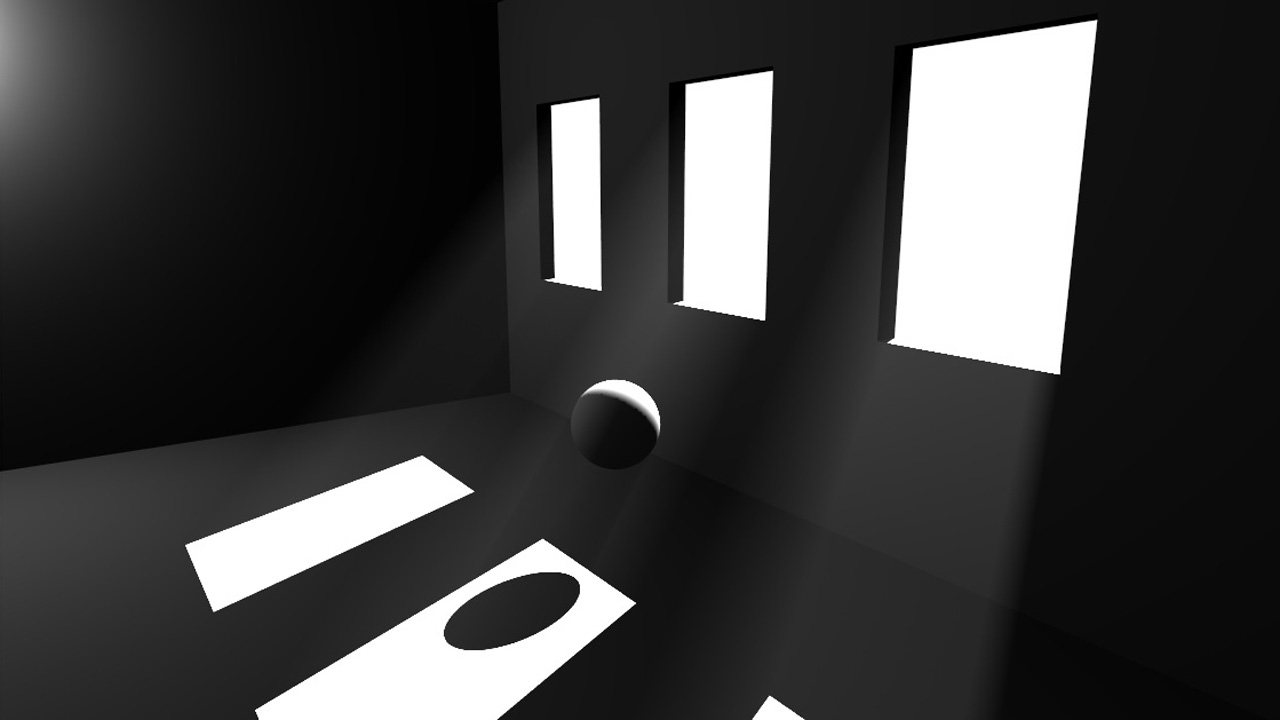
Scene filled with medium
On this image, we see that the scene is darker. The medium has absorbed the light. Scattering inside areas where light value is high creates light shafts.
Adding Global Illumination
The last step of this tutorial is to add global illumination.
// Turn on HDR:
RED::IOptions* iwinopt = iwindow->As< RED::IOptions >();
RC_TEST( iwinopt->SetOptionValue( RED::OPTIONS_WINDOW_HDR, 2, state ) );

// Turn on global illumination:
RED::IOptions* icamopt = icamera->As< RED::IOptions >();
RC_TEST( icamopt->SetOptionValue( RED::OPTIONS_RAY_GI, true, state ) );

// Turn on tone mapping:
RED::PostProcess& pp = icamera->GetPostProcessSettings();
pp.SetToneMapping( RED::TMO_PHOTOGRAPHIC );
One option activates the volume rendering during the global illumination process:
// Turn on global illumination for volume:
RC_TEST( icamopt->SetOptionValue( RED::OPTIONS_RAY_GI_ENABLE_VOLUME, true, state ) );
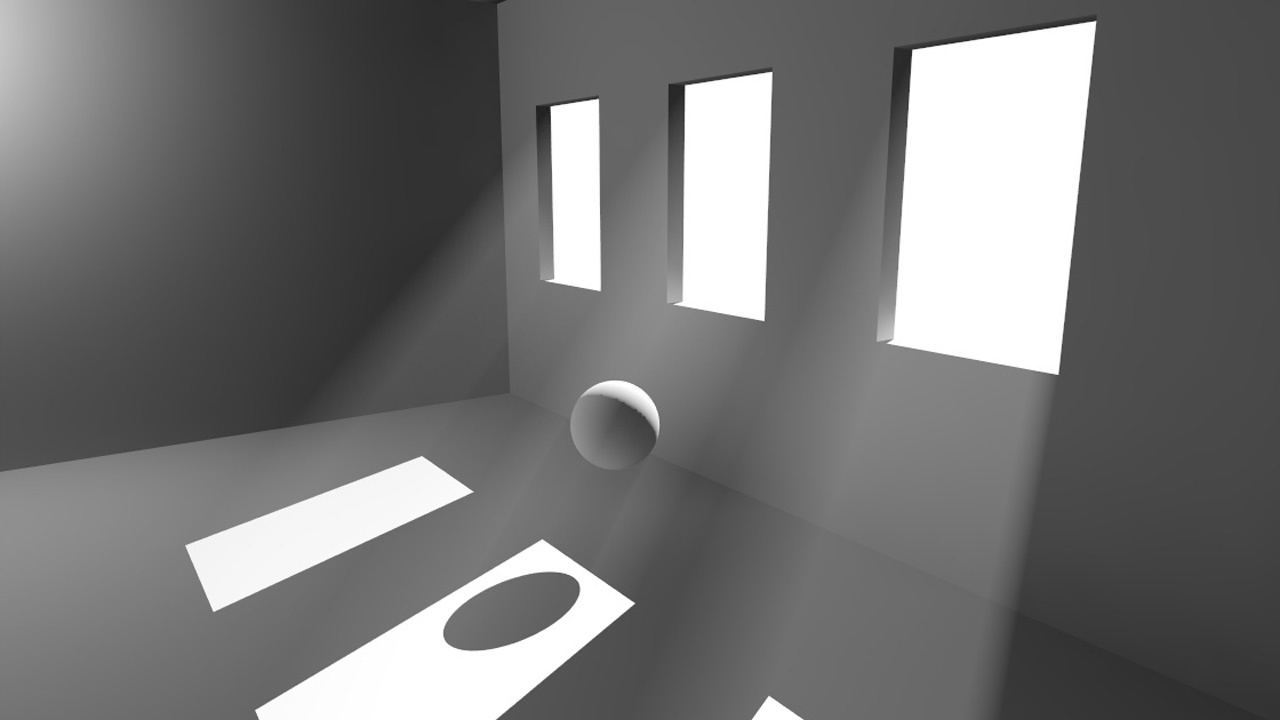
Volumetric effect with global illumination

