Outdoor Lighting
Introduction
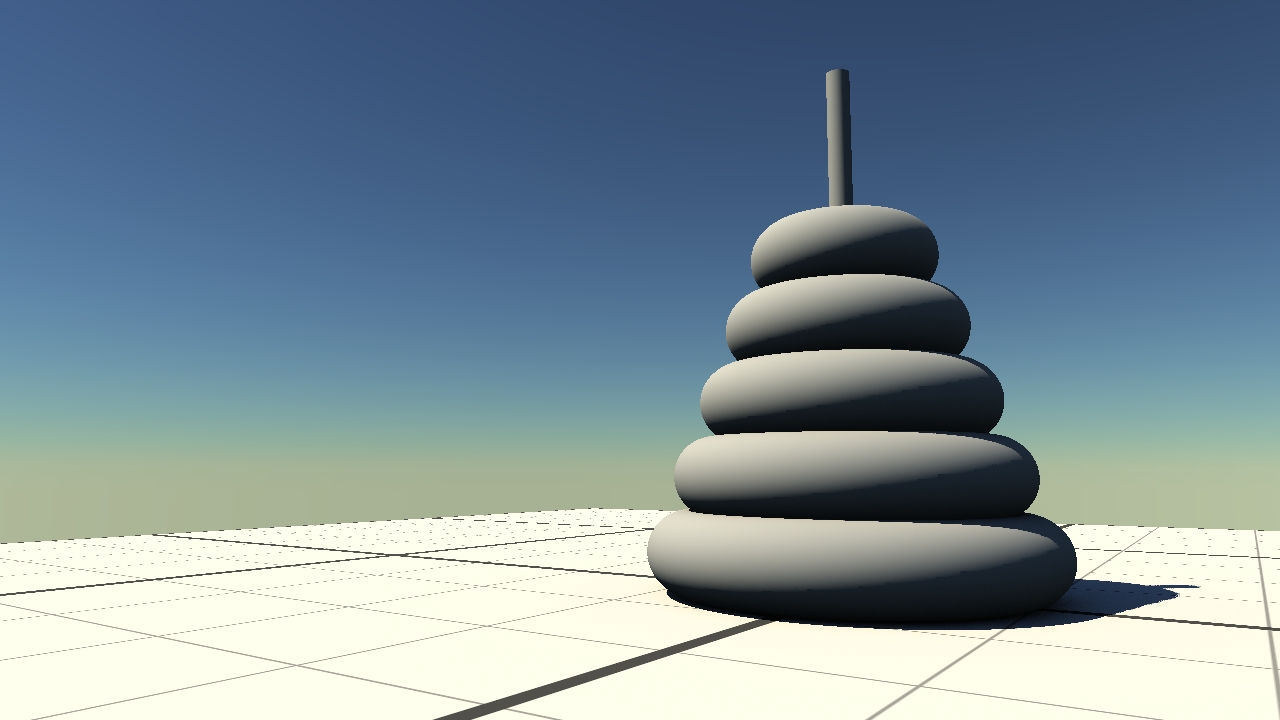
In outdoor situations, light comes directly from the sun (sun light) but also indirectly from the atmosphere (sky light). The later is due to the scattering of the sun light in the media present in the atmosphere. To simulate a complete daylight model with HOOPS Luminate, we need to create both sun and sky physical lights which is the subject of this tutorial.
Description
There are very few parameters to the creation of a physical daylight system. This is because most of the data can be retrieved from physical simulation. Hence, the code for setting up sun and sky light is quite straightforward:
Sky light:
// Create the sky light.
RED::Object* sky = RED::Factory::CreateInstance( CID_REDLightShape );
if( sky == NULL )
RC_TEST( RED_ALLOC_FAILURE );

// Turn on the sky shadows.
RED::ILightShape* ilight = sky->As< RED::ILightShape >();
RC_TEST( ilight->SetRenderMode( RED::RM_SHADOW_CASTER, 1, iresmgr->GetState() ) );

// Add the light to the scene.
RC_TEST( iviewpoint->AddShape( sky, iresmgr->GetState() ) );

// Create the physical sky texture.
RED::ISkyLightShape* isky = sky->As< RED::ISkyLightShape >();

RED::Object* sky_tex = NULL;

RC_TEST( isky->SetPhysicalModel( 1.0, 1.0, scale_sky,
                                turbidity, albedo, 0.8, 0.7,
                                sun_dir, 1.0, 1.0,
                                sun_dir, 0.0, 0.0,
                                0.0,
                                saturation,
                                iresmgr->GetState() ) );

RC_TEST( isky->CreatePhysicalSkyTexture( sky_tex, false, 256, true, false, true, iresmgr->GetState() ) );

// Use the texture to setup the sky light.
RC_TEST( isky->SetSkyTexture( sky_tex, true, RED::Vector3::XAXIS, RED::Vector3::ZAXIS, iresmgr->GetState() ) );

// set the samples count to 128;
RC_TEST( isky->SetSamplesCount( 128, iresmgr->GetState() ) );
The sky light needs a texture that describes the light distribution over its (hemi-)sphere of emission. This makes the sky light very configurable as you can provide any texture of your own to get a wide range of lighting situations. In order to make it physical and correct, HOOPS Luminate provides a helper (RED::ISkyLightShape::CreatePhysicalSkyTexture) to create a realistic sky texture for a given set of parameters.
Sun light:
// Create the sun light.
RED::Object* sun = RED::Factory::CreateInstance( CID_REDLightShape );
if( sun == NULL )
RC_TEST( RED_ALLOC_FAILURE );

// Turn on the sun shadows.
ilight = sun->As< RED::ILightShape >();
RC_TEST( ilight->SetRenderMode( RED::RM_SHADOW_CASTER, 1, iresmgr->GetState() ) );

// Add the light to the scene.
RC_TEST( iviewpoint->AddShape( sun, iresmgr->GetState() ) );

RED::ISunLightShape* isun = sun->As< RED::ISunLightShape >();

// Set the sun position and parameters.
RC_TEST( isky->SetSunLight( sun, iresmgr->GetState() ) );

// The sun light is a very small light source as seen from the earth and does
// not need that much samples.
RC_TEST( isun->SetSamplesCount( 16, iresmgr->GetState() ) );
The sky conditions are fully characterized by this reduced set of parameters:
- sun direction: It has great influence as it determines the whole aspect of the daylight system. Set the sun at the zenith to get a bright middle-of-the-day lighting or put it a little bit above the horizon for colourful sunsets
- turbidity: This sets the amount of particles in the atmosphere making the sky more or less hazy
- albedo: This describes the amount of light reflected by the ground back to the sky
Optionally, you can influence the overall light intensity and colour by tweaking those parameters:
- Scale: used as a multiplier on the actual light intensities
- Saturation: it sets the saturation of the light colours and can be used along with the scale factor to simulate different atmospheric conditions
The last step in making the daylight system complete is to set the background image of the view. To do that, we compute the same sky texture than before but at a much larger resolution. This is because the texture will now be directly visible and needs to have a sufficient quality to match the rendering resolution:
// Setup the scene background: the sky msut also be seen directly by the camera
// and must be set as a background texture; we can't use the previously computed
// sky texture for that as the background texture resolution should be a lot higher
// for direct visualization.

// This time we include the sun and make the texture spherical.
RED::Object* bg_tex = NULL;
RC_TEST( isky->CreatePhysicalSkyTexture( bg_tex, false, 512, false, true, true, iresmgr->GetState() ) );

// Retrieve info about the texture.
RED::IImage2D* iback = bg_tex->As< RED::IImage2D >();
RC_TEST( iback->GetPixels() );
RED::FORMAT pix_format = iback->GetLocalFormat();
int pix_width, pix_height;
iback->GetLocalSize( pix_width, pix_height );
unsigned char* pixels = iback->GetLocalPixels();

// create a cube map from the texture
RED::Object* bg_cube = NULL;
RC_TEST( iresmgr->CreateImageCube( bg_cube, iresmgr->GetState() ) );

RED::IImageCube* icube = bg_cube->As< RED::IImageCube >();
RC_TEST( icube->CreateEnvironmentMap( RED::FMT_FLOAT_RGB, RED::ENV_SPHERICAL,
                                    512, pixels, pix_width, pix_height, pix_format,
                                    RED::WM_CLAMP_TO_BORDER, RED::WM_CLAMP_TO_BORDER, RED::Color::BLACK,
                                    RED::Matrix::IDENTITY, RED::Matrix::IDENTITY, iresmgr->GetState() ) );

// Setup the cube map as background image.
RED::Object* vrl;
RC_TEST( iwindow->GetDefaultVRL( vrl ) );

RED::IViewpointRenderList* ivrl = vrl->As< RED::IViewpointRenderList >();
RC_TEST( ivrl->SetBackgroundImages( bg_cube, RED::Matrix::IDENTITY, NULL, RED::Matrix::IDENTITY, true, 1.0, 1.0, iresmgr->GetState() ) );
The background texture is a cube map. That’s why we need to transform the texture returned by the call to RED::ISkyLightShape::CreatePhysicalSkyTexture to a RED cube image.

The whole daylight setup

