Rendering Volumetric Clouds
This tutorial describes how to setup a RED::ICloudsVolumeShape containing RED::VolumetricEffectClouds to render volumetric clouds on the CPU. As a prerequisite to this tutorial, reading the Outdoor Lighting page is a good start.
Note
Volumetric rendering is very CPU intensive! Since the clouds cover a sky-sized volume, this tutorial could be very long to render on low-end computers.
Enabling the Correct HOOPS Luminate Options for Volume
The first step is to configure HOOPS Luminate to render the scene. The scene is only composed of sky lights and a volume shape. Volumetric clouds are currently only available in software.
This piece of code enables the software rendering, the shadows and the volumetric rendering:
// Enable ray tracer, shadows and volumetric rendering:
RED::IOptions* icamopt = iviewpoint->As< RED::IOptions >();
RC_TEST( icamopt->SetOptionValue( RED::OPTIONS_RAY_PRIMARY, true, iresmgr->GetState() ) );
RC_TEST( icamopt->SetOptionValue( RED::OPTIONS_RAY_SHADOWS, 1, iresmgr->GetState() ) );
RC_TEST( icamopt->SetOptionValue( RED::OPTIONS_RAY_VOLUME, 1, iresmgr->GetState() ) );
We need to set the window HDR since our entire scene units are physical:
// Turn on HDR.
RED::IOptions* iwinopt = window->As< RED::IOptions >();
RC_TEST( iwinopt->SetOptionValue( RED::OPTIONS_WINDOW_HDR, 2, iresmgr->GetState() ) );
Finally the tone mapping have to be set to handle the HDR values.
// Turn on tone mapping.
RED::PostProcess& pp = iviewpoint->GetPostProcessSettings();
pp.SetToneMapping( RED::TMO_EXPOSURE );
pp.SetExposure( (float)g_exposure );
pp.SetGamma( (float)g_gamma );
Creating a Physical Sky
Prior to add clouds to the scene, we need to create a physical sky. All the informations needed are well documented in the Outdoor Lighting tutorial. So we will just use the code below:
// Setup the sky light.
// Create a small sky texture for light sampling.
RED::Object* sky_tex = NULL;
RC_TEST( isky->CreatePhysicalSkyTexture( sky_tex, false, 128, true, false, false, iresmgr->GetState() ) );
RC_TEST( isky->SetSkyTexture( sky_tex, true, RED::Vector3::XAXIS, RED::Vector3::ZAXIS, iresmgr->GetState() ) );
RC_TEST( isky->SetSamplesCount( 64, iresmgr->GetState() ) );

// Let the sky create the sun and moon lights.
RC_TEST( isky->SetSunLight( g_sun, iresmgr->GetState() ) );
RC_TEST( isky->SetMoonLight( g_moon, iresmgr->GetState() ) );

// Setup the sun light.
RED::ISunLightShape* isun = g_sun->As< RED::ISunLightShape >();
RC_TEST( isun->SetSamplesCount( 1, iresmgr->GetState() ) );

// Setup the moon light.
RED::IMoonLightShape* imoon = g_moon->As< RED::IMoonLightShape >();
RC_TEST( imoon->SetSamplesCount( 1, iresmgr->GetState() ) );

// Add the lights to the scene.
RC_TEST( iviewpoint->AddShape( g_sky, iresmgr->GetState() ) );
RC_TEST( iviewpoint->AddShape( g_sun, iresmgr->GetState() ) );
RC_TEST( iviewpoint->AddShape( g_moon, iresmgr->GetState() ) );
The important thing here is to add the sky and sun lights to the scene. These lights will enlighten the volumetric clouds.
Setting low samples counts on both lights will speed-up the rendering time. But don’t reduce them to much unless the rendering quality drop will be visible.
Adding the Clouds
Volumetric clouds are part of the HOOPS Luminate volumetric API. A specific RED::IVolumeShape called RED::ICloudsVolumeShape can be created via the RED::Factory. The clouds volume shape handles the clouds volumetric effects. We can add one or more RED::VolumetricEffectClouds to the shape. Each effect handling a cloud layer in the sky. In this tutorial, we created two clouds layers:
- one low for the cumulus/stratus
- and one high for the cirrus
// Create a clouds volume shape to hold clouds volumetric effects:
RED::Object* volume = RED::Factory::CreateInstance( CID_REDCloudsVolumeShape );

// This object implements both RED::IVolumeShape and RED::ICloudsVolumeShape interfaces:
RED::IVolumeShape* ivolume = volume->As< RED::IVolumeShape >();
RED::ICloudsVolumeShape* icloudsvolume = volume->As< RED::ICloudsVolumeShape >();

// Add the shape to the scenegraph:
RC_TEST( iviewpoint->AddShape( volume, iresmgr->GetState() ) );

// Add the volumetric effects to the shape. Each volumetric effect is a clouds layer:
RC_TEST( ivolume->AddVolumetricEffect( &g_cloud_low, iresmgr->GetState() ) );
RC_TEST( ivolume->AddVolumetricEffect( &g_cloud_high, iresmgr->GetState() ) );
Volume Shape Parameters
Several raytracing parameters can be set via the RED::IVolumeShape interface. They mainly affect the quality of the final image vs the rendering time. Clouds volume shape defines default values for these parameters that are a good blend between quality and speed. We do not change them in this tutorial.
RED::IVolumeShape::SetRayMarchingStep: step size of the ray marchingRED::IVolumeShape::SetScatteringSamples: number of samples used for volume lightingRED::IVolumeShape::SetRayCutoff: value under which the raymarching is stoppedRED::IVolumeShape::SetLightRayMaxSamples: maximum number of samples taken during the lighting ray marchingRED::IVolumeShape::SetLightRayMarchingStepIncrease: Increase rate of the raymarching step during the lighting ray marching
The RED::ICloudsVolumeShape interface exposes two more parameters:
- RED::ICloudsVolumeShape::SetAlbedo: how much the ground reflects the sun light on the bottom of the clouds
- RED::ICloudsVolumeShape::SetMultipleScatteringFactor: value simulating the multiple scattering of the light in the clouds. Increasing it brings more light in the thick volumes
Clouds Volumetric Effect Parameters
In order to see our two clouds layers, several parameters must be set to the RED::VolumetricEffectClouds objects. The first set of parameters are the parameters shared by all the volumetric effects.
RED::VolumetricEffectClouds::SetSigmaA: the absorption coefficient. For clouds its generally 0. Large clouds particles don’t absorb light but scatter it.RED::VolumetricEffectClouds::SetSigmaS: the scattering coefficient. 0.05m<sup>-1</sup> in our tutorial means that the light is probabilistically scattered once every 20m in the volume.RED::VolumetricEffectClouds::SetEmission: the emission coefficient of the volume. Clouds don’t emit light: set to 0.
The second set of parameters are the clouds layer height:
RED::VolumetricEffectClouds::SetLayerHeights: the low layer lays between 1000 and 3000m while the high layer is between 7000 and 7500m. The height of the layers is important in the final aspect of the clouds.
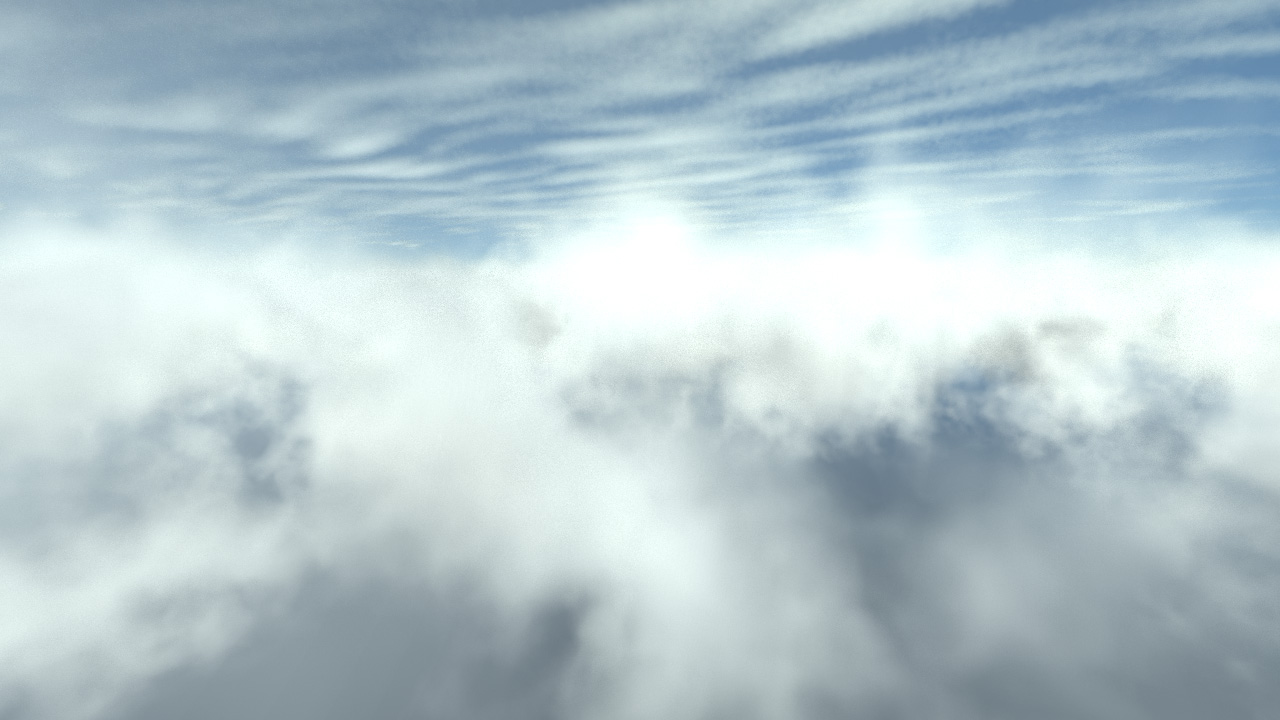
A view of the two layers from inside the clouds: cumulus bottom layer and cirrus top layer
We need to define the global aspect of our clouds. Clouds shapes are made of 3D noise.
RED::VolumetricEffectClouds::SetNoiseArray: allows to give a 3D noise texture defining the aspect of the clouds. The texture is repeated so it has to be tileable.RED::VolumetricEffectClouds::SetNoisePatchSize: sets the size of one 3D texture application in the sky. Here the texture covers 20km of sky.
Note
HOOPS Luminate provides generic noise data for cumulus and cirrus clouds via RED::VolumetricEffectClouds::GenerateCumulusVolumeData and RED::VolumetricEffectClouds::GenerateCirrusVolumeData. Feel free to use them or to use your own noise data. In this tutorial, the cumulus data are used for the lower layer and the cirrus data are used for the high layer.
The clouds cover is controlled thanks to the following parameters:
RED::VolumetricEffectClouds::SetCoverArray: provides a 2D texture array defining the amount of clouds at a given position. For conveniance, we get it from an external loaded texture. The texture is not repeated in the sky and is centered around position 0. Cover goes from 0 (no cloud) to 1 (full cover).RED::VolumetricEffectClouds::SetCoverPatchSize: sets the size of the 2D texture application in the sky. Here the texture covers 200km of sky.RED::VolumetricEffectClouds::SetCoverScale: scaling applied to the values of the cover texture.RED::VolumetricEffectClouds::SetCoverBase: minimum cover value in all the sky.
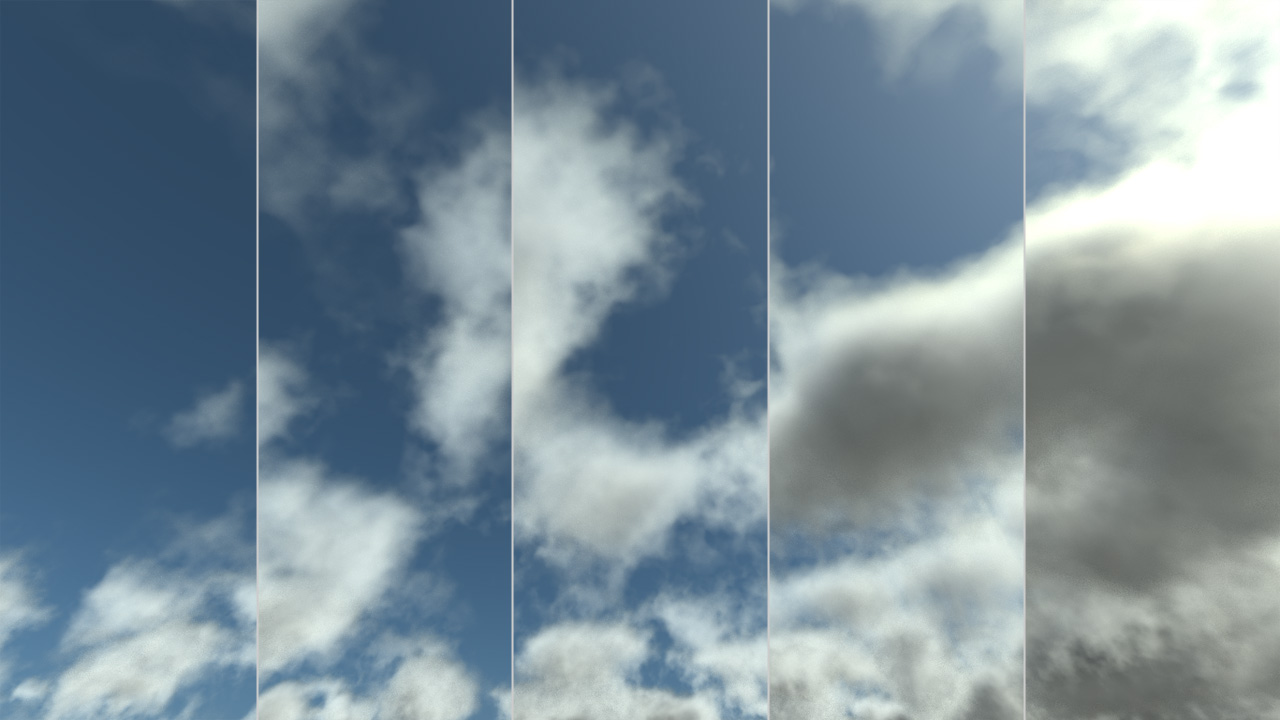
Increasing clouds cover
The sharpness and final density of the clouds can be edited with:
RED::VolumetricEffectClouds::SetSharpness: controls whether the clouds are fluffy or sharp from 0 to 1RED::VolumetricEffectClouds::SetDensityScale: applies a scale to the final clouds density
Finally, there is erosion. These parameters allow to erode the edges of the clouds to brings details.
RED::VolumetricEffectClouds::SetErosionArray: allows to give a 3D noise texture defining the erosion of the clouds. The texture is repeated: it must be tileableRED::VolumetricEffectClouds::SetErosionPatchSize: sets the size of one 3D texture application in the sky. Here the texture covers 2500m of skyRED::VolumetricEffectClouds::SetErosionScale: scaling applied to the values of the erosion textureRED::VolumetricEffectClouds::SetErosionThreshold: value from 0 to 1 indicating the percentage of clouds that is eroded from edge to center
Note
A generic erosion noise array can be retrieved via the RED::VolumetricEffectClouds::GenerateErosionVolumeData helper function. The user is free to use it or to use its own custom data.
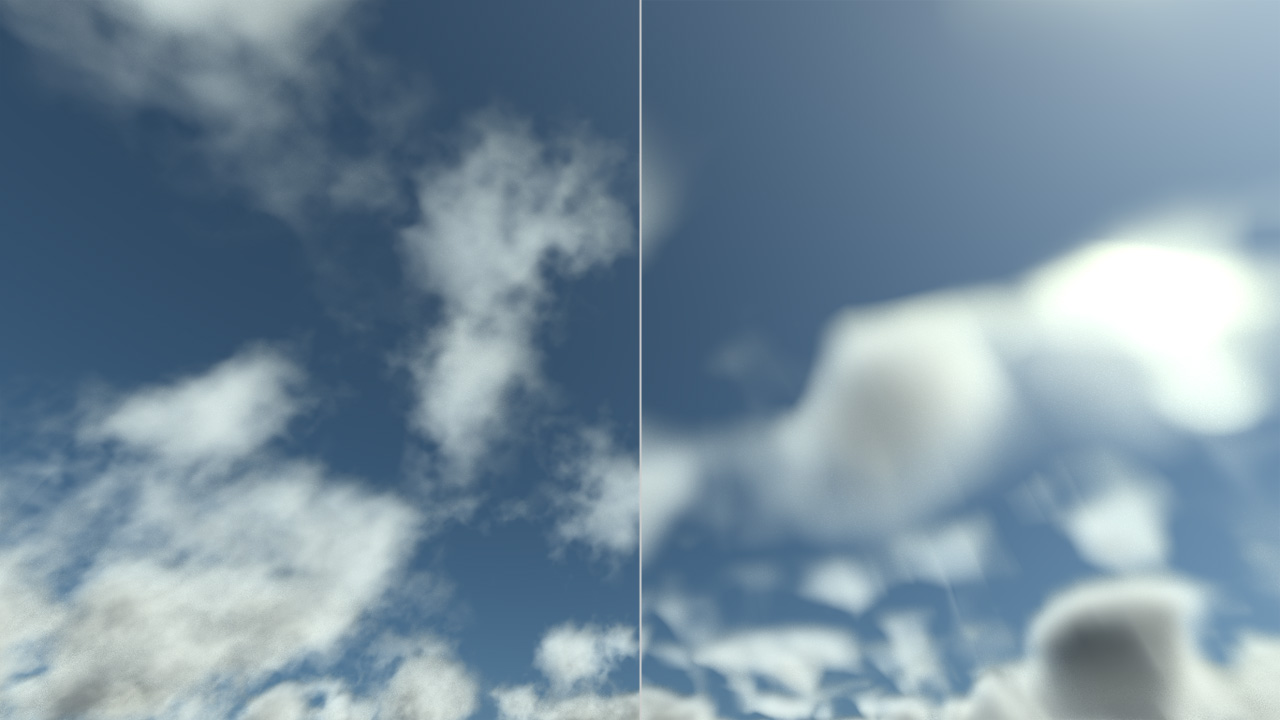
Clouds with and without erosion
Note
The generation of all the data arrays: cumulus noise, cirrus noise, cover and erosion could take time. To speed up the tutorial, we made the choice to save and reload them as external cache files.

