A Billboard Example using an Alpha Mask Texture
The purpose of this tutorial is to create a billboard using alpha masking transparency. In a first section, we will describe how to build a simple vertical axis rotation billboard using HOOPS Luminate. Then a diffuse texture and an alpha mask will be applied to it.
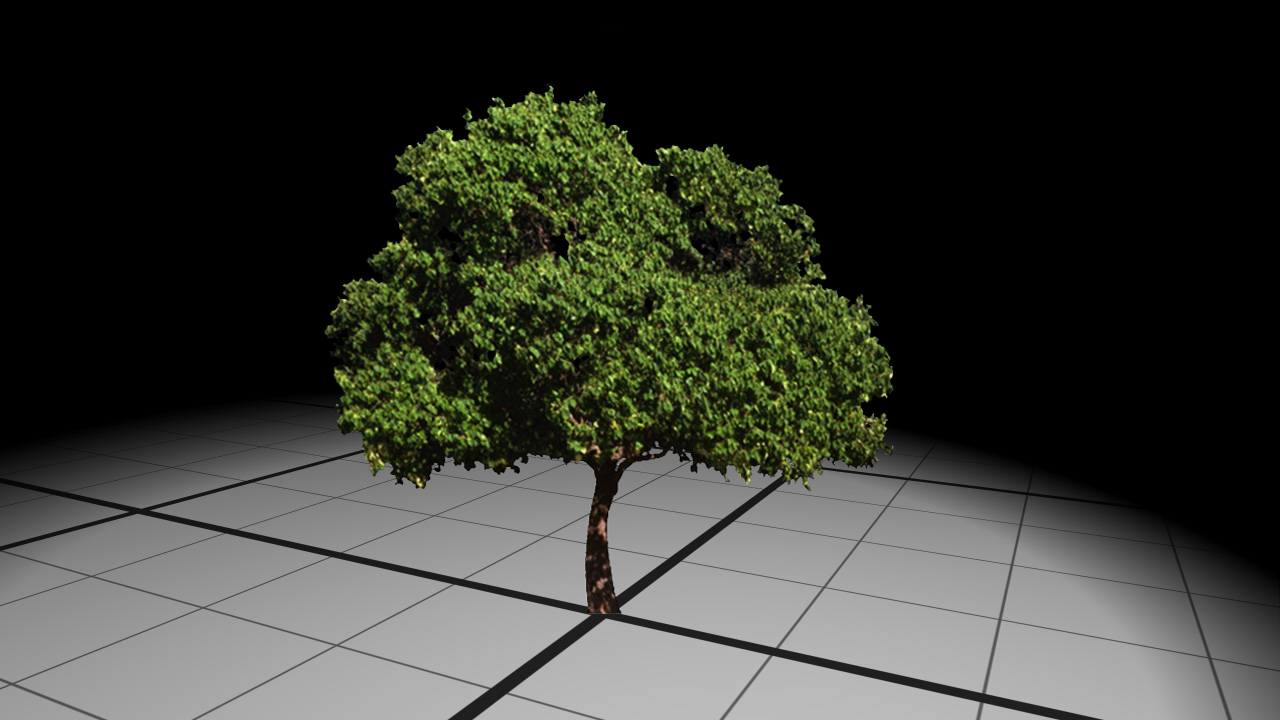
The final transparent billboard
Building the Billboard
A billboard is a simple 2D quad simulating a 3D object. Its principle is to always face up the camera, so that it gives the illusion to be in 3D. They are generally placed quite far of the camera and allow to lighten the scene complexity.
The first step of the tutorial is to create our plane:
// Creating the plane:
RED::Object* quad = RED::Factory::CreateInstance( CID_REDMeshShape );
quad->SetID( "Quad" );

RED::IMeshShape* iquad = quad->As< RED::IMeshShape >();
RC_TEST( iquad->Quad( RED::Vector3( 0.0, 0.0, 0.0 ), 20.0f, 20.0f, state ) );
By default, the RED::IMeshShape::Quad function draws a horizontal quad lying along the XY plane. Our billboard needs to be vertical so a RED::ITransformShape is added as parent in the scene graph in order to handle this transformation. We will also add another transform shape on top of them to handle the billboard rotation to face the camera.
// Create a transform node to handle billboard rotation:
RED::Object* billboard = RED::Factory::CreateInstance( CID_REDTransformShape );
billboard->SetID( "Billboard" );
RED::ITransformShape* ibillboard = billboard->As< RED::ITransformShape >();

// Create a transform node to handle the plane rotation:
RED::Object* planenode = RED::Factory::CreateInstance( CID_REDTransformShape );
RED::ITransformShape* iplanenode = planenode->As< RED::ITransformShape >();

// Set the plane matrix to make it vertical and looking in the y direction:
RED::Matrix mat;
RC_TEST( mat.RotationAngleMatrix( RED::Vector3::ZERO, RED_PI2, 0.0, RED_PI2 ) );
mat.Translate( RED::Vector3( 0.0, 0.0, 20.0 ) );
RC_TEST( iplanenode->SetMatrix( &mat, state ) );
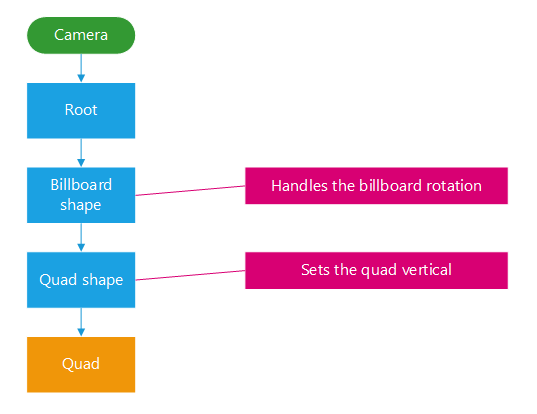
The billboard scene graph
All of the shapes are added to the scene graph accordingly to the desired hierarchy:
// Adding the shapes to the scene:
RC_TEST( iplanenode->AddChild( quad, RED_SHP_DAG_NO_UPDATE, state ) );
RC_TEST( ibillboard->AddChild( planenode, RED_SHP_DAG_NO_UPDATE, state ) );
RC_TEST( icamera->AddShape( billboard, state ) );
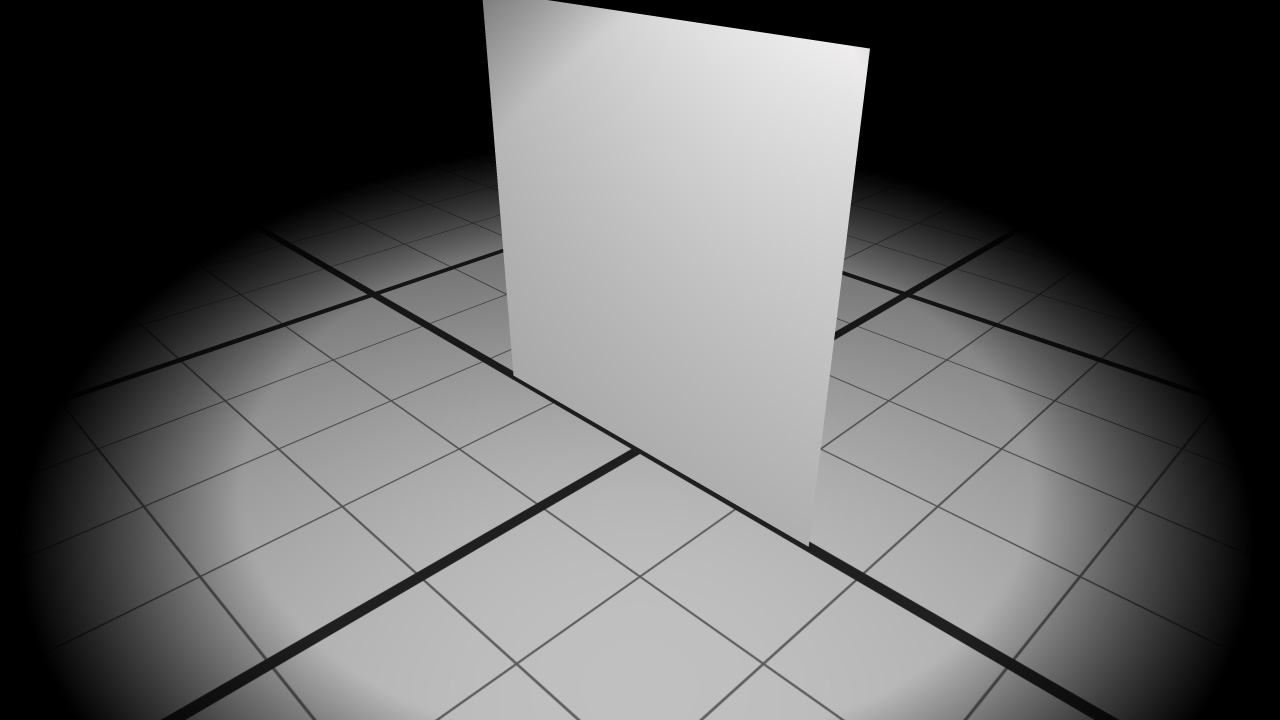
A simple vertical plane
At each frame, the plane needs to be rotated to always face the camera. The pivot axis is situated at the center of the quad and is vertical: rotation around Z. The operation is done on the billboard transform shape.
// Get the quad-to-eye direction.
// The quad position is (0;0;0), we only have to get the camera position:
RED::Vector3 eye;
RC_TEST( icamera->GetEye( eye ) );

// Compute the horizontal rotation angle:
double angle = atan2( eye._y, eye._x );

// Rotate the billboard to always look at the camera:
RED::Matrix mat;
RC_TEST( mat.RotationAxisMatrix( RED::Vector3::ZERO, RED::Vector3::ZAXIS, angle ) );
RC_TEST( ibillboard->SetMatrix( &mat, state ) );
Setting the Alpha Mask
Once we have our rotating plane, we will add a diffuse texture and an alpha mask to make it transparent. The two texture are loaded with the RED::ImageTool helper:
// Loading the alpha mask image:
RED::Object* alphamask;
RC_TEST( iresmgr->CreateImage2D( alphamask, state ) );
RC_TEST( RED::ImageTools::Load( alphamask, "../resources/BillboardUsingAlphaMask_alpha.png", RED::FMT_RGBA, true, false, RED::TGT_TEX_2D, state ) );

// Loading the diffuse map image:
RED::Object* diffuse;
RC_TEST( iresmgr->CreateImage2D( diffuse, state ) );
RC_TEST( RED::ImageTools::Load( diffuse, "../resources/BillboardUsingAlphaMask_diffuse.png", RED::FMT_RGBA, true, false, RED::TGT_TEX_2D, state ) );
The alpha mask texture is a RGBA image. Its masking information must be contained in the alpha channel (RED::CHN_ALPHA).

The alpha channel of the alpha mask
A new material have to be created. Generally, billboards do not need to be enlighten: the material will only contain a RED::StateShader and a built-in RED::RenderShaderSolid in the RED::MTL_PRELIT pass:
// Creating a material:
RED::Object* material;
RC_TEST( iresmgr->CreateMaterial( material, state ) );
RED::IMaterial* imaterial = material->As< RED::IMaterial >();

// State shader:
RED::StateShader ssh;
RC_TEST( ssh.SetMaskedTransparency( alphamask, RED::MCL_TEX0, RED::Matrix::IDENTITY ) );
RC_TEST( ssh.SetAlphaThreshold( 0.5f ) );

RC_TEST( imaterial->RegisterShader( ssh, state ) );
RC_TEST( imaterial->AddShaderToPass( ssh.GetID(), RED::MTL_PRELIT, RED::LIST_LAST, RED::LayerSet::ALL_LAYERS, state ) );

// Solid shader:
RED::RenderShaderSolid solid( RED::MTL_PRELIT,
                            RED::Color::WHITE, diffuse,   RED::Matrix::IDENTITY, RED::MCL_TEX0,
                            RED::Color::WHITE, alphamask, RED::Matrix::IDENTITY, RED::MCL_TEX0,
                            resmgr, rc );
RC_TEST( rc )

RC_TEST( imaterial->RegisterShader( solid, state ) );
RC_TEST( imaterial->AddShaderToPass( solid.GetID(), RED::MTL_PRELIT, RED::LIST_LAST, RED::LayerSet::ALL_LAYERS, state ) );

// Assigning the material to the shape:
RED::IShape* ishape = quad->As< RED::IShape >();
RC_TEST( ishape->SetMaterial( material, state ) );
The RED::StateShader::SetMaskedTransparency sets the alpha masking texture to the pipeline. The RED::StateShader::SetAlphaThreshold defines the value under which the object will be fully transparent and over which it will be fully opaque. In this tutorial, the alpha mask contains only two values: 0 and 1; the threshold is arbitrary set to 0.5.

