Using Skylight Portals
Introduction
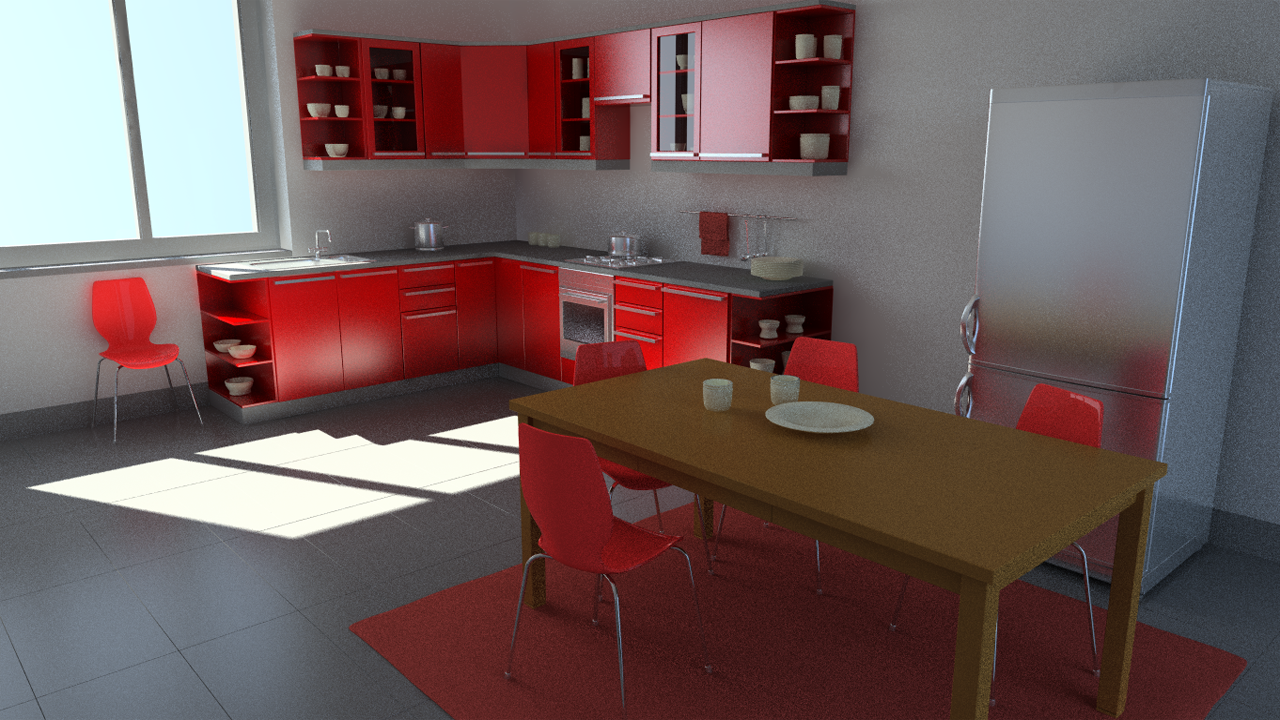
This simple tutorial illustrates the creation of a skylight with a sunlight and the setup of skylight portals. Portals enhance the visual quality of the resulting image as they concentrate the sampling of the skylight into meaningful regions of the scene, that are identified by portals. See the result difference below:

The scene rendered with two portals
The scene rendered “as is” with no portal setup
As we can see, indicating where room openings are to be found by samples fired during the rendering greatly enhance the quality of the image with the same rendering settings.
Scene Setup
The source scene is an Autodesk 3dsMax model that was exported to a .red file which is read back by the tutorial. There are no lights in the scene. However, two rectangular shapes have been added to the model, as illustrated below:
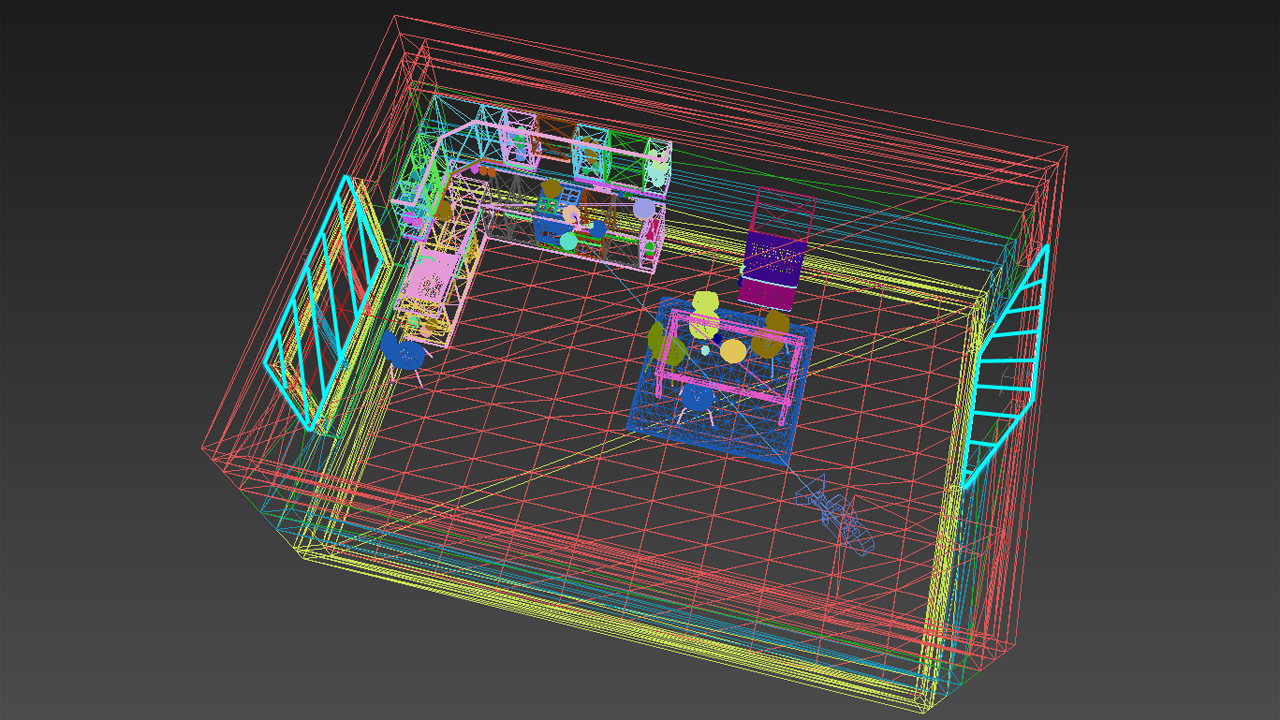
The two skylight portals geometries highlighted in Autodesk 3dsMax.
The two portals are the blue hatched quads. The position of the portal should be slightly outside of the model in order to mimic the fact that skylight sampling rays are to go outside of the model through the portal, and thus should not miss any geometry of the model before reaching the portal.
Declaring Portals
We directly jump to the code section containing the portal setup. For the skylight setup, the code in this tutorial is way similar to the code found in other tutorials. Please see Outdoor Lighting for details on this process.
Portal setup is a two fold process:
- Declare shapes to be considered as portals. These shapes must be meshes and these shapes must be in the scene graph.
- Remove portals from being visible. This is important as this avoids interferences as rays that are fired to / from portals could interfere with the exact geometry of the portal and create z-fighting artifacts related to this.
The code below illustrates the setup of portals for our tutorial:
// Parse the scene graph for the portal mesh shapes. Our source model is a 3dsMax model, so the shape
// name is located on a node above the real mesh shape that we have to declare as portal:
RC_TEST( icamera->GetRootShape( root ) );
RED::IShape* iroot = root->As< RED::IShape >();

char pname[2][32] = { "portal01", "portal02" };

for( int i = 0; i < 2; i++ )
{
    RC_TEST( iroot->GetChildByID( node, RED::Object::GetIDFromString( pname[i] ) ) );
    RED::IShape* inode = node->As< RED::IShape >();
    RC_TEST( inode->GetChild( node, 0 ) );
    inode = node->As< RED::IShape >();
    RC_TEST( inode->GetChild( portal, 0 ) );
    RC_TEST( portals.push_back( portal ) );
}

RC_TEST( isky->SetPortals( portals, iresmgr->GetState() ) );
The mesh set as a portal will be positioned using its ancestors in the scene. Consequently, it can be instanced, and one portal for each instance of that mesh will be created. Note that this imply that portals meshes are found in the scene graph: it’s not possible to declare as portals meshes that are not part of the current scene. These will be ignored.
Then, don’t forget to remove portals from being visible, and that’s all!
// Remove portals from being seen. If visible, they could interfere with the scene lighting:
// This is achieved by turning off the visibility of the light's geometry:
RC_TEST( ilight->SetRenderMode( RED::RM_VISIBLE_GEOMETRY, 0, iresmgr->GetState() ) );

