Adding Displacement Mapping to a Material
The final objective of this tutorial is to show how to use displacement mapping in order to improve the quality of a model. Displacement permits to increase the amount of details of a model by modifying the geometry during the shading phase.n
The tutorial is divided into steps ordered by visual quality ascending:
- Using diffuse map only
- Using bump mapping
- Using displacement
The scene is composed of a simple sphere object on which we will set materials and shaders according to our needs. The loading and displaying of the scene is not covered by this tutorial. Please see the Hello World! tutorial to have details about it.
Two textures are used in this tutorial: a diffuse and a bump texture. A bump texture is a greyscale map (RED::FMT_RGB, RED::FMT_RGBA, or RED::FMT_L8 format) containing the elevation information. It is used both for classical bump mapping and for displacement mapping.
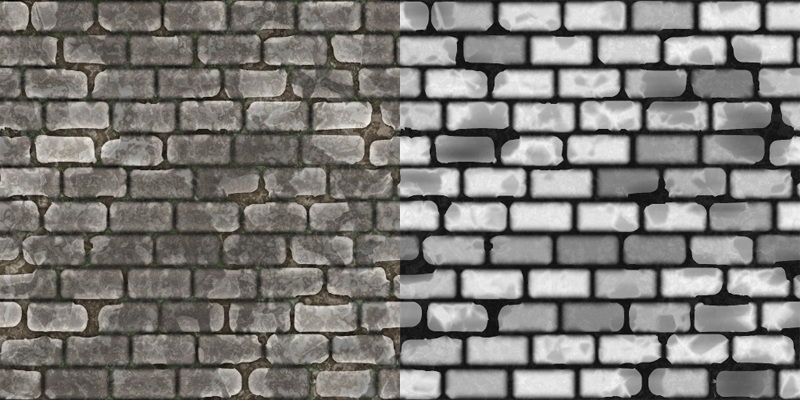
Diffuse map and bump map textures
Adding a Diffuse Map
To apply a diffuse map on the sphere, a phong shader and an ambient shader are configured and set in a material. The material is then set to the sphere mesh.
Firstly, in order to use bump mapping and displacement, the mesh must contain informations about its tangent space. HOOPS Luminate provides a useful function called RED::IMeshShape::BuildTangents to compute the tangent space vectors. The function needs two things:
- The destination mesh channel to write the output tangents:
RED::MCL_TEX1and- The source texture coordinate channel:
RED::MCL_TEX0contains the UV coordinates
// Setting up tangent vectors:
// ---------------------------
//  o To use a normal map with built-in engine shaders, we'll need
//    tangent vectors indicating the texture mapping direction at every
//    vertex of the geometry.
//  o Binormal vectors are automatically generated in vertex shaders, for
//    all built-in engine shaders.


// Getting the sphere mesh:
RED::Object *root, *sphere;
RC_TEST( icamera->GetRootShape( root ) );
RED::IShape* iroot = root->As< RED::IShape >();
RC_TEST( iroot->GetChildByID( sphere, "Sphere" ) );
RED::IMeshShape* isphere = sphere->As< RED::IMeshShape >();

// Building tangent vectors: we need a set of UV texture coordinates.
// In our source models, these coordinates are found in the RED::MCL_TEX0
// channel of the mesh. Here, we create these tangents vectors in the
// RED::MCL_TEX1 channel of the mesh.
RC_TEST( isphere->BuildTangents( RED::MCL_TEX1, RED::MCL_TEX0, state ) );
The next step is to load the diffuse texture and create a 2D image based on it.
// Creating a diffuse map from a simple texture image:
// --------------------------------------------------

// Load the texture map:
RED::Object* image;
RC_TEST( iresmgr->CreateImage2D( image, iresmgr->GetState() ) );
RC_TEST( RED::ImageTools::Load( image, "../resources/displacement_diffuse.jpg", RED::FMT_RGB, false, false, RED::TGT_TEX_2D, state ) );

// Set the image parameters:
RED::IImage* iimage = image->As< RED::IImage >();
RC_TEST( iimage->SetFilterModes( RED::FM_LINEAR, RED::FM_LINEAR, state ) );
RC_TEST( iimage->SetWrapModes( RED::WM_REPEAT, RED::WM_REPEAT, state ) );
A new material for the sphere object is created via the RED::IResourceManager
// Setting up a new material:
// --------------------------

RED_RC rc;
RED::Object* mat;
RC_TEST( iresmgr->CreateMaterial( mat, state ) );
RED::IMaterial* imat = mat->As< RED::IMaterial >();
The ambient and phong shaders are created and both use the previously loaded diffuse map. They are added respectively to the prelit and lit material passes.
RED::Color specular( 0.2f );
float shininess = 4.0f;

// Add ambient shader:
RED::RenderShaderAmbient ambient( RED::MTL_PRELIT,
                                RED::Color::WHITE, image, RED::Matrix::IDENTITY, RED::MCL_TEX0,
                                RED::Color::BLACK, NULL,  RED::Matrix::IDENTITY, RED::MCL_TEX0,
                                RED::Color::BLACK, NULL,  RED::Matrix::IDENTITY, RED::MCL_TEX0,
                                RED::Color::WHITE, NULL,  RED::Matrix::IDENTITY, RED::MCL_TEX0,
                                true, resmgr, rc );
RC_TEST( rc );
RC_TEST( imat->RegisterShader( ambient, state ) );
RC_TEST( imat->AddShaderToPass( ambient.GetID(),
                                RED::MTL_PRELIT,
                                RED::LIST_LAST,
                                RED::LayerSet::ALL_LAYERS,
                                state ) );

// Add phong shader:
RED::RenderShaderPhong phong( RED::MTL_LIT,
                            RED::Color::WHITE, image, RED::Matrix::IDENTITY, RED::MCL_TEX0,
                            specular,          NULL,  RED::Matrix::IDENTITY, RED::MCL_TEX0,
                            shininess,         NULL,  RED::Matrix::IDENTITY, RED::MCL_TEX0, 256.f,
                            RED::Color::WHITE, NULL,  RED::Matrix::IDENTITY, RED::MCL_TEX0,
                                                NULL,  RED::Matrix::IDENTITY, RED::MCL_TEX0, RED::MCL_TEX1,
                            0.f, false, resmgr, rc );
RC_TEST( rc );
RC_TEST( imat->RegisterShader( phong, state ) );
RC_TEST( imat->AddShaderToPass( phong.GetID(),
                                RED::MTL_LIT,
                                RED::LIST_LAST,
                                RED::LayerSet::ALL_LAYERS,
                                state ) );
The last step is to set the newly created material to the sphere mesh:
// Set the new material to the sphere object:
RED::IShape* ishape = sphere->As< RED::IShape >();
RC_TEST( ishape->SetMaterial( mat, state ) );
As a result, we have a basic perfect sphere with a texture on it.
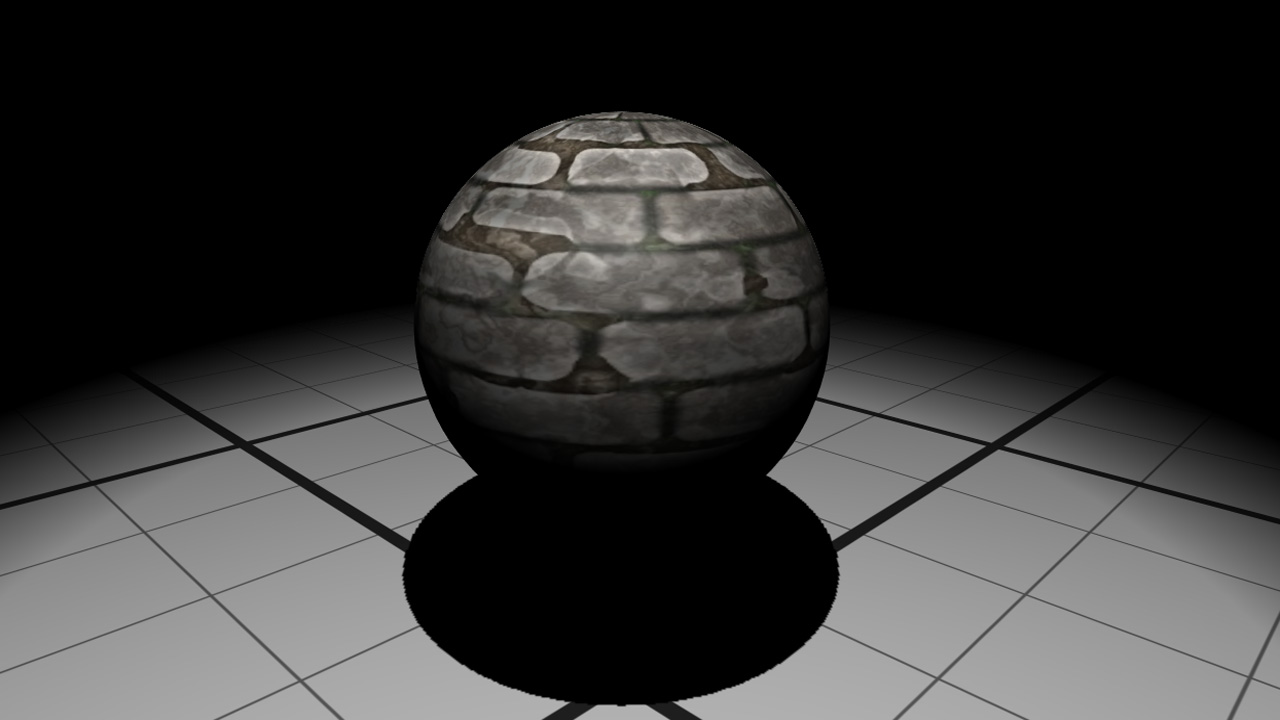
Sphere with diffuse map only
Adding Bump Mapping
To add more relief on the previous sphere, in this section we will use bump mapping. Bump mapping is a technique to simulate bumps and wrinkles on the surface of an object. This technique doesn’t modify the object shape but changes how the surface reacts to light by applying a distortion to the normals during the shading.
In the same way as the diffuse map created in the first section, the bump map texture is loaded and a normal map is created from it.
The only difference here is the call to the RED::IImage2D::NormalMap function. This method creates a normal map from a bump map image.
Its parameters are:
- The image format after the operation
- The target after the operation
- A scaling factor: this parameter is important and allows to increase or decrease the texture bumpiness
- The source image: here we use the same image for input and output
- The transaction state
// Creating a normal map from a simple texture image:
// --------------------------------------------------

// Load the texture map:
RED::Object* normap;
RC_TEST( iresmgr->CreateImage2D( normap, iresmgr->GetState() ) );
RC_TEST( RED::ImageTools::Load( normap, "../resources/displacement_bump.jpg", RED::FMT_RGB, false, false, RED::TGT_TEX_2D, state ) );
RED::IImage* inormap = normap->As< RED::IImage >();
RED::IImage2D* inormap2D = normap->As< RED::IImage2D >();

// Convert the image into a normal map:
RC_TEST( inormap2D->NormalMap( RED::FMT_RGBA, RED::TGT_TEX_2D, 10.0f, normap, state ) );

// Set the image parameters:
RC_TEST( inormap->SetFilterModes( RED::FM_LINEAR, RED::FM_LINEAR, state ) );
RC_TEST( inormap->SetWrapModes( RED::WM_REPEAT, RED::WM_REPEAT, state ) );
This time, 3 more things are given to the phong shader:
- The normal map
- The texture UV mesh channel used for normal map:
RED::MCL_TEX0- The channel containing the tangents: they were previously built in the
RED::MCL_TEX1channel
// Add phong shader:
RED::RenderShaderPhong phong( RED::MTL_LIT,
                            RED::Color::WHITE, image,  RED::Matrix::IDENTITY, RED::MCL_TEX0,
                            specular,          NULL,   RED::Matrix::IDENTITY, RED::MCL_TEX0,
                            shininess,         NULL,   RED::Matrix::IDENTITY, RED::MCL_TEX0, 256.f,
                            RED::Color::WHITE, NULL,   RED::Matrix::IDENTITY, RED::MCL_TEX0,
                                                normap, RED::Matrix::IDENTITY, RED::MCL_TEX0, RED::MCL_TEX1,
                            0.f, false, resmgr, rc );
As a result, we can see our sphere with an illusion of relief. It also reacts correctly to the lighting changes. However, the sphere topology has not been modified and the shape outline and shadow remain those of a perfect sphere.

Sphere with bump mapping
Adding Displacement Mapping
In the last section, we will add displacement mapping to our sphere using the same texture that we used for bump mapping.
Contrary to bump mapping, displacement really modifies the sphere surface, therefore it gives the best results in term of realistic rendering. On the other hand, it costs a little more on processing time.
Same as what was previously done for loading the diffuse and normal texture, the displacement image have to be created and loaded.
// Creating a displacement map from a simple texture image:
// --------------------------------------------------------

// Load the texture map:
RED::Object* dispmap;
RC_TEST( iresmgr->CreateImage2D( dispmap, iresmgr->GetState() ) );
RC_TEST( RED::ImageTools::Load( dispmap, "../resources/displacement_bump.jpg", RED::FMT_RGB, false, false, RED::TGT_TEX_2D, state ) );

// Set the image parameters:
RED::IImage* idispmap = dispmap->As< RED::IImage >();
RC_TEST( idispmap->SetFilterModes( RED::FM_LINEAR, RED::FM_LINEAR, state ) );
RC_TEST( idispmap->SetWrapModes( RED::WM_REPEAT, RED::WM_REPEAT, state ) );
For this example, no need to set a normal map to the phong shader.
// Add phong shader:
RED::RenderShaderPhong phong( RED::MTL_LIT,
                            RED::Color::WHITE, image, RED::Matrix::IDENTITY, RED::MCL_TEX0,
                            specular,          NULL,  RED::Matrix::IDENTITY, RED::MCL_TEX0,
                            shininess,         NULL,  RED::Matrix::IDENTITY, RED::MCL_TEX0, 256.f,
                            RED::Color::WHITE, NULL,  RED::Matrix::IDENTITY, RED::MCL_TEX0,
                                                NULL,  RED::Matrix::IDENTITY, RED::MCL_TEX0, RED::MCL_TEX1,
                            0.f, false, resmgr, rc );
HOOPS Luminate provides a really easy method to activate displacement mapping. All we have to do is to specify to a state shader that we want displacement using the RED::StateShader::SetDisplacement function.
It needs 5 parameters:
- the displacement height in model unit allows to control the bumpiness
- the displacement texture previously loaded
- a transform matrix if transformation needed: no need in this example
- the UV channel to use to sample the texture: UV coordinates are still in
RED::MCL_TEX0- an offset to translate the whole displacement region
float disp_height = 2.0f;
float disp_offset = 0.0f;

// Create a state shader with displacement map:
RED::StateShader stateshader;
RC_TEST( stateshader.SetDisplacement( disp_height, dispmap, RED::Matrix::IDENTITY, RED::MCL_TEX0, disp_offset ) );

// Add the shader to the material:
RC_TEST( imat->RegisterShader( stateshader, state ) );
RC_TEST( imat->AddShaderToPass( stateshader.GetID(),
                                RED::MTL_PRELIT,
                                RED::LIST_LAST,
                                RED::LayerSet::ALL_LAYERS,
                                state ) );
As a result, we can see the sphere with a real bumpy surface. Both the shape outline and its shadow are rendered realistically.
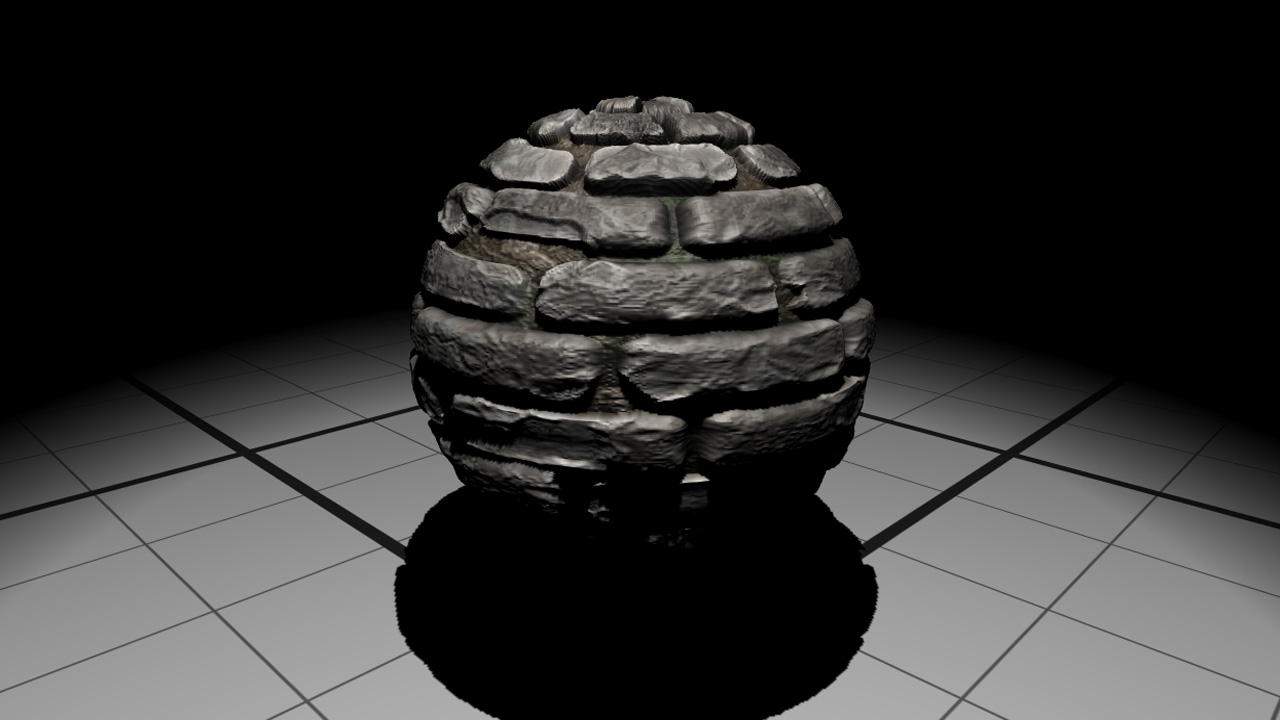
Sphere with displacement

