Caustics
Caustics are produced by objects when light gets concentrated through reflections and refractions. Well-known examples are visible at the bottom of a swimming pool under the summer sun or a glass on a table.
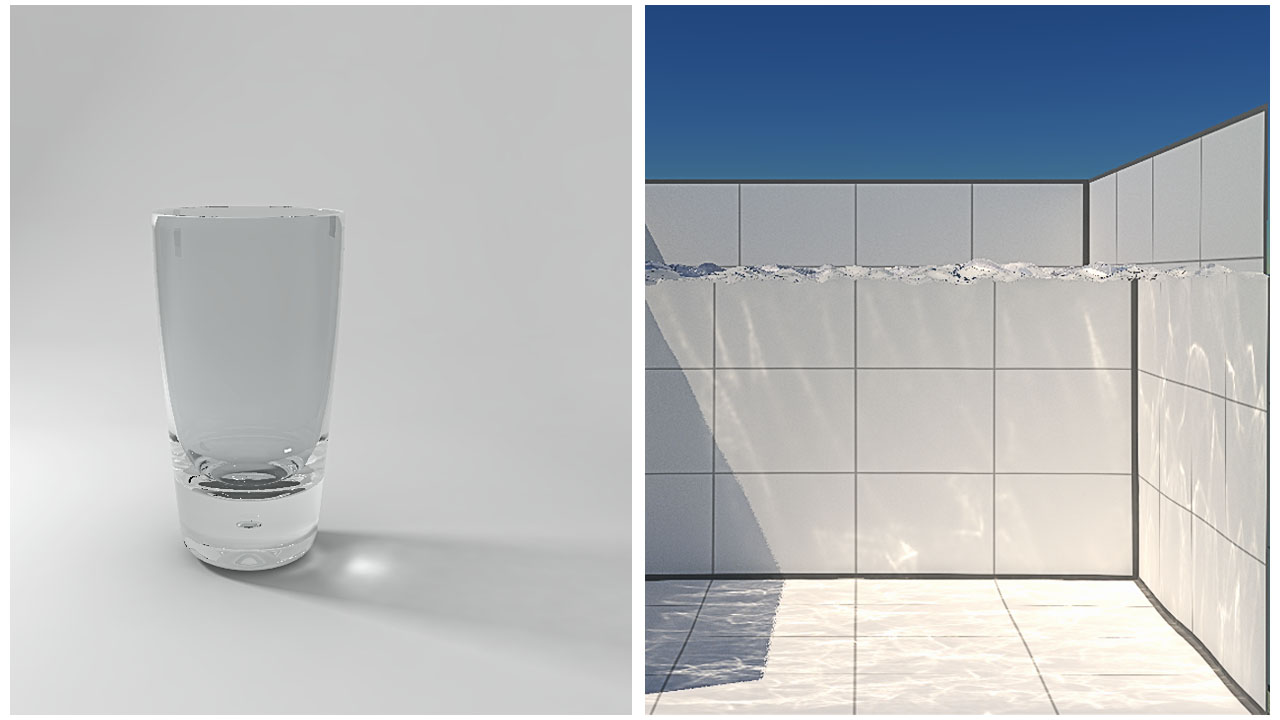
Two examples of caustics.
Note
In HOOPS Luminate, we distinguish between reflection and refraction caustics. However for a complete physically accurate rendering, both caustics support should be turned on.
Caustics are rendered using the photon mapping method. This method works by tracing photons from the lights to the scene and recording their interactions with the geometries. It produces a cache of photons which can be quite huge (millions of photons are needed, even for simplest scenes). This cache is built during the first rendering step. Then, during the ray-tracing step, the photons cache is requested for rendering the caustics anywhere in the scene using density estimation.
Because the number of photons is very high and the time to process them can grow up quickly, HOOPS Luminate offers all the options to tune the caustics generation process precisely.
Caustics are a combination of three setup in HOOPS Luminate:
- material setup: objects producing caustics must receive dedicated materials
- light setup: each light which generates caustics must be marked as so
- engine setup: engine options must be tuned to render caustics
Material Setup
In HOOPS Luminate, materials are built as a combination of shaders (see Building HOOPS Luminate Materials). To enable rendering of caustics at the material level, you need to call the RED::StateShader::SetReflectiveCaustics, RED::StateShader::SetRefractiveCaustics or both depending on the caustics you want.
To call this methods you need to access to one of the material RED::StateShader instance. You don’t need to call the methods for each instance of RED::StateShader in your material (the engine will handle this for you), process only the first you find.
If your material has no RED::StateShader, you need to add it one before enabling the caustics rendering (see an example here: Registering and Adding a Shader to a Material Pass).
Light Setup
To avoid tracing too many photons from the lights, the user can choose which lights participate to the caustics rendering process. Hence, to render caustics from a light, simply set the corresponding render mode:
// 'ilight' is a pointer to a RED::ILightShape interface.
// 'iresmgr' is a pointer to the RED::IResourceManager interface.
ilight->SetRenderMode( RED::RM_CAUSTICS, 1, iresmgr->GetState() );
By carefully selecting which lights produce caustics, the user can choose where the process should focus.
Engine Setup
Finally, engine options let you control the overall photons emission and density estimation processes.
The RED::OPTIONS_RAY_ENABLE_CAUSTICS option should be set to true to enable the computation of caustics for selected materials and lights (see above). Then, the RED::OPTIONS_RAY_CAUSTICS_SAMPLING_RATE gives the number of traced photons. The actual number of photons is the squared option value. Hence a value of 1000 will produce 1M photons. The number of photons traced from each light individually is determined automatically by the engine as a fraction of the whole photons count depending on the light intensity.
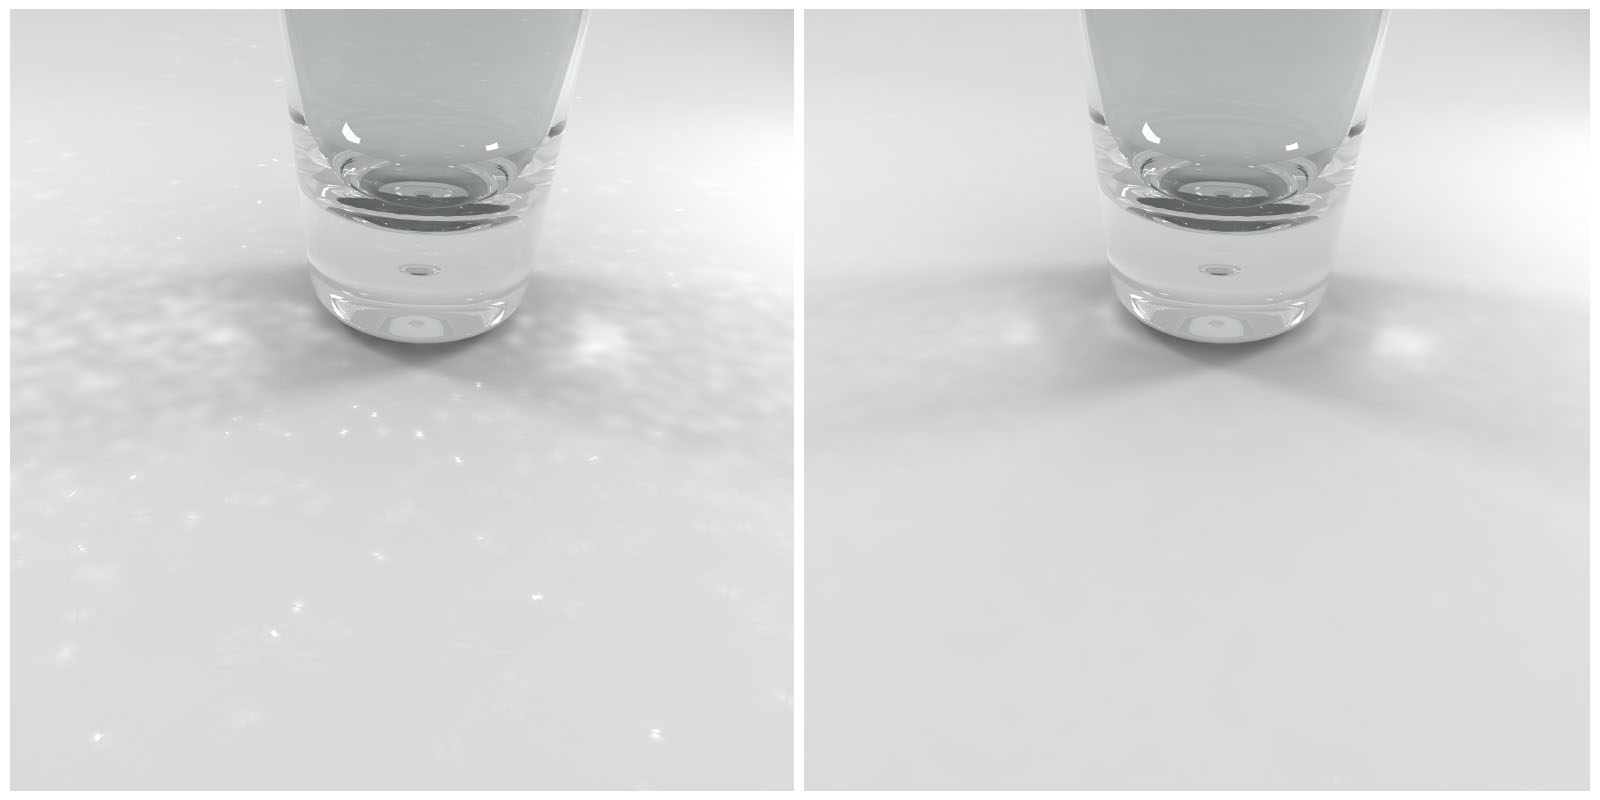
The higher the number of photons, the better the caustics estimation. Photons sampling rate is set to 1000 on the left while it’s set to 3000 on the right.
The caustics reconstruction process which occurs during the ray-tracing phase is driven by two engine options: RED::OPTIONS_RAY_CAUSTICS_SEARCH_RADIUS and RED::OPTIONS_RAY_CAUSTICS_SEARCH_COUNT.
The first option gives the maximum distance in scene units to which photons should be looked for around the shading position. The higher the value, the blurrier the result.
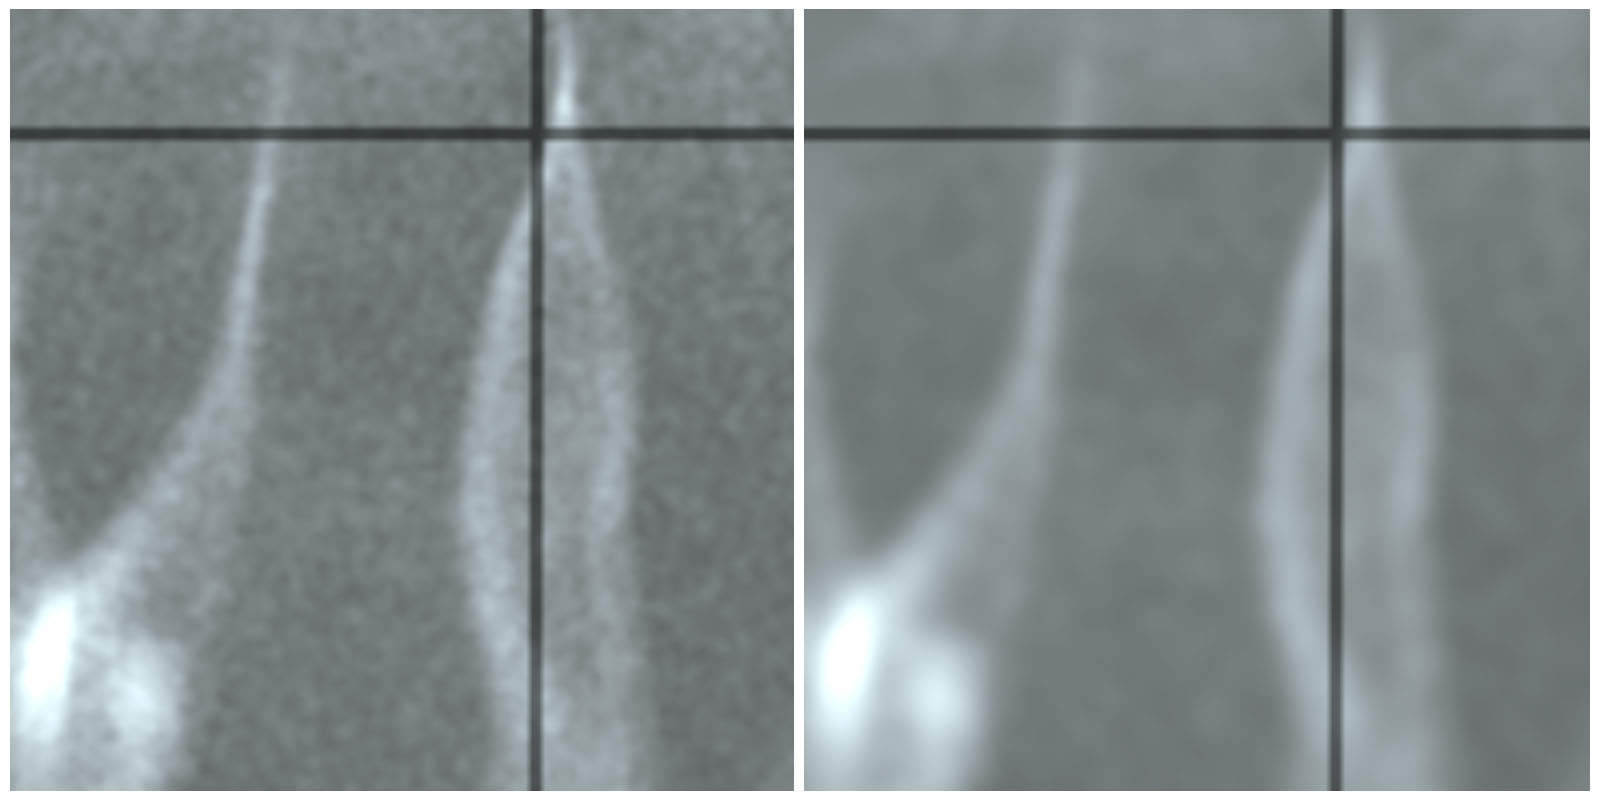
The search distance in the image on the right is twice the one in the image on the left. Caustics have less noise but some details are lost.
The second option defines the maximum number of photons to look for (constrained to the search area defined by the previous option). If allows the engine to use fewer photons than actually found in the search region and helps in keeping the result sharp. If this value is set to 0, all the photons inside the search region are used.
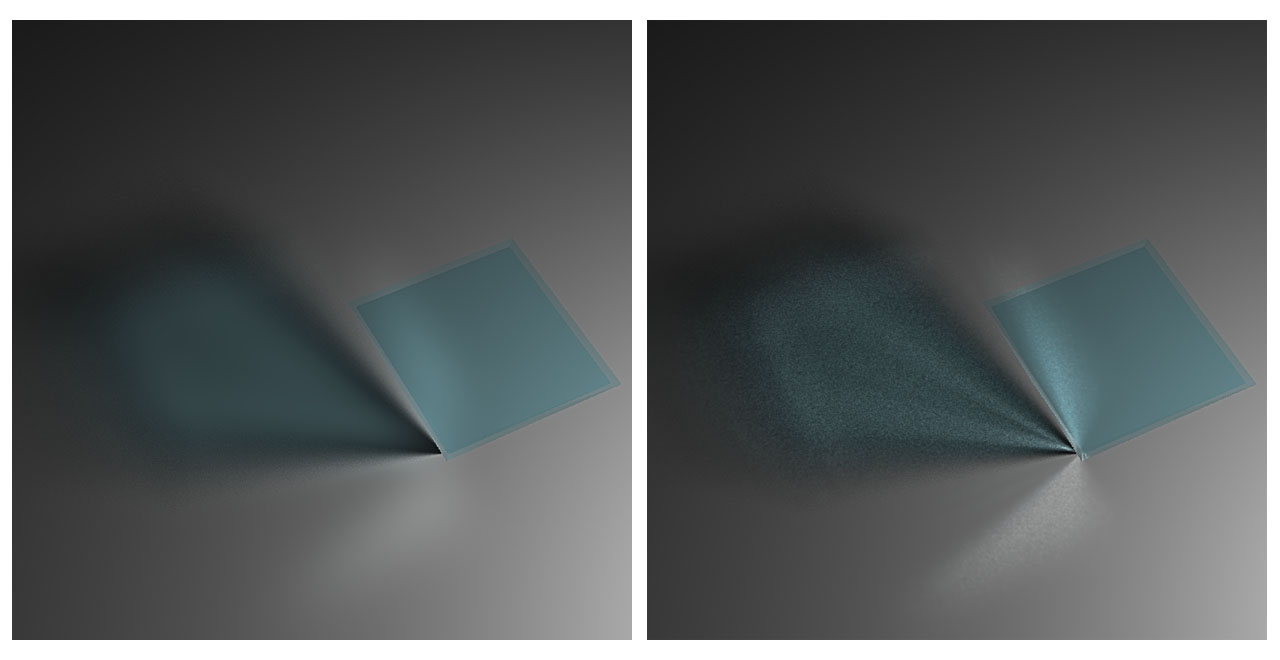
The number of searched photons has been limited to 2000 on the right (set to 0 on the left) producing a more sharpen result.

