Playing an Animation Clip
In this tutorial, we will see how to animate an object in HOOPS Luminate using an animation clip and its controller.
In HOOPS Luminate, animation clips are used to animate RED::AnimationData objects. The RED::AnimationData objects describe geometric transformations:
- Position
- Rotation
- Scale
They allow to animate a RED::ITransformShape object for instance.
The scene of the tutorial is composed of two transform shapes (RED::ITransformShape), one being the parent of the other. As a child of these shapes, here is a cube mesh (RED::IMeshShape).
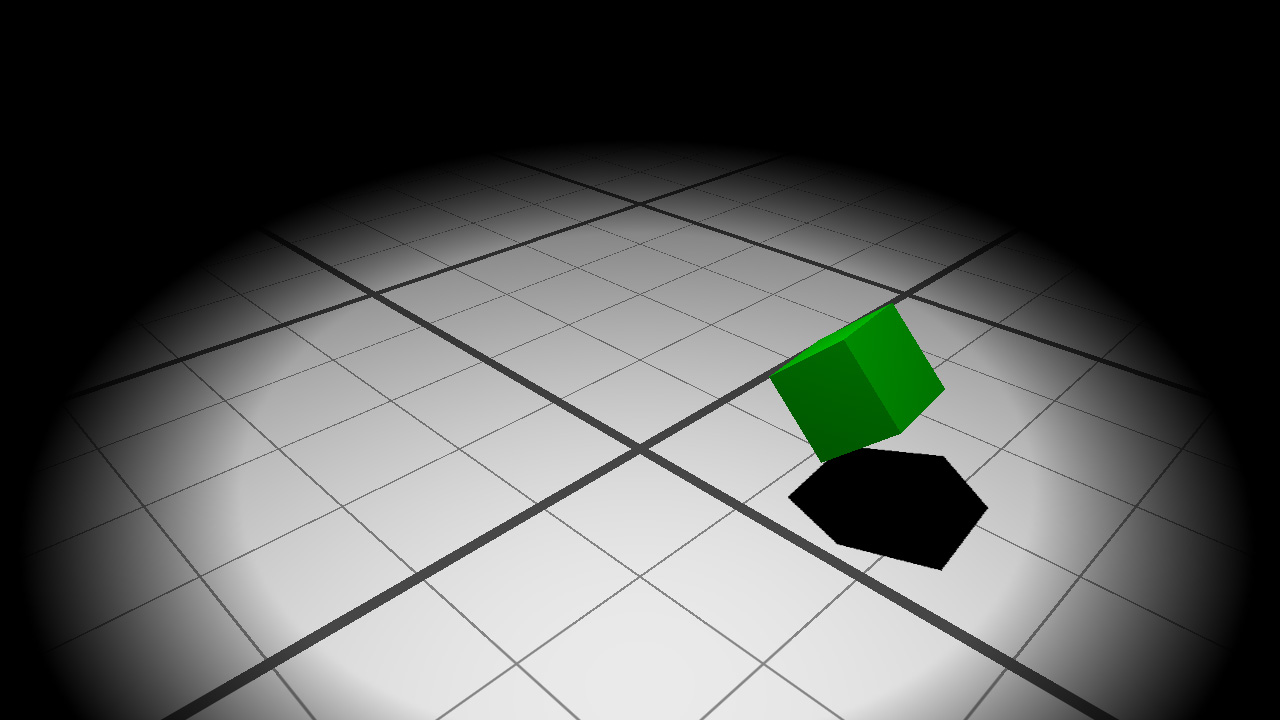
The scene containing a hierarchy of two transform shapes and a cube mesh
Creating the Animation Clip
Here, we will create an animation clip containing two animation channels. Each animation channel will be used to animate a separate transform shape.
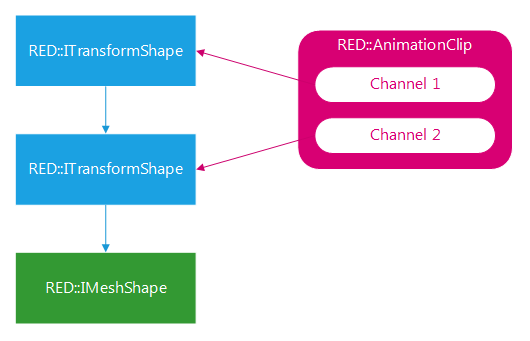
The scene hierarchy and how the animation clip will be bound on it
First thing to do: creating the animation clip. Animation clips are data object, they can be defined on the stack. We then create the two animation channels by calling the appropriate function:
RED::AnimationClip clip;
RC_TEST( clip.CreateChannels(2) ) ;
Once the animation clip and there channels are created, we will add the animation key frames. Key frames are composed of a RED::AnimationData object and a timestamp inside the animation.
RED::AnimationData data;
RED::Quaternion rotation;

// First channel:
// --------------

// Frame 1:
data.SetPosition( RED::Vector3( 0.0, 0.0, 5.0 ) );
RC_TEST( clip.AddKey( data, 0.0, 0 ) );

// Frame 2:
rotation.SetAxisAngle( RED::Vector3::ZAXIS, RED_PI2 );
data.SetRotation( rotation );
data.SetPosition( RED::Vector3( 0.0, 0.0, 15.0 ) );
RC_TEST( clip.AddKey( data, 2.0, 0 ) );

// Frame 3:
rotation.SetAxisAngle( RED::Vector3::ZAXIS, RED_PI );
data.SetRotation( rotation );
data.SetPosition( RED::Vector3( 0.0, 0.0, 25.0 ) );
RC_TEST( clip.AddKey( data, 4.0, 0 ) );

// Frame 4:
rotation.SetAxisAngle( RED::Vector3::ZAXIS, RED_PI2 * 3.0 );
data.SetRotation( rotation );
data.SetPosition( RED::Vector3( 0.0, 0.0, 15.0 ) );
RC_TEST( clip.AddKey( data, 6.0, 0 ) );

// Frame 5:
rotation.SetAxisAngle( RED::Vector3::ZAXIS, RED_2PI );
data.SetRotation( rotation );
data.SetPosition( RED::Vector3( 0.0, 0.0, 5.0 ) );
RC_TEST( clip.AddKey( data, 8.0, 0 ) );

// Second channel:
// ---------------

// Frame 1:
data.SetNeutral();
RC_TEST( clip.AddKey( data, 0.0, 1 ) );

// Frame 2:
data.SetPosition( RED::Vector3( 40.0, 0.0, 0.0 ) );
rotation.SetAxisAngle( RED::Vector3::YAXIS, RED_PI2 );
data.SetRotation( rotation );
data.SetScale( RED::Vector3( 2.0 ) );
RC_TEST( clip.AddKey( data, 4.0, 1 ) );

// Frame 3:
data.SetPosition( RED::Vector3( 0.0, 0.0, 0.0 ) );
rotation.SetAxisAngle( RED::Vector3::YAXIS, RED_PI );
data.SetRotation( rotation );
data.SetScale( RED::Vector3( 1.0 ) );
RC_TEST( clip.AddKey( data, 8.0, 1 ) );
Our animation clip is now ready to be played.
Creating and using the Animation Clip Controller
In order to play the animation clip, a RED::IAnimationClipController object needs to be created with the RED::Factory.
// Create an animation controller:
RED_RC rc;
g_anim_controller = RED::Factory::CreateAnimationClipController( *resmgr, clip, rc );
RC_TEST( rc );

RED::IAnimationClipController* ianim_controller = g_anim_controller->As< RED::IAnimationClipController >();

// Set loop:
RC_TEST( ianim_controller->SetLoop( true ) );
The animation controller is set in loop mode because we want our animation to loop (…obviously).
At this step, we have all our objects correctly initialized. The following operations needs to be done at each application frame:
- Updating the animation controller
- Querying the animation output for each channel
- Moving our
RED::ITransformShapeobjects using the animation output
// First update the animation controller.
RED::IAnimationClipController* ianim_controller = g_anim_controller->As< RED::IAnimationClipController >();
RC_TEST( ianim_controller->Update( dt ) );

// Then retrieve the animation output for the two channels.
const RED::AnimationData* animdata1;
const RED::AnimationData* animdata2;
RC_TEST( ianim_controller->GetChannelOutput( animdata1, 0 ) );
RC_TEST( ianim_controller->GetChannelOutput( animdata2, 1 ) );

// Finally apply the animation output to our transform shapes.
RED::Matrix* matx;

// First channel to the first shape:
RED::ITransformShape* itrans = g_transform_node_1->As< RED::ITransformShape >();
RC_TEST( itrans->GetMatrix( matx, iresmgr->GetState() ) );
animdata1->GetMatrix( *matx );

// Second channel to the second shape:
itrans = g_transform_node_2->As< RED::ITransformShape >();
RC_TEST( itrans->GetMatrix( matx, iresmgr->GetState() ) );
animdata2->GetMatrix( *matx );
By calling this code, the two transform shapes will move at each frame following the animation clip defined previously.
The RED::IAnimationClipController interface provides several other methods to control the animation:
RED::IAnimationClipController::PauseRED::IAnimationClipController::PlayRED::IAnimationClipController::StopRED::IAnimationClipController::SetSpeedRED::IAnimationClipController::Rewind

