Sourcing Informations
The program of the book uses a complete HOOPS Luminate scene graph as a starting point. The engine model we load at the beginning of the program is originated from a Parasolid model (see Parasolid Import), that was then painted using a few colors for each part in REDmax (see Autodesk 3DS Max Plug-In) before being exported using high performance RED::RenderShaderViewport.
Therefore, our source informations are made of a scene graph with materials set on its part (or assembly branches). Each part contains a color, as illustrated below:

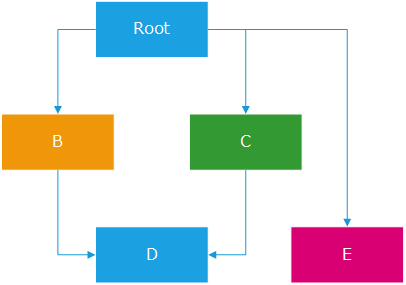
The source scene graph: simple materials set in the assembly hierarchy
We’ll need two informations to setup our advanced rendering system:
- The bounding box of the global assembly,
- A rich mapping between colors and material informations.
Accessing the Assembly Bounding Box
We do need a bounding box information that encloses the entire assembly. This is used to setup the sun light shadow map.
RED::IShape* iroot = root->As< RED::IShape >();
RC_TEST( iroot->UpdateBoundingSpheres( RED_SHP_DAG_PROPAGATE_DOWNWARD | RED_SHP_DAG_UPDATE_LEAVES, iresmgr->GetState() ) );
RED::BoundingSphere* bs;
RC_TEST( iroot->GetBoundingSphere( bs ) );
if( !bs )
    RC_TEST( RED_FAIL );

_bcenter = bs->GetCenter();
_bradius = bs->GetRadius();
This can be done using the quite simple code above. Please note that this code will not behave well if there are light sources in the assembly already! Light sources may have huge bounding spheres resulting of their wide influence on the model.
Mapping Colors to Material Descriptions
Ok, we have colors as only source of informations in our model. For the purpose of this example, we’ll associate each color to one material: One of our “black” materials is applied to chrome parts, so we’ll turn it into a chrome; Similary, we have a “red” material used for painted red metallic parts. The “yellow” color is applied to stainless steel flexible pipes; the “blue” one is used for rubber pipes…and so on.
Then, the tutorial defines a new material representation that must be filled for each identified material:
/** _diffuse_color: Diffuse color (default = grey).
*/
RED::Color _diffuse_color;

/** _specular_color: Specular color (default = light grey).
*/
RED::Color _specular_color;

/** _reflection_color: Reflection color (default = light grey).
*/
RED::Color _reflection_color;

/** _opacity_color: Opacity color (default = white).
*/
RED::Color _opacity_color;

/** _reflection_ior: Reflection IOR for Fresnel effect (default = 2.5f).
*/
float _reflection_ior;

/** _shininess: Specular exponent in [ 1.0, +inf [ (default = 20.0f).
*/
float _shininess;

/** _glossiness: Glossiness value in [ 0.0, +inf [ (default = 100.0f).
*/
float _glossiness;
The description of the material has a lot more parameters than our source color. This will improve our capability to define materials producing different visual results.
So in the end we setup a RED::Map that associate each material found in our scene with a material description. For instance, chrome pipes use the following setup:
else if( matr->GetID() == RED::Object::GetIDFromString( "black2" ) )
{
    // This material is applied to the chrome pipes of the engine. So we're to setup an almost fully
    // reflective material here: no diffuse color, a sky rocketing reflection factor, a very high IOR
    // to attenuate the effect of the Fresnel term which is almost not noticeable on very reflective
    // metals such as a chrome. We'll keep a bit of glossiness to simulate a polished finishing.
    minfo._diffuse_color    = RED::Color( 0.02f );
    minfo._specular_color   = RED::Color( 0.0f );
    minfo._reflection_color = RED::Color( 0.95f );
    minfo._opacity_color    = RED::Color( 1.0f );
    minfo._reflection_ior   = 7.0f;
    minfo._shininess        = 20.0f;
    minfo._glossiness       = 9.0f;
}
This mapping information is used as input parameters for our REDCADGraphicsBuilder class, which is the class of the book program that performs the processing and setup of our visually enhanced scene.

