Denoising
The image denoiser is a feature that can be used to remove sampling noise in a software rendered image. Scenes that contain physical lights and physical materials such as Using Built-in HOOPS Luminate Materials in the section The Realistic Material are noisy when rendered. The output noise level is of course heavily related to chosen rendering options. We’ll use this scene to review levers we have to remove noise in an image:

OMG, so much noise in there!
We’ll review two methods to suppress noise an image:
- One using the image denoiser algorithm. See below: Using the Denoiser
- The other tweaking rendering options. See below: Removing Noise by Increasing the Rendering Qualities
Using the Denoiser
The denoiser is controlled by options set through the RED::IOptions interface:
RED::OPTIONS_RAY_ENABLE_DENOISER: Turn the denoiser on or off.RED::OPTIONS_RAY_DENOISER_RADIUS: This is the area of effect (measured in pixels) of the denoiser at each processed pixel.RED::OPTIONS_RAY_DENOISER_STRENGTH: This is the strength of the denoising effect. Low values tend to do no denoising effect at all. High values tend to blur details in the image.

The same image after application of the denoiser (strength = 1, radius = 10).
The denoiser uses an extra step in the image processing. This specific step is identified in the RED::RENDERING_PROGRESS_STEP as the RED::RPS_DENOISER_PROCESSING. The RED::RPS_DENOISER_PROCESSING comes right after the RED::RPS_RAY_TRACING_PROCESSING. This step can be used to report the progress of the denoising phase.
The RED::OPTIONS_RAY_DENOISER_RADIUS must be understood as an image research zone around the pixel being denoised, as illustrated below:
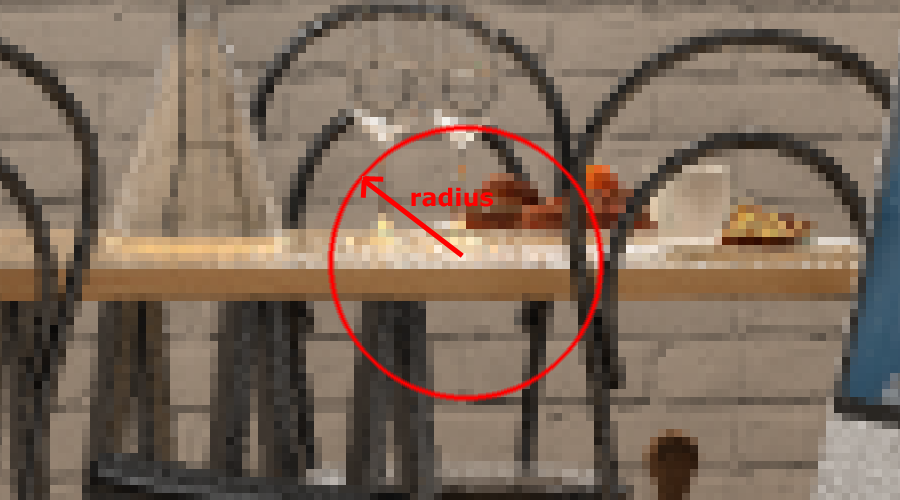
Radius of the denoiser, expressed in screen pixels.
The RED::OPTIONS_RAY_DENOISER_STRENGTH should be understood as a kind of exponential profile for the denoising effect. See the illustration below:
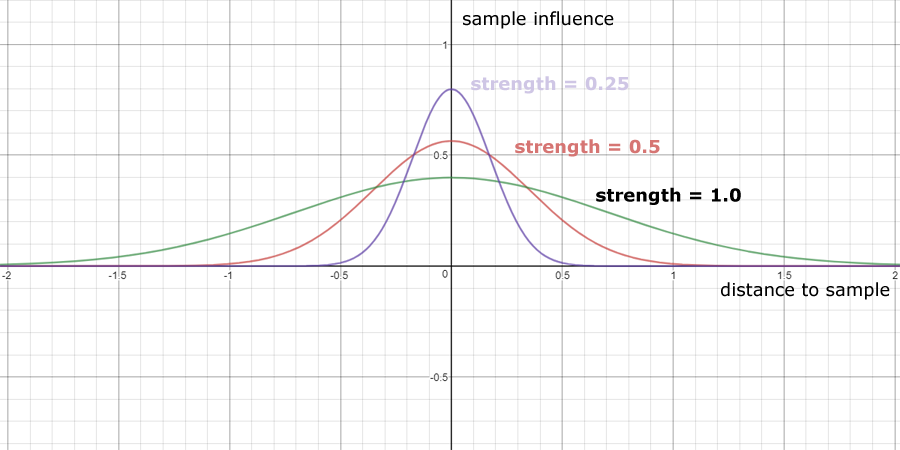
Strength of the denoiser, no units.
A low strength indicates a profile with a great peak, so a lower influence of pixels far away from the denoised sample. At the opposite, a high strength indicates a flat profile, so getting more like a blur.
Large denoising radius and high strengths will tend to remove fine details in the denoised image. However, all noise will be eliminated. On the other hand, small radius denoising is useful if the noise level is quite low to simply ‘cleanup’ images that already have a good quality.
Note that the denoiser approximates the source image to get rid of its noises: this is a lossy process. Small defects can appear, details of the source image can be lost. But, generally speaking, for a few seconds of extra calculation time, it can remove lots of unpleasant noise in an image.
Also note that the denoiser works generally quite well in conjunction with the Adaptive Sampling. Since the adaptive sampling produces a homogeneous noise level throughout the entire image, it fits well with the denoising process.
Denoising and Tonemapping
This is an important point to keep in mind: the visual intensity of an image may be affected by the denoising process, after application of tonemapping. Let’s consider the following case of a black & white pattern that we consider as an extreme noise case here. Let’s apply a curve profile to this pattern. We can see that the curve doesn’t change the pattern, since black remains black and white remains white:
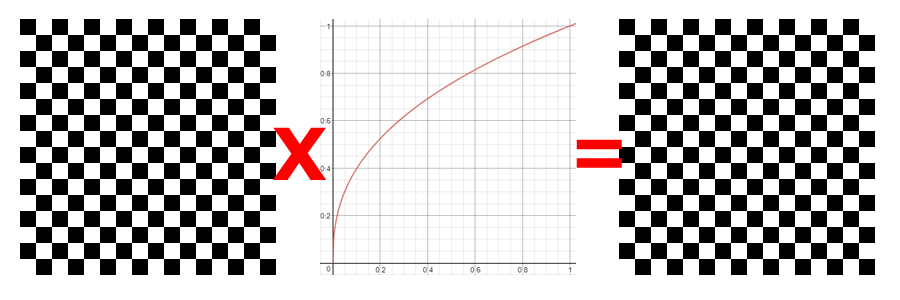
Extreme example of a black & white pattern not modified by a gamma transform.
However, if we apply a denoising effect first, in that example, the black & white pattern is turned in to a grey denoised average, and the tonemapped result differ in visual intensity from the first case:
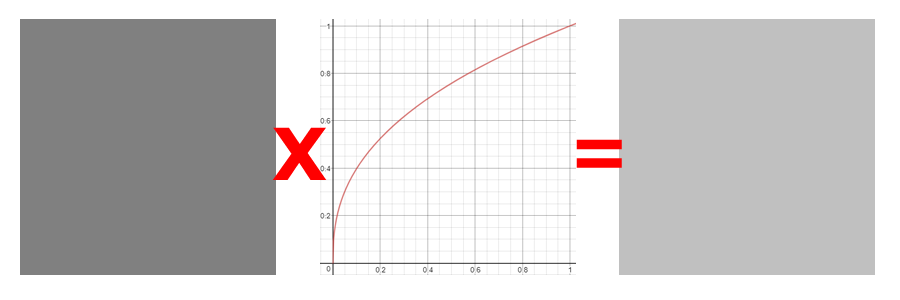
Denoising before application of the tonemapping is not a neutral operation with a non linear tonemapping transform.
From that we can say that if we had no noise in the original image, then our source image would have been a grey image, and not a black & white image, and the tonemapper would have produced the same result as the one it provides after the application of the denoiser.
So this is something to keep in mind: in HOOPS Luminate, the tonemapping comes last, and tonemapping a noisy image doesn’t get you the same result as tonemapping a non noisy image: the human brain averages the noise remaining after tonemapping while the denoiser removes the noise before tonemapping.
Removing Noise by Increasing the Rendering Quality
Well, this is the obvious way to go if you don’t want to use the denoiser and still get a better image. There’s no mystery then: the only way to remove noise in the image is to increase the number of samples rendered per pixel for each effect.
- Set the
RED::OPTIONS_RAY_GLOSSY_SAMPLING_RATEto a higher value.- Set the
RED::OPTIONS_RAY_LIGHTS_SAMPLING_RATEto a higher value.

