Volumetric Effects
A powerful feature of HOOPS Luminate is the rendering of volumetric effects. We call volumetric effects all the visual effects induced by the light passing through media particles like gas, smoke, dust, etc.. It is often called ‘participating media’ in the literature.
In HOOPS Luminate, any volumetric effect is added in the scene graph with the intermediate of a special shape named RED::IVolumeShape.
The volume shape contains all the effects of the scene as RED::VolumetricEffect objects. This RED::VolumetricEffect class is an atomic class, all the HOOPS Luminate built-in volumetric effects are of this type and custom effects must inherit it.
A volumetric effect has several properties:
- The absorption coefficient named Sigma A defines how much the media attenuates the light passing through it.
- The scattering coefficient named Sigma S defines how much the media scatters the light. The light scattering can be ‘out’ i.e. the amount of light dissipated by the medium in all directions; or can be ‘in’ i.e. the amount of surrounding light enlightening the medium.

Volumetric effect properties
- The density is the amount of particles contained in a sample of the medium. It influences the opacity and brightness of the media.
- The phase function influences the scattering and describes how the light is scattered into the viewing direction. It can be isotropic or anisotropic.
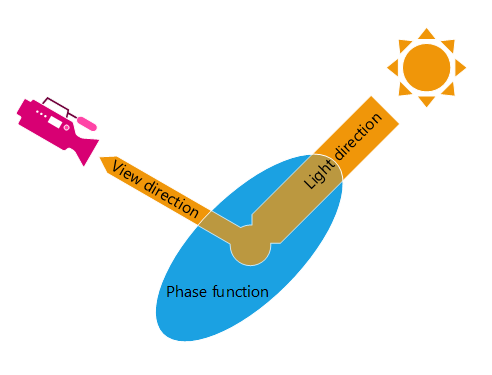
Anisotropic phase function: the amount of light in the view direction depends on the light and view directions
The media can be:
- Homogeneous its properties like sigma and density are constant inside all the volume;
- or Heterogeneous its properties may change depending on the position inside the volume. This last option is useful to add noise to create smoke effects for example. It is also more CPU expensive than the first one.
Defining Volumetric Boxes
The first and easiest volumetric effect provided by HOOPS Luminate is RED::VolumetricEffectBoxVolume. It adds a media inside a volume defined by a box. The box is simply defined by its extents in the scene aligned with the world coordinates axis.
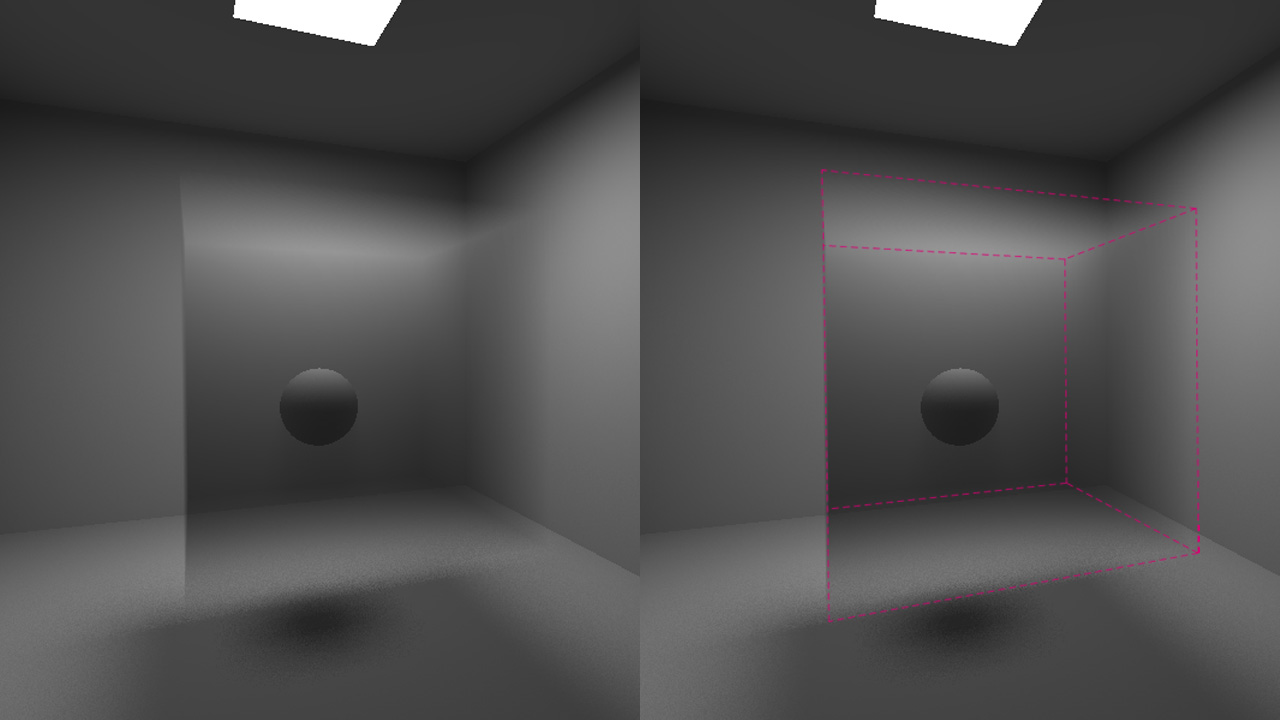
Box volume filled with participating media enlightened by an area light
A Simple Volumetric Effect Example
The following code shows how to add a simple volumetric effect in the scene.
// Enable volumetric rendering:
RED::IOptions* icamopt = icamera->As< RED::IOptions >();
RC_TEST( icamopt->SetOptionValue( RED::OPTIONS_RAY_VOLUME, 1, iresmgr->GetState() ) );

// Create a volume shape to hold volumetric effect:
RED::Object* volume = RED::Factory::CreateInstance( CID_REDVolumeShape );
RED::IVolumeShape* ivolume = volume->As< RED::IVolumeShape >();

// Set volume rendering parameters:
RC_TEST( ivolume->SetRayMarchingStep( 1, iresmgr->GetState() ) );
RC_TEST( ivolume->SetRayCutoff( 0.001, iresmgr->GetState() ) );
RC_TEST( ivolume->SetScatteringSamples( 128, iresmgr->GetState() ) );

// Add the shape to the scenegraph:
RC_TEST( icamera->AddShape( volume, iresmgr->GetState() ) );

// Create the volumetric effect:
RED::VolumetricEffectBoxVolume effect;

// Set the volumetric effect parameters:
effect.SetSigmaA( RED::Vector3( 0.001 ) );
effect.SetSigmaS( RED::Vector3( 0.02 ) );
effect.SetBox( RED::Vector3( -100.0 ), RED::Vector3( 100.0 ) );

// Add the volumetric effect to the volume shape:
RC_TEST( ivolume->AddVolumetricEffect( &effect, iresmgr->GetState() ) );
The process is divided into four main steps:
- Enable the volume rendering in the camera options
- Create a volume shape and add it to the scene graph
- Create the volumetric effect and add it to the volume shape
- Set the volumetric effect parameters
Light Shafts
The second volumetric effect provided by the API is RED::VolumetricEffectLightVolume. This effect adds media inside all the volumes of the scene lights to create ‘light shaft’ effects.
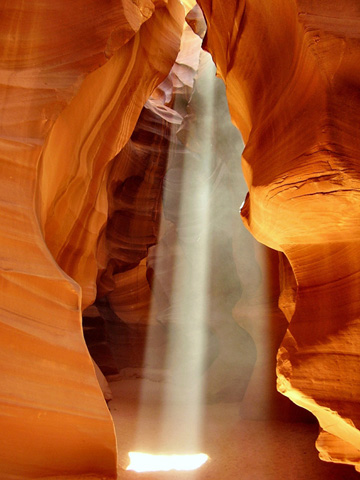
Real life light shaft
The light types that define a volume are:
- Spot Light: cone volume
- Beam Light: cylinder volume
- Point Light: sphere volume
Note
All the other lights (directionnal, area, sun, sky) are ignored by this kind of effect and do not add any media in the scene. But they still enlighten the medium created by other lights or effects.
The volume creation by a valid light can be disabled using the RED::RM_DEFINE_VOLUME render mode set by the RED::ILightShape::SetRenderMode function.
Writing Custom Volumetric Effects
As said previously, the RED::VolumetricEffect class is atomic and is the base class of all the specialized volumetric effects. Writing custom effect is as simple as creating a new sub-class filling this interface.
By this mechanism, HOOPS Luminate lets the user the ability to define its own media properties:
- Custom sigma coefficients
- Custom density
- Custom phase function
- Custom volume boundaries
Volume boundaries of effects are set thanks to the RED::VolumetricEffect::GetVolumeIntervals. By implementing the interface, the user must write this method which, given a ray, returns its intersections with the custom volume.
The user has also the ability to define heterogeneous medium by writing the RED::VolumetricEffect::GetDensity function and returning different density values according to the position (using a noise function for example).
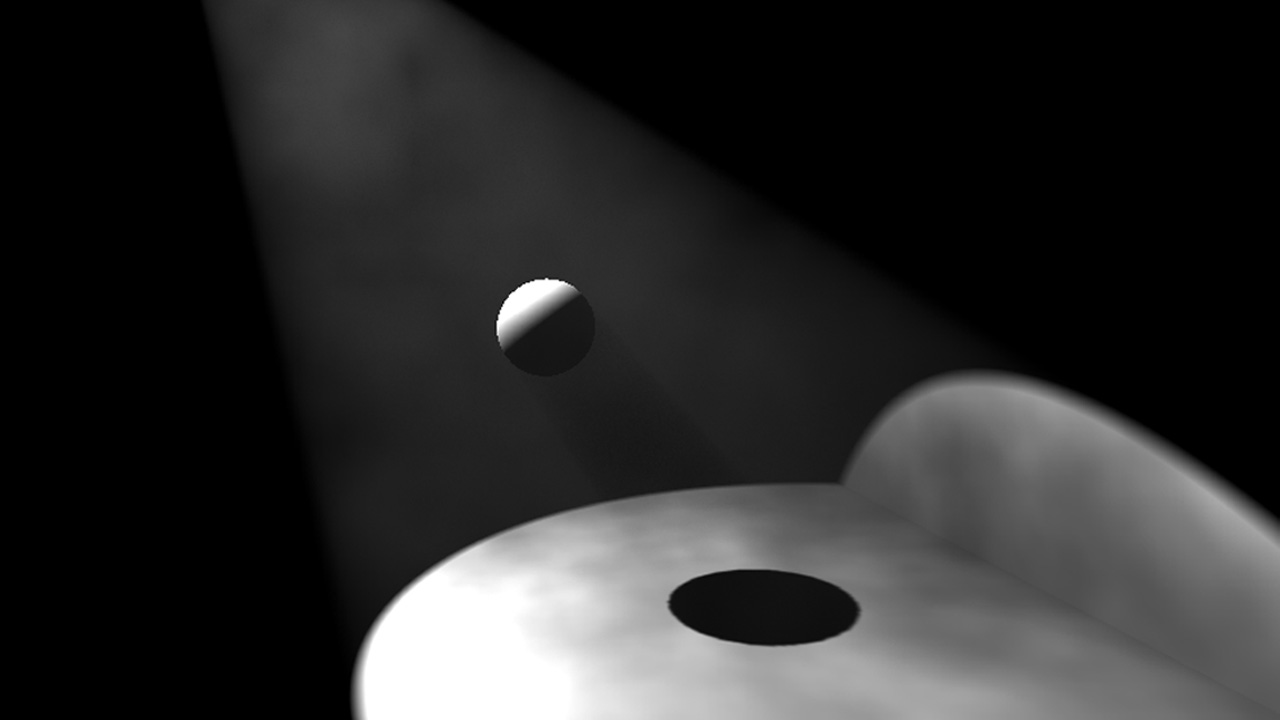
A custom heterogeneous media in a spot light volume
Rendering Options
To enable the volumetric rendering in HOOPS Luminate, one must set the right option using the`RED::IOption interface of the viewpoint: RED::OPTIONS_RAY_VOLUME. This option activates or deactivates the calculation of software ray-traced volumetric effects. It also gives the ability to define the level of reflections and refractions after which the calculation is stopped.
To activate the volumetric calculations in the Global Illumination process, the user must activate the RED::OPTIONS_RAY_GI_ENABLE_VOLUME option.
As we have seen previously, the participating media can be enlightened by surrounding lights in the scene. This is what we called in-scattering. Each light can be individually activated or deactivated for this step using the RED::RM_ENLIGHTEN_VOLUME render mode. To change it, simply call the RED::ILightShape::SetRenderMode function. Sometimes, it can be useful to deactivate it for the lights that are far from the scene medium or for the ambient lights like sky or sun. By default, this option is activated: all the lights are used to enlighten the medium.

