Setup a Physical Sky Light
You need to start with the creation of a light instance using the generic HOOPS Luminate shape creation mechanism (Creating and Destroying Shapes).
In RED, the sky light works with an input (hemi-)spherical texture which describes the radiance coming from any direction around the centre of the scene. This texture can be any user-defined texture. However, the user who wants to guarantee physically-correct results would prefer to use a texture created using RED::ISkyLightShape::CreatePhysicalSkyTexture (see Creating a Physical Sky Texture).
// "sun" is a pointer to a previously created RED light instance.
RED::ISkyLightShape* isky = sky->As< RED::ISkyLightShape >();

// "sky_tex" is a pointer to the input sky texture.
// "sky_tex_is_hemi" is a boolean indicating if the input texture is hemispherical or spherical.
RED::Vector3 dir = RED::Vector3::XAXIS;
RED::Vector3 top = RED::Vector3::ZAXIS;
RC_TEST( isky->SetSkyTexture( sky_tex, sky_tex_is_hemi, dir, top, iresmgr->GetState() ) );
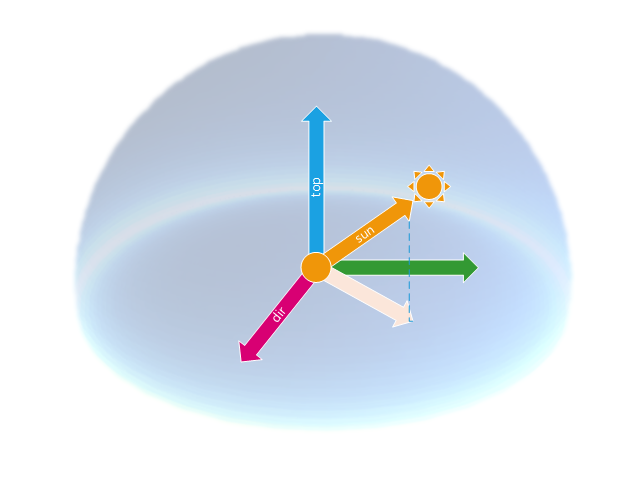
The two given vectors let you define a transformation basis for the sky texture. Here the texture horizon is mapped along the x-axis (i.e texture coordinate u = 0 along x) while the texture zenith is mapped along the z-axis.

The sky light basis
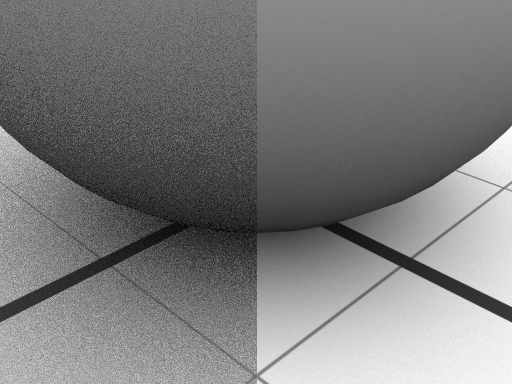
As for any other sampled light in HOOPS Luminate, the user can control the rendering quality of the sky by setting the number of samples to used:
// 1024 samples are used to evaluate the contribution of the sky during rendering.
RC_TEST( isky->SetSamplesCount( 1024, iresmgr->GetState() ) );
The sky light is by far the biggest source of light in your scene and the number of samples used to render it must be set accordingly. Hence, it’s not unusual to set the sky number of samples to something as big as 2048 or even more!

The effect of increasing the sky light samples count: 16 samples on the left, 256 on the right

