Tonemapping Explained
This is a key part in the image generation process. Tonemapping is a technique that is used to map a set of colors onto another. In computer graphics, this process is generally used to map a HDR input image colors onto a LDR display device colors (such as a LCD monitor, or a printer). So the problem is all about mapping our input intensities and colors to the displayable range of our output device.
An outdoor image is generally lit by the sun and sky. It produces an image with high intensities colors. The set of images below illustrates the rendering differences for various tonemapper settings, starting with no tonemapping on the left side image:
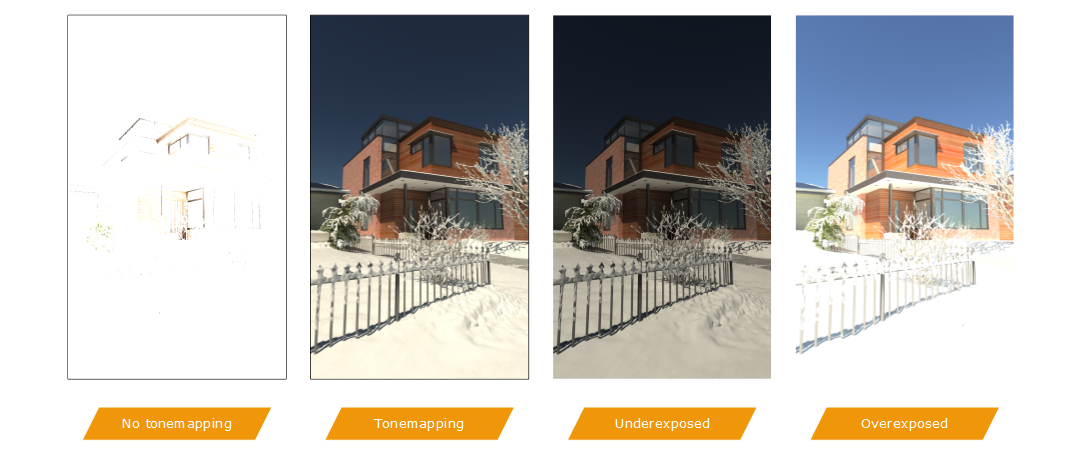
Tonemapping applied to the three rightmost images. The left one is the raw HDR image generated by the renderer.
We can see that the image produced by the renderer can’t be displayed without applying a tonemapper scaling process to it: it’s all white. A physical sky produces intensities that are a lot greater than one, and the sun produces even larger numerical values when written down in the image.
So the purpose of the tonemapper process is to remap all intensities in the original image back to the visible [ 0, 1 ] range. The key point of this process is that when used ‘as is’ without tweaking, the resulting image will have at least one white pixel (or nearly white). Therefore, the tonemapper can either dramatically reduce the intensity in an image (as this happens for an outdoor rendering in the sunlight), or it can greatly strengthen small intensities to ensure these are still visible. In all cases, it’ll look - by default - to remap the image contents back to the [ 0, 1 ] range, and there will be white pixels in the result.
In that sense it behaves like a human eye (of course, much simpler!), but unclamped: even in the darkest scene, the tonemapper will transform the input image into a visible one, as illustrated below:
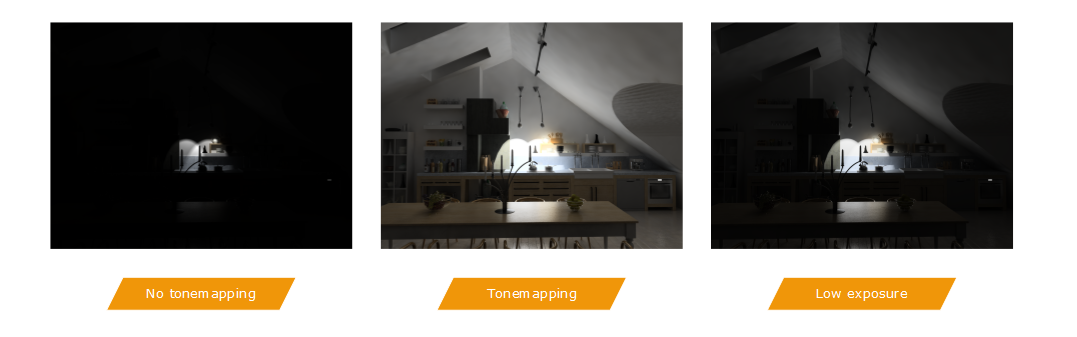
Tonemapping in dark scenes still produces a visible image.
The left image is the non-tonemapped result after rendering the scene. The middle image is the result after the default tonemapper has been applied to the scene rendering. It’s slightly brighter than what would be expected from an human eye under these lighting conditions. The rightmost image is closer to the expected result, and it uses a lower exposure to achieve that. So the point here is in the fact that the tonemapper will by default always generate a visible image with ‘nearly white’ pixels in it.
Light Power and Tonemapped Images
From the statement above, a non trivial side effect is that scaling the intensity of the lighting in the scene will NOT significantly change the resulting image after tonemapping. In the example below, the intensity of lights is scaled by x 10 factors, which is huge:
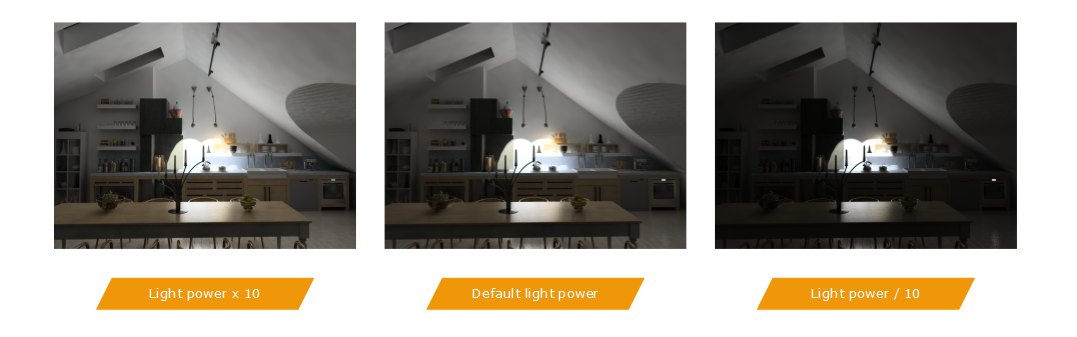
Lack of visible result for scaled lighting intensities after tonemapping
Whatever the intensities of the lighting, there WILL be white pixels in the resulting images after tonemapping (or course with default tonemapper settings). Overally speaking, there ARE differences between the three images: the tonemapping is a non linear process (using a logarithmic curve). The tonemapper does not react identically to different images that have different luminance values. So we can see differences, but these differences are far lower from expected. This is a key behavior to keep in mind.
Relative Power of Lights
The next step is then related to the power of lights. You will not be able to dramatically change the scene by scaling it’s lighting intensity globally. A scene will be brighter or darker due to tonemapper settings; However, modifying the relative intensity of lights IS the way to proceed to alterate the rendering. Let’s consider a mixed outdoor and indoor rendering configuration:
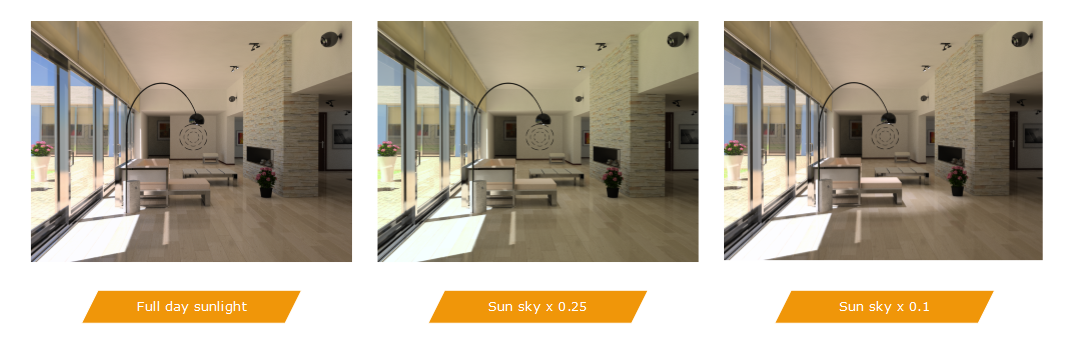
The relative power of lights. Here, effect of the sun / sky intensity variation
In this example, under a very bright sunlight, we barely see the living room lamp over the table. If we diminish the sunlight intensity (due to haze, clouds or atmospheric pollution for instance), the indoor / outdoor light intensity balance is significantly affected, and the indoor light may become visible.
Tonemapper Controls
We have several controls in the HOOPS Luminate tonemapper, as described by the RED::PostProcess class:
- Tone mapping operating mode:
RED::TMO_CLAMP(no tonemapping);RED::TMO_PHOTOGRAPHIC(best mode) orRED::TMO_EXPOSURE(a simpler intensity scaling operator)- Exposure control
- Burn factor
- Curve correction
- White balance
- Gamma correction
While it may be appealing to tweak everything in an image, most of the times, the tonemapped image does not need many adjustments. The most important parameter to setup is the global exposure of the resulting image so that it appears as wished. Then, color balance is the main parameter to tweak so that the image’s warmth can be adjusted. Finally, curve, gamma, burn can be adjusted to finalize the rendering.
Among the different curves controls, we generally see three main curve shapes commonly used:
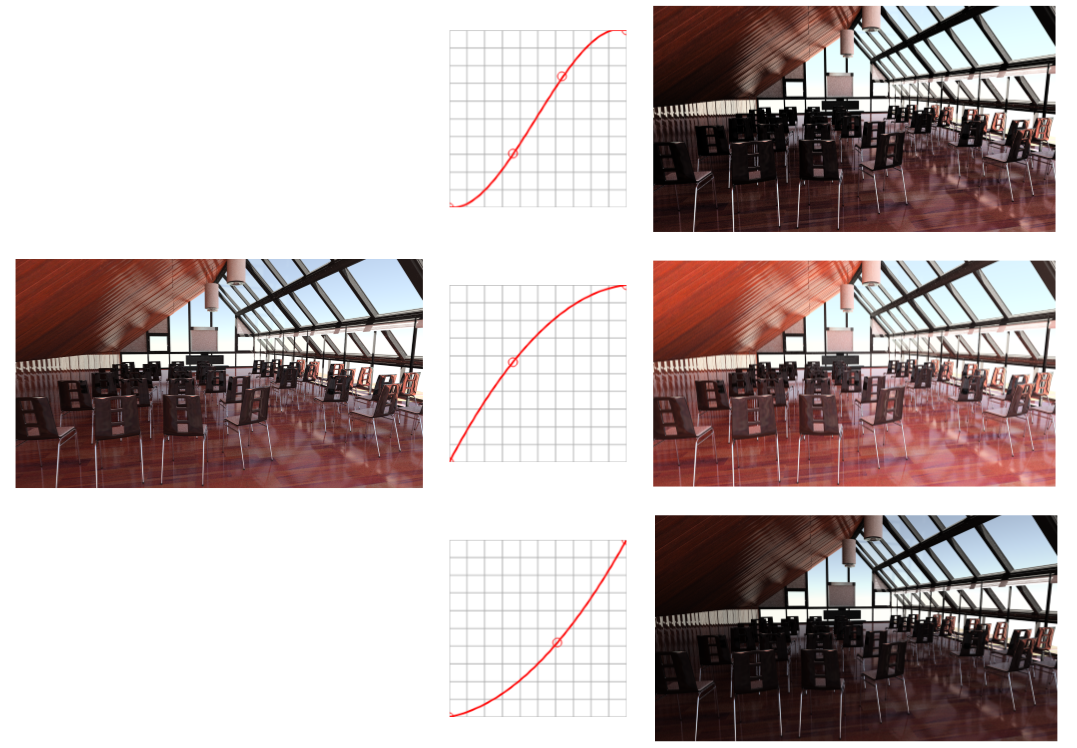
Commonly used curve shapes
All the three curves are quite simple. The first one is quite interesting: it’s a ‘S’ curve. It tends to increase the image contrast. The two other curves are brightening and darkening curves using each one simple control point slightly offset from the middle. Of course any curve shape can be used.
Interactive Tonemapping
An important feature in HOOPS Luminate is that the tonemapping process can be done anytime. It can be done during the rendering or after the rendering completion. This let anyone modify an image after the rendering without having to redo a costly rendering operation. The tonemapping operation preserves the image anti-aliasing even if performed after the draw.

