Lighting with Physical Lights
Introduction
HOOPS Luminate provides several ways to simulate artificial or natural lighting conditions. Here, we’ll focus on artificial lighting with real-life lamps. Those are commonly denominated as physical lights in our documentation (see Using Physical Lights). In the following you’ll see the basics behind the creation and setup of such lights.
Rectangular Light
Most of the time, physical rectangular area lights can be used for good quality rendering. Rectangle-shaped lights are easy to use because they approximate quite well more complex shapes and are pretty quick to render (fast evaluation and not too many samples are required). In the first tutorial step, we create such a light and set it physically plausible values:
// Create the light mesh.
RED::Object* quad = RED::Factory::CreateInstance( CID_REDMeshShape );
if( quad == NULL )
    return RED_ALLOC_FAILURE;

RED::IMeshShape* iquad = quad->As< RED::IMeshShape >();
RC_TEST( iquad->Quad( RED::Vector3( 0, 0, 0 ), 20.f, 10.f, iresmgr->GetState() ) );

// Create the physical light.
RED::Object* phy_light = RED::Factory::CreateInstance( CID_REDLightShape );
if( phy_light == NULL )
    return RED_ALLOC_FAILURE;

// Link the emitter to the mesh.
RED::IPhysicalLightShape* iphy = phy_light->As< RED::IPhysicalLightShape >();
RC_TEST( iphy->SetEmitter( quad, units_scale, iresmgr->GetState() ) );

// Set a 1500 lm light.
RC_TEST( iphy->SetLuminousFlux( 1500.f, iresmgr->GetState() ) );

// Set the emission color to white.
RC_TEST( iphy->SetColor( RED::Color::WHITE, iresmgr->GetState() ) );

// Rectangular physical lights do not require that much samples.
RC_TEST( iphy->SetSamplesCount( 64, iresmgr->GetState() ) );
Creating a mesh-based physical light is a three-step process:
- create the light mesh: this is needed to define the light spatial source of emission
- create the light itself: this is the HOOPS Luminate object which concatenates all the API needed for lighting setup
- setup the light: set the light intensity, colour and samples count
When you go physical, you have to be careful about the homogeneity of the data you use. For example, light intensities must be set accordingly to the size of the models you’re visualizing.
Physical lights let you decide if you want the base mesh to be visible or not (see Controlling Visibility of a Physical Light Emitter). If the mesh is visible, you may want to give it the right appearance, i.e the right colour and intensity. This is easily achieved by asking to the light the material to apply to its geometry:
// Get the mesh material from the physical light: the physical light exposes an helper
// to create the corresponding material to be applied to the linked mesh. This material
// is then automatically updated each time the light gets changed.
RED::Object* mat_quad;
RC_TEST( iphy->GetEmitterMaterial( mat_quad, iresmgr->GetState() ) );
RED::IShape* ishape = quad->As< RED::IShape >();
RC_TEST( ishape->SetMaterial( mat_quad, iresmgr->GetState() ) );
That’s it; this is as simple to setup a generic physical light.
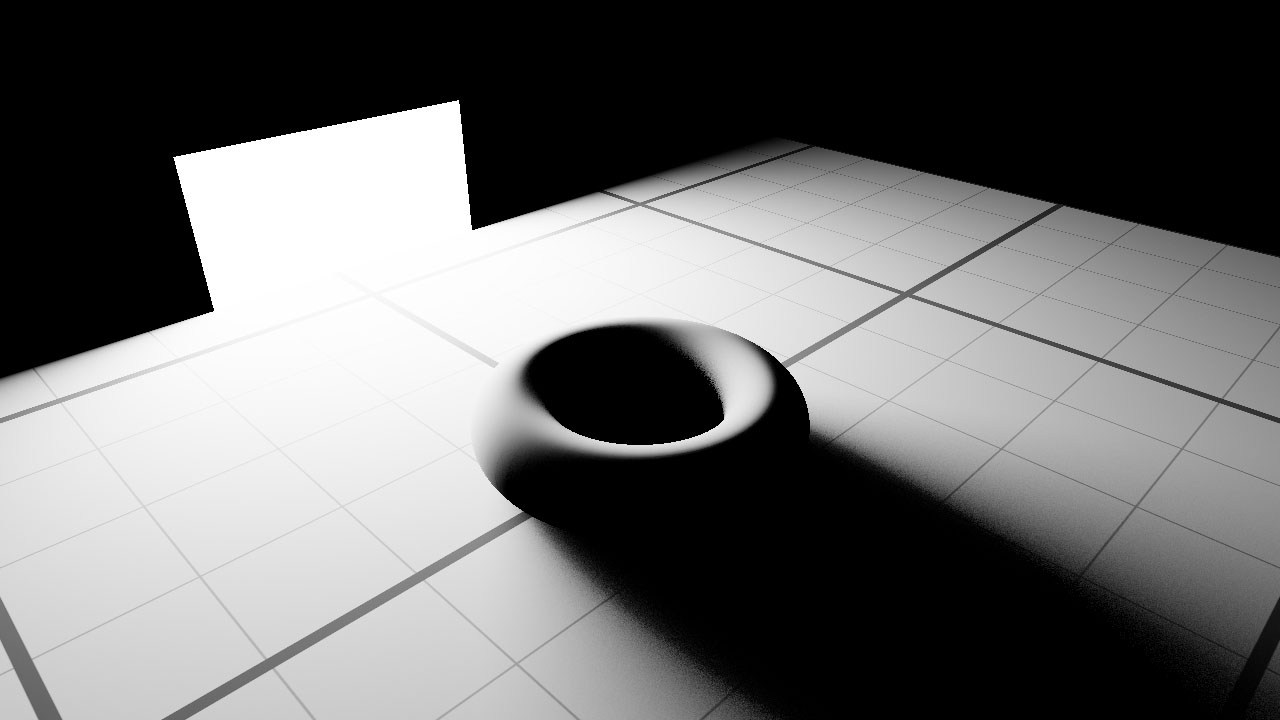
A physical rectangular light.
Generic Light
You can use any other shape rather than the rectangle to build more complex or detailed physical light. It depends only on the mesh you pass to the light. In the step 2 of the tutorial, we use a box and a cone as base shapes for two more physical lights.
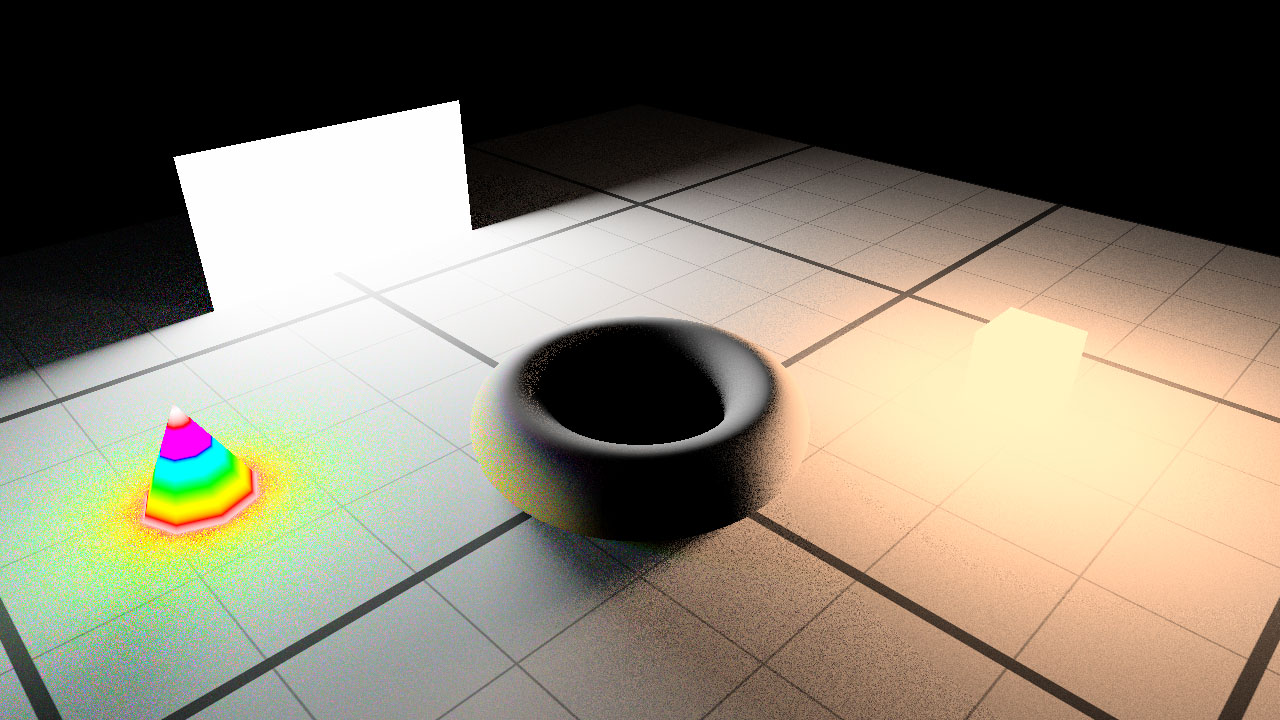
Two generic-shape physical lights have been added to the scene.
As you can, using more complex light shapes produce more rendering noise for the same number of light samples. To overcome this, we need to lower the number of samples used to render the scene. This is what we achieve in the third step of the tutorial:
// Change the quality of the lighting by increasing the amount of samples used.
RED::IOptions* iwinopt = RFK::TutorialApplication::GetWindow()->As< RED::IOptions >();
RC_TEST( iwinopt->SetOptionValue( RED::OPTIONS_RAY_LIGHTS_SAMPLING_RATE, 16, iresmgr->GetState() ) );
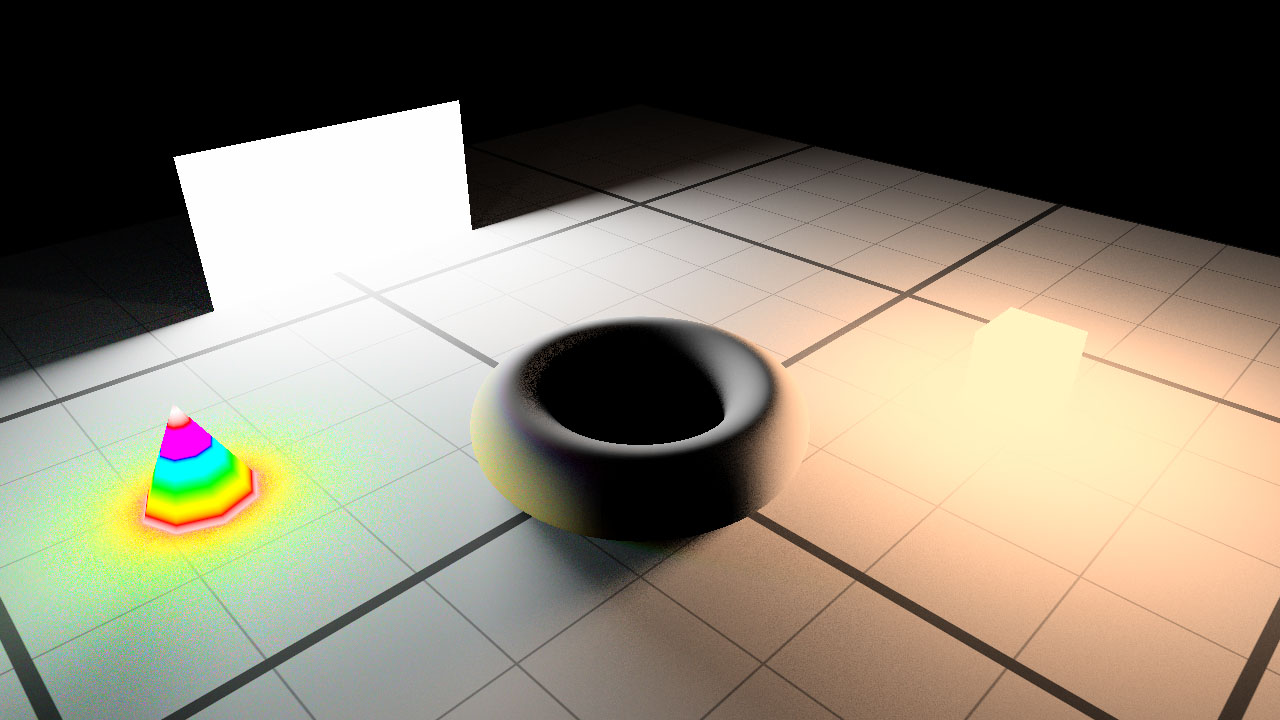
The same scene but with 4 times more samples to render the lighting.
Spherical Light
Because sometimes you need a better shape than just a rectangle to approximate your lamp but can’t afford a very detailed model of it, HOOPS Luminate also supports physical analytical spherical lights, i.e lights whose shape are defined per perfect mathematical spheres. The user still provide a mesh to the HOOPS Luminate light, but it is used only for the direct visualization of the light into the scene (if visible) and not for light emission (sampling of light). Light emission is computed from the bounding sphere of the provided mesh (i.e. the analytical sphere that best surrounds the provided geometry). It means that what you see is different from what light samples are taken from.
Spherical lights are quicker to sample than triangle-based ones and most often provide better results, cheaper. As for generic physical light, the same three-step process is needed in order to setup the light:
RED::Object* sphere1 = RED::Factory::CreateInstance( CID_REDMeshShape );
if( sphere1 == NULL )
    return RED_ALLOC_FAILURE;

RED::IMeshShape* isphere = sphere1->As< RED::IMeshShape >();
RC_TEST( isphere->Sphere( RED::Vector3( -10.f, -23.f, 20.f ), 2.5f, 3, 3, iresmgr->GetState() ) );

RED::Object* phy_light1 = RED::Factory::CreateInstance( CID_REDLightShape );
if( phy_light1 == NULL )
    return RED_ALLOC_FAILURE;

phy_light1->SetID( "emitter #1" );

RED::IPhysicalLightShape* iphy = phy_light1->As< RED::IPhysicalLightShape >();
RC_TEST( iphy->SetEmitterSpherical( sphere1, units_scale, -RED::Vector3::ZAXIS, RED_PI, iresmgr->GetState() ) );
RC_TEST( iphy->SetLuminousFlux( 1000.f, iresmgr->GetState() ) );
RC_TEST( iphy->SetColor( RED::Color( 0.85f ), iresmgr->GetState() ) );

RED::ILightShape* ilight = phy_light1->As< RED::ILightShape >();
RC_TEST( ilight->SetRenderMode( RED::RM_SHADOW_CASTER, 1, iresmgr->GetState() ) );

RC_TEST( iphy->GetEmitterMaterial( material, iresmgr->GetState() ) );
RED::IShape* ishape = sphere1->As< RED::IShape >();
RC_TEST( ishape->SetMaterial( material, iresmgr->GetState() ) );
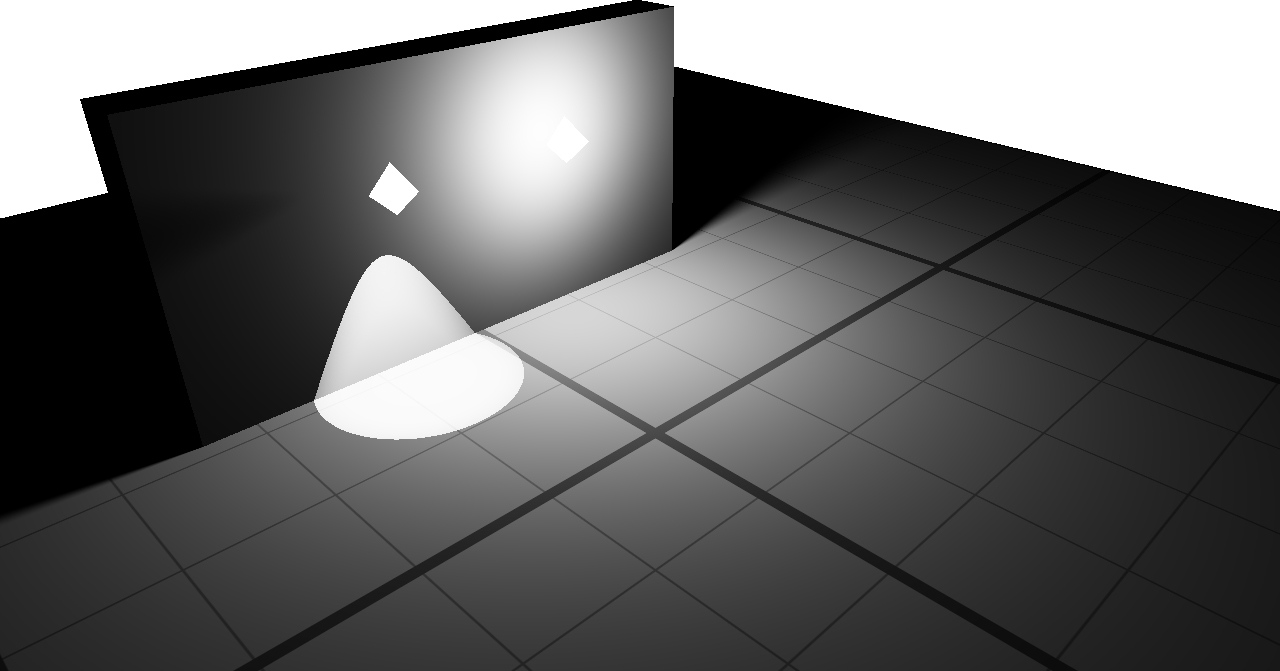
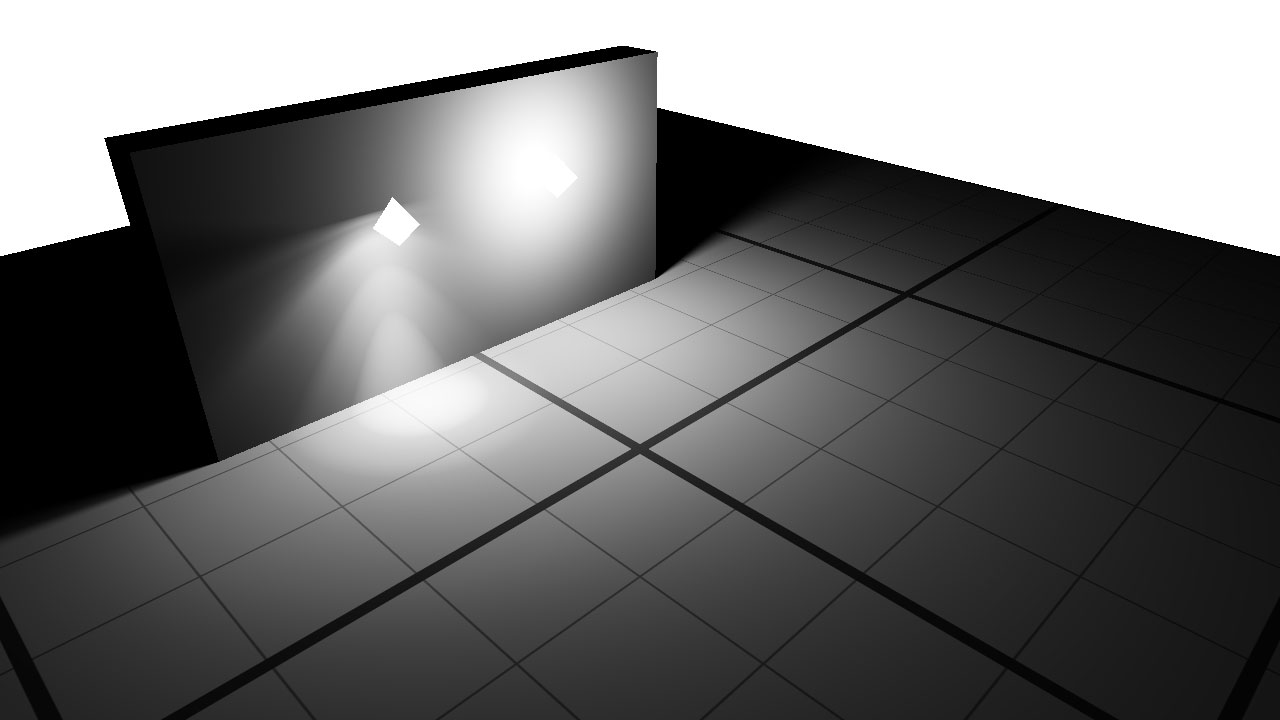
Two physical spherical lights; the one of the left is reduced to a spot angle.
A spherical physical light can have an angular spot term to reduce it’s spreading area, resulting in slightly better performances. However, this don’t define a falloff as this can be achieved using IES profiles detailed hereafter.
IES Profiles
HOOPS Luminate support IES files coming from bulb manufacturers (www.ies.org).
A IES file has been applied to the spot light.
HOOPS Luminate only supports the most common IES file format known under the name of IESNA LM-63-02. To set a IES profile to a physical light, you just need to give it the path to the file:
RED::IPhysicalLightShape* iphy = emitter->As< RED::IPhysicalLightShape >();

// The method returns the list of the attributes read from the IES file.
RED::Vector< RED::String > attributes;
RC_TEST( iphy->SetIES( attributes, "../resources/emitter.ies", iresmgr->GetState() ) );

